Table of Contents
Advertisement
Advertisement
Table of Contents

Related Manuals for YAKUMO DVD RW RECORDER

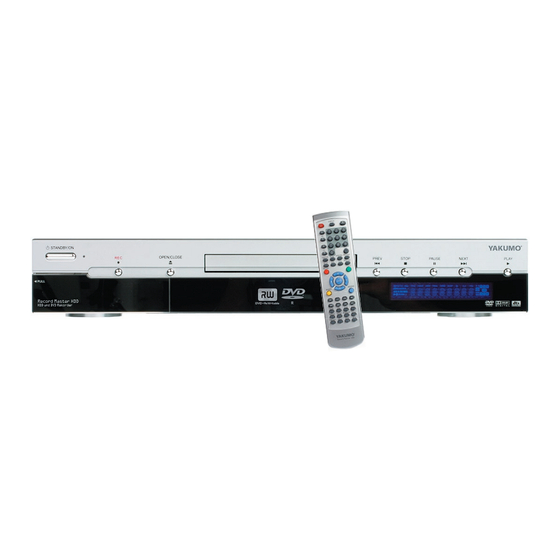
Summary of Contents for YAKUMO DVD RW RECORDER
- Page 1 Handbuch Manual Manuel Yakumo Record Master HDD DVD±RW Rekorder/Player...
- Page 2 Yakumo GmbH and other rights owners. Use of this copyright protection technology must be authorized by Yakumo GmbH, and is intended for home and other limited viewing uses only unless otherwise authorized by Yakumo GmbH. Reverse engineering or disassembly is prohibited.
-
Page 3: Table Of Contents
TABLE OF CONTENTS Table of Contents ......Safety instructions ......General information . -
Page 4: Safety Instructions
SAFETY INSTRUCTIONS Keep electrical equipment out of reach of children Never allow children to use electrical devices unattended. If swallowed, batteries may endanger life. For this reason, keep the radio and batteries out of reach of children. If a battery is swallowed, please obtain immediate medical assistance. - Page 5 The Yakumo Record Master HDD The Yakumo Record Master HDD is a class 1 laser product. The device has a safety system that prevents dangerous laser rays escaping from the device during normal use. In order to avoid injury to the eyes, never manipulate or damage the unit's security system.
-
Page 6: General Information
GENERAL INFORMATION About DVDs A DVD Digital Versatile Disc is a digital medium for storing information. DVDs are marked with one of the symbols shown here. T here are different types of DVD with different storage capacities depending on how the information is stored. DVD structure Video DVDs are divided into titles and chapters. - Page 7 The requirement for playing back in the PROGRESSIVE SCAN format is that your TV can also process it. If your TV has a so-called "Progressive Scan" function use the component outputs to connect the Yakumo Record Master HDD to the TV so that you receive the best image quality.
- Page 8 VIDEO Plus+ is a simple programming aid for video recording devices. Simply enter the programming number listed for the programme in your TV guide. The Yakumo Record Master HDD then adopts the start and duration of the recording in the timer. VIDEO Plus+ and Plus Code are registered trademarks of Gemstar Development Corporation.
-
Page 9: Preparation
Do not let children play with the plastic wrapping. There is a risk of asphyxiation! Check package contents When unpacking, ensure that the following parts are included: Yakumo Record Master HDD SCART cable AV cable (white, red and yellow cinch plugs) -
Page 10: Connections And Connection Options
CONNECTIONS AND CONNECTION OPTIONS The Yakumo Record Master HDD can be connected in various ways to other input and output devices: ☐ to a television ☐ to an amplifier/receiver ☐ to a video recorder ☐ to other audio/video devices Make sure that all devices are switched off before connecting them. - Page 11 Connecting the aerial cable If you connect the Yakumo Record Master HDD to a TV you must create an aerial connection between the TV, DVD/HDD recorder and aerial so that the device can receive and record TV programmes. The following connection examples require an aerial connection and only image and sound transfer types to the TV or external devices have been listed.
- Page 12 With cinch (AV) cables If your TV has neither a SCART connection nor a S-VIDEO socket you can also connect the Yakumo Record Master HDD with an audio cinch cable (red/white) and a video cinch cable (yellow) to the AUDIO/VIDEO IN socket of the TV (AUDIO OUT/VIDEO OUT socket on the Yakumo Record Master HDD).
- Page 13 About the component connections If your television has a "Progressive Scan" function the best image quality will be achieved via the component outputs (Y, CB/PB, Cr/Pr on the rear of the device). An increased image frequency is created using the Progressive Scan procedure.
- Page 14 Yakumo Record Master HDD, e.g. to record the sound from this device to the Yakumo Record Master HDD. To do so connect an audio cinch cable (red/white) to the external device's AUDIO OUT socket and the audio socket (AV1 IN) on the Yakumo Record Master HDD.
- Page 15 There are audio and video inputs on the front of the device to enable you to connect such items as a video camera easily. Connect the AV output sockets on the video camera to the inputs on the Yakumo Record Master HDD. You can use the following cable connections:...
- Page 16 To transfer the image you can use the connection options described in the "Connecting the TV" chapter: If the AUDIO SETUP on the Yakumo Record Master HDD is not correctly set up for your AV amplifier/receiver the sound may not be transferred to outputs the voice on the DVD).
- Page 17 Digital sound transfer Connect either a coaxial cable or an optical cable to the COAXIAL or OPTICAL output on the Yakumo Record Master HDD and the corresponding input on the amplifier. For image transfer you can again either use an S-Video...
-
Page 18: Initial Operation
Depending on the connection type, select the video channel (AV) or another reception channel that matches the connections you have made. Switch the Yakumo Record Master HDD on if you have not already done so. HELLO and then INSTALL is displayed on the screen... -
Page 19: Set Menu Language And Country
Set menu language and country The window for setting the setup language will appear. Your country's language is set by default. Confirm your entry by pressing ENTER on the remote control or select another language using the arrow keys You can change the screen language later from SETUP> SYSTEM > Guide Language. -
Page 20: Change Programme Presets/Edit Channels
Manual setting A calendar is displayed: D = day; M = month; Y = year; H = hour; M = minute. Move around the calendar fields by pressing the arrow keys. Change the value using the arrow keys. Finally, move to the field and confirm the setting by pressing ENTER. - Page 21 You cancel this process by choosing the right option. TV-System (TV-Sys) Here you select the TV standard for your region if no channels are found during channel search using the preset standard. ☐ PAL-I is the TV standard in Great Britain, Ireland and most Commonwealth countries.
- Page 22 Programme name (Ch. Id) You have the option of giving the programmes a name that you yourself select. Move to the programme name and press the arrow button . An on-screen keyboard opens. The first letter of the current channel is active.
-
Page 23: Dvd And Cd Playback
DVD AND CD PLAYBACK Inserting a disc Make sure that there is about 15 cm of space in front of the disc compartment so that it can open without hindrance. Switch the unit on and press OPEN/CLOSE. Insert a disc into the disc compartment with the title side upwards. Make sure to place the disc in the middle of the disk holder so that it does not stick when you close the compartment. -
Page 24: Search Functions
Search functions SKIP (DVD, VCD, CD) During playback press the button to skip backwards or forwards (for DVDs: from chapter to chapter; for CDs: from title to title). CM SKIP (DVD) During playback press the CM SKIP ("Commercial Skip") button. Playback jumps forward around 30 seconds approximately the length of a TV commercial. -
Page 25: Audio And Subtitle Menu (Dvd)
AUDIO and SUBTITLE MENU (DVD) If other languages are available on the DVD these two buttons are the quickest method of selecting other languages. Please note, however, that this function has not been implemented on many DVDs. Select audio language Press the AUDIO key repeatedly to select another language that is available on the DVD. -
Page 26: Picture Functions
Picture functions Enlarge/reduce image ZOOM (DVD, VCD) Press the ZOOM key repeatedly. The image is enlarged from the middl eoutwards. In addition the complete picture is shown with the enlargement factor and the enlarged section in a window. The possible enlargements are 200%, 400% and 800%. When you press ZOOM for the fourth time you return to the normal view. -
Page 27: Summary Of Playback Settings - Display
TV, you can display the TV picture while the Yakumo Record Master HDD records in the background. However, please note that the TV must be connected to an aerial for it to... -
Page 28: Setting Bookmarks-Bookmark(Dvd)
Setting bookmarks BOOKMARK (DVD) During playback press the BOOKMARK button. The BOOKMARK menu with eight positions is displayed. The first position is highlighted. At the location in the film where you would like to set a bookmark press the ENTER button. The first position is filled with a "1". If you would like to set further bookmarks press the arrow key to move to the next position and press ENTER again. - Page 29 You return to the higher level by selecting the topmost entry and pressing ENTER. When the MP3 files appear in the file list on the left side you can use the arrow buttons to select a title and play it back by pressing PLAY.
-
Page 30: Playing Back Jpeg Cds
Playing back JPEG CDs You control the playback of JPEG CDs via the file menu that is displayed after you insert a JPEG CD. Insert a JPEG CD. The file menu is displayed. If necessary use the arrow button to move to the symbol for image playback (it becomes brighter) and confirm by pressing ENTER. -
Page 31: Recording To Dvd/Hard Disk
RECORDING TO DVD/HARD DISK DVD mode and HDD mode With this device you can record to either the integrated hard disk or a DVD. All sound signals are recorded in stereo when you record to the hard disk or DVD. By pressing the HDD/DVD button on the remote control you choose between the two recording modes: ☐... - Page 32 It may not be possible to record to a DVD+/- RW that already contains recordings from another Yakumo Record Master HDD or a computer. If you are still able to record on a DVD+/-RW that was produced by another recorder your Yakumo Record Master HDD creates a new DVD menu.
- Page 33 CVBS 1: for a device that is connected with the Yakumo Record Master HDD via CVBS 1 IN socket; CVBS 2: for a device that is connected with the Yakumo Record Master HDD via the CVBS 2 IN socket (front of device);...
-
Page 34: Automatic Recording("Timer" Menu)
DVD player is switched off or there is no cable connection. If you try to record from an external device which contains a copy protected DVD/CD, it will not be possible to transfer data to the Yakumo Record Master HDD. The screen then shows the message: "DISC COPY PROTECTED PLEASE WAIT...". - Page 35 CVBS 1: for a device that is connected with the Yakumo Record Master HDD via the CVBS 1 IN socket; CVBS 2: for a device that is connected with the Yakumo Record Master HDD via the CVBS 2 IN socket (front of device);...
-
Page 36: Video Plus + Programming
Activate PDC/VPS Use the buttons to move the cursor to the PDC field. Use the buttons to set the PDC function for the recording to On if you have used a PDC/VPS time from your TV guide. Set the PDC function to Off if you do not want to use PDC/VPS time otherwise the recording may not start. -
Page 37: Close Programming
Close programming When programming is complete move to the field and confirm by pressing ENTER. The recording data is transferred into the table. Switch the unit to standby mode. The automatic recording cannot start if the device is switched on. If you have forgotten to switch off the device a message appears just before the recording starts showing the remaining time until the programme recording. -
Page 38: Opening Title Menus/Viewing + Editing Recordings
OPENING TITLE MENUS/VIEWING + EDITING RECORDINGS Open title menus Via the title menu you can display, edit and playback recordings that are on the hard disk or DVD. DVD title menu When you insert a formatted blank DVD the device switches automatically to the title menu. -
Page 39: Dvd Title Options
Multi Import and Multi Delete Select the Multi -Import entry to copy one or more titles to the hard disk. Select the Multi -Delete entry to delete one or more titles from the hard disk. To do so highlight one or more titles that you want to overwrite by pressing ENTER. - Page 40 The following graphic explains deleting titles on a DVD+/-RW and releasing memory capacity: The following graphic shows as an example that Title1 has been recorded and this takes up 20% of the DVD's memory capacity. In the second example, Title 2 was recorded and this takes up 30% of the memory capacity.
-
Page 41: Editing Dvd Recordings During Playback
If several chapters are to be displayed you can select the COMBINE entry to combine the current chapter with the next one. Press RETURN to go back to the title menu. Import Copy title to the hard disk Select the IMPORT entry to copy the selected titles to the hard disk. Ensure that there is adequate space on the hard disk and confirm the subsequent enquiry with YES by pressing ENTER. -
Page 42: Watch Tv At A Different Time (Time Shift)
Open the title menu (see above). In the menu select the entry that you want to edit and press the arrow key. You can also select several recordings. Selected items are marked with a tick. The TITLE EDIT sub-menu is displayed. If you want to delete the title select the Delete entry and confirm the field by pressing ENTER. -
Page 43: Copying Mp3/Jpeg/Divx/Mpeg 4 Data To The Hard Disk
Press the EDIT button and confirm the IMPORT field by pressing ENTER. The Yakumo Record Master HDD now starts to create folders for the selected files and to copy them to the hard disk. During copying the progress is shown via a progress bar. -
Page 44: Settings In The Setup Menu
SETTINGS IN THE SETUP MENU All settings are made in the SETUP menu, which you can open using the SETUP key . The SETUP menu includes the SYSTEM, VIDEO, AUDIO,SECURITY, RECORD and DISC menus. You can select an entry by pressing the arrow keys. -
Page 45: Video Menu
Please note that a new password is retained even after completing the factory reset. Country Setup You select here the country in which the Yakumo Record Master HDD is operated. You can extend the list of countries by navigating to the top option by pressing... -
Page 46: Audio Menu
About the component connections ,Page 13). RGB: Select this setting if the TV is connected to the Yakumo Record Master HDD via a SCART cable and your TV support the RGB colour system. YCrCb/RGB Off: Select this setting only if the TV is connected with the Yakumo Record Master HDD via the video cinch cable. - Page 47 PCM signal. In addition, an audio signal will be transmitted via the left/right outputs. Bitstream: The Yakumo Record Master HDD outputs the raw data as Dolby Digital sound (default setting). PCM: Please refer to "Dolby Digital" above.
- Page 48 DRC ("Dynamic Range Control") Off: The sound is reproduced without changes, i.e. loud passages and bass sounds are loud and quiet passages are quiet (cinema sound). This setting is only appropriate if nobody will be disturbed. The volume difference is minimized, i.e. loud passages are quieter and quiet passages are louder.
-
Page 49: Security Menu
SECURITY menu Rating Some DVDs and CDs are coded with encryption signals. DVDs can be subdivided into eight different authorization classes. The assignment of a DVD to an authorization class depends on which country code is set (refer to "Country Code" chapter below). We list below the authorization classes established by the Motion Picture Association: UNLOCK:... - Page 50 If you want to delete the password select the Delete option and enter the valid password. A new password is retained even if the power supply is interrupted or the factory reset option is used. If you forget your own password enter the master password 3308 so you can edit the authorization classes again.
-
Page 51: Record Menu
RECORD menu Record Quality You can set the quality of the next recording in this entry. You can choose between five possible recording speeds or qualities, whereby higher picture quality means lower recording capacity: HQ (High quality) highest picture quality (60 minutes are available on the DVD);... -
Page 52: Disc Menu
DISC Menu Audio Language You can select the default setting for the spoken language on the DVD here. If the DVD does not contain the selected language it is played back using the original language. The setting for a current DVD can be changed during playback via the AUDIO or DISPLAY buttons. - Page 53 Format HDD Here you can format the integrated hard disk. Please note that the complete hard disk is deleted during formatting. Check HDD (Scandisk HDD) Here you can check the integrated hard disk if errors during recording occur or incorrect memory space information is provided. To do so confirm the START entry by pressing ENTER and in the Subsequent "P"...
-
Page 54: Troubleshooting
Have you selected the correct video output on the DVD player? Have you selected the YCrCb/RGB Off option in VIDEO-SETUP but the TV is connected to the Yakumo Record Master HDD via a SCART cable? To restore the picture connect the video cinch output of the DVD/HDD recorder to the video cinch input of the TV (yellow cinch plug) and if necessary set the correct input on the TV. - Page 55 whether the format selected matches that of the TV set. Has the sound been switched off (MUTE)? Check the audio connections. Wrong audio output settings. The DVD playback is set to fast forward or slow motion. Check the audio settings in the SETUP menu: has the correct sound format been selected? DVD-Related Problems Change the language settings in the SETUP menu (DISC - SUBTITLE...
-
Page 56: Technical Data
Recording disc formats: DVD+R DVD+/-R, DVD+/-RW There is no guarantee that a DVD+/-R or DVD+/-RW produced with your Yakumo Record Master HDD will be playable on a different DVD player. If necessary read the other DVD player's manual and ensure that the device can playback DVD+/-R and DVD+/-RW formats. -
Page 57: Country Codes
COUNTRY CODES You can enter these country codes in the SETUP under SECURITY > Country-Code to adapt the authorization classes on coded DVDs to the Andorra Bhutan Ethiopia United Arab Emirates Bouvet Island Finland Afghanistan Otswana Fiji Antigua and Barbuda Belarus Falkland Islands Anguilla... - Page 58 Western Sahara Heard and McDonald Latvia Islands Eritrea Honduras Libya Spain Croatia Morocco Ethiopia Haiti Moldova Finland Hungary Madagascar Fiji Indonesia Marshall Islands Falkland Islands Ireland Macedonia ( former Yugoslavian Republic) Micronesia Israel Mali Faroe Islands India Myanmar ( Union) France Iraq Mongolia...
-
Page 59: Service And Warranty
French Polynesia Taiwan Western Samoa ( Savaii, Papua New Guinea Tanzania Yemen Philippines Ukraine Mayotte Pakistan Uganda Togo Poland United Kingdom Thailand ( Great Britain and Northern Ireland) St. Pierre and United States of Tajikistan Miquelon America Pitcairn Uruguay Tokelau Puerto Rico Uzbekistan Serbia and Montenegro... - Page 60 Warranty If you think that you need to make a claim on your Yakumo product under the warranty, call the hotline on 00 800 / 92 58 66 00. Experienced staff will advise you and arrange how you should proceed. Please do not send any goods to the Yakumo service centre without obtaining an RMA number from the hotline first, as otherwise the goods will be returned unrepaired or refused.
- Page 61 yakumo.com...
Need help?
Do you have a question about the DVD RW RECORDER and is the answer not in the manual?
Questions and answers