Pfaff HOBBY 1142 Manual
Hide thumbs
Also See for HOBBY 1142:
- Brochure (4 pages) ,
- Technical specifications (1 page) ,
- Service manual (26 pages)
Table of Contents
Advertisement
Advertisement
Table of Contents

Related Manuals for Pfaff HOBBY 1142


Summary of Contents for Pfaff HOBBY 1142
- Page 1 hobby 1142 O w n e r ´ s m a n u a l...
-
Page 2: Product View
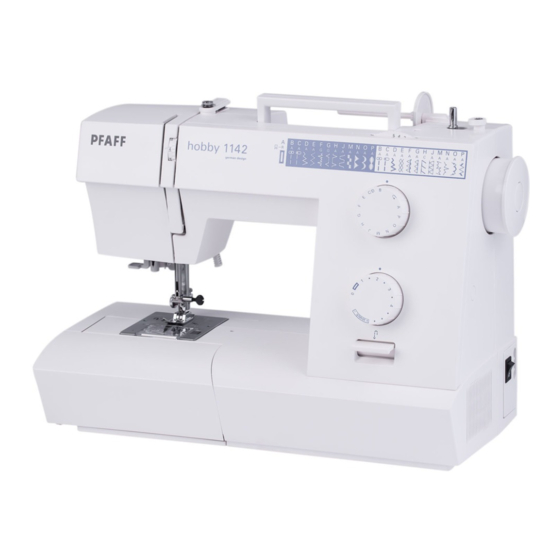
4 4 4 4 4 4 4 4 6 6 6 6 6 6 6 6 5 5 5 5 5 5 5 7 7 7 7 7 7 7 7 3 3 3 3 8 8 8 8 21 1 10 0 2 2 0 1 1 1... - Page 3 Parts of your hobby™ 1142 sewing machine Bobbin winder stop Bobbin winder spindle Hole for extra spool pin Spool pin Carrying handle Bobbin thread guide Take-up lever Foot pressure dial Face plate Thread cutter Buttonhole lever Needle threader Slide for lowering the feed dog Needle plate Accessory tray Throat plate...
- Page 4 Your Pfaff dealer will be at your service with any help or advice you need. We wish you many enjoyable...
-
Page 5: Important Safety Instructions
This houshold sewing machine is designed to comply with IEC/EN 60335-2-28 and UL1594 IMPORTANT SAFETY INSTRUCTIONS When using an electrical appliance, basic safety precautions should always be followed, including the following: Read all instructions before using this household sewing machine. DANGER - To reduce the risk of electric shock: •... -
Page 6: Table Of Contents
Accessory tray Seam guides on the needle plate Stitch table Turning a square corner Explanation of the sewing chart 1. Operate your hobby 1142 Straight stitch Carrying handle, carrying case Stretch triple straight stitch Connecting the foot control Zigzag stitch... -
Page 7: Maintenance And
Introduction 3. Maintenance and trouble-shooting Cleaning Changing the light bulb Trouble-shooting Index Technical data... -
Page 8: Standard Accessories
Introduction Standard accessories 1 Standard presser foot A Part No. 820 546-096 2 Buttonhole foot B Part No. 820 547-096 3 Overcasting foot C Part No. 820 548-096 4 Zipper foot E Part No. 820 549-096 5 Blindhem foot G Part No. - Page 9 Introduction 8-9 Spool cap 13 Extra spool pin Part No. 4160424-01 Part No. 4160292-01 10 Cushion felt 14 Screwdriver Part No. 4160234-01 Part No. 4160422-01 11 Brush 15 Bobbins Part No. 4160409-01 Part No. 4160233-01 12 Seam ripper 16 Needles Part No.
-
Page 10: Stitch Table
Introduction Stitch table hobby 1142 Stitch Description Buttonhole Standard buttonhole for blouses or bed linens Straight stitch, needle position For all straight stitching and topstitching work up middle to 4 mm Straight stitch, needle position left For all sewing and topstitching work requiring a... - Page 11 1. Operate your hobby 1142...
- Page 12 Operate your hobby 1142 Carrying handle Lift up the carrying handle of the sewing machine from behind. Carrying case The carrying case, which is part of the basic equipment, protects your sewing machine from dust and damage while transporting. Before putting on the carrying case, lift up the carrying handle.
- Page 13 Operate your hobby 1142 Foot pressure dial Turn the foot pressure dial to adjust the foot pressure. The foot pressure dial should be set at “III” for regular sewing. Reduce the pressure to “II” for appliqué, cutwork, drawn work and basting.
- Page 14 Operate your hobby 1142 Presser foot lifter The presser foot is raised or lowered with the presser foot lifter. You can raise the foot about 1/4" (6 mm) higher than the normal up position for easy removal of the presser foot, or to help you place heavy fabric under the foot.
- Page 15 Operate your hobby 1142 Removing and attaching the foot holder Turn off the main switch. To remove the foot holder Remove the thumbscrew (E) by turning it counterclockwise with a screwdriver and remove the foot holder. To attach the foot holder Match the hole in the foot holder with the threaded hole in the presser bar.
-
Page 16: Bobbin Winding
Operate your hobby 1142 Bobbin winding Preparing the machine for bobbin winding Pull out the handwheel to disengage the clutch. Setting the spool Place a spool of thread on the spool pin with the thread coming off the spool as shown in the picture. - Page 17 Operate your hobby 1142 Thread through the hole in the bobbin (D) from the inside to the outside as shown in the picture. Place the bobbin on the bobbin winder spindle with the free end of the thread at the top.
-
Page 18: Inserting The Bobbin
Operate your hobby 1142 Inserting the bobbin Turn off the main switch. Place the bobbin in the bobbin holder with the thread running off as shown in the picture. Pull the thread into the front notch (A) on the front side of the bobbin holder. Pull the thread to the left, sliding it between the tension spring blades. - Page 19 Operate your hobby 1142 Threading the machine Turn off the main switch. Raise the presser foot and turn the handwheel towards you until the take-up lever (F) is in it's highest position. Pull the thread from the spool and pass it under the thread guide (G).
-
Page 20: Needle Threader
1:10 Operate your hobby 1142 Needle threader Turn off the main switch. To make threading the needle easier and quicker, you have been provided with a needle threader. Lower the presser foot. Turn the handwheel until the needle is at its highest position. - Page 21 Operate your hobby 1142 1:11 Threading the twin needle How to sew with a twin needle Do not set the stitch width at more than 3 mm, otherwise the needle hit the needle Turn off the main switch plate and the needle will break.
-
Page 22: Bringing Up The Bobbin Thread
1:12 Operate your hobby 1142 Bringing up the bobbin thread Turn off the main switch. Raise the presser foot. Hold the needle thread and turn the handwheel towards you until the needle is at the top again and the bobbin thread has formed a loop. -
Page 23: Stitch Selection
Operate your hobby 1142 1:13 Stretch stitches Stitch selection Raise the needle to its highest position. Turn the stitch selector dial (C) to set the desired stitch at the setting mark (D). Note: Do not turn the stitch selector dial while the needle is in the fabric, otherwise the needle may bend or break. - Page 24 1:14 Operate your hobby 1142 Adjusting stretch stitch balance If the stretch stitches are uneven when you sew on a particular fabric, correct them by turning the stitch length dial. Balancing stitches: If the stitches are drawn out, correct them by turning the dial in the “–”...
- Page 25 Operate your hobby 1142 1:15 Variable needle position The needle drop position of the straight stitches can be moved between the center (5) and left (0) with the stitch width dial. Note: Do not turn the stitch width dial while...
- Page 26 1:16 Operate your hobby 1142 Balancing needle thread tension The thread tension should be adjusted depending on the sewing materials, layers of fabric and sewing method. To ensure perfect sewing results, the needle thread tensions must be perfectly tuned. Balanced tension:...
- Page 27 2. Utility stitches and practical sewing...
-
Page 28: Basic Sewing
2:2 Utility stitches and practical sewing Basic sewing Starting to sew Raise the presser foot and place the fabric under the foot. Lower the needle into the fabric. Lower the presser foot and smooth the threads toward the back. Depress the foot control. - Page 29 Utility stitches and practical sewing Finishing sewing Press the reverse stitch lever and sew several stitches in reverse at the end of the seam. Raise the presser foot and remove the fabric, pulling the threads to the back. Pull the threads up and into the thread cutter.
-
Page 30: Free Arm Sewing
Utility stitches and practical sewing Free arm sewing For stitching sleeves, waistbands, pant legs or any other tubular garments. In order to sew with the free arm, you must remove the accessory tray. Hook your ngers on the bottom left of the accessory tray and pull it to the left. -
Page 31: Seam Guides On The Needle Plate
Utility stitches and practical sewing Seam guides on the needle plate The seam guides on the needle plate help you to measure seam allowance. The numbers indicate the distance between the center needle position and the seam guide. inches Turning a square corner When the fabric edge facing you lines up with the cornering guide (C) as shown in the picture, stop stitching and lower... -
Page 32: Explanation Of The Sewing Chart
2:6 Utility stitches and practical sewing Explanation of the sewing chart The following charts show the stitch recommended settings for each stitch or technique. These charts also provide you with further instructions that are necessary when sewing the selected stitches. The choice of the sewing foot, the Recommended stitch setting of the needle thread tension and... -
Page 33: Straight Stitch
Utility stitches and practical sewing stitch 1.5-4 Straight stitch Straight stitch B/C is the basic straight stitch. The stitch length can be increased up to 4 mm. It is easier to do some sewing jobs by changing the needle position, e.g. top- stitching a collar or sewing in a zipper. -
Page 34: Stretch Triple Straight Stitch
Utility stitches and practical sewing stitch stitch 0.5-3 stretch Stretch triple straight stitch Zigzag stitch This stitch is used for sewing all seams Simple zigzag stitching is widely used for where great strength is needed, e.g. inside overcasting, sewing on buttons etc. Adjust trouser seams, crotch and armhole seams. -
Page 35: Honeycomb Stitch
Utility stitches and practical sewing stitch stitch 0.5-1.5 stretch Tricot stitch (Triple zigzag stitch) Honeycomb stitch This stitch is used to nish the seam The honeycomb stitch is an elastic and allowance on synthetics and other fabrics decorative hem which is particularly that tend to pucker. -
Page 36: Closed Overlock Stitch
2:10 Utility stitches and practical sewing stitch stitch stretch stretch What is an overlock stitch? Closed overlock stitch For elastic materials and knits, the hobby The closed overlock stitch is perfect for 1142 offers an overlock stitch which sews sewing jersey knits. You can also sew two fabric layers together and overcasts sleeve cuffs and knit collars which are simultaneously. -
Page 37: Blindhem Stitch (Elastic)
Utility stitches and practical sewing 2:11 Stitch F Stitch G stitch Blindhem Blindhem stitch (elastic) Stitch F is a blindhem stitch for woven Blindhem foot G is best suited for or elastic materials. The hem is sewn and invisible hems; sewing by hand is no overcast at the same time. -
Page 38: Automatic Buttonhole
2:12 Utility stitches and practical sewing stitch 0.5-1 Automatic Buttonhole To open the button holder (A), pull to the back and place the button in it. Push back Buttonholes are generally sewn onto a the button holder against the button to piece of doubled fabric. - Page 39 Utility stitches and practical sewing 2:13 The machine sews the front bartack and To sew another buttonhole, turn the stitch left row rst, then the back bartack and selector to “ ”, then back to “A” again. right row. Then press the foot control to sew an identical buttonhole.
-
Page 40: Buttonhole With Gimp Thread
2:14 Utility stitches and practical sewing stitch stitch 0.5-1 0.5-1 Buttonhole with gimp thread Manual buttonhole To sew strong durable buttonholes, on If the diameter of the button is more than heavy fabrics, knits or sportswear, using a 2.5 cm (1"), a buttonhole must be made gimp thread is recommended. -
Page 41: Button Sewing
Utility stitches and practical sewing 2:15 stitch adjust Button sewing Raise the presser foot and remove the fabric. Cut the needle and bobbin threads With zigzag stitch D you can sew on two- leaving 20 cm (8") tails. and four-hole buttons. Bring the needle thread between the Note: Lower the feed dog when sewing on button and fabric through the holes in the... -
Page 42: Sewing On Zippers
2:16 Utility stitches and practical sewing The trouser zipper stitch • Iron the seam allowances, making sure that the underlap extends by about 4 1.5-4 • Baste the zipper under the underlap so that the teeth are visible. Sewing on zippers •... - Page 43 Utility stitches and practical sewing 2:17 Fully concealed, sew-in zipper • Sew the second half of the zipper parallel at the same distance. • Insert the zipper foot on the right side (A) to sew on the left side of the zipper. •...
-
Page 44: Darning With The Elastic Stitch
2:18 Utility stitches and practical sewing Darning with the elastic stitch stitch Darning with the elastic stitch is suitable for repairing damaged areas. 0.2-1.5 • Sew over the damaged area in rows until it is well covered. Make sure that the rows overlap. - Page 45 3. Maintenance and trouble-shooting...
- Page 46 Maintenance and trouble-shooting Cleaning: Turn off the main switch It is very important to clean your sewing machine, because it will reward you with a longer service life. The more often you use the machine, the more care it needs. Do not dismantle the machine other than as explained in this section.
- Page 47 Maintenance and trouble-shooting Changing the light bulb Turn off the main switch • Disconnect the main plug and the foot control plug from the machine. • If you have used the machine, wait for the lamp to cool before touching it. Removal •...
- Page 48 3:4 Maintenance and trouble-shooting Trouble-shooting The needle thread breaks. The needle thread is not threaded properly. Page 1:9 The needle thread tension is too tight. Page 1:16 The needle is bent or blunt. Page 1:5 The needle is incorrectly inserted. Page 1:5 The needle thread and the bobbin thread are not set under the Page 2:2...
- Page 49 Maintenance and trouble-shooting The cloth is not fed smoothly The feed dog is packed with lint. Page 3:2 The stitches are too ne. Page 1:13 The feed dog is not raised after ”drop feed” sewing. Page 1:3 Loops on the seams The needle thread tension is too loose.
- Page 50 3:6 Maintenance and trouble-shooting Index Foot preassure dial Accessories - optional Free arm sewing - standard Accessory tray Automatic buttonhole 2:12 Honeycomb stitch Basic sewing Blindhem 2:11 Inserting the bobbin Blindhem stitch (elastic) 2:11 Bobbin winding Bringing up the bobbin thread 1:12 Manual buttonhole 2:14...
- Page 51 Maintenance and trouble-shooting Seam guides on the needle plate Sewing chart - explanation Sewing on patches 2:18 Sewing on zippers 2:16 Special accessories Straight stitch Stretch stitch balance - adjust 1:14 Stretch triple straight stitch Standard accessories Stitch length dial 1:13 Stitch selection 1:13...
-
Page 52: Technical Data
Technical data Dimensions (w x h x d) 385 x 280 x 170 Weight 8 kg Nominal voltage (Europe) 230 V Nominal voltage (USA/Canada) 120 V Nominal voltage (Australia) 240 V Power consumption 75 W Sewing lamp 15 W Sewing speed Max 800 stitches/minute Stitching width 0...5 mm... - Page 55 Such modi cations, however, will always be to the bene t of the user and the product. Intellectual Property PFAFF and HOBBY are trademarks of KSIN Luxembourg II, S.ar.l. All trademarks are used under license by VSM Group AB.
- Page 56 VSM Group AB • SE-561 84 Huskvarna • SWEDEN www.pfaff.com...
Need help?
Do you have a question about the HOBBY 1142 and is the answer not in the manual?
Questions and answers