Wacom CINTIQ 21UX Installation Manual
Installation guide & hardware manual
Hide thumbs
Also See for CINTIQ 21UX:
- Installation manual & hardware manual (68 pages) ,
- User manual (34 pages) ,
- Manual (32 pages)
Table of Contents
Advertisement
Advertisement
Table of Contents
Troubleshooting

Related Manuals for Wacom CINTIQ 21UX


Summary of Contents for Wacom CINTIQ 21UX
- Page 1 Installation Guide & Hardware Manual for Cintiq 21UX (DTZ-2100D)
- Page 2 Wacom reserves the right to revise this publication without obligation to provide notification of such changes. Wacom does its best to provide current and accurate information in this manual. However, Wacom reserves the right to change any specifications and product configurations at its discretion, without prior notice and without obligation to include such changes in this manual.
-
Page 3: Introduction And Overview
IMPORTANT: You MUST install the Wacom pen tablet driver software for correct pen-on-screen functionality. To learn about using the Wacom Tablet control panel to customize your pen display tablet and pen settings on Windows or Macintosh computers, see Customizing on page 32. -
Page 4: Precautions On Use And Handling
Failure to do so could cause the loss of data or damage to your computer. Failure to do so could also void your warranty, in which case Wacom shall have no responsibility to repair or replace the product. -
Page 5: Usage
Do not connect or disconnect the video or power cables while Cintiq or your computer AUTION are turned on; this may damage the display or computer video card. In this case, Wacom shall have no responsibility to repair or replace the product. - Page 6 Do not disassemble the Cintiq stand. Improper disassembly could result in physical injury ARNING or damage to the stand. In this case, Wacom shall have no responsibility to repair or replace the product. Prevent children from swallowing the pen tip or side switch. The pen tip or side switch ARNING may accidentally be pulled out if children are biting on them.
- Page 7 WEEE symbol shown at the beginning of this note unless this is not feasible because of the size or the function of the product. Wacom products are subject to the Directive 2002/96/EC and therefore you should always collect them separately and bring them to the appropriate collection point in your community or region.
-
Page 8: Table Of Contents
CONTENTS Introduction and overview ........1 Precautions on use and handling . - Page 9 Troubleshooting ..........41 Testing Cintiq .
-
Page 10: Unpacking Your Cintiq
Cintiq or the Cintiq stand. Your product came with the following items: Cintiq 21UX pen display, main unit Cintiq stand (MST-A103) with attached cable... -
Page 11: Setting Up The Cintiq Stand
SETTING UP THE CINTIQ STAND Place the stand on your desktop or work surface, making sure the stand is stable and will not tip or fall when the pen display is mounted on it. Then familiarize yourself with the stand components. ARNING Do not operate the incline adjustment levers when Cintiq is not mounted on the stand, and do not lift the stand by the adjustment levers;... -
Page 12: Unpacking And Mounting The Cintiq Pen Display
UNPACKING AND MOUNTING THE CINTIQ PEN DISPLAY Remove any packing materials from the back of the display unit and cabling. To mount Cintiq on the stand: • Make sure the stand is stable on your desktop or other work surface and will not tip or fall when Cintiq is mounted on it. -
Page 13: Adjusting The Display Incline
ARNING When operating the incline adjustment levers, Cintiq must be mounted on the stand with the stand feet resting on a – B – stable, flat surface. The stand is spring-loaded and can snap back quickly, causing injury or damage if not operated properly. -
Page 14: Adjusting Rotation
ADJUSTING ROTATION The pen display can be rotated on the display stand when the incline is less than or equal to 25 degrees. To adjust rotation, grasp Cintiq by the main body and rotate the unit to the desired position; it will move on the bearing hub. -
Page 15: Removing Cintiq From The Display Stand
REMOVING CINTIQ FROM THE DISPLAY STAND To remove Cintiq from the display stand: • If the rotation lock screws are attached, remove them from the back of Cintiq. • Position the pen display to landscape orientation before removing it from the display stand. The stand will not release unless Cintiq is in landscape orientation. -
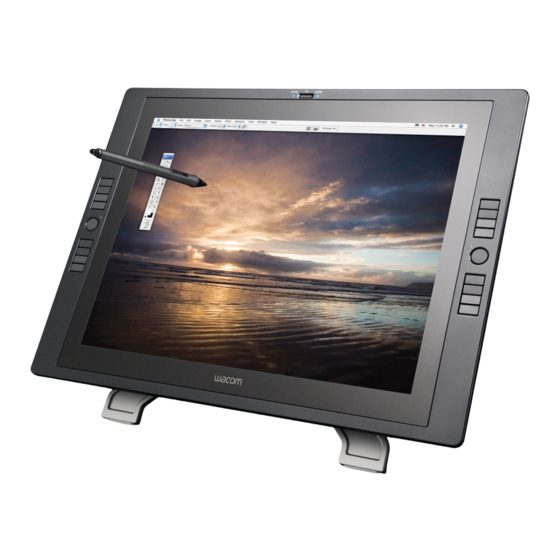
Page 16: Cintiq Pen Display Components
CINTIQ PEN DISPLAY COMPONENTS After the Cintiq pen display is safely mounted on the Cintiq stand, take some time to familiarize yourself with its features and components. The display and tablet sensor function as an integrated output and input device. The display supports resolutions up to 1600 x 1200 pixels at 16.77 million colors. -
Page 17: Rear View
REAR VIEW Digital/Analog (DVI/VGA) switch On Screen Display (OSD) controls Set this switch for the video connection you will be using. Use these controls to adjust a variety of display settings. See Adjusting the display on page 35. Integrated pen holder and alternate cable exit The pen can be stored here. -
Page 18: Installation
INSTALLATION SYSTEM REQUIREMENTS Before installing Cintiq, make sure your computer meets the following minimum system requirements: • PC. Windows Vista , Vista x64, XP, XP x64, or 2000. DVI or VGA video connector, available USB ™ port, and CD-ROM drive. •... -
Page 19: Step 1: Display Installation
STEP 1: DISPLAY INSTALLATION In this step, Cintiq is installed as a display on your system. Important: Do not connect the USB data cable until instructed to do so. • Turn off your computer. Caution: Never connect or disconnect the video or power cables while your computer or Cintiq are powered on –... - Page 20 If connecting to an Apple ADC or mini-VGA connection, you will need to obtain an appropriate adapter. Adapters can be purchased at various retail outlets. For ADC operation, plug the Cintiq video cable into the ADC to DVI-I adapter. Then plug the ADC adapter end into the ADC connector on your video card.
-
Page 21: Display Cabling Diagram
DISPLAY CABLING DIAGRAM DVI/VGA switch AUTION Make sure your video card has a DVI or VGA connector, and – A – that you correctly set the Cintiq DVI/VGA switch for the video connector you are using. Do not attach the USB data cable until instructed to do so. - Page 22 ... button. An update driver dialog or RIVER PDATE RIVER Wizard will appear. 5. Insert the Wacom Pen Tablet Driver CD. If the Wacom Tablet installation menu displays, close it. Windows Vista: • Select the option B ROWSE MY COMPUTER FOR DRIVER SOFTWARE •...
- Page 23 To activate this color profile for use with Cintiq, you may need to select the Cintiq 21UX profile in the system’s ColorSync Utility control panel. For more details, see the color management information in your operating system and application documentation.
-
Page 24: Step 2: Pen Tablet Installation
STEP 2: PEN TABLET INSTALLATION USB CABLE INSTALLATION Plug the USB connector into an available USB port on your computer or into a USB hub attached to your computer. See – E – in the connection diagram below. Next, move on to the pen tablet Software installation on page 23. PEN TABLET USB CABLING DIAGRAM To Cintiq –... -
Page 25: Software Installation
For Windows Vista, XP, and Macintosh OS X, user-specific preferences are supported. After logging in, each user can customize their personal settings in the Wacom Tablet control panel. Switching to another user will automatically load the settings for that user. -
Page 26: Working With Your Cintiq
When pressure is applied to the pen tip, the tip switch is turned on and the pen simulates a primary mouse button click. The tip click pressure can be adjusted in the Wacom Tablet control panel. DuoSwitch: The DuoSwitch is programmable, and can be used to perform the same click and double- click functions as the tip switch. -
Page 27: Basic Pen Operations
BASIC PEN OPERATIONS Pointing and selecting: Move the pen slightly above the Cintiq display screen to position the screen cursor; you do not need to touch the tablet surface to move the screen cursor. The cursor jumps to the location where you place the pen. Press the pen tip on the display screen to make a selection. - Page 28 Using the side switch: The pen is equipped with a DuoSwitch. This switch has two programmable functions that can be selected by rocking the switch in either direction. You can use the DuoSwitch whenever the pen tip is within 5 mm (0.2 inch) of the tablet surface; you do not need to touch the pen tip to the tablet in order to use the switch.
-
Page 29: Tablet Controls
TABLET CONTROLS To speed up your workflow in graphics or other applications, your Cintiq pen display features ExpressKeys and Touch Strips. While using the pen with your dominant hand, you can simultaneously use your other hand to operate the ExpressKeys or Touch Strip. Touch Strip Slide your finger over the Touch Strip to zoom, scroll, or issue an assigned keystroke function. -
Page 30: Using Expresskeys
USING EXPRESSKEYS As you work with your pen on the display tablet surface, press an ExpressKey to toggle between tools or change tool properties. You can work with the default settings, or choose from any of the other available functions. The default settings were chosen to optimize your workflow in Photoshop and other graphics applications, using the following modifier functions: Button 1: C modifier key for Windows. -
Page 31: Using The Touch Strips
Each Touch Strip can be independently customized to meet your needs. Note that the Touch Strips are quite sensitive. If you find yourself accidentally activating a Touch Strip with your drawing arm, open the Wacom Tablet control panel and disable the Touch Strip on your drawing arm side. -
Page 32: Setting Up Your Work Area
SETTING UP YOUR WORK AREA The Cintiq 21UX pen display and stand were designed to provide you with the widest possible range of flexibility and ergonomic work approach. The design allows you to quickly adjust Cintiq to a different position whenever the need arises. You may want to experiment with different height adjustments to determine which best fits your particular working style and tasks. - Page 33 Hints: • If the rotation lock screws are attached to the back of Cintiq, they must be removed before Cintiq can be rotated. • Before rotating the display unit, be sure the cable is freely rotating behind the unit. • Because the Cintiq drawing surface will be a little higher than your desk, consider adjusting the height of your desk or chair to assure comfortable use of the device.
-
Page 34: Customizing
After you master the basics of using your Grip Pen on the Cintiq pen display, you may want to customize the way the pen or pen display works. The Wacom Tablet control panel makes it easy to customize Cintiq and the pen. -
Page 35: Customization Basics
This manual only covers the basics of customizing Cintiq. For detailed information see the Cintiq Software User’s Manual. Open the Wacom Tablet control panel to customize your product. When you open the control panel, an icon for the Grip Pen is displayed in the T list and the appropriate tabs are displayed. -
Page 36: Calibrating Cintiq
See Adjusting clock and phase (VGA only) on page 39, and Adjusting the display beginning on page 35. • In the Wacom Tablet control panel, select the Grip Pen from the T list and then select the tab. -
Page 37: Adjusting The Display
ADJUSTING THE DISPLAY FACTORY PRESETS, AUTO-SYNC, AND USER SETTINGS Factory presets: For optimal display quality, set your video card to Cintiq’s native resolution of 1600 x 1200 pixels (UXGA). See page 63 for signal specifications. Auto-sync: The auto-sync function automatically sets the horizontal and vertical screen position, as well as clock and phase. - Page 38 The basic process for working with the OSD is as follows: • Press the M button to open the OSD main menu. • Press the up or down buttons to toggle between the main menu icons. Then press the S ELECT The Main Control icon displays a DVI or VGA identifier, button to choose the...
- Page 39 When you open the On Screen Display, the main menu icons are displayed. Main Control. Reset. Provides options (D Returns the display ISPLAY , and parameters of the current MAGE OSITION ) that enable you to mode to their factory default OLOR fine tune your display settings.
- Page 40 menu options (VGA only) are as follows: OSITION • . Changes the vertical position of the image. ERTICAL To automatically adjust, use the A option. DJUST • . Changes the horizontal position of the image. ORIZONTAL To automatically adjust, use the A option.
-
Page 41: Adjusting Clock And Phase (Vga Only)
For optimal display quality, set your video card to Cintiq’s native resolution of 1600 x 1200 pixels. • In the Wacom Tablet control panel, select the tab. ALIBRATE •... -
Page 42: Power Saving
POWER SAVING ® Cintiq conforms to VESA and ENERGY STAR power saving guidelines. When using Cintiq with a Display Power Management Signaling (DPMS) compliant computer or video card, the display will automatically comply with the below power saving parameters. When these power-saving functions are in effect, the screen display is darker than usual. -
Page 43: Troubleshooting
TROUBLESHOOTING Most of the time your pen display tablet will work flawlessly. But if you are having trouble, Wacom recommends you do the following: 1. If the Wacom tablet driver failed to load properly, first perform the recommended action in any error message that may appear on your screen. - Page 44 3. Verify that the tablet and Grip Pen are working: • Press the Grip Pen tip against the display and verify that the status LED lights blue. • If the LED does not light, verify that Cintiq’s USB cable is plugged into an active USB port. If Cintiq is plugged into a USB hub, try plugging Cintiq directly into the USB port on your computer.
-
Page 45: Testing Controls And Input Tools
T list with its default settings. Open the Wacom Tablet control panel and click on the A button. In the dialog box that appears,... -
Page 46: Testing A Pen
TESTING A PEN 1. While observing the P column, bring your pen within 5 mm (0.2 inch) of the OINTING EVICE display screen. A value for P , the D , and a D S/N (serial ROXIMITY EVICE EVICE EVICE number) should be displayed. -
Page 47: Display Troubleshooting
DISPLAY TROUBLESHOOTING If you encounter problems with the Cintiq display, refer to the following tables; your problem may be described here and you can try the solution offered. For additional information about color issues, refer to the documentation that came with your operating system or applications. GENERAL DISPLAY PROBLEMS No display. -
Page 48: Vga Problems
Color quality is inaccurate. • Open the OSD menu, go to the R menu, and select the ESET option. ACTORY ESET • Be sure the Cintiq color profile has been installed and is selected as the profile for use with your operating system and applications. •... -
Page 49: Pen Tablet Troubleshooting
Clicking is difficult. Open the Wacom Tablet control panel and go to the P tab. Try using a lighter T The pen selects everything Open the Wacom Tablet control panel and go to the P tab. - Page 50 (0.2 inch) of the pen display’s active area – do this without pressing down on the pen tip. From the Wacom Tablet control panel, verify that the side switch is set to the proper function you are expecting to occur for the application (and input tool) you are using.
- Page 51 Make sure the Wacom tablet driver has loaded properly by opening but it does not jump to the the Wacom Tablet control panel. If the driver did not load you will see pen tip location when the an error message. If an error message appears, reboot your pen is placed on the display computer.
-
Page 52: Windows-Specific Problems
Cintiq. to your computer. WINDOWS-SPECIFIC PROBLEMS After changing right- and Restart Windows for your Wacom tool settings to be correctly left-handed settings in the recognized. computer’s mouse control panel, the pen tip no longer functions properly. -
Page 53: Macintosh-Specific Problems
ROFILER ARDWARE ONTENTS list. A Wacom USB pen display model should be listed. If a pen display model is not listed, check the pen display’s USB cable connection or try plugging the pen display into a different USB port. If this does not help, contact Wacom for Technical Support. -
Page 54: Technical Support Options
If you cannot find the answer in this guide, you may find updated information about your problem in the appropriate Read Me file for your platform (located on the Wacom Pen Tablet Driver CD). You can also check the product FAQs (Frequently Asked Questions) on the Wacom web site for your region. -
Page 55: Obtaining Driver Downloads
Wacom periodically updates the pen tablet software driver to maintain compatibility with new products. If you are having a compatibility problem between your Cintiq pen display and a new hardware or software product, it may be helpful to download a new Wacom tablet software driver (when available) from the Internet. -
Page 56: Appendix
APPENDIX CARING FOR CINTIQ Keep the Grip Pen and your Cintiq LCD screen surface clean. Dust and dirt particles can stick to the pen and cause excessive wear to the display screen surface. Regular cleaning will help to prolong the life of your LCD screen surface and pen. -
Page 57: Replacing The Pen Tip
To remove the old nib: To insert a new nib: Clasp it with a Wacom nib removal tool, pair of Slide it straight into the barrel of the pen. tweezers, needle-nosed plier, or similar Firmly push the nib until it stops. The new nib instrument and pull the old nib straight out of will slide into the correct position. -
Page 58: Optional Display Configurations
OPTIONAL DISPLAY CONFIGURATIONS After mounting the pen display unit on the Cintiq stand, you can rotate the pen display tablet to a variety of positions. If you do not plan to rotate the Cintiq and want to fasten it more securely to the stand, you can install the rotation lock screws as shown below. -
Page 59: Using An Alternate Mount Or Stand
USING AN ALTERNATE MOUNT OR STAND Cintiq can be attached to any mount arm or stand conforming to the VESA 100 standard. Mounting screws that are 4 mm wide with a 0.7 mm pitch (M4 Regular), with a screw clearance depth from 13 – 18 mm are required. To attach Cintiq to a VESA 100 mounting platform: 1. - Page 60 4. Next remove the four attachment screws from the cable cover plate and lift the plate away from the pen display unit. 5. Place the cable into the cable exit channel. Then reattach the cable cover plate making sure to use the correct screws for reattachment.
- Page 61 6. Taking care not to dislodge the bearing stopper from the hub section, position the two halves of the bearing hub together around the pen display tablet cable and over their attachment points. Proper positioning shows the hub sections aligned along the horizontal axis of the pen display tablet.
-
Page 62: Pen And Digital Ink Capabilities In Windows Vista
Journal simulates a physical notebook, but with the advantages of digital note taking – you can choose from a variety of pen, marker, and highlighter tools, plus an eraser that is easily activated by the eraser end of your Wacom pen. Journal also includes a powerful search engine that can even locate your handwritten content. -
Page 63: About The Windows Vista Tablet Pc Input Panel
ABOUT THE WINDOWS VISTA TABLET PC INPUT PANEL The Windows Vista Tablet PC Input Panel enables you to use handwriting or an on-screen keyboard to directly enter text with your Wacom pen. There are a number of ways to launch the Input Panel: •... -
Page 64: Uninstalling Cintiq
UNINSTALLING CINTIQ Follow the appropriate procedure below to remove the Wacom tablet software and Cintiq pen display from your system. Important: When you remove the Wacom tablet software from your system, your Wacom tablet will no longer operate with full tablet functionality but will continue to function as a mouse device. -
Page 65: Product Specifications
Each Cintiq LCD panel is produced under very stringent quality standards. Production techniques cannot guarantee an absolutely perfect TFT display. Wacom does not allow any pixel to be always white or always black. The Cintiq 21UX display contains 5.76 million sub-pixels (red, green, or blue dots). -
Page 66: Pen Tablet
PEN TABLET Reading technology Electromagnetic resonance technology Active area 432.0 x 324.0 mm (17.0 x 12.75 in) Resolution 0.005 mm/point (5080 lpi) Accuracy ±0.5 mm (±0.02 in), average Tilt range (all pens) ±60 degrees Reading height 5 mm (0.2 in) Maximum report rate 145 points/sec. -
Page 67: Accessories
ACCESSORIES Airbrush. A true digital airbrush incorporating a pressure-sensitive tip and eraser, tilt sensitivity, and a fingerwheel that provides an additional degree of control over the application of digital paint. ZP-400E This tool also includes a programmable side switch. 6D Art Pen. This pen provides rotation sensing technology with a unique chisel-shaped nib that emulates brushes, markers, and calligraphic pens. -
Page 68: Ordering Parts And Accessories
Wacom’s web site at http://www.WacomDirect.com (USA only). • To purchase parts and accessories in Europe, call +49 (0)180.500.03.75 or send an email to spareparts@wacom.eu. Or, visit www.wacom.eu/solutionstore. You can also contact your local dealer, distributor, or technical support using the appropriate number for your region. •... -
Page 69: Radio And Television Interference
The equipment described in this manual generates, uses, and can radiate radio-frequency energy. If it is not installed and used properly – that is, in strict accordance with Wacom instructions – it may cause interference with radio and television reception. -
Page 70: Industry Canada (Canada Only)
“Cet appareil numerique de la classe (B) est conforme a la norme NMB-003 du Canada.” CE DECLARATION The Cintiq 21UX pen display has been tested and found to comply with the following harmonized European Norms: • EN 55024: 1998+A1:2001+A2:2003 (electromagnetic immunity) •... -
Page 71: Warranty
(ii) any loss or damage to the product resulting from such transportation. Wacom shall have no responsibility to repair or replace the product if the failure of the product has resulted from accident, abuse, misuse, negligence, or unauthorized modification or repair, or if it has been handled or stored other than in accordance with Wacom’s storage instructions. - Page 72 Wacom repair center. In all other respects the terms of the warranty as set forth above apply to such sales.
- Page 73 This page intentionally left blank. Appendix Page 71...
- Page 74 This page intentionally left blank. Appendix Page 72...
- Page 75 Internet: http://tablet.wacom.co.jp Telephone General: +81.3.5309.1513 Fax: +81.3.5309.1514 Wacom China Corporation Wacom Digital Solutions Co., Ltd. 1108 Block One, Kuntai International Bldg Gangnam Telepia B/D 9th Fl, 662-18 12 Chao Wai Street, Chao Yang District Yeoksam-dong, Gangnam-gu, Seoul, 135-080 Beijing, China 100020...
- Page 76 Installation Guide & Hardware Manual for Cintiq 21UX (DTZ-2100D) Wacom Co., Ltd. UE-0308 (E)
Need help?
Do you have a question about the CINTIQ 21UX and is the answer not in the manual?
Questions and answers