Table of Contents
Advertisement
Quick Links
Advertisement
Table of Contents
Troubleshooting

Related Manuals for Yamaha DJX-II


Summary of Contents for Yamaha DJX-II
- Page 1 Owner's Manual Owner's Manual...
- Page 2 This product should be used only with the components supplied or; teries of a different type. Batteries MUST be installed correctly. Mis- a cart, rack, or stand that is recommended by Yamaha. If a cart, etc., matches or incorrect installation may result in overheating and is used, please observe all safety markings and instructions that battery case rupture.
- Page 3 I SAVING USER DATA time, remove the batteries from the instrument to prevent possible leakage • Always save data to an external device such as the Yamaha MIDI data filer of the battery fluid. MDF3 frequently, in order to help prevent the loss of important data due to •...
-
Page 4: Packing List
Its intuitive interface makes real-time operation exceptionally easy — whether you have a DJ background or not! Read this Owner’s Manual carefully while playing your new DJX-II in order to take full advantage of its various features. -
Page 5: What Is The Djx-Ii
G Audio bpm .....................page 67 If you’ve got a favorite beat on CD or vinyl, you can easily sync it up to the DJX-II! The DJX-II “hears” the beat (from a connected CD player, MD player, etc.) and automatically locks into the rhythm by auto-adjusting the bpm of the DJX-II’s Pattern. -
Page 6: Table Of Contents
Contents Packing List...........4 Chapter 6 How to Use the Manual.........4 Part Mixer Basics ....29 What is the DJX-II? ........5 Tip 27 What is a Part?............29 Contents .............6 Tip 28 Take the console and remix the Parts! ....29 Panel Controls............8... - Page 7 One-hand Effector control! ......... 47 Tip 96 Sync applications Tip 62 Isolator to the max! ..........48 — using the DJX-II as the master ....... 68 Tip 97 Sync applications Chapter 14 — using the DJX-II as the slave ......69 Part Mixer Power Tips ....
-
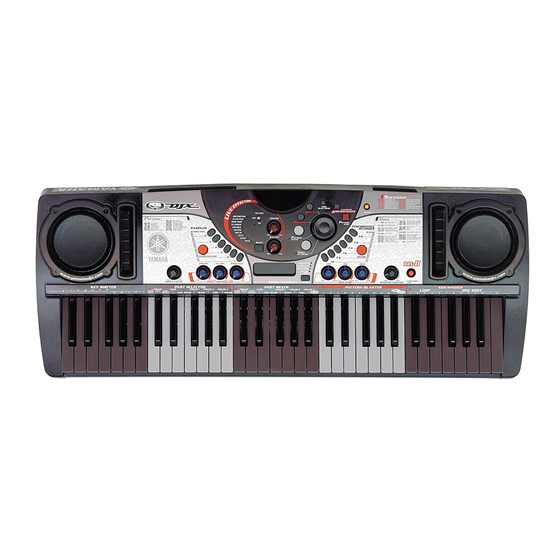
Page 8: Panel Controls
Pattern number, Activator number, bpm (tempo), and Pressing this button changes the DJX-II keyboard to Voice number. operate in the Voice mode. When the power is turned on, the DJX-II is set by default to the Pattern mode; pressing this button changes to the Voice mode. - Page 9 RECORD and 1 - 6 but- that lets you synchronize external audio (such as from a CD or MD) with the Patterns of the DJX-II. Hold tons. To play back your recorded performance, simply down this button and adjust the input level while press the appropriate button: 1 - 6.
-
Page 10: Functions Of The Keyboard
In a conventional keyboard instrument, the keys are used to play scales, melodies and chords. The DJX-II, however, is hardly a conventional instrument. For the dynamic DJ functions, it is better to think of the keyboard as a large bank of convenient buttons that are used to trigger and control the various Patterns and sounds of the instrument. -
Page 11: Rear Panel & Connections
The LINE OUT jacks are used to send the DJX-II output to a DJ mixer, stereo sound system, mixing console, or tape recorder. The DJX-II also features MIDI terminals, allowing you to interface the DJX-II with other MIDI instruments and devices. -
Page 12: Setting Up (Power Supply Connections)
Setting Up (Power supply connections) Although the DJX-II will run either from an optional AC adaptor or batteries, Yamaha rec- ommends use of the more environmentally safe AC adaptor. Follow the instructions below according to the power source you intend to use. -
Page 13: Switching On The Power
• Even when the switch is in the “STANDBY” position, electricity is still flowing to the instru- ment at the minimum level. When you are not using the DJX-II for a long time, make sure you unplug the AC power adaptor from the wall AC outlet, and/or remove the batteries from the instrument. -
Page 14: Tips To Be A Dj
Hitting another key instantly switches to a different Pattern (actually, a Variation on the main Pattern). Since the DJX-II starts the Pattern right away, be careful to press the key in time with the rhythm. Practice this a while — there’s no better way to get your timing tight and develop a solid sense of rhythm! To stop the Pattern, press PATTERN STOP. -
Page 15: Mixing Main And Fill-In Patterns
The key to great timing is knowing where the “one” is. And the “one” is the first beat in a four-beat Pattern. Another key to timing is feeling the downbeats (four downbeats to a Pattern). The DJX-II makes this easy to do! Check this out: While the Pattern is playing, the dot in the bpm display flashes rhythmically. -
Page 16: Exploring Other Patterns
Exploring other Patterns Try out some different Patterns now — the DJX-II has a ton of them! To change the Pattern, first press PATTERN/ENTER then turn the dial. Check the display to see what you’re selecting. The two numbers on the left indicate the current Pattern number, and the numbers on the right indicate the new one. -
Page 17: Go Back, Go Forward
Actually, the DJX-II takes care of this for you — automatically! If you change Patterns while a Pat- tern is playing, the bpm setting stays the same. However, if you stop the Pattern and start a new one, the bpm is automatically reset to best suit the newly selected Pattern. -
Page 18: Activator Basics
Pattern is playing back. Improvise while the Pattern is playing, hitting different keys to create your own sound. The DJX-II has a total of 52 different Activator kits — each kit with five Loops and eight One Shots. Go on to the next Tip and learn some more about these! Loops and One Shots The DJX-II has two kinds of Activator sounds: Loop and One Shot. -
Page 19: Explore The Activator Kits
Explore the Activator kits! As we pointed out above, the DJX-II is loaded with a variety of different Activator kits. Select a few of them now, and try out their sounds. Press ACTIVATOR (the display shows “A 00”) and turn the dial to change the Activator number. -
Page 20: Put 'Em Together
One Shots on top of the main beat. Activator intro textures Part of the key to a great dance track is how it starts. The DJX-II gives you the power to craft your own intros, and get people moving right from the get-go! Try this intro on for size! Here we’ll have a drum fill lead into the main Pattern. -
Page 21: Activator Loop Bpm
DJX-II automatically matches up the bpm of the Activator Loops to the bpm of the Pattern. However, the DJX-II can’t sync up your loops if you don’t play them on time! Be careful to hit the Loops right on the beat — just as you did with the Patterns. -
Page 22: Live Effector Basics
The Live Effector gives you a wide variety of real-time effects that let you mangle and munge the sound in wild and exciting ways. All of the sounds of the DJX-II — the Pattern, Activator, and Sam- pler (→ page 53) — are processed by these versatile sound shapers. You can turn the effects on and off in time with the rhythm, and adjust a pre-programmed key effect parameter and the balance (depth) of the effect in realtime as the Pattern plays. -
Page 23: Distortion
Chapter 3 Live Effector Basics Distortion This popular effect lets you distort the sound — from a soft grunge to a full-on metallic assault. Turn the CONTROL knob to the right for more crunch and bite. Auto Pan Get your sound moving in space! This effect shifts the sound in the stereo image back and forth between hard left and hard right. -
Page 24: Phaser
Echo effect; see Tip 21 below.) And check this out — no rocket science needed! The DJX-II automatically syncs the delay time to the current bpm, so you don't even need to re-adjust the knob, even when the bpm is changed. Use the CON- TROL knob to change the relative delay time to match the rhythmic effect you want. -
Page 25: Echo
Like Delay (in Tip 20 above), Echo produces repeats of the sound for rhythmic effect. However, the CONTROL knob is used to change the number of repeats (also called “feedback”). Naturally, the DJX-II automatically syncs this effect to the bpm of the Pattern. -
Page 26: Isolator Basics
Chapter 4 Isolator Basics More sonic control to you! The Isolator lets you tailor the sound just the way you want it — phat and round, thin and edgy, or big and banging! Tweak the sound just right! Need a beefier low end? Want to put some edge and shimmer in the top? Tweak these knobs to your heart’s content, and get the sound just the way you want it! Try turning the Low and High knobs of the Isolator a little bit to the right, and make the sound more punchy. -
Page 27: The Keyboard
Play the keyboard You may not have realized it, but the DJX-II also has a regular, conventional keyboard in addition to its DJ Pattern-based one. Simply press VOICE/KEYBOARD to call up the Keyboard Mode, and play the keyboard normally. To switch back to the DJ functions —... -
Page 28: Try Some Different Voices
Chapter 5 The Keyboard Try some different voices! The DJX-II is chock full of a stunning variety of dynamic voices. Try some of them out right now! To get at these voices and play them, press VOICE/KEYBOARD (the display shows “Vxxx”), then turn the dial. -
Page 29: Part Mixer Basics
What is a Part? The DJX-II Patterns are made up of eight different instrument Parts: Kick, Snare, Hi-Hat, Percus- sion, Bass, and Phrases 1 - 3. Each Part has its own unique function and sound within the rhythm. -
Page 30: Combination Keys
Combination keys Sometimes you’ll want to mute or sound a group of Parts at the same time. Rather than having to grab several keys simultaneously, you can use the special combination keys, and turn several parts on or off together — instantly! The combination keys are: BASS+KICK, PHRASE1+2+3, and KICK+HI- HAT. -
Page 31: Extra Texture
Chapter 6 Part Mixer Basics Extra texture! Work on your instrument textures. All the mixmasters and mixologists do it! Why? Because it works like a charm! Try turning all the Parts off — except the BASS Part — then select P05 and start V1. p 05 Let the Bass carry on for a while. -
Page 32: Part Selector
Chapter 7 Part Selector Now that you’ve learned about the Parts and had a chance to fool around with them, let’s see what other magic you can work with them... Grab a Part and tweak it! If you thought tweaking the effects (Tips 13 - 23 above) was a blast, wait till you start working on the Parts. -
Page 33: Tweak The Activator Sound
Chapter 7 Part Selector Tweak the Activator sound! Guess what? The Activator is fair game for the Part Controller, too! Press the ACTIVATOR key in the Part Selector section, and you’ve just called up all of the Activator sounds for tweaking. In other words, the Part Controller affects ALL keys in the Activator at the same time. -
Page 34: Part Controller
Chapter 8 Part Controller In the last chapter you did some tweaking of the Parts. Now it’s time to dig in a little deeper and explore the Part Controller section. These little knobs can really open up your sound! Cutoff and Resonance The CUTOFF and RESONANCE knobs control the filter effects. -
Page 35: Adjust The Part Volume
Chapter 8 Part Controller Adjust the Part volume Yes, the VOLUME knob is a simple control for the volume of the Part — but the simplicity is deceiv- ing. By letting you adjust the volume for each Part, you can perform various arranging tricks on the fly, like fading specific parts in and out of the overall mix —... -
Page 36: Key Shifter
Key Shifter. Transpose the key The Key Shifter section of the DJX-II lets you take the pitch (or “key”) of the overall sound, and transpose it up or down — instantly! Believe it or not, changing the key of the overall sound makes subtle but fundamental changes to the character of the sound as well. -
Page 37: Create Your Own Chord Progressions
Three Four Since many of the DJX-II Patterns have their own pre-programmed chord progressions, shifting the key in the middle of a Pattern may result in unexpected or unusual twists. Experiment! Try dif- ferent Patterns. Try using only two keys, alternating between them every other bar. Try changing key only once every four bars, especially for Patterns that change chords several times over their four-bar cycle. -
Page 38: Ribbon Controller
You’ve heard the effect — where the whole track drops in pitch and slows down to a grinding halt! Guess what — you can do the same thing on the DJX-II, and have fingertip control over it, too! Select Pitch&BPM (press the SELECT button), and the Ribbon Controller switches to control both pitch and bpm simultaneously. -
Page 39: Bpm/Tap Basics
N Be careful! If the Pattern is stopped and you turn the dial past 280.0, “Sync” appears in the dis- play and the DJX-II goes into the Sync Mode (see page 69). To get out of this mode, simply turn the dial to the left, until bpm values appear in the display again. -
Page 40: Pattern Player Power Tips
Chapter 12 Pattern Player Power Tips Hitting a new Pattern and Variation — at the same time! There will be times when you’ll want to change not only to a new Pattern, but to a specific Variation — instantly and at the same time. Here’s the best way to do that! First, press PATTERN/ENTER and turn the dial to call up the new Pattern number. -
Page 41: Step Up To The Next Pattern And Variation
Chapter 12 Pattern Player Power Tips Step up to the next Pattern and Vari- ation Here’s a “Variation” on Tip 45 above. This lets you select the next Pattern number and one of its Variations at the same time. Press NEXT and the desired Variation key in the Pattern Player. Both the Pattern number and the Variation number change simultaneously. -
Page 42: Creative Fill-In 1
Creative fill-in 1 Select P03 and start with V1. Then, hit the V1 key in the following rhythm. Three Four Start! Hit it here..and here! Creative fill-in 2 Select P03 and start with V2. Hit the V2 key repeatedly in the following rhythm, then play the V3 key on the “one”... -
Page 43: Live Effector Power Tips
Chapter 13 Live Effector Power Tips Distortion This little trick can kick your tracks into high gear! Use the Distortion effect selectively, applying it only to certain beats in the Pattern, places you want to add an accent — such as on the 2nd or 3rd beat of the bar. -
Page 44: Auto Pan
Auto Pan Tweak the knob until you hit the “sweet spot” — the point at which auto panning syncs up to the bpm and gives you the rhythmic effect you want. Knob q 1 beat cycle position Knob 9 10 11 12 w 2 beat cycle position Fast speed... -
Page 45: Phaser
Chapter 13 Live Effector Power Tips Phaser Tweak the knob until you hit the “sweet spot” — the point at which the Phaser’s modulation cycle syncs up to the bpm and gives you the rhythmic effect you want. (See the illustration in Tip 52 for details on how the knob settings relate to bpm.) Slice The different rhythm feels that Slice creates depends on the Pattern you’ve selected as well as the... -
Page 46: Echo
Echo Many styles of dance music use echo effects in surprising, unique ways. The DJX-II’s Echo effect lets you use the popular 3/4 beat delay to build up dramatic rhythmic rolls and fills. It also gives you some fascinating echo textures to use in transitions and endings. -
Page 47: One-Hand Effector Control
Chapter 13 Live Effector Power Tips One-hand Effector control! This technique may take a little practice and some digital dexterity — but once you’ve got it down and are able to play in the pocket, you’re on your way to being a true DJ wizard! Grab the Control knob with your forefinger and thumb, and use your middle finger or ring finger to flick the effect switch on and off. -
Page 48: Isolator To The Max
Isolator to the max! Play the Isolator in real time! Get the Pattern running, then tweak the knobs to their extreme set- tings for radical changes to the sound — on the fly! For example, try cutting back Low and Mid to zero, and bring High up to the max — for a really brit- tle, tinny sound. -
Page 49: Part Mixer Power Tips
Chapter 14 Part Mixer Power Tips Toggle the Part Mix Here’s a quick and really powerful way to break up the beat! The Toggle key lets you switch between two opposite arrangements of the rhythm. For example, if the Bass is off and all the rest of the Parts are on, pressing the Toggle key instantly switches the Pattern so that only the Bass is on, and all the rest of the Parts are off. -
Page 50: Solo A Single Part - Instantly
Solo a single Part — instantly! Here’s another useful mixing and arranging trick! Use this after a climactic part, and bring the whole sound down to one certain instrument — like the Bass, or one of the Phrases. Here’s how: When all the Parts are on, press one of the Part keys and the Toggle key simulta- neously. -
Page 51: Part Controller Power Tips
Chapter 15 Part Controller Power Tips Activator textures Here’s a key to getting the same smooth, shifting textures you hear in a lot of pro mixes! Select the Activator key in the Part Selector and turn the Part Controller volume to zero. Now, with the Pattern playing, trigger one of the Activator Loops, and bring up the volume gradually. -
Page 52: Instant Reset
(in standby) Pitch Bend for keyboard voices Play some of the Synth Lead voices of the DJX-II and work out on the Pitch Bend! Set the Ribbon Controller to PITCH BEND, and use this expressive device to give your playing a more dynamic, human feel! Naturally, Pitch Bend can be used on any of the voices —... -
Page 53: Sampling
Sample it! Roll your own samples! With the DJX-II, you can record any audio source — such as a CD or MD player, or your own voice with a microphone — and create and play your own original samples. It’s simple! Just follow the easy steps here, and you’re off! -
Page 54: Erase The Sample
Loops and One Shots The DJX-II has two different kinds of Sample Pads — One Shot and Loop — that let you play back the samples two different ways. If you record a sample to a One Shot Pad, that sample plays back once and then stops — hence the name, “One Shot.”... -
Page 55: Play Samples From The Keyboard
Chapter 16 Sampling Play samples from the keyboard! Create melodies with your original samples. Pitch them low and slow down the speed for special effects. Pitch them high and speed them up. Or play several samples together as a chord. You can even play complex rhythms and stutter Patterns with them. -
Page 56: Performance Recorder
Recorder! Record your performance Here’s another powerful DJX-II function you’ll love! Record all your DJ moves to this amazing Performance Recorder, and play them back — any time you want! Six Perfor- mance Recorder buttons give you recording space for up to six performances. Really easy to use, too! Here’s how:... -
Page 57: Jamming With Performance Player
However, if you record your Pattern playback plus the Cutoff and Resonance tweaking to the Per- formance Recorder beforehand, you can work the Live Effector controls onstage as much as you want, while the DJX-II plays back your recorded performance! Record... -
Page 58: Bpm/Tap Power Tips
Chapter 18 BPM/Tap Power Tips Tap out the beat! Change the bpm in real time! Tap the BPM/TAP button twice rhythmically, while the Pattern is run- ning — and the bpm automatically changes to the tapped speed. 120. 0 The Pattern changes bpm according to your tapping. -
Page 59: Down And Out
Need to know what the bpm of a certain track on CD or vinyl is? Here’s a convenient tool! Just tap out the rhythm of the music as you listen to it, and the DJX-II displays the bpm for you — automat- ically! (Make sure to turn down the MASTER VOLUME to keep the DJX-II Pattern from sounding.) -
Page 60: The Outside World
DJ mixer, and you’ve got a full dance production setup to rival the pros! This way you can play the DJX-II as well as your favorite vinyl tracks, and mix and switch them with the controls on the DJ mixer. -
Page 61: Mute The Speakers
If you’re routing the DJX-II’s sound to a DJ mixer or external amplifier/speaker system, you may want to cut off the sound of the DJX-II’s built-in speakers. Easy! Simply insert a phone plug into the PHONES jack — or hook up a set of stereo headphones for monitoring the DJX-II sound. -
Page 62: Dj Performance Master Class
Chapter 20 DJ Performance Master Class Take it up to the next level! Use these advanced tips as a springboard to explore all the amazing DJ possibilities — and become a true mixing virtuoso! Creative fill-in 3 Here’s a cool technique for stopping the Pattern and coming back in with the rhythm. Select P14 and start with V1. -
Page 63: Switch The Drums
Chapter 20 DJ Performance Master Class Switch the drums! Try this slick trick! Here, you’ll keep the Phrase Parts of a Pattern going, but slip in a different rhythm to back it up. This is a technique the pros use to switch the beat around, yet still maintain the flow! Select P17 and A02, then start V8. -
Page 64: Upside Down, Inside Out
Upside down, inside out! Sometimes when you play certain Parts in a Pattern by themselves, it’s difficult to hear where the downbeat is. Especially in an intro. Your ears may fool you into hearing and expecting a com- pletely different downbeat! Then, when the rest of the rhythm kicks in, it turns your feet (and whole body!) around. -
Page 65: Sync Up Your Samples To The Pattern
Sync up your samples to the Pat- tern! By now, you’ve probably got a few really hot samples recorded to the DJX-II. And maybe you’re itching to use them with the Patterns. Well, here’s how you can do just that — and keep everything... -
Page 66: Play A Pattern, Trigger A Performance
Play a Pattern, trigger a Performance Work on using the Pattern Player and Performance Player in tandem for your onstage mixes — both give you so much more than you get with either one alone! When you're playing a Pattern, press one of the Performance Player Pads — to instantly switch over to a recorded performance. -
Page 67: Taking The Pulse
Eventually, you’ll hone in on the proper bpm! Auto-adjusting the bpm Got a favorite beat on CD or vinyl that you want to sync to the DJX-II? This powerful function lets you do just that! The DJX-II “hears” the beat (from a connected external sound source) and automatically locks into the rhythm by auto-adjusting the bpm of the currently playing Pattern. -
Page 68: Toggling On Beat, Muting In Rhythm
(in Tip 97 below). If you’ve got a second device, try it both ways! When the DJX-II is used as the master, you can play the Patterns of the DJX-II and have sequenced Patterns and music on an external sequencer lock into the bpm of the DJX-II. -
Page 69: Sync Applications - Using The Djx-Ii As The Slave
DJX-II as the slave Here we’ll do the opposite of Tip 96 above. This sophisticated application lets you play sequenced Patterns and song data on an external sequencer and have the Patterns of the DJX-II lock into the bpm of that device. -
Page 70: Get More Patterns
Once new Pattern data is loaded, select one of the Patterns U1 - U5 to play the desired Pattern. (U1 - U5 appear only when User Pattern data has been loaded to the DJX-II.) Up to five Patterns can be loaded at one time. -
Page 71: Using Midi Bulk Send
Make the proper connections and insert the appropriate (floppy) disk containing the data to the data filer. (Refer to the relevant owner’s manual for details, if necessary.) On the DJX-II side, make sure that the DJX-II is not in the middle of an operation, such as Per- formance Recording, Sampling, MIDI Bulk Send, etc. -
Page 72: Tip 100 Create Your Own Patterns
Simply use a conventional MIDI sequencer software (such as XG Works) to record your original Patterns as MIDI data — then import the data to the DJX-II using the special Pattern Launcher soft- ware. Data for up to five Patterns (maximum of 85 KB) can be loaded to the DJX-II. - Page 73 • Save the file using Standard MIDI File Format 0 and make sure that the file extension “.mid” is included in the name. • Load the Pattern file to the DJX-II using the Pattern Launcher software. (Refer to the online Help file in the software for specific operation instructions.)
-
Page 74: Appendix
DJX-II does not function as a conventional keyboard. Not all of the voices seem to sound, or the The DJX-II is polyphonic up to a maximum of 32 notes. If Sam- sound seems to be cut off. ples and Activator phrases are playing simultaneously with a Pattern, some notes/sounds may be omitted (or “stolen”) from... -
Page 75: Troubleshooting
PROBLEM POSSIBLE CAUSE/SOLUTION The sound is distorted or noisy. • Many of the DJX-II sounds have been deliberately pro- cessed or created with a “lo-fi” or “grunge” sound to suit cer- tain styles of music. • Using the CUTOFF and RESONANCE knobs at or near the maximum settings (especially when the MASTER VOLUME knob is also at maximum) may result in distortion. -
Page 76: Error Message List
Error Message List ERROR MESSAGE DESCRIPTION This appears when the MIDI reception buffer of the DJX-II has filled up, and process- Err1 ing is not possible. Try decreasing the amount of data or increasing the interval time and transmit the data once again. -
Page 77: Specifications
* Specifications and descriptions in this owner’s manual are for information purposes only. Yamaha Corp. reserves the right to change or modify prod- ucts or specifications at any time without prior notice. Since specifications, equipment or options may not be the same in every locale, please check... -
Page 78: Glossary
II, you can change the key by using the Key Shifter. (Know- (such as from a CD, MD, or vinyl record) with the Patterns ing the names of the keys isn’t important. On the DJX-II, of the DJX-II. The DJX-II monitors the beat from the you change the number —... - Page 79 The Sampler on the special Pattern Launcher software and a computer, you can DJX-II lets you record any audio source — such as from a even load new and original Patterns to the DJX-II! CD, or with a microphone —...
-
Page 80: Pattern List
Appendix Pattern List Pattern Pattern Category Name Pattern Name Category Name Pattern Name Berlin Techno Hard Hip Hop Japan Beatz Hardcore HIP HOP Detroit 2000 TECHNO Parade Beat Rock Hop French Techno Futuristic Detroit SPACE HOP Cosmic Acid Techno Universal UNDERGROUND German Underground Live... -
Page 81: Activator List
Appendix Activator List Activator Activator Category Name Activator Name Category Name Activator Name AUTO Auto Hip Hop X-tra 1 Techno X-tra 1 Hip Hop X-tra 2 Techno X-tra 2 HIP HOP X-TRA Hip Hop X-tra 3 TECHNO X-TRA Techno X-tra 3 Hip Hop X-tra 4 Techno X-tra 4 Hip Hop X-tra 5... -
Page 82: Voice List
Bank Select MIDI Bank Select MIDI Voice Voice Program Voice Name Program Voice Name Change# Change# HYPER MIX SQUARE LEAD DJX-II Alien KEYBOARD Psyche Funky EP Square Lead1 Bright Piano Square Lead2 Clavi Square Lead3 Glocken SAW LEAD Vibes BreakIt... - Page 83 Appendix Voice List Bank Select MIDI Bank Select MIDI Voice Voice Program Voice Name Program Voice Name Change# Change# Fretless I am Your DJ (robot) (1) Aco. Bass I am Your DJ (robot) (2) Fretless I am Your DJ (robot) (3) SCRATCH Rock The House (robot) (1) Scratch 1F...
-
Page 84: Drum Kit List
Appendix Drum Kit List • : Same as Standard Kit1. • : Same as the kit to the immediate left. • The Keyboard Note Numbers (#) and Note names shown in this list apply to all kits, with the exception of Voice #190 (Electronic Kit2), #191 (B900 Kit), #192 (DJX Kit), #196 (Human Kit) and #197 (Scratch Kit). - Page 85 Appendix Drum Kit List Voice # Bank MSB# Bank LSB# Program # Keyboard MIDI Alternate Standard Kit1 Analog Kit3 Break Kit RhBox Kit Analog Kit1D Analog Kit2D Electronic Kit2 assign Note# Note Note# Note C# -1 Surdo Mute Surdo Open D# -1 Hi-Q Whip...
- Page 86 Appendix Drum Kit List Voice # Bank MSB# Bank LSB# Program # Keyboard MIDI Alternate B900 Kit DJX Kit BD Kit SD Kit HH Kit Human Kit Scratch Kit assign Note# Note Note# Note C# -1 D# -1 G# -1 A# -1 Ain'tGoingOut(1) Ain'tGoingOut(2)
-
Page 87: Midi Data Format Midi
Appendix MIDI Data Format MIDI Many MIDI messages listed in the MIDI Data Format are expressed as decimal numbers, binary numbers or hexadecimal numbers. Hexadecimal numbers may include the letter “H” as a suffix. Also, “n” can freely be defined as any whole number. To enter data/values, refer to the table below. - Page 88 Appendix MIDI Data Format MIDI I Channel/Mode/Realtime Messages o : available Status byte 1st Data byte 2nd Data byte MIDI MIDI Events Status Data (HEX) Parameter Data (HEX) Parameter Transmitted Recognized Key Off (n:channel no.) kk Key no. (0 - 127) Velocity (0 - 127) Key On Key no.
-
Page 89: System Exclusive Messages
Appendix MIDI Data Format MIDI I System Exclusive Messages Universal System Exclusive o : available MIDI Event Data Format Transmitted Recognized MIDI Master Volume F0H 7FH 7FH 04H 01H l l mm F7H ll mm Volume (mm = 0 - 7f, ll = Ignored) F0H 7FH XN 04H 01H l l mm F7H when N is received N=0-F,whichever is received. -
Page 90: Effect Map
Appendix MIDI Data Format MIDI I MIDI Parameter Change Table MIDI PARAMETER CHANGE TABLE (EFFECT) Address Size Data Parameter Transmitted Recognized Description Default 00-7F REVERB TYPE MSB Refer to “MIDI Effect Map.” 01 (=HALL1) 00-7F REVERB TYPE LSB 00 : basic type 1 20 00-7F CHORUS TYPE MSB... - Page 91 MIDI Data Format MIDI I About MIDI remote control About MIDI IN channel and DJX-II parts The individual Parts of the DJX-II respond to incoming data over the MIDI channels as listed below. MIDI IN channel channel Keyboard (Note / ProgramChange)
- Page 92 Appendix MIDI Data Format MIDI Functions Panel Operation MIDI Data Format Pattern Pattern Player ** = Note On (7FH), Note Off (00H) Pattern Player 1 Note (93H, 48H, **H) Pattern Player 2 Note (93H, 49H, **H) Pattern Player 3 Note (93H, 4AH, **H) Pattern Player 4 Note (93H, 4BH, **H) Pattern Player 5...
- Page 93 Appendix MIDI Data Format MIDI Functions Panel Operation MIDI Data Format Live Effector ON/OFF switch Hold/On Soft Pedal (B3H, 43H, 7FH) Hold/Off Soft Pedal (B3H, 43H, 00H) Effect Type selection Bank Select MSB (B3H, 00H, 00H) Bank Select LSB (B3H, 20H, 04H) DISTORTION Program Change (C3H, 00H) AUTO PAN...
-
Page 94: Midi Implementation Chart
Appendix MIDI Implementation Chart YAMAHA [ DJ-GEAR ] Date :17-MAR-2000 Model DJX-II MIDI Implementation Chart Version : 1.0 Transmitted Recognized Remarks Function... Basic Default 1 - 16 Channel Changed 1 - 16 Default Mode Messages Altered ************** Note 0 - 127... -
Page 95: Index
Appendix Index AC adaptor ................12 initialization.................13 Activator...........8, 10, 18, 33, 51, 78 Input Level ..............9, 53, 67 Activator List............... 81 intro................20, 49 AUDIO BPM COUNTER ........9, 67, 78 Isolator ...............9, 26, 48 Auto (Activator)..............19 Auto Pan................ 23, 44 key ..............30, 32, 36, 50 Key Shifter..............10, 36 Balance (Live Effector) ........... - Page 96 Appendix Index Performance Recorder ........5, 9, 13, 56, 66 Phaser ................24, 45 PHONES ............... 11, 61 Phrase ................29, 49 Pitch Bend ..............52, 73 Pitch&bpm ................38 PREV/NEXT keys ............... 17 Recording ..............53, 56, 71 Resonance............34, 35, 51, 78 Ribbon Controller ..........9, 38, 52, 79 Ring Modulation............
- Page 97 FCC requirements. Modifications not expressly eliminate the problem by using one of the following measures: approved by Yamaha may void your authority, granted by the FCC, to use the product. Relocate either this product or the device that is being affected by the interference.
-
Page 98: Limited Warranty
PSR SERIES OF PORTATONE ELECTRONIC KEYBOARDS If during the first 90 days that immediately follows the purchase date, your new Yamaha product covered by this warranty is found to have a defect in material and/or workmanship, Yamaha and/or its authorized representative will repair such defect without charge for parts or labor. - Page 99 Niederlassung und bei Yamaha Vertragshändlern in den jeweiligen Bestimmungsländern erhältlich. Pour plus de détails sur les produits, veuillez-vous adresser à Yamaha ou au distributeur le plus proche de vous figurant dans la liste suivante. Para detalles sobre productos, contacte su tienda Yamaha más cercana o el distribuidor autorizado que se lista debajo.
- Page 100 M.D.G., Pro Audio & Digital Musical Instrument Division, Yamaha Corporation © 2000 Yamaha Corporation V560170 00?PO???.?-01A0 Printed in China...
Need help?
Do you have a question about the DJX-II and is the answer not in the manual?
Questions and answers