Yamaha RX-V371 Owner's Manual
Owners manual
Hide thumbs
Also See for RX-V371:
- Quick reference manual (9 pages) ,
- Service manual (103 pages) ,
- Owner's manual (68 pages)
Table of Contents
Advertisement
Advertisement
Table of Contents

Subscribe to Our Youtube Channel
Related Manuals for Yamaha RX-V371


Summary of Contents for Yamaha RX-V371
- Page 1 Owner’s Manual AV Receiver English for North America...
-
Page 2: Table Of Contents
Playing back tunes from your iPod™/iPhone™ ... 34 multiple Yamaha receivers ..........56 Front panel display ............7 Connecting the Yamaha iPod universal dock ....34 Initializing various settings for this unit ......56 Remote control ..............8 Controlling an iPod/iPhone ..........34 Using the HDMI Control function ......... -
Page 3: Features And Capabilities
■ External device connection and playback – External device operation with this unit’s remote control ...............52 – Cables and input/output jacks for this unit ....................13 – Multiple Yamaha receiver operation without signal interference <Remote ID Switching>....56 – TV connection............................14 ■ Other features –... -
Page 4: About This Manual
INTRODUCTION Features and capabilities About this manual ■ Attaching the VIDEO AUX input cover (included) ■ Installing batteries in the remote control To protect against dust, attach the supplied VIDEO AUX input When inserting batteries in the remote control, remove the cover to the VIDEO AUX jacks when you do not use the jacks. -
Page 5: Part Names And Functions
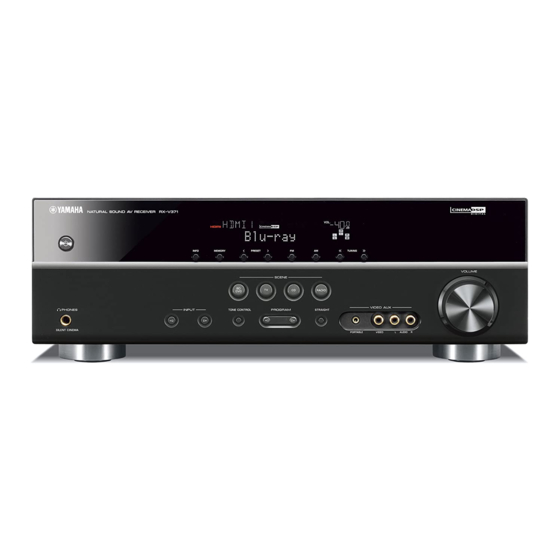
INTRODUCTION Part names and functions Front panel TUNING jj / ii TONE CONTROL Changes FM/AM tuner frequencies (☞p. 30). Adjusts high-frequency/low-frequency output of speakers/headphones (☞p. 25). Front panel display A (Power) PROGRAM l / h Displays information on this unit (☞p. -
Page 6: Rear Panel
COMPONENT VIDEO jacks DOCK jack For connecting TV that are compatible with component video signals, AUDIO OUT jacks For connecting an optional Yamaha iPod universal dock (such as using three cables to output video signal (☞p. 14). For outputting audio signals received when analog inputs such as the YDS-12) (☞p. -
Page 7: Front Panel Display
Indicate speaker terminals from which signals are output. iPod CHARGE indicator STRAIGHT Lights up when an iPod/iPhone is connected through an optional Yamaha iPod universal dock (such as YDS-12), and the iPod Standby Subwoofer Center speaker Charge function is active (☞p. -
Page 8: Remote Control
[ B ] DOCK keys without changing inputs. Operate a monitor such as a TV. DOCK A Yamaha iPod universal dock or Bluetooth TUNER CODE SET wireless audio receiver connected to the DOCK Sets remote control codes for external component operations (☞p. -
Page 9: Connections
CONNECTIONS Connecting speakers This unit uses acoustic field effects and sound decoders to bring you the impact of a real movie theater or concert hall. These effects will be brought to you with ideal speaker positioning and connections in your listening environment. ■... -
Page 10: Speaker Layout
CONNECTIONS Connecting speakers Speaker layout Connecting speakers ■ 5.1-channel speaker layout (5 speakers + subwoofer) Changing speaker impedance This unit is configured for 8Ω speakers when it is dispatched from the factory. Front speaker R When connecting to 6Ω speakers, carry out the following procedure to switch to 6Ω. Set this unit to the standby mode. - Page 11 CONNECTIONS Connecting speakers Connect your speakers to their respective terminals on the rear panel. Front speaker Surround speaker ANTENNA HDMI 4 GND AM SPEAKERS FRONT SURROUND CENTER OR OUT AUDIO SUBWOOFER Subwoofer Center speaker CAUTION • Remove the AC power cord of this unit from the power outlet before connecting the speakers. •...
- Page 12 CONNECTIONS Connecting speakers ■ ■ ■ Connecting front speakers Connecting center speakers / surround Connecting the subwoofer speakers Connect the subwoofer input jack to the Remove approximately 10mm of insulation from the SUBWOOFER jack on this unit with an audio pin Press the tab on the speaker terminal down.
-
Page 13: Connecting External Devices
CONNECTIONS Connecting external devices ■ Cable plugs and jacks Audio jacks OPTICAL jacks COAXIAL jacks The main unit is equipped with the following input/output jacks. Use jacks and cables appropriate for These jacks transmit optical digital audio signals. These jacks transmit coaxial digital audio signals. components that you are going to connect. -
Page 14: Connecting Tv/Hdmi Monitor
CONNECTIONS Connecting external devices ■ Connecting a TV monitor Connecting an HDMI video monitor Connect the HDMI cable to the HDMI OUT jack. This unit is equipped with the following three types of output jack for connection to a TV. HDMI OUT, COMPONENT VIDEO or VIDEO. -
Page 15: Connecting A Video Monitor
CONNECTIONS Connecting external devices ■ Connecting a video monitor When using other TVs Connect the video pin cable to the VIDEO (MONITOR OUT) jack. To transmit sound from the TV to this unit, connect its AV1-5 or AUDIO1-2 jacks to the TV’s audio output jacks. -
Page 16: Connecting Bd/Dvd Players And Other Devices
CONNECTIONS Connecting external devices TRANSMIT CODE SET Connecting BD/DVD players and other devices SOURCE RECEIVER ■ Receiving audio from other input sources SLEEP HDMI This unit can use the AV1-5 or AUDIO1-2 input jacks to receive audio signals from This unit has the following input jacks. Connect them to the appropriate output jacks on other audio input sources. - Page 17 CONNECTIONS Connecting external devices ■ Connecting BD/DVD players and other devices with component ■ Component connections to analog audio output devices cables Connect the device with a component video cable to one of the AV1-2 input jacks. Component video / Audio Using optical digital audio output sources output Select the AV1 input that the external device is connected to for playback.
- Page 18 CONNECTIONS Connecting external devices ■ Connecting BD/DVD players and other devices with video cables Using analog stereo audio output sources Select the AV5 input that the external device is connected to for playback. Connect the external device with a video pin cable to one of the AV3-5 input jacks. Using optical digital audio output sources Select the AV4 input that the external device is connected to for playback.
- Page 19 CONNECTIONS Connecting external devices ■ Connecting CD players and other audio devices Using coaxial digital output sources Select the AV input (AV2 or AV3) that the external device is connected to for playback. Using analog stereo output sources Select the audio input (AUDIO1-2) that the external device is connected to for playback. (BD/DVD) HDMI OUT DOCK...
-
Page 20: Connecting Video Cameras And Portable Audio Players
CONNECTIONS Connecting external devices Connecting video cameras and portable audio players Transmitting input A/V to external devices Use the VIDEO AUX jacks on the front panel to temporarily connect video cameras, game consoles, or This receiver can transmit selected incoming analog audio/video signals to external devices through the portable audio devices to the receiver. -
Page 21: Connecting The Fm/Am Antennas
CONNECTIONS Connecting the FM/AM antennas An indoor FM antenna and an AM loop antenna are included with this receiver. Connect these antennas properly to their respective jacks. AM loop antenna Indoor FM antenna Position the AM antenna away from the receiver. The wires of the AM antenna have no polarity. -
Page 22: Setting Up Speaker Parameters
CONNECTIONS Setting up speaker parameters TRANSMIT CODE SET SOURCE RECEIVER SLEEP STEP 1: Display the setting menu STEP 2: Set the speaker status and When you have finished connecting your speakers, HDMI configure this unit so that they output sound normally. size Carry out the following steps to configure this unit. -
Page 23: Step 3: Set The Distance From The Listening Point
CONNECTIONS Setting up speaker parameters TRANSMIT CODE SET SOURCE RECEIVER • Whether or not you set “Crossover,” “SWFR Phase,” SLEEP jCursor B / C jCursor B / C to select the speaker Press to select the speaker HDMI and “Extra Bass” is optional. Check how the effects (subwoofer) you want to configure, and that you want to configure, and press sound and then configure them to your liking. -
Page 24: Step 4: Playback A Test Tone
CONNECTIONS Setting up speaker parameters TRANSMIT CODE SET STEP 4: Playback a test tone STEP 5: Adjust the volume SOURCE RECEIVER SLEEP Repeat steps 14 and 15 to adjust the HDMI volume balance for all speakers to your preference. jCursor C jCursor B Press repeatedly to display... -
Page 25: Playback
PLAYBACK TRANSMIT CODE SET Basic playback procedure SOURCE RECEIVER SLEEP HDMI Adjusting high/low-frequency sound Press PROGRAM l / h to adjust the output Turn on external components (TV, DVD (Tone control) AUDIO player, etc.) connected to this unit. level in those frequency ranges. V-AUX [ A ] [ B ]... -
Page 26: Changing Input Settings With A Single Key (Scene Function)
Enjoying sound field programs This unit is also equipped with a Yamaha digital sound field processing (DSP) chip. You can enjoy multi-channel playback for almost any sound source using various sound field programs stored on the chip, and a range of sound decoders. - Page 27 PLAYBACK Enjoying sound field programs TRANSMIT CODE SET ■ ■ ■ Enjoying unprocessed playback Enjoying stereo playback Enjoying sound field programs SOURCE RECEIVER SLEEP (Straight decoding mode) without surround sound speakers Select “2ch Stereo” from the surround field programs HDMI Use straight decoding mode when you want to playback when you want to playback 2-channel stereo sound This unit allows you to use virtual surround speakers to...
-
Page 28: Sound Field Programs
PLAYBACK Enjoying sound field programs Sound field programs Roleplaying Game This sound field is suitable for role-playing and adventure games. This program adds depth to the sound field for natural and realistic reproduction of background music, special effects and dialog from a wide variety of scenes. in the table indicates the sound field program for CINEMA DSP. - Page 29 PLAYBACK Enjoying sound field programs ■ Category: STEREO Suitable for listening to stereo sources. 2ch Stereo Use this program to mix down multi-channel sources to 2 channels. When multi-channel signals are input, they are down mixed to 2 channels and output from the front left and right speakers.
-
Page 30: Fm/Am Tuning
PLAYBACK FM/AM tuning TRANSMIT CODE SET SOURCE RECEIVER SLEEP Selecting a frequency for reception HDMI When using the FM/AM tuner, adjust the direction of ■ Entering a frequency number (Normal tuning) the FM/AM antenna connected to this unit to get the lNumeric keys In normal tuning mode, use the AUDIO... -
Page 31: Registering And Recalling A Frequency (Preset Tuning)
PLAYBACK FM/AM tuning TRANSMIT CODE SET Registering and recalling a SOURCE RECEIVER ■ When signal reception is poor SLEEP ePRESET F / Press jENTER, then press frequency (Preset tuning) HDMI jCursor B / C When you are receiving an FM broadcast and cannot to choose the preset obtain a stable stereo broadcast, you can force this number from which to start the Auto Preset... -
Page 32: Clearing Preset Stations
PLAYBACK FM/AM tuning TRANSMIT CODE SET ■ ■ Designating a preset number for Clearing preset stations Registering stations manually SOURCE RECEIVER SLEEP (Manual Preset) registration HDMI eMEMORY Press once, to display “Manual Preset” on Select stations by hand and register them as presets the front panel display. -
Page 33: Video Out
PLAYBACK FM/AM tuning TRANSMIT CODE SET ■ Combining the video signals and Selectable video source: SOURCE RECEIVER SLEEP radio audio signals HDMI HDMI1-4 Video signals input from one of the Select the video signal to be output from the video HDMI1 to 4 are output from the HDMI output jack on this unit when TUNER is selected as the output jack on this unit. -
Page 34: Playing Back Tunes From Your Ipod™/Iphone
RECEIVER SLEEP Once you have connected a Yamaha iPod universal dock (such as the YDS-12, sold separately) to this unit, you can enjoy playback of your iPod/iPhone using the remote HDMI control supplied with this unit. When playing back from an iPod/iPhone, you can also use the compressed music enhancer sound field programs (☞p. - Page 35 PLAYBACK Playing back tunes from your iPod™/iPhone™ TRANSMIT CODE SET SOURCE RECEIVER ■ To charge the iPod/iPhone when this unit SLEEP HDMI is in standby mode If you connect an iPod/iPhone to the iPod universal AUDIO dock the iPod/iPhone will always charge when this unit is turned on.
-
Page 36: Playing Back Tunes From Bluetooth™ Components
TRANSMIT CODE SET SOURCE RECEIVER SLEEP You can connect a Yamaha Bluetooth wireless audio receiver (such as the YBA-10, sold separately) to this unit and enjoy wireless playback from Bluetooth-compatible HDMI portable music players. AUDIO NOTE When playing back from a Bluetooth component for the first time, you must first pair the devices (register the Bluetooth components). When establishing a wireless connection... -
Page 37: Using Bluetooth™ Components
PLAYBACK Playing back tunes from Bluetooth™ components TRANSMIT CODE SET Using Bluetooth™ components SOURCE RECEIVER SLEEP jCursor B / C to select “Connect” and HDMI press jENTER. When pairing is complete, carry out the following procedure to achieve a wireless connection between this When wireless connection is complete AUDIO unit and the Bluetooth component. -
Page 38: Setup
SETUP TRANSMIT CODE SET Configuring the settings specific for each input source (Option menu) SOURCE RECEIVER SLEEP HDMI This receiver has a unique option menu specific for each type of input source, such as volume trim for compatible input sources, audio/video data display for signals from external devices, and other frequently used menu items. -
Page 39: Video And Audio
SETUP Configuring the settings specific for each input source (Option menu) ■ Adjusting volume between input sources Audio information Set as follows according on the desired combination of audio input jacks. Volume Trim FORMAT Format of audio signals. Audio inputs Settings method CHAN The number of input signal channels (front/surround/... - Page 40 SETUP Configuring the settings specific for each input source (Option menu) ■ ■ Changing FM mode (Stereo/Monaural) Bluetooth™ wireless connections FM Mode Connect Disconnect Input source: TUNER Sets this unit to automatically match FM broadcast frequencies in Input source: Bluetooth (DOCK) stereo, or to convert the frequency to monaural (☞p.
-
Page 41: Setting Various Functions (Setup Menu)
SETUP Setting various functions (Setup menu) TRANSMIT CODE SET SOURCE RECEIVER SLEEP You can configure various function settings of this unit using the Setup menu. HDMI Setup menu display and settings Setup menu items AUDIO jCursor B / C to navigate the submenus to find the desired setting and V-AUX [ A ]... -
Page 42: Manages Settings For Speakers
SETUP Setting various functions (Setup menu) ■ Manages settings for speakers Manual speaker setup Front Selects the size (sound reproduction capacity) of the front Config speakers. Adjusts the output characteristics of the speakers based on SETUP VOL. Small (Default) Select this for small speakers. The subwoofer will manually set parameters. - Page 43 SETUP Setting various functions (Setup menu) ■ ■ Crossover Controlling the volume of each speaker Manually setting speaker distance Sets the lower limit of low-frequency component output from Level Distance speakers set to “Small.” jCursor B / Audio with a frequency below that limit will be produced from the Separately adjusts the volume of each speaker.
- Page 44 SETUP Setting various functions (Setup menu) ■ ■ Adjusting sound quality with the equalizer Generating test tones jCursor C Press repeatedly to select the Equalizer Test Tone jCursor D frequency you want to adjust, then use Adjusts sound quality and tune with a graphic equalizer. Turns the test tone generator on or off.
-
Page 45: Setting The Audio Output Function Of This Unit
SETUP Setting various functions (Setup menu) ■ ■ Setting the audio output function of this Synchronizing audio/video output Auto-adjusting the sound level to make even low volumes more audible unit Lipsync Adaptive DRC Adjusts the delay between audio and video output (Lipsync function). -
Page 46: Setting Hdmi Functions
SETUP Setting various functions (Setup menu) ■ ■ Auto-adjusting Dolby Digital and DTS Setting the startup volume Setting HDMI functions dynamic range Init.Volume D.Range Sets the initial volume for when this receiver is turned on. When SETUP VOL. Selects the dynamic range adjustment method for audio bitstream this parameter is set to “Off,”... - Page 47 SETUP Setting various functions (Setup menu) ■ ■ Receiver operation via TV (HDMI Control) Changing the output destination of HDMI • “TVAudio” is only displayed with the HDMI Control function input audio signals (Control) is set to “On.” Control • Please refer to “Using the HDMI Control function” (☞p.
-
Page 48: Making The Receiver Easier To Use
■ Selecting a template exit the Setup menu. HDMI1 VOL. To cancel a name change, select the original name INPUT YAMAHA BD Select “Input Rename” from the Setup RETURN TV VOL TV CH and then press to exit renaming. -
Page 49: Setting Sound Field Program Parameters
SETUP Setting various functions (Setup menu) ■ Goes enter standby mode automatically Setting sound field program parameters when you leave it without operating You can set the parameters for the sound field programs (☞p. 50). AutoPowerDown If you do not operate this unit or use the remote control for an SETUP VOL. -
Page 50: Setting Sound Field Program Parameters
SETUP Setting sound field program parameters TRANSMIT CODE SET SOURCE RECEIVER SLEEP Although the sound field programs would satisfy you as they are with the default parameters, you can arrange the effect by setting the sound field elements (parameters). HDMI To adjust the sound effects suitable for acoustical conditions of audio/video sources or rooms, perform the following operations. -
Page 51: Parameters Usable In Surround Decoder
SETUP Setting sound field program parameters ■ Parameters usable in certain sound field Straight Enhancer/5ch Enhancer only Dimension programs EFCT LVL Adjusts the difference in level between the front sound field and 2ch Stereo only Adjusts the effect level of the compressed music enhancer mode. the surround sound field. -
Page 52: Controlling Other Components With The Remote Control
RADIO Input Category Manufacturer control code SETUP OPTION Switches an external component on and off. CD player HDMI1 Blu-ray Yamaha 2064 Cursor, ENTER, RETURN player/ ENTER VOLUME Selecting input source connected to CD Operates the menus of external components. recorder... -
Page 53: Registering Remote Control Codes For External Component Operations
Then you can operate the external components by V-AUX [ A ] [ B ] DOCK remote control codes of a Yamaha BD player connected switching the input source to HDMI2, or selecting Enter a remote control code “2064” using TUNER to HDMI2 jack. -
Page 54: Resetting All Remote Control Codes
SETUP Controlling other components with the remote control TRANSMIT CODE SET Resetting all remote control codes SOURCE RECEIVER SLEEP lNumeric Enter “9981” using keys. HDMI Resetting all remote control codes for external components to the initial factory settings. AUDIO Perform each of the following steps within 1 minute. V-AUX [ A ] [ B ]... -
Page 55: Extended Functionality That Can Be Configured As Needed (Advanced Setup Menu)
SETUP Extended functionality that can be configured as needed (Advanced Setup menu) The Advanced Setup menu can be used for unit initialization and other useful extended functions. The Advanced Setup menu can be operated as follows. Displaying/Setting the Advanced Setup Setting the impedance of speakers Use PROGRAM to select the item to be set from the menu... -
Page 56: Avoiding Crossing Remote Control Signals When Using Multiple Yamaha Receivers
STEREO from a receiver which has an identical ID (remote ballpoint pen. STRAIGHT control ID). When using multiple Yamaha AV receivers, DSP PARAM Initializes all parameters for the sound SCENE you can set each remote control with a unique remote... -
Page 57: Using The Hdmi Control Function
SETUP Using the HDMI Control function This unit supports the HDMI Control function, which allows you to Connect the TV, DVD recorder supporting HDMI Turn the TV on. operate external components via HDMI. If you connect devices Control to this unit’s HDMI output jack. Confirm that this unit has turned on in conjunction with the TV. - Page 58 SETUP Using the HDMI Control function TRANSMIT CODE SET ■ Switching the input source on this To use other jacks to input audio signals from TV, carry SOURCE RECEIVER SLEEP jCursor B / C to select “HDMI Setup” unit automatically when listening out the following procedure.
- Page 59 SETUP Using the HDMI Control function TRANSMIT CODE SET ■ Single HDMI cable input to TV SOURCE RECEIVER SLEEP jCursor B / C to select “HDMI Setup” audio with Audio Return Channel HDMI and press jENTER. function When using a TV that supports HDMI functions and AUDIO HDMI VOL.
-
Page 60: Appendix
Refer to the table below when this unit does not function properly. If the problem you are experiencing is not listed below, or if the instructions below do not help, turn off this unit, disconnect the power cable, and contact the nearest authorized Yamaha dealer or service center. - Page 61 APPENDIX Troubleshooting Problem Cause Remedy Problem Cause Remedy page page No sound. Incorrect input or output cable Connect the cables properly. If the problem No sound is output The speaker is malfunctioning. If sound is not output, the unit may be connections.
- Page 62 APPENDIX Troubleshooting Problem Cause Remedy Problem Cause Remedy page page No sound is heard This unit is in straight decoding Press STRAIGHT (on the remote Noise/hum noise is Incorrect cable connection. If the problem persists, the cables may be — from the surround mode and a monaural source is control) to exit straight decoding mode.
-
Page 63: Hdmi
APPENDIX Troubleshooting HDMI™ Tuner (FM/AM) Problem Cause Remedy page Problem Cause Remedy page The front panel An error with the HDMI Try re-inserting the HDMI cable. — display HDMI connection has occurred. FM stereo reception You are too far from the station Check the antenna connections. -
Page 64: Remote Control
APPENDIX Troubleshooting Remote control Problem Cause Remedy page Problem Cause Remedy The desired station The signal is weak, or the antenna Adjust the AM loop antenna orientation. page cannot be tuned into connections are loose. Use the manual tuning method. The remote control Wrong distance or angle. -
Page 65: Ipod™/Iphone
Connect error There is a problem with the signal Turn off the unit and reconnect the Yamaha establishing a connection. path from your iPod/iPhone to the iPod universal dock to the DOCK jack of unit. -
Page 66: Glossary
APPENDIX Glossary Audio information Dolby Surround DTS Express Dolby Surround uses a 4-channel analog recording system to reproduce This is an audio format for next-generation optical discs such as Blu-ray realistic and dynamic sound effects: 2 front left and right channels (stereo), discs. -
Page 67: Sound Field Program Information
Based on a wealth of actually measured data, Yamaha CINEMA DSP uses Yamaha’s original DSP technology to combine Dolby Pro Logic, Dolby Digital, and DTS systems to provide the audiovisual experience of a movie theater in the listening room of your own home. -
Page 68: Information On Hdmi
– 576p/50 Hz About trademarks Bluetooth™ Bluetooth is a registered trademark of the Bluetooth SIG and is used by Yamaha in accordance with a license agreement. Manufactured under license from Dolby Laboratories. Dolby, Pro Logic and the double-D symbol are trademarks of Dolby Laboratories. -
Page 69: Specifications
APPENDIX Specifications ■ INPUT/OUTPUT • Audio Format • Maximum Useful Output Power (JEITA) [China, Korea, General and Asia models] - Dolby Digital Input jacks 1 kHz, 10% THD, 6 Ω ............135 W - DTS • HDMI input x 4 •... -
Page 70: Index
APPENDIX ■ VIDEO SECTION • Signal to Noise Ratio (IHF) • Power Consumption Mono/Stereo..............74 dB/69 dB [U.S.A. and Canada models] ........250 W/320 VA • Video Signal Type [Other models] ................ 250 W • Harmonic Distortion (1 kHz) [U.S.A., Canada, Korea and General models]......NTSC Mono/Stereo................0.3/0.3% •... - Page 71 © 2011 Yamaha Corporation YD282A0/OMEN1...
- Page 72 • Rated Output Power for Front, Center, Surround (1 kHz, 0.9% THD, 8Ω, 2 channels driven simultaneously) FRONT L/R ..............80 W + 80 W CENTER................... 80 W SURROUND L/R ............80 W + 80 W © 2011 Yamaha Corporation Printed in China WY69390...
-
Page 73: Quick Reference Guide
English for North America Quick Reference Guide Accessories The following accessories are supplied with this product. Remote control Batteries (2) (AAA, R03, UM-4) AM loop antenna Indoor FM antenna VIDEO AUX input cover Preparing the remote control Take off the battery compartment cover. Insert the two supplied AAA batteries into the battery case, following the polarity markings. - Page 74 Connect and install as follows the fi rst time you use this unit. See the following explanations for the connections for each number. BD/DVD player (recorder) This unit Front speaker R Front Subwoofer speaker L Surround speaker R Center speaker Surround speaker L Connect the speakers...
-
Page 75: Connecting The Subwoofer
Connect the speakers Surround speaker Front speaker Caution: • Remove the AC power cord of this unit from the power outlet before connecting the speakers. • Generally speaker cables consist of two parallel insulated cables. One of these cables is a different color, or has a line running along it, to indicate different polarity. - Page 76 Connect a TV Video input to this unit is output to a TV using output jacks of the same kind. Input Output HDMI HDMI When you have made connections using different types of video HDMI input such as HDMI and component video, make the same connection COMPONENT COMPONENT Component...
- Page 77 Connect playback device such as BD/DVD players and recorders If your playback device has multiple audio/video outputs, connect with the following priority (A to D) to enjoy a higher quality sounds and images. When playback device is HDMI HDMI capable of HDMI output COMPONENT VIDEO When playback device is...
-
Page 78: Speaker Setup
Set up speaker parameters When you fi nish connecting, adjust the status, size, and volume of each speaker so that the output is normal. TRANSMIT TRANSMIT CODE SET CODE SET STEP 1: Display the setting menu SOURCE SOURCE RECEIVER RECEIVER A SLEEP SLEEP HDMI... - Page 79 Press Cursor B / C to select the speaker (subwoofer) that you want to confi gure, and press Cursor D / E to set the distance. If necessary, you can change the setting units under “Unit.” Information Description Setting Unit Switches between setting units (feet / meters).
-
Page 80: Operation Guide
- You can set the tone control for speakers and headphones separately. Connect the headphones when adjusting the headphone tone control. - If you set an extreme tone balance, sounds may not match those from other channels. © 2011 Yamaha Corporation YD282A0/QREN1 - 8 -... - Page 81 List of remote control codes Liste des codes de commande Lista de códigos de mando a distancia Baird 0282 Condor 0161, 0277, 0320, Elite 0320, 0340, 0350 Bang & Olufsen 0180, 0339 0323, 0342, 0350, Elman 0341 Basic Line 0282, 0320, 0323, 0351 Elta 0277, 0323, 0343...
- Page 82 Gibralter 0008, 0030, 0050, Ingersol 0323, 0343 Loewe 0161, 0168, 0265, Naonis 0346 0062 Initial 0153 0320, 0330, 0352 0008, 0026, 0050, GoldHand 0277 Inno Hit 0171, 0282, 0320, Loewe Opta 0339, 0349, 0350 0052, 0053, 0072, Goldline 0320 0323, 0340, 0342, Logik 0054 0103, 0282, 0344...
- Page 83 0101, 0106 0343 Sonoko 0282, 0320, 0323, Tensai 0282, 0320, 0323, Xrypton 0320 Robotron 0339 0337, 0342, 0343, 0340, 0343, 0350 Yamaha 0008, 0026, 0050, Rowa 0277, 0282 0349, 0350 Tesmet 0350 0053, 0080, 0081, Royal Lux 0161 Sonolor 0321, 0347...
- Page 84 Yoko 0161, 0277, 0282, Dumont 1026, 1028 JC Penney 1064, 1065, 1068, Panasonic 1000, 1022, 1044, 0320, 0323, 0337, Durabrand 1114 1070, 1071 1055, 1068, 1072, 0340, 0342, 0343, Dynatech 1069 1068 1085, 1090, 1091, 0349, 0350 Echostar 1018 1007, 1018, 1027, 1120, 1121, 1214 Yorx 0340...
- Page 85 2380 2302, 2317, 2328, Weltblick 1031 Dayton 2363 2131, 2149 2338, 2342, 2350, XR-1000 1068, 1069 2358 Koda 2358 2467 Yamaha 1064, 1065 Decca 2362 Koss 2013, 2148, 2158 Phonotrend 2367 Yamishi 1008, 1029 Denon 2059, 2151, 2193, 2359 Pioneer...
- Page 86 TruVision 2359 2039, 2049, 2054, Multitech 3127 Samsung 2000, 2045, 2077, 2364 2055, 2076 3064 2112, 2113, 2114, Umax 2361 Yamaha 2056 NET Brazil 3085 2115, 2151, 2200, United 2367 Nokia 3097 2216, 2219, 2228, Urban Concepts 2159 Noos 3101...
- Page 87 TV86 3077 Conrad Electronic 4217, 4219 Grundig 4006, 4004, 4015, Mega 4055, 4053 Unika 3065, 3070 Contec 4050 4035, 4211, 4218, Memorex 4127 United Cable 3018, 3119 Coolsat 4096 4222 Metronic 4031, 4028, 4001, Universal 3065, 3070 Cosat 4048 Hänsel & Gretel 4219 4004, 4005, 4010, Universum 3097, 3099...
- Page 88 4223 Technowelt 4219 Teco 4011, 4054 Telanor 4007 Yamaha 5091, 5093 Telasat 4215, 4219 Telecom 4217 Telefunken 4017, 4001, 4216 SIRIUS Teleka 4004, 4011, 4014, © 2010 Yamaha Corporation Yamaha 5064, 5067 4218, 4219 Telemaster 4010 YC434C0/RC - 8 -...
Need help?
Do you have a question about the RX-V371 and is the answer not in the manual?
Questions and answers