Harman Kardon BDS 400 Owner's Manual
Integrated home theater system
Hide thumbs
Also See for BDS 400:
- Specifications (2 pages) ,
- Bedienungsanleitung (38 pages) ,
- Owner's manual (38 pages)
Table of Contents
Advertisement
Advertisement
Table of Contents

Related Manuals for Harman Kardon BDS 400


Summary of Contents for Harman Kardon BDS 400
- Page 1 Integrated home theater system Owner’s Manual...
-
Page 2: Table Of Contents
RECEIVER REAR-PANEL CONNECTIONS SUBWOOFER CONTROLS AND CONNECTIONS REMOTE CONTROL FUNCTIONS PLACING THE SPEAKERS (BDS 800, BDS 700, BDS 400 AND BDS 300 SYSTEMS) PLACING THE SPEAKERS (BDS 600 SYSTEM) MOUNTING OPTIONS FOR SATELLITE AND CENTER SPEAKERS CONNECTIONS PREPARING THE REMOTE CONTROL... -
Page 3: Verify Line Voltage Before Using
Products! damage. Some surface finishes may be particularly sensitive to absorbing such In the years since harman kardon engineers invented the high-fidelity receiver, we have marks, due to a variety of factors beyond harman kardon control, including the taken to heart this philosophy: Bringing the joy of home entertainment to as many people nature of the finish, cleaning materials used, normal heat and vibration caused by... -
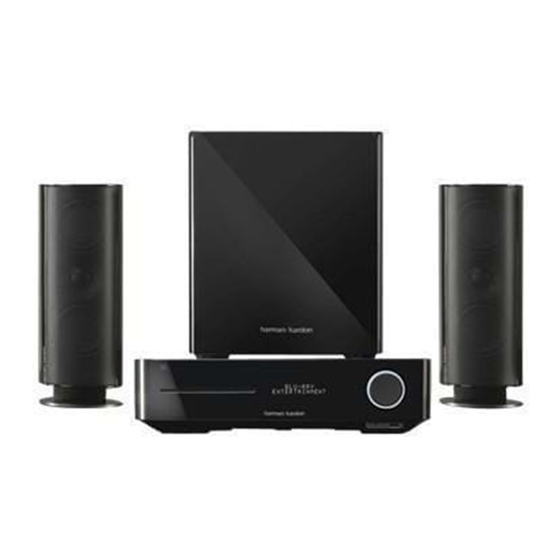
Page 4: System Components
– gray and blue color connection to the subwoofer – bands (BDS 700 system only) Supplied Accessories purple connectors If any of these items are missing, please contact harman kardon Customer Service via www.harmankardon.com. BDS 800, BDS 400 Systems BDS 600 System System ™... -
Page 5: Receiver Front-Panel Controls
Receiver Front-Panel Controls Receiver Front-Panel Controls Disc Slot Information Display Eject Button Standby Button (on top panel) (on top panel) Headphone Jack USB Port Volume Control Disc Slot: Insert a compatible disc into the slot. The BDS receiver’s disc player will into this jack. -
Page 6: Receiver Rear-Panel Connections
Receiver Rear-Panel Connections Receiver Rear-Panel Connections Main Power Switch Speaker Connectors (BDS 5 Shown) BD-Live Connector HDMI Output FM Antenna Connector AC Power Connector Cooling Fan Air Exhaust Optical Analog The Bridge IIIP Digital Audio Connector Inputs Inputs Subwoofer Coaxial Output Digital Input NOTE: See the Connections section, on page 14, for detailed information about... -
Page 7: Subwoofer Controls And Connections
Subwoofer Controls and Connections Subwoofer Controls and Connections Phase Switch Bass-Boost Switch Power-On Mode Switch Subwoofer Level Control External Trigger Input Connector Line-Level In LFE Connector Line-Level In L/R Connector Power Switch Power Cord PL0004-01001 External Trigger Input Connector: NOTE: This connector is NOT used with the Phase Switch: This switch determines whether the subwoofer driver’s piston-like action moves in and out in phase with the satellite speakers. -
Page 8: Remote Control Functions
Remote Control Functions Eject Button: Press this button to eject a disc from the BDS receiver’s built-in disc Remote Control Functions player. Before pressing this button, make sure no objects are blocking the disc slot opening. Power Button TV Power Button Power Button: Pressing this button toggles the BDS receiver between the On and Standby modes. - Page 9 Remote Control Functions Surround Button: Pressing this button cycles through all of the surround-sound Pause Button: Press this button to pause a disc or music file that is playing. Pressing modes that are available for the active program. Each press of the Surround button the button while a Blu-ray Disc recording or DVD is playing will freeze-frame on the will change to the next mode in line.
-
Page 10: Placing The Speakers (Bds 800, Bds 700, Bds 400 And Bds 300 Systems)
Placing the Speakers (BDS 800, BDS 700, BDS 400 and BDS 300 Systems) Placing the Subwoofer Placing the Speakers (BDS 800, BDS 700, BDS 400 and BDS 300 Systems) Front Left Front Right Speaker Speaker Placing the Front Left and Front Right Speakers... -
Page 11: Placing The Speakers (Bds 600 System)
Shelf Placement You can place the satellite and center speakers on shelves. BDS 800 and BDS 400 satellite speakers have built-in bases for shelf placement. If you want, you can remove a base by pulling it straight off its speaker. Apply even pressure to both sides of the base and smoothly slide it off the speaker. - Page 12 Mounting Options for Satellite and Center Speakers 4. Attach the wall portion of the wall-mount bracket onto the wall using hardware CAUTION: Before making speaker connections, be sure that the BDS receiver is turned OFF and, preferably, its AC cord is unplugged from the AC outlet. that is appropriate for the wall’s construction and materials.
- Page 13 Recess on Speaker Bottom 2. Determine the locations for the speakers. (See Placing the Speakers (BDS 800, BDS 700, BDS 400 and BDS 300), on page 10, for more information.) If possible, Attach Speaker to Bracket Using position the speakers so that the mounting screws (not included; use size #8) Long Bolt can be installed directly into a wall stud.
-
Page 14: Connections
1. Determine the location for the speaker (see Placing the Speakers (BDS 800, BDS channels. 700, BDS 400 and BDS 300 Systems), on page 10, for more information). If possible, position the speaker so that one of the mounting screws (not included; use size #10) The BDS 5 receiver uses the following colors to denote the (+) terminals of the can be installed directly into a wall stud. - Page 15 Connections Connecting the Satellite and Center Speakers (BDS 700 and BDS 300 systems) Connecting the Speaker Terminals (BDS 800 and BDS 400 systems) Front Right Front Left Center – – – Front Right Cable Front Left Cable – – Center Cable...
- Page 16 Connections Connecting the Subwoofer (all systems) Connecting a TV or Video Display Use the supplied mono RCA audio cable (purple connectors) to connect the subwoofer’s Use the supplied HDMI cable to connect the BDS receiver’s HDMI output to your TV/video Line-Level LFE In connector to the BDS receiver’s Subwoofer output.
- Page 17 Connections Connecting Audio Sources Connecting to a Local Area Network (LAN) Use a CAT. 5/RJ45 network cable (not supplied) to connect the BDS receiver’s BD-Live connector directly to a network router, a network switch, a network modem or an Ethernet network wall jack that has Internet access.
-
Page 18: Preparing The Remote Control
Preparing the Remote Control Preparing the Remote Control a) Press and hold the Aux button for three seconds. The button will turn red, go dark and turn red again. Then release the button. Installing the Batteries b) For a conventional US TV, enter ”0999”; for a conventional EU TV, enter “1999”; Your BDS system remote control uses three AAA batteries (supplied). -
Page 19: Setting Up The Receiver
16:9 Normal Page: 1/5 4:3 Pan & Scan 4:3 Letterbox Welcome to the Harman Kardon BDS Setup Wizard. Some simple information is needed to ensure you get the best experience from your product. You can adjust these settings later in addition top making changes to more advanced settings by pressing the ‘Settings’... - Page 20 Select to adjust display settings System Upgrade: Select this option when you want to install a BDS firmware upgrade for your BDS receiver that you’ve downloaded from a harman kardon Web site or other harman kardon source. TV: This option allows you to set the following display parameters: Setup Wizard: This option activates the receiver’s Setup Wizard (see Setup Wizard, on...
- Page 21 2.1: This configuration consists of left and right main speakers, plus a subwoofer. not, the receiver will output 30-bit color. BDS 400 and BDS 300 systems are factory-set to this configuration. Off: The BDS receiver does not output Deep Color (color resolution remains at 24 bits).
-
Page 22: Using The Receiver
8. When you have entered the distances to all of your system’s speakers, press the Exit speaker configuration. After you select your system’s configuration, the speaker button repeatedly until the harman kardon logo screen appears. setup screen will appear (BDS 800 5.1 system screen shown). -
Page 23: Using The Disc Player
8. When you are finished adjusting the volumes of all of your system’s speakers, press Channel Setup Configuration Configuration the Exit button repeatedly until the harman kardon logo screen appears. Configuration Notes on Setting Speaker Volumes in 5.1-Channel Systems: 2.1-Channel... - Page 24 Using the Disc Player Disc Cleaning Precautions Loading and Playing a Disc Before playing, clean the disc with a cleaning cloth. Wipe the disc from the center out. Hold the disc horizontally when loading it, and insert it gently into the Disc slot. The disc loading mechanism will take the disc and slide it into the unit.
-
Page 25: Listening To Your Ipod/Iphone
Using the Disc Player and Listening to Your iPod/iPhone Programmed Play: This option lets you create a programmed playlist for a disc. The program function works for CDs, DVDs and some Blu-ray Disc recordings (not all Blu-ray Disc recordings allow programmed play). 1. -
Page 26: Using The Radio
Using the Radio, Listening to Audio Sources and Playing Files from USB Devices and CD Data Discs Using the Radio Listening to Audio Sources Press the Radio button on the remote control, or if the Home screen is displayed on the Press the Aux button on the remote control. - Page 27 Playing Files from USB Devices and CD Data Discs File: Select a file to view. Play Mode: View files in their normal order, in random order (until you press the Stop button) or in shuffle order (displays each image in the folder one time in random order, then returns to the directory).
-
Page 28: Using Playlists
Playing Files from USB Devices and CD Data Discs, and Using Playlists Selecting a music file plays the file. If there are other music files in the folder that follow The video will automatically play. If there are other video files in the folder, the BDS the selected file, the receiver will play them in the order they appear on the on-screen receiver will play each one in the order they appear on the on-screen menu. -
Page 29: Troubleshooting
Troubleshooting Troubleshooting If your BDS system isn’t performing the way you think it should, check to see if the problem is covered in this section before calling your dealer or contacting a harman kardon representative. Problem Solution The receiver won’t power up (the Power indicator is not lit): Check that the receiver’s Power cord is properly plugged into the receiver’s AC... -
Page 30: Aux Component Remote-Control Code List
0121 0087 0029 BROCKSONIC 0206 0205 GRUNDIG 0193 BUSH 1010 1020 1040 1043 1092 HALL MARK 0128 BUSH (UK) 1044 harman kardon 0201 CENTURY 1023 1088 HITACHI 0147 0144 0132 0128 0123 CITIZEN 0132 0128 0123 0045 HYTEK 0016 COMTEL... - Page 31 Aux Component Remote-Control Code List TV/DVR Manufacturer Code Numbers Manufacturer Code Numbers LG (GOLDSTAR) 0132 0128 0122 0110 0101 0002 SAMSUNG 0145 0132 0128 0124 0022 0020 0013 2004 2003 LLOYTRON 0173 0172 SANYO 0054 0026 LODGENET 0069 SCOTT 0132 0128 0045 0148...
- Page 32 Aux Component Remote-Control Code List Cable Tuners Manufacturer Code Numbers Manufacturer Code Numbers 3011 3001 3220 3197 ALLEGRO 3111 PACE 3179 AMERICAST 3212 PANASONIC 3214 3189 3177 3176 3053 ARCHER 3112 PANTHER 3114 BELCOR 3113 PHILIPS 3090 3085 3020 3019 3013 4023 BT CABLE...
- Page 33 Aux Component Remote-Control Code List Satellite Tuners Manufacturer Code Numbers Manufacturer Code Numbers AIWA 6041 HITACHI 5055 5004 6006 6011 AKAI 6033 HOUSTON 5063 TRACKER ALBA 6001 6011 HUGHES 5089 5037 5005 5006 AMSTRAD 6032 HUMAX 6007 ANKARO 6021 6067 ASTRO 6076 6077...
- Page 34 Aux Component Remote-Control Code List Satellite Tuners Manufacturer Code Numbers Manufacturer Code Numbers PANASONIC 5069 5066 5057 5053 6024 6031 6006 PANSAT 5020 SKY MASTER 6033 PERSONAL 5018 SKYLAB 6021 CABLE SONY 5005 5062 PHILIPS 5075 6019 6021 6024 6032 6033 STAR CHOICE 5059...
-
Page 35: Specifications
Specifications Specifications BDS 5 receiver (BDS 800, BDS 700, BDS 600 systems) BDS 2 receiver (BDS 400, BDS 300 systems) Audio Section Continuous average power, stereo mode (BDS 5, BDS 2): 65 watts per channel, 20Hz – 20kHz, @ <0.1% THD, both channels driven into 6 ohms Multichannel power (BDS 5 only): 65 watts per channel, 20Hz –... - Page 36 Specifications SAT-TS60 Satellites (BDS 800 and CEN-TS60 Center (BDS 800 system) BDS 400 systems) Midrange transducer: Two x 3" (75mm) flat-panel drivers, video-shielded Two x 3" (75mm) flat-panel drivers, video-shielded High-frequency transducer: 1" (25mm) CMMD ® Lite dome, video-shielded 1" (25mm) CMMD Lite dome, video-shielded Recommended power: 10 –...
- Page 37 © 2010 HARMAN International Industries, Incorporated. All rights reserved. harman kardon and CMMD (patent nos. 6,327,372 and 6,404,897) are trademarks of HARMAN International Industries, Incorporated, registered in the United States and/or other countries. Blu-ray Disc and BD-Live are trademarks of the Blu-ray Disc Association. DivX ®...
Need help?
Do you have a question about the BDS 400 and is the answer not in the manual?
Questions and answers