
Related Manuals for Minolta 3600HS D


Summary of Contents for Minolta 3600HS D
- Page 1 3600HSD_E.qxd for final 00.10.3 12:01 Page E1 PROGRAM FLASH MAXXUM FLASH 3600HS ( D ) Printed in Malaysia E INSTRUCTION MANUAL 9222-8842-10 MM-A009...
- Page 2 This Class B digital apparatus complies with Canadian ICES-003. Do not disassemble. Electric shock may occur if a high voltage cir- cuit inside the product is touched. Take your flash to a Minolta Service Facility when repairs are required. CAUTION Do not touch the flashtube during operation, it may become hot when the flash fires.
-
Page 3: Table Of Contents
INSTALLING BATTERIES ..............10 This flash unit is designed and manufactured solely for use with Checking Batteries ..............11 the Minolta Maxxum/Dynax series cameras. It cannot be attached ATTACHING AND REMOVAL..............12 to other Minolta cameras. Performance when used with cameras AUTO POWER ON/OFF AND FILM............13 from other manufacturers cannot be guaranteed. -
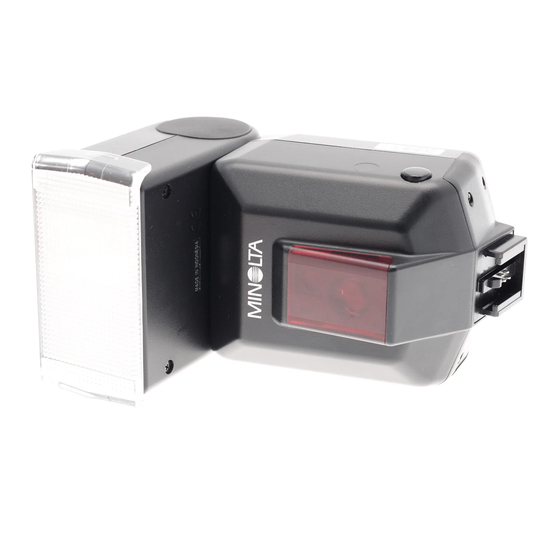
Page 4: Names Of Parts
3600HSD_E.qxd for final 00.10.3 12:01 Page E6 NAMES OF PARTS Flash Unit Diagram Control Panel Please peel off the protective film on the front of the flash. Flashtube Wireless/Remote flash lamps (28) Mounting-foot-release Wireless/Remote Auto lamp (14) button (12) control-signal Manual-zoom receiver (28) lamp (21) -
Page 5: Basic Operation
3600HSD_E.qxd for final 00.10.3 12:01 Page E8 This manual covers the PROGRAM/MAXXUM FLASH 3600HS (D) BASIC OPERATION as attached to one of the following cameras. Maxxum 9, 7, 800si, 700si, 600si, 400si, 300si, XTsi, HTsi, STsi, QTsi Dynax 9, 7, 800si, 700si, 600si, 505si, 505siSuper, 500si, 500siSuper, 404si, 303si, 300si When attaching to another Maxxum series camera, a Dynax series camera, a Vectis series camera, or a Dimâge series digital camera,... -
Page 6: Installing Batteries
3600HSD_E.qxd for final 00.10.3 12:01 Page E10 INSTALLING BATTERIES The 3600HS (D) may be powered by : Checking Batteries • Four AA-size alkaline batteries The low-battery lamp will light or blink on the control panel • Four AA-size lithium batteries when the batteries are low. -
Page 7: Attaching And Removal
3600HSD_E.qxd for final 00.10.3 12:01 Page E12 ATTACHING AND REMOVAL AUTO POWER ON/OFF AND FILM Attaching To The Camera Auto Power On Power is supplied to this flash automatically (auto power on) in the Push the mounting foot firmly following situations. onto the camera until it stops. -
Page 8: P Mode Flash: The Basics
3600HSD_E.qxd for final 00.10.3 12:01 Page E14 P MODE FLASH: THE BASICS 1. Select the P mode on the cam- 4. When the flash is charged, era. press the shutter-release but- ton to take the photo. • The flash is charged when the flash- 2. -
Page 9: Exposure Modes
3600HSD_E.qxd for final 00.10.3 12:01 Page E16 EXPOSURE MODES P MODE FLASH: THE BASICS • Following is the flash range that is recommended when using the This photography is only possible with cameras having the A, S and 3600HS (D). When you need information in more detail, please see M modes. -
Page 10: M Mode Flash
3600HSD_E.qxd for final 00.10.3 12:01 Page E18 EXPOSURE MODES M Mode Flash 1. Select the M mode on the camera. APPLICATIONS 2. Press the flash on/off button to glow the lamp [ON]. • Fill flash is selected. 3. Set the aperture and shutter speed, and focus the sub- ject. -
Page 11: Zoom Flash Coverage (Auto)
3600HSD_E.qxd for final 00.10.3 12:01 Page E20 ZOOM FLASH COVERAGE Auto Zoom Manual Zoom This flash unit employs auto zoom to cover a range of focal lengths Zoom may be set manually irrespective of the focal length currently from 24mm to 85mm. There is normally no need to manually adjust in use. -
Page 12: Zoom Flash Coverage (Manual)
3600HSD_E.qxd for final 00.10.3 12:01 Page E22 BOUNCE FLASH ZOOM FLASH COVERAGE Wide Angle Adapter (17mm zoom angle) Strong shadows appear when flash is Put the wide-angle adapter on for the 17mm zoom angle. used with a wall directly behind the subject. -
Page 13: Bounce Flash
3600HSD_E.qxd for final 00.10.3 12:01 Page E24 BOUNCE FLASH Rotate the flash towards the ceil- Adjusting Bounce Angle ing. An unsightly photo results when both direct light and bounced light • The flash may be set to the following from the flash are used simultaneously. angles : 45°, 60°, 75°, 90°. -
Page 14: High-Speed Sync [Hss]
3600HSD_E.qxd for final 00.10.3 12:01 Page E26 HIGH-SPEED SYNC [HSS] • High-speed sync is cleared when the high-speed-sync button is pressed again, and a shutter speed faster than the sync speed can no longer be set. • It is recommended that photos be taken in bright locations. •... -
Page 15: Wireless/Remote Flash Mode [Wl]
3600HSD_E.qxd for final 00.10.3 12:01 Page E28 WIRELESS/REMOTE FLASH MODE [WL] Photographs taken with the flash 1. Attach the flash to the camera attached to the camera are flat as and switch the flash and cam- shown in photo . In such cases, era power supplies on. - Page 16 3600HSD_E.qxd for final 00.10.3 12:01 Page E30 WIRELESS/REMOTE FLASH MODE 4. Set up the camera and the Wireless Flash Range 3600HS(D) flash. Distance between camera Distance between • Photograph in dark locations indoors. and subject (see Table 1) 3600HS (D) and Built-in-Flash subject (see Table 2) •...
- Page 17 3600HSD_E.qxd for final 00.10.3 12:01 Page E32 WIRELESS/REMOTE FLASH MODE Notes On Wireless Flash Changing the channel setting The MS-2 mini-stand is useful when the flash unit is off the camera. When another wireless flash is being used nearby, your flash might The mini-stand has a tripod configuration with a threaded hole to fire with a light signal from the built-in flash of other cameras.
-
Page 18: Af Illuminator
3600HSD_E.qxd for final 00.10.3 12:01 Page E34 AF ILLUMINATOR WIRELESS/REMOTE FLASH MODE Setting Wireless/Remote Flash By Flash Only In low-light or when subject contrast is low, pressing the shutter-release but- If you keep using the same camera and the flash combination with- ton partway down for autofocus lights out changing the wireless channel, it will not be necessary to attach the red lamp on the front of the flash... -
Page 19: Time To Auto Power Off
3600HSD_E.qxd for final 00.10.3 12:01 Page E36 TIME TO AUTO POWER OFF It is possible to change the settings of the time to auto power off. 3. Press the zoom selection button to select the desired setting time to auto power off. Available options will be changing as following: 1. -
Page 20: Appendix
3600HSD_E.qxd for final 00.10.3 12:01 Page E38 USE IN COMBINATION WITH OTHER PRODUCTS Read this manual in combination with the relevant manual when any of the following products are used in combination with the APPENDIX 3600HS (D). Using xi Series Single Lens Reflex Cameras (Maxxum/Dynax 9xi, 7xi, 5xi, 3xi, SPxi, 2xi) •... - Page 21 Page E40 USE IN COMBINATION WITH OTHER PRODUCTS Using Early AF Series Single Lens Reflex Cameras Using Minolta Digital Cameras (Maxxum/Minolta 9000, 7000, 5000) (Dimâge RD3000, Digital camera RD-175) • The optional flash shoe adapter FS-1200 is necessary. See the FS- •...
-
Page 22: Flash Range
3600HSD_E.qxd for final 00.10.3 12:01 Page E42 FLASH RANGE Flash range is the appropriate range that provides you for a correct exposure. To determine the flash range for the film and aperture being used, refer to the graph shown. maximum distance minimum distance subject distance 1. -
Page 23: Cautions While Handling
• If you have questions about your flash, contact your local camera • The flash unit may be used over a temperature range of –20°C to dealer or write to the Minolta distributor in your area. 50°C. • Before shipping your flash for repair, please contact an aoutho- •... -
Page 24: Performance
3600HSD_E.qxd for final 00.10.3 12:01 Page E46 PERFORMANCE Guide number Normal flash (ISO 100) Flash coverage Flash coverage 17* 24 Flash Coverage Setting (mm) Flash coverage 17* 24 (*When using Wide Angle Adapter) Top-bottom (° ) 115 60 Left-right (° ) 125 78 Wireless flash (ISO 100) (*When using Wide Angle Adapter) - Page 25 7 Tanners Drive, Blakelands, Milton Keynes, MK14 5BU, England Minolta Austria Ges. m.b.H. Amalienstrasse 59-61, A-1131 Wien, Austria Minolta Camera Benelux B.V. Zonnebaan 39, P.O. Box 6000, NL-3600 HA Maarssen, The Netherlands Belgium Branch Prins Boudewijnlaan 1, B-2550 Kontich, Belgium...
Need help?
Do you have a question about the 3600HS D and is the answer not in the manual?
Questions and answers