
Related Manuals for NEC XG85-XG135LC - 1


Summary of Contents for NEC XG85-XG135LC - 1
- Page 1 MultiSync XG85 MultiSync XG135LC Large Screen MultiSync Projection Monitor Set-Up Manual Model Number: XG-852/XG-1352 XG-852G/XG-1352G...
-
Page 3: Table Of Contents
1 2 3 4 5 6 1 2 3 4 5 6 CONTENTS. 1 2 3 4 5 6 1 2 3 4 5 6 1 2 3 4 5 6 1 2 3 4 5 6 1 2 3 4 5 6 SETTING .............. -
Page 4: Part Names And Functions
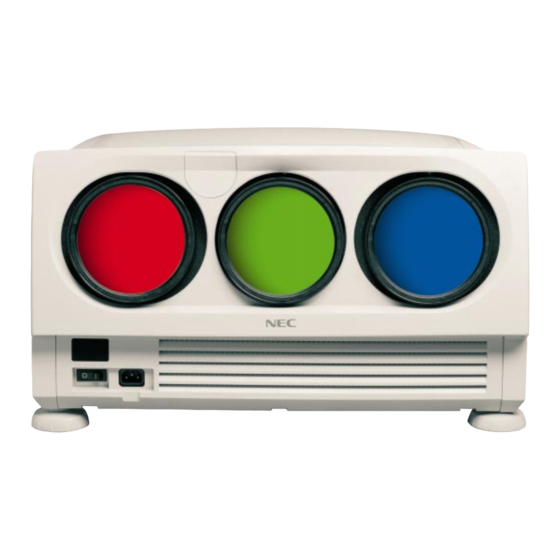
1 2 3 4 5 6 1 2 3 4 5 6 PART NAMES AND FUNCTIONS. 1 2 3 4 5 6 PART NAMES AND FUNCTIONS 1 2 3 4 5 6 1 2 3 4 5 6 1 2 3 4 5 6 Front Terminal Panel Rear Control Panel A cover is provided to attach the rear control panel. - Page 5 PART NAMES AND FUNCTIONS A ACAT OUT Terminal Front Panel This is a video output connector for the optional built in 1 Power Switch (Main power) CCD camera. The CCD camera is needed in order to To turn on the main power to the projector press the perform automatic convergence with the optional ACAT switch to the ON position ( I ).
-
Page 6: Optional Boards
PART NAMES AND FUNCTIONS OPTIONAL Boards VIDEO INPUT Board [XG VIDIN (A)] Front view VIDEO S-VIDEO VIDEO INPUT AUDIO INPUT VIDEO S-VIDEO 1 Active Indicator (green LED) ..Lights up when this board is selected. 2 VIDEO INPUT Terminal ....Connects composite video output signals. 3 S-VIDEO INPUT Terminal ... - Page 7 PART NAMES AND FUNCTIONS The combination of the rotary switch and the jumper pins allows the projector to accept VIDEO or COMPONENT signals. Note that this board cannot accept RGB signals when board is set to VIDEO input. Setting of Rotary switch Rotary switch (S1001) Jumper (S1002, S1003, S1004) Mark...
-
Page 8: Remote Control Unit
PART NAMES AND FUNCTIONS Remote control unit POWER POWER INPUT 1 ABC 2 DEF 3 GHI OPERATE 1 ABC 2 DEF 3 GHI PICTURE 4 JKL 5 MNO 6 PQR TEST 4 JKL 5 MNO 6 PQR MUTE SOUND 7 STU 8 VWX 9 YZ / MUTE... -
Page 9: Display Button
PART NAMES AND FUNCTIONS NOTE: Even if the on-screen display may be turned off 3 ADJUST Button with pressing CTL and DISPLAY, any adjustment will Press to display the “ADJUST” menu. still change the projector’s memory settings. This mode is available even when an input is switched to another or 4 OPERATE Button the power is turned off using the POWER OFF button on Press to display the “OPERATE”... -
Page 10: Enter Button
PART NAMES AND FUNCTIONS I PINCUS Button S NORMAL Button Press to enter the PINCUSHION mode. You can adjust Returns the standard level for each signal. When pressed the horizontal and the vertical pincushion of the projected once, the confirmation message will be displayed. When image. -
Page 11: Battery Installation And Replacement
PART NAMES AND FUNCTIONS Battery installation and replacement User remote control (RC-6320) Full function remote control (RC-6321) Press down on the battery compartment cover and slide Press down on the battery compartment cover and slide the cover in the direction of the arrow. the cover in the direction of the arrow. - Page 13 Set-Up (for service personnel) Set-Up CONTENTS The Signal Entry chapter explains how to register a new Before Set-Up ..........14 input signal and how to set various parameters of the Signal Entry ............ 19 currently selected signal. Adjustment ............. 38 The Adjustment chapter gives you the procedures for Passcode ............
-
Page 14: Before Set-Up
1 2 3 4 5 6 1 2 3 4 5 6 BEFORE SET-UP. 1 2 3 4 5 6 1 2 3 4 5 6 1 2 3 4 5 6 1 2 3 4 5 6 1 2 3 4 5 6 Displaying the Menu and Adjustment Screens Access of all set-up functions is done through the menu system. -
Page 15: Storing Projector Settings (Automatic Save Feature)
BEFORE SET-UP Storing Projector Settings (Automatic Save Feature) You have two options to store projector settings in the memory: automatically and manually. • Storing time is four seconds. • The Automatic Save Feature mode has been set to DISABLE by factory. - Page 16 BEFORE SET-UP When selecting “NEW” The current settings are registered as a new signal and are saved to an unassigned line starting at memory location NEW ENTRY? No.51. LIST No. A registered name is automatically given. NAME ******** The “NEW ENTRY?” menu will be displayed. Use the CURSOR button to highlight “YES”...
-
Page 17: On Adjust Mode
BEFORE SET-UP On ADJUST MODE The ADJUST mode contains various adjustment items for set-up. Open the ADJUST menu and select the item you wish to adjust. To display the ADJUST menu, proceed as follows: 1 Press the ADJUST button. • The projector may ask for your passcode. 2 Enter your registered passcode. -
Page 18: Test Pattern
BEFORE SET-UP Test Pattern This projector will generate a selection of test signals. Ten kinds of internal test patterns can be selected from the TEST PATTERN menu. To display the TEST PATTERN menu, proceed as follows: 1 Press the TEST button on the Full function remote control. •... -
Page 19: Signal Entry
1 2 3 4 5 6 SIGNAL ENTRY. 1 2 3 4 5 6 1 2 3 4 5 6 1 2 3 4 5 6 1 2 3 4 5 6 1 2 3 4 5 6 On Signal Entry The projector uses a micro-processor to automatically read and distinguish between all video signals input at the same time. - Page 20 SIGNAL ENTRY 4 Use the CURSOR button to select the item and then press ENTER. S I G N A L E N T R Y N E W E N T R Y • The Input terminal menu will be displayed. E N T R Y C O P Y E N T R Y M O V E Items to select...
- Page 21 SIGNAL ENTRY When using with a single Switcher ISS-6020/ISS-6020G: M A S T E R Use the CURSOR button to select the input slot number S L O T – 0 1 of the Switcher and press ENTER. S L O T – 0 2 •...
- Page 22 SIGNAL ENTRY Items to select • VIDEO ---------- Selects the signal from the VIDEO input terminal of the VIDEO input board. • RGB ------------ Selects the signal from the RGB input terminal of the RGB input board. • S-VIDEO ------- Selects the signal from the S-VIDEO input terminal of the VIDEO input board.
- Page 23 SIGNAL ENTRY 3) Use the CURSOR or button to select an item and press ENTER. I N I T I A L D A T A S E L E C T Items to select D E F A U L T •...
- Page 24 SIGNAL ENTRY When selecting “ENTRY COPY” You can copy one of the registered input to another selected line. To do this, proceed as follows: S I G N A L E N T R Y N E W E N T R Y E N T R Y C O P Y 1) Use the CURSOR or button to select “ENTRY COPY”...
- Page 25 SIGNAL ENTRY displayed. Use the CURSOR button to select “YES” or “NO” and then press ENTER. • When the “ENTRY MOVE END” message will be ENTR Y DATA O VERW RITE? displayed, this completes the ENTRY MOVE mode. Y E S •...
- Page 26 SIGNAL ENTRY When selecting “DATA COPY” To help assist in adjusting multiple inputs this projector has a feature called DATA COPY. This feature allows you to copy the S I G N A L E N T R Y memory data from one input to another input. By copying this N E W E N T R Y E N T R Y C O P Y data from an input that has already been adjusted to an existing...
- Page 27 SIGNAL ENTRY 1) Use the CURSOR or button to select “CHANGE DEFAULT” and press ENTER. • The “STORE TO DEFAULT AREA?” will be displayed. 2) Use the CURSOR or button to select an item and press ENTER. Items to select •...
- Page 28 SIGNAL ENTRY When selecting "INPUT TERMINAL" You can select the input terminal for the registered P 0 1 / 0 3 S O U R C E I N F O R M A T I O N signal. This feature is useful when you need to change the input terminal due to adding optional equip- N A M E I N P U T T E R M I N A L...
- Page 29 SIGNAL ENTRY 5 To complete the signal entry, press the END button. • Whenever the END button is pressed, the menus will R ETURN U SER MOD E? sequence in this order: Y E S “ADJUST” menu Source screen. • When your passcode is in effect, the “RETURN USER MODE?”...
-
Page 30: Checking And Setting Various Parameters
SIGNAL ENTRY Checking and Setting Various Parameters Parameters of the signal currently projected can be displayed. For changing parameters of the other registered signals, perform on the SIGNAL ENTRY screen. See pages 19 to 35. – A D J U S T – To view or change the parameters, proceed as follows: 1 / S I G N A L E N T R Y 1 Press the ADJUST button. - Page 31 SIGNAL ENTRY Setting “NAME” This function is used to change a user name that has previously been entered. To do this, proceed as follows: 1) Use the CURSOR buttons to select “NAME” and then press P01/03 SOURCE INFORMATION ENTER. • The “NAME INPUT” screen will be displayed. NAME INPUT TERMINAL INPUT A...
- Page 32 SIGNAL ENTRY Setting “COUNTER” This function is used to reset the number of times a signal is selected for display. 1) Use the CURSOR buttons to select the “COUNTER” and P02/03 SOURCE INFORMATION then press ENTER. SYNC CONTROL AUTO • The “COUNTER RESET?” screen will be displayed. COMP.
- Page 33 SIGNAL ENTRY Setting “SOURCE LOCK” This function is used to stop the projector’s automatic signal P02/03 SOURCE INFORMATION discrimination of various RGB signals. SYNC CONTROL AUTO Set the lock control to the ON position when connecting an COMP. intermittent or low quality signal. COUNTER DISPLAY TIME 1) Use the CURSOR buttons to select “SOURCE LOCK”...
- Page 34 SIGNAL ENTRY Setting “G-Y MATRIX” This function is used to set a matrix ratio for a COMPONENT P02/03 SOURCE INFORMATION signal. SYNC CONTROL AUTO Note that this function is not available unless a COMPONENT COMP. signal is accepted. COUNTER DISPLAY TIME To do this, proceed as follows: SOURCE LOCK 1) Use the CURSOR buttons to select “G-Y MATRIX”...
- Page 35 SIGNAL ENTRY Selecting “POSITION” This function is used to select the vertical area mode for the “POSITION-SHIFT” adjustment. P03/03 SOURCE INFORMATION To do this, proceed as follows: POSITION WIDE 1) Use the CURSOR buttons to select “POSITION” and then FONT NORMAL press ENTER.
- Page 36 SIGNAL ENTRY Setting “APERTURE” This function is used to correct picture edge by changing the frequency response of the video circuit. You can select two P03/03 SOURCE INFORMATION aperture modes: manual and auto. POSITION WIDE FONT NORMAL 1) Use the CURSOR buttons to select “APERTURE” , then APERTURE MANUAL press ENTER.
- Page 37 SIGNAL ENTRY Setting “AFC” This function is used to reduce jitter by changing time-constant P03/03 SOURCE INFORMATION of AFC of the sync generator circuit. POSITION WIDE FONT NORMAL 1) Use the CURSOR buttons to select “AFC”, then press APERTURE MANUAL ENTER.
-
Page 38: Adjustment
1 2 3 4 5 6 1 2 3 4 5 6 ADJUSTMENT. 1 2 3 4 5 6 1 2 3 4 5 6 1 2 3 4 5 6 1 2 3 4 5 6 1 2 3 4 5 6 Set-Up Procedure Before adjusting 1 Installation of the projector. -
Page 39: Electrical Focus Adjustment
ADJUSTMENT Electrical Focus Adjustment Adjust the focus electrically to obtain the best screen focus. NOTE: • The adjustment must be done to each input. • Select the FOCUS test pattern using the TEST button on the full function remote control. Proceed as follows: 1 Press the ADJUST button to display the “ADJUST”... - Page 40 ADJUSTMENT 4 Press the R, G, and B button to project the CRT beam to be adjusted. • You can turn on or off each CRT beam (R, G, and B)separately. NOTE: • The CENTER, EDGE SEPA. ,and CORNER focus adjustment should be performed for each CRT separately.
- Page 41 ADJUSTMENT When selecting “EDGE ALL”/”EDGE SEPA.” 1) Press and hold the CTL button then press any one of the F O C U S CURSOR buttons to select the position to be adjusted. (The - E D G E S E P A R A T E - marker on the selected side will turn to a solid color.) C R T - R - CTL +...
- Page 42 ADJUSTMENT 7 Repeat steps 4 to 6 for the other CRTs if necessary. 8 To end this adjustment, press the END button. • Whenever the END button is pressed, the menu will sequence in this order: “FOCUS” menu “ADJUST” menu Source screen •...
-
Page 43: Alignment Adjustment
ADJUSTMENT Alignment Adjustment Correct the horizontal and vertical error for the projected image. NOTE: Select the CROSS-COARSE test pattern using the TEST button on the full function remote control. – A D J U S T – Proceed as follows: 1 / S I G N A L E N T R Y 1 Press the ADJUST button to display the “ADJUST”... - Page 44 ADJUSTMENT 4 Press the R, G, and B buttons to display only the Green pattern. • You can turn on or off each CRT beam (R, G or B) separately. A L I G N M E N T • To access the CONVERGENCE screen (see page 49), press and - T I L T , S K E W - hold down the CTL button then press the R or B button.
- Page 45 3) Use the CURSOR buttons to align the pattern. ALIGNMENT When selecting "CENTER": - LINE DIST. EDGE - • Pressing the CURSOR button increases the level. Pressing the CURSOR button decreases the level. When selecting "EDGE": • Pressing the CURSOR button corrects the vertical lines.
- Page 46 ADJUSTMENT 2) Use the CURSOR button to select the item and press ENTER to display the selected adjustment screen. You can also select the item directly by pressing the corresponding INPUT - R , G , B P O I N T - number button.
- Page 47 ADJUSTMENT 4) For alignment, hold down the CTL button, then use the CURSOR buttons to align the pattern. For convergence, hold down the CTL button and then use the CURSOR buttons to align the Red or Blue pattern with the Green pattern. NOTE: For more accurate convergence correction on edges, perform the amplitude and linearity adjustments before the POINT convergence adjustment.
- Page 48 ADJUSTMENT Alignment Adjustment Items SKEW TILT Adjust vertical center line. Adjust horizontal center line. Horizontal BOW Vertical BOW Adjust horizontal center line bow. Adjust vertical center line bow. Vertical AMPLITUDE Horizontal AMPLITUDE Adjust horizontal size of image. Adjust vertical height of image. Horizontal LINEARITY Vertical LINEARITY Adjust top and bottom linearity.
- Page 49 ADJUSTMENT Alignment Adjustment Items Vertical PINCUSHION Horizontal PINCUSHION Equalize top and bottom pincushion error. Equalize left and right pincushion error. Vertical LINEAR-BALANCE Horizontal LINEAR-BALANCE Equalize top and bottom linearity balance error. Equalize left and right linearity balance error. Vertical KEY-BALANCE Horizontal KEY-BALANCE Equalize top and bottom keystone balance error.
-
Page 50: Static Convergence Adjustment
ADJUSTMENT Static Convergence Adjustment Adjust the red and blue CRT images to position them over the green test pattern (center portion only). NOTE: The static convergence adjustment should be performed for each CRT (R and B) separately. Carry out the adjustment after displaying an active image for 20 minutes or more. -
Page 51: Dynamic Convergence Adjustment
ADJUSTMENT Dynamic Convergence Adjustment Corrects the horizontal and vertical error for each color and align the red and blue to the green. NOTE: • The dynamic convergence adjustment should be performed for each CRT (R and B) separately. • Select the CROSS-COARSE test pattern using the TEST button on the full function remote control. - Page 52 ADJUSTMENT 5 Hold down the CTL button then select the CRT you wish to C O N V E R G E N C E adjust with the R and B buttons. - T I L T , S K E W - NOTE: Always be aware of what color the on-screen CRT C R T - R - display is showing (R, B).
- Page 53 ADJUSTMENT CONVERGENCE 3) Use the CURSOR buttons to align the pattern. - LINE DIST. CENTER - When selecting "CENTER": CRT –R– • Pressing the CURSOR button increases the level. Pressing the CURSOR button decreases the level. To switch to the "EDGE" screen, press and hold the CTL, then press CUSOR button.
- Page 54 ADJUSTMENT POINT Adjusting – P O I N T – NOTE: 1 / C O A R S E • The POINT adjustments should only be done if necessary. Over 2 / M E D I U M adjusting them may cause the picture distortion. •...
- Page 55 ADJUSTMENT Adjusting PHASE P H A S E This adjustment corrects the phase of convergence wave forms. - C O N V . , C U R S O R - NOTE: Since the projector has been pre-adjusted for the optimal phase adjustments at the factory, further adjustment should not be required in normal operation.
- Page 56 ADJUSTMENT Convergence Adjustment Items TILT Adjust horizontal center line. Vertical BOW Adjust horizontal center line bow. Vertical AMPLITUDE Adjust top and bottom height. Vertical LINEARITY Adjust top and bottom linearity. KEYSTONE Adjust the selected part. When RIGHT is selected When TOP is selected When LEFT is selected When BOTTOM is selected...
- Page 57 ADJUSTMENT PINCUSHION When TOP is selected When RIGHT is selected When BOTTOM is selected When LEFT is selected LINEAR-BALANCE Adjust the selected part. When TOP is selected When RIGHT is selected When LEFT is selected When BOTTOM is selected LINE DIST. EDGE LINE DIST.
- Page 58 ADJUSTMENT PHASE CONV. PHASE CURSOR PHASE Adjust the pattern so the sharp turns at the Align the vertical center line of the point left and right edges in the diagonal lines are cursor with the point peak. equal. Screen center...
-
Page 59: Color Temperature And White Balance Adjustment
ADJUSTMENT Color Temperature and White Balance Adjustment Adjusts the color temperature and the white balance. NOTE: • When you are in this adjustment mode, all the CRTs will be in use. The white balance adjustment should be performed for each CRT (R, G, and B) separately. -
Page 60: R, G, And B Gain Adjustment
ADJUSTMENT R, G, and B Gain Adjustment Adjusts the input level of the signal. NOTE: This adjustment works only with the ISS-6020/ISS-6020G Switcher. Proceed as follows: 1 Press the ADJUST button to display the “ADJUST” menu. • The projector may ask you to enter your passcode. See page 61 for the explanation of the PASSCODE. -
Page 61: Passcode
1 2 3 4 5 6 1 2 3 4 5 6 PASSCODE. 1 2 3 4 5 6 1 2 3 4 5 6 1 2 3 4 5 6 1 2 3 4 5 6 1 2 3 4 5 6 Entering Passcode To prevent any unauthorized operation or mis-adjustment, the projector is equipped with a passcode option. -
Page 62: Registering Passcode
PASSCODE Registering Passcode When the projector is shipped from the factory, no passcode is registered. If you want to use the passcode option, you must register a passcode. To register a new passcode, proceed as follows: 1 Press the ADJUST button. •... - Page 63 PASSCODE 5 Enter the new passcode again. 1) Each time you press the INPUT button, an asterisk will appear under the “CONFIRM NEW PASSCODE?” message. 2) Once you have finished entering the new four digit passcode, C O N F I R M N E W P A S S C O D E ? press ENTER.
-
Page 64: Changing Your Passcode
PASSCODE Changing Your Passcode To change your passcode, proceed as follows: 1 Press the ADJUST button. • The “PASSCODE?” screen will be displayed. 2 Enter the four digit current passcode using the “1” through “0” buttons. Press ENTER. • The “ADJUST” menu will be displayed. 3 Use the CURSOR button to highlight the “7/ –... - Page 65 PASSCODE 6 Enter a new passcode using the “1” through “0” buttons. 1) Each time you press the INPUT button, an asterisk will appear under the “NEW PASSCODE?” message. 2) Once you have finished entering the four digit new passcode, N E W P A S S C O D E ? press ENTER.
-
Page 66: Canceling Your Passcode
PASSCODE Canceling Your Passcode To cancel the passcode, proceed as follows: 1 Press the ADJUST button and then enter your passcode. • The “PASSCODE?” screen will be displayed. 2 Enter the four digit current passcode using the “1” through “0” buttons and then press ENTER. - Page 67 PASSCODE 6 Use the CURSOR button to select either “YES” or “NO” and then press ENTER. Items to select • YES ..When selecting “YES”, the current passcode will be canceled. You will not be required to re-enter PA SSC ODE DISABLE? your passcode when you press the ADJUST button Y E S to re-enter the ADJUST mode.
-
Page 68: Setting
1 2 3 4 5 6 1 2 3 4 5 6 SETTING. 1 2 3 4 5 6 1 2 3 4 5 6 1 2 3 4 5 6 1 2 3 4 5 6 1 2 3 4 5 6 Displaying the Various Setting Features You can view some of the setting features and check to make sure OPTION... -
Page 69: Projection Type Selection
SETTING Projection Type Selection This feature allows you to set the installation type according to the projection configuration. NOTE: • After changing the installation condition, be sure to perform this setting. Setting this automatically reverses the vertical polarity. However, you will have to reverse the horizontal polarity connec- tors. - Page 70 SETTING 5 Use the CURSOR button to select one of the four projector installation types and press ENTER. P J O R I E N T A T I O N Items to select C E I L I N G / R E A R •...
-
Page 71: Connecting To The Switcher
SETTING Connecting to the Switcher This setting explains how the projector is used with the ISS-6020/ ISS-6020G Switcher. 1 Press the ADJUST button to display the “ADJUST” menu. • The projector may ask you to enter your passcode. See page 61 for the explanation of the PASSCODE. 2 Use the CURSOR button to highlight the “8/OPTION”... - Page 72 SETTING 6 Use the CURSOR button to select either “YES” or “NO” and press ENTER. Items to select • YES ..Restart the projector. R E - S T A R T ? • N O ... Does not restart the projector. Y E S NOTE: The selected connection condition becomes effective only after the projector is restarted.
-
Page 73: Default Input Selection
SETTING Default Input Selection You can set the projector to default to any one of its inputs each time the projector is turned on. Proceed as follows: 1 Press the ADJUST button to display the “ADJUST” menu. • The projector may ask you to enter your passcode. See page 61 for the explanation of the PASSCODE. - Page 74 SETTING 5 Use the CURSOR button to select either “LAST” or “DEFAULT” and press ENTER. • Selecting “LAST” completes setting. Go on to step D E F A U L T I N P U T S E L E C T •...
- Page 75 SETTING 7 To complete, press the END button. • Whenever the END button is pressed, the menus will sequence in this order: “OPTION” menu “ADJUST” menu Source screen • If the “RETURN USER MODE?” menu appears, use the CURSOR button to select either “YES” or “NO” and RETURN U SER MODE? press ENTER.
-
Page 76: Focus Edge Mode
SETTING Focus Edge Mode This function allows you to set either of two electrical edge focus modes; one affects all the RGB patterns at the same time and the other each CRT separately. To set this, proceed as follows: 1 Press the ADJUST button to display the “ADJUST” menu. •... - Page 77 SETTING 5 Use the CURSOR button to select either “ALL” or “SEPARATE” and press ENTER. F O C U S E D G E M O D E A L L Items to select S E P A R A T E •...
-
Page 78: S-Video Mode Selection
SETTING S-Video Mode Selection This function is used to select the S-video signal detection mode. This allows identifying of the S-video signals with different aspect ratio: squeeze or full mode (CINEMA 16 : 9) and letter box (WIDE 4 : 3) signals. To set, proceed as follows: NOTE: An identifying result will be displayed in the SOURCE INFORMATION screen. - Page 79 SETTING 5 Use the CURSOR button to select one of the three items: S2, S1, and OFF, and then press ENTER. S - V I D E O M O D E S E L E C T Items to select S2 ....
-
Page 80: Video Mode Selection
SETTING Video Mode Selection This function is used to select the NTSC 3.58, NTSC 4.43, PAL or SECAM video standard. To select any one of the video standards, proceed as follows: 1 Press the ADJUST button to display the “ADJUST” menu. •... - Page 81 SETTING 5 Use the CURSOR button to select either “AUTO” or “MANUAL” and then press ENTER. When selecting “AUTO” V I D E O M O D E S E L E C T One of the video standards is selected automatically and is A U T O M A N U A L displayed in the SOURCE INFORMATION screen.
-
Page 82: Auto Power On Mode Setting
SETTING Auto Power ON Mode Setting The AUTO POWER ON MODE is a convenient way to start up the projector without pressing the POWER button. You can turn the projector on and off by supplying AC power to the projector. To do this, proceed as follows: 1 Press the ADJUST button to display the “ADJUST”... - Page 83 SETTING 5 Use the CURSOR button to select either “ACTIVE” or “INACTIVE” and press the ENTER button. Items to select A U T O P O W E R O N M O D E • INACTIVE . Normal operation setting. Power ON is accom- I N A C T I V E A C T I V E plished through the rear panel or the POWER...
-
Page 84: Warm-Up Mode Setting
SETTING Warm-up Mode Setting This function allows you to automatically warm up the projector from 5 to 15 minutes when the projector is turned on. To set the Warm-up mode, proceed as follows: 1 Press the ADJUST button to display the “ADJUST” menu. •... - Page 85 SETTING 5 Use the CURSOR button to select either “ACTIVE” or “INACTIVE” and press ENTER. Items to select W A R M - U P M O D E • INACTIVE . Displays the input source after the projector is I N A C T I V E turned on.
-
Page 86: Automatic Save Feature
SETTING Automatic Save Feature This feature allows you to select two ways to store settings; auto- matically and manually. After “ENABLE” is selected in the AUTOMATIC DATA STORE menu, all projector settings are stored in the projector's memory automatically. To set the AUTOMATIC DATA STORE, proceed as follows: 1 Press the ADJUST button to display the “ADJUST”... - Page 87 SETTING 5 Use the CURSOR button to select either “DISABLE” or “ENABLE” and then press ENTER. A U T O M A T I C D A T A S T O R E D I S A B L E Items to select E N A B L E •...
-
Page 88: Phosphor Saver Setting
SETTING Phosphor Saver Setting This function allows you to safeguard the CRTs against burns by shifting the image vertically and horizontally on the screen in the regular intervals. This can prolong the life of CRT of the projector. To set the Phosphor saver, proceed as follows: 1 Press the ADJUST button to display the “ADJUST”... - Page 89 SETTING 5 Use the CURSOR button to select either “OFF” or “ON” and press ENTER. Items to select P H O S P H O R S A V E R O F F • OFF ..Deactivates the PHOSPHOR SAVER function. •...
-
Page 90: Signal Switching Mute Mode Setting
SETTING Signal Switching Mute Mode Setting This function allows you to mute the picture and/or sound during signal switching. To set the Signal Switching Mute mode, proceed as follows: 1 Press the ADJUST button to display the “ADJUST” menu. • The projector may ask you to enter your passcode. See page 61 for the explanation of the PASSCODE. - Page 91 SETTING 5 Use the CURSOR button to select either “SOUND” or “PICTURE”, and press the ENTER button. S I G N A L S W I T C H I N G M U T E • The “SOUND MUTE” or “PICTURE MUTE” menu will be S O U N D P I C T U R E displayed.
-
Page 92: Direct Entry Access Setting
SETTING Direct Entry Access Setting This feature allows you to switch the current input directly to one of the registered inputs from NO1 to NO10 in the INPUT LIST. NOTE: To use this feature, hold down the CTL button and press one of the INPUT buttons corresponding to the input number. - Page 93 SETTING 5 Use the CURSOR button to select either “DISABLE” or “ENABLE” and press ENTER. D I R E C T E N T R Y A C C E S S D I S A B L E Items to select E N A B L E •...
-
Page 94: Blue Focus Tracking Setting
SETTING Blue Focus Tracking Setting This feature allows you to obtain the better white uniformity by defocusing the blue CRT. NOTE: • The defocus values will vary with changes in the horizontal frequency. • Select the “ALL WHITE” pattern using the TEST button on the full function remote control. -
Page 95: Optional Terminal Baud Rate Selection
SETTING Optional Terminal Baud Rate Selection This feature allows you to set baud rate of the OPTION terminal from 4800 to 38400 bps. NOTE: • The baud rate of the OPTION terminal defaults to 9600 bps at the factory. • Make sure that the baud rate of the OPTION terminal matches that of operating of the connected equipment. -
Page 96: Rgb/Component Search Setting
SETTING RGB/COMPONENT Search Setting This feature allows you to set the searching method of RGB/ COMPONENT signal. – A D J U S T – To set this feature, proceed as follows: 1 / S I G N A L E N T R Y 1 Press the ADJUST button to display the “ADJUST”... - Page 97 SETTING When used with a single Switcher ISS-6020/ISS-6020G: M A S T E R Items to select S L O T – 0 1 • MANUAL ..... Searches RGB or COMPONENT signals only. S L O T – 0 2 S L O T –...
-
Page 98: On-Screen Display Mode Setting
SETTING On-screen Display Mode Setting There are two modes of operations for the on-screen display. With AUTO mode, the on-screen display will automatically switch off after three through ten seconds. In the MANUAL mode, the display must be manually turned off with the DISPLAY button on the full function remote control each time it appears. - Page 99 SETTING 5 Use the CURSOR button to select either “AUTO” or “MANUAL“ and press ENTER. Items to select M E S S A G E M O D E • AUTO ..The on-screen menu display appears when the A U T O M A N U A L buttons on the remote control, or the controls on the rear panel are pressed.
-
Page 100: On-Screen Display Color Setting
SETTING On-screen Display Color Setting You can select two color modes (full color, or green only) for the color of the on-screen display such as menus, or messages. Proceed as follows: 1 Press the ADJUST button to display the “ADJUST” menu. •... - Page 101 SETTING 5 Use the CURSOR button to select either “COLOR” or “GREEN“ and press ENTER. Items to select M E S S A G E C O L O R • COLOR ..The on-screen characters will be displayed in C O L O R G R E E N color.
-
Page 102: Date, Time Display Setting
SETTING Date, Time Display Setting The current year, month, date and time are displayed on the top of the screen. Proceed as follows: 1 Press the ADJUST button to display the “ADJUST” menu. • The projector may ask you to enter your passcode. See page 61 for the explanation of the PASSCODE. - Page 103 SETTING When selecting “DATE” Use the CURSOR button to select any one of the three formats: MM/DD/YY, MONTH/ DD/YY, or OFF from the D A T E D I S P L A Y “DATE DISPLAY” menu and press ENTER. M M / D D / Y Y M O N T H / D D / Y Y Items to select...
-
Page 104: Entering Date And Time
SETTING Entering Date and Time You can enter the year, date and time to display them on the screen. Proceed as follows: 1 Press the ADJUST button to display the “ADJUST” menu. • The projector may ask you to enter your passcode. See page 61 for the explanation of the PASSCODE. - Page 105 SETTING 5 Use INPUT buttons to enter the year, month, day, hour, minute, and second and press ENTER. • Pressing the END button will turn off the “DATE, TIME D A T E , T I M E P R E S E T D A T E ( M M / D D / Y Y ) PRESET”...
-
Page 106: Pj Address Display Setting
SETTING PJ Address Display Setting This feature allows you to view the PJ address on the screen. To set the PJ address display, proceed as follows: 1 Press the ADJUST button to display the “ADJUST” menu. • The projector may ask you to enter your passcode. –... -
Page 107: New Signal" Message Display Setting
SETTING "NEW SIGNAL" Message Display Setting This feature allows you to view the "NEW SIGNAL" message when an unregistered signal is projected. – A D J U S T – To set the PJ address display, proceed as follows: 1 / S I G N A L E N T R Y 1 Press the ADJUST button to display the “ADJUST”... -
Page 108: Auto Sequence Setting
SETTING Auto Sequence Setting You can program the projector to change sources. Up to 20 program lines can be accepted. To do this proceed as follows: 1 Press the ADJUST button to display the “ADJUST” menu. • The projector may ask you to enter your passcode. See page 61 for the explanation of the PASSCODE. - Page 109 SETTING 5 Use the CURSOR or button to highlight the line to be input O P T I O N - S E Q U E N C E R - P 0 1 and press ENTER. • The Program menu is displayed. I N P U T T I M E S M T W T F S...
- Page 110 SETTING 5) Use the CURSOR or button to select any day of the W E E K S E L E C T week, then select either “YES” or “NO” with ENTER. D A I L Y • When “DAILY” selected, the entire week is changed to S U N “YES”.
- Page 111 SETTING When using with two or more ISS-6020/ISS-6020G Switchers: 1) Use the CURSOR or button to select “INPUT” and press I N P U T W A I T ENTER. G O T O • The “MASTER” and “SLAVE” menu will be displayed. L O O P P - O N P - O F F...
- Page 112 SETTING Selecting “WAIT” 1) Use the CURSOR or button to select “WAIT” and press I N P U T W A I T ENTER. G O T O • The “TIME” input screen will be displayed. L O O P P - O N P - O F F I N S E R T...
- Page 113 SETTING Selecting “GOTO” 1) Use the CURSOR or button to select “GOTO” and press ENTER. I N P U T • The “GOTO” input screen will be displayed. W A I T G O T O L O O P P - O N P - O F F I N S E R T...
- Page 114 SETTING Selecting “P-ON” 1) Use the CURSOR or button to select “P-ON” and press ENTER. I N P U T • The POWER ON input screen will be displayed. W A I T G O T O L O O P P - O N P - O F F I N S E R T...
- Page 115 SETTING Selecting “INSERT” 1) Use the CURSOR or button to select “INSERT” and press ENTER. I N P U T W A I T G O T O L O O P P - O N P - O F F I N S E R T D E L E T E 2) Use the CURSOR or...
- Page 116 SETTING 7 Pressing the END button will exit the “EDIT” mode. O P T I O N - S E Q U E N C E R - P 0 1 Select “START” and press ENTER to execute the program. •...
-
Page 117: Address Setting
SETTING Address Setting Each projector needs its own unique address in the case of a serial connection of projectors. Up to 64 addresses can be set. Proceed as follows: 1 Press the ADJUST button to display the “ADJUST” menu. • The projector may ask you to enter your passcode. See page 61 for the explanation of the PASSCODE. - Page 118 SETTING 5 To complete, press the END button. • Whenever the END button is pressed, the menus will sequence in this order: “OPTION” menu “ADJUST” menu Source screen • If the “RETURN USER MODE?” menu appears, use the CURSOR or button to select either “YES”...
- Page 119 SETTING Addressing the Remote Control Unit When changing the projector address, ensure that the projector address respond to the remote control address, otherwise you cannot operate the projector using the remote control. To specify the remote control address, proceed as follows: 1) Press and hold the CTL button then press the ADDRESS button to access the RC UNIT address mode.
-
Page 120: Projector Version Number
SETTING Projector Version Number This function lets you know the version for hardware and software used in the projector. To view the Version number, proceed as follows: 1 Press the ADJUST button to display the “ADJUST” menu. – A D J U S T – •... -
Page 121: Checking And Setting The Running Time
SETTING Checking and Setting the Running Time The projector will give you the amount of operating time. Proceed as follows: 1 Press the ADJUST button to display the “ADJUST” menu. • The projector may ask you to enter your passcode. See page 61 for the explanation of the PASSCODE. -
Page 122: Viewing Default Data
SETTING 4 To exit the HOUR METER display, press END. • Whenever the END button is pressed, the menus will sequence in this order: “ADJUST” menu Source screen • If the “RETURN USER MODE?” menu appears, use the CURSOR or button to select either “YES”... -
Page 123: Reference Adjustment
1 2 3 4 5 6 1 2 3 4 5 6 REFERENCE ADJUSTMENT 1 2 3 4 5 6 1 2 3 4 5 6 1 2 3 4 5 6 1 2 3 4 5 6 REF. ADJUST menu Adjustments contained in this menu are criteria. -
Page 124: Astig Adjustment
REFERENCE ADJUSTMENT Astig Adjustment This feature allows you to adjust the beam shape. Proceed as follows: 1 Press and hold the CTL button then press the ADJUST button to – R E F . A D J U S T – display the “REF. - Page 125 REFERENCE ADJUSTMENT CRT beam to adjusted • You can turn on or off each CRT beam (R, G, B). 6 Press and hold the CTL then press any one of the CURSOR buttons to select the position to be adjusted. (The marker on the selected side will turn to a solid color.) A S T I G - E D G E -...
-
Page 126: Bright Uniformity Adjustment
REFERENCE ADJUSTMENT Bright Uniformity Adjustment This feature allows you to equalize the brightness between the center and the edge. Before adjustment: • Select the “ALL WHITE” pattern using the TEST button on the full function remote control. Proceed as follows: 1 Press and hold the CTL button then press the ADJUST button to –... -
Page 127: White Uniformity Adjustment
REFERENCE ADJUSTMENT White Uniformity Adjustment This feature allows you to adjust color balance on the left and the right side of the screen. Before adjustment: • When you are in this mode, all the three CRTs are beamed, and the CRTs cannot be cut off. -
Page 128: Raster Centering Adjustment
REFERENCE ADJUSTMENT Raster Centering Adjustment c o r r e c t y o u a l l o w s f e a t u r e T h i s – R E F . A D J U S T – C R T s t h e a l l... -
Page 129: Appendix
Appendix CONTENTS Timing Charts Pre-set Signals ..........130 Input Signal Referecne Chart ....... 131 Input Signal Timing ........132 Message List ........133... -
Page 130: Timing Charts
1 2 3 4 5 6 1 2 3 4 5 6 TIMING CHARTS. 1 2 3 4 5 6 1 2 3 4 5 6 1 2 3 4 5 6 1 2 3 4 5 6 1 2 3 4 5 6 Pre-set Signals The following signals have been set by factory. -
Page 131: Input Signal Reference Chart
TIMING CHART Input Signal Refernce Chart Separate Sync. VIDEO HORIZONTAL VIDEO VERTICAL Sync. Polarity: Positive/Negative Composite Sync. VIDEO HORIZONTAL VIDEO VERTICAL Sync. Polarity: Positive/Negative Composite Sync. & Video (Sync. on Green) VIDEO HORIZONTAL VIDEO VERTICAL Sync. Polarity: Negative... -
Page 132: Input Signal Timing
TIMING CHART Input Signal Timing Polarity 31.8 26.1 IBM VGA 350 V ms 14.3 0.06 1.72 11.53 0.99 31.8 26.1 IBM VGA 400 V ms 14.3 0.06 0.89 13.19 0.16 31.78 2.76 26.29 1.13 IDTV V ms 16.67 0.64 0.77 15.14 0.12 28.57... -
Page 133: Message List
1 2 3 4 5 6 1 2 3 4 5 6 MESSAGE LIST. 1 2 3 4 5 6 1 2 3 4 5 6 1 2 3 4 5 6 1 2 3 4 5 6 1 2 3 4 5 6 c e n t e r t h e d i s p l a y e d... - Page 134 MASSAGE LIST p o r t i o n b o t t o m t h e d i s p l a y e d m e s s a g e s f o l l o w i n g a r e T h e Message...
- Page 135 MASSAGE LIST Message Conditions Countermeasures *D-CONV COMMUNICATION ERROR* D-CONV PWB communication error *D-CONV CPU NOT READY* D-CONV PWB communication error *POINT DATA WRITE ERROR* POINT DATA write error *SELECTED SCAN NUMBER IS NOT USED* Selection of an unregistered line on the Select a registered line.
- Page 136 NEC Corporation Printed in Japan 78409151...