Table of Contents
Advertisement
Quick Links
NEC M
NEC M
NEC M
NEC M
O B I L E
O B I L E
O B I L E
O B I L E
P P P P
O C K E T
O C K E T
O C K E T
O C K E T
R E F E R E N C E
R E F E R E N C E
R E F E R E N C E
R E F E R E N C E
P P P P
P300
P300
P300
P300
™ ™ ™ ™
R O
R O
R O
R O
P C 2 0 0 2
P C 2 0 0 2
P C 2 0 0 2
P C 2 0 0 2
G U I D E
G U I D E
G U I D E
G U I D E
Advertisement
Table of Contents

Related Manuals for NEC MOBILEPRO P300


Summary of Contents for NEC MOBILEPRO P300
- Page 1 NEC M NEC M P P P P P300 P300 NEC M NEC M P300 P300 ™ ™ ™ ™ O B I L E O B I L E O B I L E O B I L E...
- Page 2 Reproduction of this document or portions thereof without prior written approval of NEC Computers is prohibited. NEC is a registered trademark and MobilePro is a trademark of NEC Corporation and/or one or more of its subsidiaries. All are used under license.
-
Page 3: Table Of Contents
Contents Preface ..........................vii 1 Get Started Unpack Your MobilePro P300 ..................1-2 Get to Know Your MobilePro P300 .................. 1-3 Front Features ......................1-4 Back Features ......................1-5 Right Side Features..................... 1-6 Left Side Features....................... 1-7 Top Features ....................... 1-8 Bottom Features...................... - Page 4 Using ActiveSync to Add Programs ..............2-12 Using the Internet to Add Programs ..............2-13 Adding a Program to the Start Menu ..............2-13 Removing a Program from the Start Menu............2-14 3 Use Microsoft Pocket Outlook Calendar: Scheduling Appointments and Meetings ............3-2 Creating an Appointment ....................
- Page 5 7 If You Have Problems Problem Solving ........................ 7-2 Help Resources ........................7-3 8 NEC Computers Information Services NEC Computers Service and Support Functions ............... 8-2 NEC Computers Technical Support................... 8-2 NEC Computers Web Site ..................8-2 E-mail to Technical Support Services ................ 8-3 NEC Computers Technical Support Services .............
-
Page 6: Preface
Preface ™ This reference guide contains detailed information on the use of the NEC MobilePro P300 ® ® powered with the Microsoft Windows Powered Pocket PC 2002. The guide is organized as follows. Chapter 1 — Get Started, provides procedures for unpacking, battery charging, calibration, ®... -
Page 7: Get Started
Get Started Unpack Your MobilePro P300 Get to Know Your MobilePro P300 Charge the Battery Calibrate and Activate the MobilePro Learn the Basics Install ActiveSync Use the Secure Data Card Access MobilePro Functions Get Help MobilePro Care Install Productivity, Mobility, and Entertainment Applications... - Page 8 MobilePro. Note Before you start using your MobilePro P300 for the first time, you need to charge the built-in battery (see “Charging the Battery” later in this guide).
-
Page 9: Get To Know Your Mobilepro P300
AC adapter. Use the cradle to charge the battery and to synchronize with your computer. Your MobilePro P300 comes with a stylus, a pen-like device that allows you to touch, tap, or double tap objects on the MobilePro touch screen. The touch, tap, and double tap act just like a point, click, and double click of a mouse. -
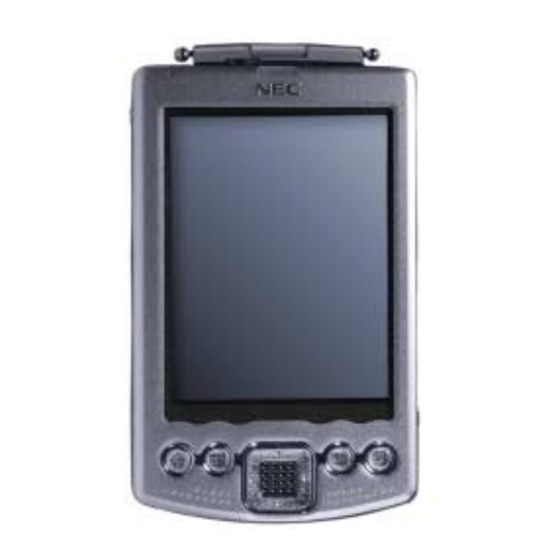
Page 10: Front Features
Front Features The front features are shown in the following figure (shown with the cover folded back). Brief descriptions follow the figure. MobilePro P300 Front Features A – Battery Charging LED F – Contacts Button B – Touch Screen G – Tasks Button C –... -
Page 11: Back Features
Back Features The back features are shown in the following figure (shown with the cover removed). Brief descriptions follow the figure. MobilePro P300 Back Features A – Compact Flash Card Slot C – Reset Button B – Strap Holder D – Ejector Button Compact Flash (CF) Card Slot —... -
Page 12: Right Side Features
Right Side Features The right side features are shown in the following figure (shown with the cover removed). Brief descriptions follow the figure. MobilePro P300 Right Side Features A – Stylus B – Host Interface Connector Stylus — use to tap or write on the screen. Slide the stylus out of its storage compartment on your MobilePro. -
Page 13: Left Side Features
Left Side Features The left side features are shown in the following figure (shown with the cover removed). Brief descriptions follow the figure. MobilePro P300 Left Side Features A – Power Button C – Recording Button B – Scroll Dial D –... -
Page 14: Top Features
Top Features The top features are shown in the following figure (shown with the cover removed). Brief descriptions follow the figure. MobilePro P300 Top Features A – Headset Jack C – IR Port B – CF Card Slot D – Microphone Headset Jack —... -
Page 15: Cradle Features
MobilePro on for long periods. You can also charge the MobilePro without using the cradle. The cradle features are shown in the following figure. Brief descriptions follow the figure. MobilePro P300 Cradle Features A – MobilePro Connector (on front) C – USB PC Cable Connector B –... -
Page 16: Lcd Cover Features
B – Catch (1 of 2) Charge the Battery Your MobilePro P300 contains a rechargeable Lithium Ion battery. The battery must be charged before you use the MobilePro the first time and periodically recharged thereafter. As the battery is rechargeable, you do not need to constantly replace batteries. - Page 17 Charge the battery as follows. Position the cover so that it does not cover the back and front of the MobilePro. Plug the MobilePro into the cradle. Plug the AC adapter into the power port on the back of the cradle. If you are not using the cradle, plug the AC adapter directly into the power port on the bottom of the MobilePro.
-
Page 18: Calibrate And Activate The Mobilepro
Calibrate and Activate the MobilePro It is essential that you calibrate and activate your MobilePro before you use it. This ensures accurate positioning when entering text and selecting menus. Calibrate and activate the MobilePro as follows. Press the power button to power on the MobilePro. Tap the touch screen with the stylus to start the calibration and activation. -
Page 19: Today Screen
Today Screen The Today screen normally appears whenever you power up the MobilePro. On the Today screen, you can see at a glance your important information for the day. The following figure shows a typical Today screen and what you can do from it. Typical Today Screen At the top of the screen is the Start bar. -
Page 20: Navigation Bar Screen
Navigation Bar Screen To switch to the Navigation Bar screen, tap or tap at the top of the Today screen. The Start Navigation Bar is displayed on the Today screen. From the Navigation Bar, you can select any one of the listed activities by tapping on your selection with the stylus. -
Page 21: My Menu Screen
Programs Icon Program Description ActiveSync Synchronize information between your MobilePro and computer. Calendar Keep track of your appointments and create meeting requests. Contacts Keep track of your colleagues and friends. MobilePro Use as a single-source mobile solution to stay connected while Synchronization away from the office. -
Page 22: Install Activesync
Install ActiveSync A key component of your MobilePro is the Microsoft ActiveSync program. With Microsoft ActiveSync, you can synchronize the information on your computer with the information on your MobilePro and update both with the most recent information. For example: ®... - Page 23 Click and read the overview to see if you require the Download Connection Wizard wizard. Follow the prompts to install the wizard on your computer. Return to the Start Here menu when done. At the Start Here screen, click Install ActiveSync 3.5 At the Install ActiveSync 3.5 screen, click Install At the File Download screen, click...
-
Page 24: Use The Secure Data Card
Press the power button on the MobilePro and check your Calendar. Tap the Calendar program button, tap the Calendar icon on the Today screen, or tap and tap (calendar). Note that your calendar information in Microsoft Outlook on your computer was copied to your MobilePro. - Page 25 Accessing MobilePro Functions Function Access About Pocket PC Tap Start, tap Settings, tap System tab, and tap About to see Pocket PC version and processor type. ActiveSync Tap Start, tap ActiveSync, and tap Sync or Tools. Align Screen Tap Start, tap Settings, tap System tab, and tap Screen. Tap Start, tap Settings, tap System tab, and tap Backlight.
-
Page 26: Get Help
Tap Start and tap Windows Media. Windows Media Get Help The following table provides a comprehensive list of where you can get help and information on your MobilePro P300, the software, connections, accessories, and support. Help Resources Item Resource MobilePro Operation... -
Page 27: Mobilepro Care
Software and Hardware Resources http://www.ppcmag.com NEC Computers Inc. Accessories MobilePro Accessories http://www.neccomp.com/accessories_category.asp NEC Computers Inc. MobilePro Support MobilePro Technical Support http://support.neccomp.com MobilePro Care Your MobilePro is a durable, dependable unit built for extensive use and travel. Follow these guidelines to maintain the condition and performance of the MobilePro. -
Page 28: Install Productivity, Mobility, And Entertainment Applications
The Westtek ClearVue Office Viewers application combines a Presentation, Worksheet, and Document viewer for use on your MobilePro P300. With ClearVue Office Viewers, you can open and view native Microsoft Office 97, Office 2000, and Office XP files. ClearVue supports timed transitions, custom animations, and inserted images, fonts, text, AutoShapes, graphs, and charts. -
Page 29: Voicemessenger Force
At the applications selection screen on your MobilePro, tap . The ClearVue ClearVue.cab application installs. Remove the SD card from the MobilePro. At the Today screen, tap , tap , and tap one of the ClearVue viewer icons. Start Programs (Help) for detailed features, instructions, and troubleshooting information. - Page 30 VoiceMessenger Force can be installed on your MobilePro from the Companion CD or the SD card. To install VoiceMessenger Force from the Companion CD, use the following steps. Ensure that your MobilePro is on and connected to your computer, both are synchronized, and that you have established a partnership.
-
Page 31: Photobase
In the MSN Messenger, Desktop companion, if a user hits the Alt-F4 key repeatedly when a voice chat invite is received, the application exits and causes the desktop MSN Messenger Service to sign out. In a voice conversation between a desktop and the MobilePro, if the user floods the MSN Messenger Service server by sending multiple text messages at a furious pace, the server terminates the session. -
Page 32: Mobilepro Synchronization System
If your MobilePro is connected to your computer (see step 1), a Retrieving Device Data screen is displayed, followed by an Installing Applications screen. Click to install NEC MobilePro Sync Systems Manager for iFD and iSM and other pending applications in the default application install directory. 1-26 Get Started... - Page 33 The client software installs on the MobilePro and the Application Downloading Complete screen appears. Click . To complete the installation, you must configure the MobilePro Synchronization System on your MobilePro (see the following paragraphs). If your MobilePro was not connected to your computer, a Pending Application Install screen is displayed.
-
Page 34: Ziogolf 2
Your MobilePro operating system has an autocomplete input feature that might hinder the security of passwords. By default, this feature is enabled. If enabled, when you begin to enter a password, suggested words are displayed in a window above the input panel. A space might also be added to the end of the suggested word. -
Page 35: Golfwits
At the Entertainment screen, scroll to ZIOGolf 2. Click for information about Details ZIOGolf and click . Follow the prompts to install ZioGolf on your computer. Install The installation program copies the ZIOGolf files to the desired location on your computer and installs the software on your MobilePro. -
Page 36: Learn The Basics
Learn the Basics Overview Pop-up Menus Notifications Enter Information Enter Text with the Input Panel Write on the Screen Draw on the Screen Record a Message Use a Preset or Frequently Used Message Find and Organize Information Customize Your MobilePro... - Page 37 Overview This chapter describes the basics for using your MobilePro. Included are the following topics: pop-up menus notifications enter information enter text write and draw on the screen record a message use a preset message find information customize your MobilePro. Pop-up Menus Pop-up menus are used throughout your MobilePro and vary slightly from program to program.
-
Page 38: Enter Information
To select reminder types and sounds, tap and tap . In Settings, tap Settings Sounds & . Make your choices and tap when done. Keep in mind that what you choose Notifications applies throughout your MobilePro. Enter Information Information is entered into your MobilePro in several ways. Enter typed text in the input panel by using the soft keyboard or Letter Recognizer. -
Page 39: Using Letter Recognizer
Using the Soft Keyboard Note To change word suggestion options, such as the number of words suggested at a time, , tap Settings, tap the Personal tab, tap Input, and tap the Word Completion tab. Using Letter Recognizer With Letter Recognizer, you can use the stylus to write letters, just as you would on paper. Use these steps to write with Letter Recognizer. -
Page 40: Using Transcriber
Using Transcriber With Transcriber, you can use the stylus to write anywhere on the screen, just as you would on paper. Unlike Letter Recognizer and Block Recognizer, you can write a sentence or additional information. Pause after writing, and let Transcriber change the written characters to typed characters. -
Page 41: Editing Your Writing
Writing in Notes Note Some programs that accept writing might not have the Pen button. See the documentation that comes with the program to find out how to switch to the writing mode. Editing Your Writing If you want to edit or format your writing, you must first select the writing, then edit it. Do this as follows. -
Page 42: Converting Your Writing To Text
Converting Your Writing to Text After you hand wrote your message, you can convert it to text. Do it as follows. If you only want to convert certain words, select them before going to the next step. Selecting and Coverting Your Writing and tap . -
Page 43: Draw On The Screen
Tap the word you want to use or tap the writing at the top of the menu to return to the original writing. Here are some tips for getting good resolution. Write neatly. Write on the lines and draw descenders below the line. Write the cross of the “t” and apostrophes below the top line so that they are not confused with the word above. -
Page 44: Editing Your Drawing
Note You might want to change the zoom level to more easily work on or view your drawing. Tap Tools and tap a zoom level. Editing Your Drawing If you want to edit or format your drawing, you must first select the drawing, then edit it. Do this as follows. -
Page 45: Use A Preset Or Frequently Used Message
Recording a Message Use a Preset or Frequently Used Message When using Inbox or MSN Messenger, use My Text to quickly insert preset or frequently used messages into the text entry area. To insert a message, tap and tap a message. My Text Note You can add text after inserting a My Text message. -
Page 46: Find And Organize Information
Find and Organize Information The Find feature on your MobilePro helps you to quickly locate information. You can also organize your information with File Explorer. Use the following steps to find information. On the menu, tap Find Enter the text you want to find, select a data type, and tap to start the search. -
Page 47: Customize Your Mobilepro
Customize Your MobilePro You can customize your MobilePro by adjusting its settings and installing additional software. Adjusting Settings You can adjust MobilePro settings to suit the way you work. To see available options, tap tap Settings, and tap the Personal or System tab located at the bottom of the screen. You also might want to adjust the following. -
Page 48: Using The Internet To Add Programs
If the file is not an installer, you’ll see an error message stating that the program is valid but it is designed for a different type of computer. You’ll need to move this file to your MobilePro. If you cannot find any installation instructions for the program in the Read Me file or documentation, use ActiveSync Explore to copy the program file to the Program Files folder on your MobilePro. -
Page 49: Removing A Program From The Start Menu
Move the shortcut to the Start Menu folder in the Windows folder. The shortcut appears on the menu. For more information, see ActiveSync Help. Removing a Program from the Start Menu Use the following procedure to remove a program from the Start menu. and tap . -
Page 50: Use Microsoft Pocket Outlook
Use Microsoft Pocket Outlook Calendar Contacts Tasks Notes Inbox... -
Page 51: Calendar: Scheduling Appointments And Meetings
Microsoft Pocket Outlook includes Calendar, Contacts, Tasks, Inbox, and Notes. You can use these programs individually or together. For example, e-mail addresses stored in Contacts can be used to address e-mail messages in Inbox. Using ActiveSync, you can synchronize information in Microsoft Outlook or Microsoft Exchange on your desktop computer with your MobilePro. -
Page 52: Using The Summary Screen
Calendar Appointment To add notes, tap the Notes tab. You can enter text, draw, or create a recording. For more information on creating notes, see “Notes: Capturing Thoughts and Ideas,” later in this chapter. When finished, tap to return to the calendar. Note If you select Remind me in an appointment, your MobilePro reminds you according to the options set in... -
Page 53: Creating Meeting Requests
Creating Meeting Requests You can use Calendar to set up meetings with users of Outlook or Pocket Outlook. The meeting request is created automatically and sent either when you synchronize Inbox or when you connect to your e-mail server. Indicate how you want meeting requests sent by tapping Tools and tapping . -
Page 54: Creating A Contact
Creating a Contact Create a contact as follows. Using the input panel keyboard (or other input device), enter a name and other contact information. Scroll down to see all the available fields. Contacts Input Panel To assign the contact to a category, scroll to and tap and select a category from Categories the list. -
Page 55: Using The Summary Screen
Using the Summary Screen When you tap a contact in the contact list, a summary screen is displayed. To change the contact information, tap Edit. Contacts Summary Screen Tasks: Keeping a To Do List Use Tasks to keep track of what you have to do. Tasks Screen Note To change the way information is displayed in the list, tap Tools and tap Options. -
Page 56: Creating A Task
Creating a task Create a task as follows. Using the input panel keyboard, enter a description. Tasks Input Panel You can enter a start date and due date or enter other information by first tapping the field. If the input panel is open, you need to hide it to see all available fields. To assign the task to a category, tap and select a category from the list. -
Page 57: Using The Summary Screen
Using the Summary Screen When you tap a task in the task list, a summary screen is displayed. To change the task, tap Edit Tasks Summary Screen Notes: Capturing Thoughts and Ideas Quickly capture thoughts, reminders, ideas, drawings, and phone numbers with Notes. You can create a written note or a recording. -
Page 58: Creating A Note
Creating a Note Create a note as follows. Create your note by writing, drawing, typing, and recording. For more information about using the input panel, writing and drawing on the screen, and creating recordings, see Chapter 2. Notes Input Screen Inbox: Sending and Receiving E-mail Use the Inbox to send and receive e-mail messages in one of several ways: Synchronize e-mail messages with Microsoft Exchange or Microsoft Outlook on your... -
Page 59: Synchronizing E-Mail Messages
Synchronizing E-mail Messages E-mail messages can be synchronized as part of the general synchronization process. To do this, you need to enable Inbox synchronization in ActiveSync. For information on enabling Inbox synchronization, see ActiveSync Help on the desktop computer. During synchronization: Messages are copied from the mail folders of Exchange or Outlook on your desktop computer to the ActiveSync folder in Inbox on your MobilePro. -
Page 60: Using The Message List
Using the Message List Messages you receive are displayed in the message list. By default, the most recently received messages are displayed first in the list. Inbox Message List Screen When you receive a message, tap it to open it. Unread messages are displayed in bold. Message Screen Use Microsoft Pocket Outlook 3-11... -
Page 61: Composing Messages
When you connect to your e-mail server or synchronize with your desktop computer, by default, you’ll receive messages from the last three days only, the first 100 lines of each new message, and file attachments of less than 100 KB in size. The original messages remain on the e-mail server or your desktop computer. -
Page 62: Managing E-Mail Messages And Folders
Compose your message. To enter preset or frequently used messages, tap My Text select a message. when you’ve finished the message. If you are working offline, the message is Send moved to the Outbox folder and is sent the next time you connect. If you are sending an SMS message and want to know if it was received, before sending the message, tap , tap... -
Page 63: Use Companion Programs
Use Companion Programs Pocket Word Pocket Excel MSN Messenger Windows Media Player for Pocket PC Microsoft Reader... - Page 64 The companion programs consist of Microsoft Pocket Word, Microsoft Pocket Excel, Windows Media™ Player for Pocket PC, and Microsoft Reader. To switch to a companion program on your device, tap on the menu, and tap the Programs program name. Pocket Word Pocket Word works with Microsoft Word on your desktop computer to give you easy access to copies of your documents.
-
Page 65: Typing Mode
Note If you’re opening a Word document created on a desktop computer, select Wrap to Window on the View menu so that you can see the entire document. Typing Mode Using the input panel (keyboard or other input mode), enter typed text into the document. For more information on entering typed text, see Chapter 2. -
Page 66: Writing Mode
Writing Mode In writing mode, use your stylus to write directly on the screen. Ruled lines are displayed as a guide, and the zoom magnification is greater than in typing mode to allow you to write more easily. For more information on writing and selecting writing, see Chapter 2. Pocket Word Writing Screen Note If you cross three ruled lines in a single stylus stroke, the writing becomes a drawing,... -
Page 67: Drawing Mode
Drawing Mode In drawing mode, use your stylus to draw on the screen. Gridlines appear as a guide. When you lift your stylus off the screen after the first stroke, you’ll see a drawing box indicating the boundaries of the drawing. Every subsequent stroke within or touching the drawing box becomes part of the drawing. -
Page 68: Tips For Working In Pocket Excel
Pocket Excel contains a list of the files stored on your MobilePro. Tap a file in the list to open it. To delete, make copies of, and send files, tap and hold a file in the list. Then select the appropriate action from the pop-up menu. -
Page 69: Msn Messenger
MSN Messenger MSN Messenger on your MobilePro is an instant messaging program that lets you see who is online send and receive instant messages have instant message conversations with groups of contacts. To use MSN Messenger, you must have an Internet connection and a Microsoft Passport™ account or a Microsoft Exchange e-mail account. -
Page 70: Working With Contacts
Working with Contacts The MSN Messenger window shows all of your messenger contacts at a glance, and are divided into Online and Not Online categories. From this view, while connected, you can chat, send e-mail, block the contact from chatting with you, or delete contacts from your list using the pop- up menu. -
Page 71: Chatting With Contacts
Chatting with Contacts Tap a contact name to open a chat window. Enter your message in the text entry area at the bottom of the screen, or tap to enter a preset message, and tap . To invite another My Text Send contact to a multi-user chat, in the menu, tap... -
Page 72: Windows Media Player For Pocket Pc
Windows Media Player for Pocket PC Use Microsoft Windows Media Player for Pocket PC to play digital audio and video files that are stored on your MobilePro or on a network. To switch to Windows Media Player for Pocket PC, tap and tap Windows Media Windows Media Player Screen... -
Page 73: Getting Books On Your Mobilepro
The Guidebook contains all the information you need to use the software. To open the Guidebook, tap on the Reader command bar. Or, on a book page, tap and hold on the book Help title, and then tap on the pop-up menu. Help To switch to Microsoft Reader, tap , tap... -
Page 74: Reading A Book
Reading a Book Each book consists of a cover page, an optional table of contents, and the pages of the book. Navigation options are listed in the bottom portion of the cover page. The first time you open a book, you’ll probably want to go to the first page or to the table of contents, if there is one. -
Page 75: Removing A Book
Drawings. When you add a drawing, a Drawing icon appears in the bottom-left corner of the page, and drawing tools appear across the bottom of the page. Draw by dragging your stylus. To see a list of a book’s annotations, including bookmarks, highlights, text notes, and drawings, tap on the book’s cover page. -
Page 76: Use Pocket Internet Explorer
Use Pocket Internet Explorer Pocket Internet Explorer Mobile Favorites Folder AvantGo Channels... -
Page 77: Pocket Internet Explorer
Use Microsoft Pocket Internet Explorer to view Web or Wireless Application Protocol (WAP) pages in either of these ways. During synchronization with your desktop computer, download your favorite links and mobile favorites that are stored in the Mobile Favorites subfolder in Internet Explorer on the desktop computer. -
Page 78: Browse The Internet
Browse the Internet You can browse the Internet with your MobilePro. Here’s how. Set up a connection to your ISP or corporate network using Connections, as described in Chapter 6. To connect and start browsing, do one of the following: Tap the button, and then tap the favorite you want to view. -
Page 79: Saving Mobilepro Memory
Synchronize your MobilePro and desktop computer. Mobile favorites that are stored in the Mobile Favorites folder in Internet Explorer are downloaded to your MobilePro. Note If you did not specify an update schedule in step 3, you need to manually download content to keep the information updated on your desktop computer and MobilePro. -
Page 80: Get Connected
Get Connected Transfer Items Using Infrared Connect to the Internet Connect to Work End a Connection Connect Directly to an E-mail Server Get Help on Connecting... -
Page 81: Send Information
You can use your MobilePro to exchange information with other mobile devices as well as your desktop computer, a network, or the Internet. You have the following connection options. Use the IR port on your MobilePro to send and receive files between two devices. If this is the method you want to use, see the following section “Transfer Items Using Infrared.”... -
Page 82: Receive Information
Receive Information Receive information as follows. Align the IR ports on the two devices so that they are unobstructed and within 2 to 20 inches apart. Have the owner of the other device send the information to you. Your MobilePro automatically receives it. -
Page 83: Create An Ethernet Connection To An Isp
Visit Web and WAP pages by using Pocket Internet Explorer. For more information, see Chapter 5. Send and receive instant messages with MSN Messenger. For more information, see “MSN Messenger” in Chapter 5. Create an Ethernet connection to an ISP Create an Ethernet connection to your ISP as follows. -
Page 84: Create An Ethernet Connection To A Network
Install an optional modem card. and tap . In the Connections tab, tap . Under The Internet Settings Connections settings, select Internet Settings and tap Modify In the Modem tab, tap Enter a name for the connection, such as “Company Connection.” In the Select a Modem list, select your modem type. -
Page 85: End A Connection
If you want to synchronize your MobilePro, tap , and tap . In the Tools ActiveSync menu, tap . In the PC tab, select Include PC when synchronizing remotely and Options connect to, and select your computer's name. Remote synchronization with a desktop computer works only if you set up a partnership with that computer through ActiveSync and have set ActiveSync to allow remote connections. -
Page 86: If You Have Problems
If You Have Problems Problem Solving Help Resources... -
Page 87: Problem Solving
You may occasionally encounter a problem with your MobilePro P300. In most cases, the problem is one that you can solve yourself. If there is a problem, the MobilePro may display an error message. If this happens, follow any instructions on the screen. -
Page 88: Help Resources
ActiveSync Help on the Web http://www.microsoft.com/mobile/pocketpc/ howdoi/default.asp Microsoft Pocket PC Features Pocket Word, Excel, Reader, Outlook (Inbox, http://www.microsoft.com/mobile/pocketpc/ Calendar, Contacts, Tasks, bguide/features/mobile_software.asp Notes), Windows Media Player, Internet Explorer MobilePro Technical NEC Computers Inc. MobilePro Support Support http://support.neccomp.com If You Have Problems 7-3... -
Page 89: Nec Computers Information Services
NEC Computers Information Services NEC Computers Service and Support Functions NEC Computers Technical Support Applications Support... -
Page 90: Nec Computers Web Site
If you have access to the Internet (via a network or a modem connection), you can access the NEC Computers Web site. You can do this through a commercial online service or through your Internet account. The NEC Computers web site contains general information about NEC Computers and its products. -
Page 91: E-Mail To Technical Support Services
Computers technical support is for U.S. and Canadian customers only; international customers should check with their sales provider.) Direct assistance is available 24 hours a day, 7 days a week. Call the NEC Computers Technical Support Center, toll free, at (U.S. -
Page 92: Specifications
Specifications System Physical Environment... -
Page 93: System Specifications
The following specifications are standard except where noted. System Specifications Display 65K color, 240 x 320 pixels, TFT, liquid crystal display (LCD), with backlight, touch screen Intel Strong ARM, 206-MHz processor User Data Entry Methods Touch screen (input via stylus) Scroll (Jog) dial Soft keyboard Block recognizer... - Page 94 Backlighting Adjustable brightness levels — Super bright — High bright — Medium bright — Low bright — Power save Power Cradle — Input Voltage — 100 to 240 volts AC, 50 or 60 Hz — Output Voltage — 5.0 volts, 3.0 amp AC Adapter —...
-
Page 95: Physical Specifications
Physical Specifications Dimensions (approximate) 5.0 in. (h) x 3.0 in. (w) x 0.75 in. (d) 127 mm (h) x 76.2 mm (w) x 19.05 mm (d) Weight (approximate) 5.8 oz. (with battery) 163.5 grams (with battery) Environment Specifications Operating Environment Temperature —... -
Page 96: Index
Index Cards Compact Flash, 1-5 CF card AC adapter slot, 1-8 connecting to cradle, 1-11 Cleaning ActiveSync MobilePro, 1-21 add programs, 2-12 ClearVue Office Viewers, 1-22 features, 1-16 features, 1-22 help, 1-21 installation, 1-22 Activites support information, 8-3 partial listing, 1-14 Command bar, 1-13 Adjusting settings, 2-12 Compact Flash... - Page 97 favorite links, 5-3 mobile favorites folder, 5-3 Features mobile links, 5-3 accessing MobilePro functions, 1-18 saving MobilePro memory, 5-4 back, 1-5 IR port bottom, 1-8 location, 1-8 cradle, 1-9 external, 1-3 general, 1-3 Keyboard LCD cover, 1-10 soft, 2-3 left side, 1-7 right side, 1-6 top, 1-8 LCD panel cover, 1-10...
- Page 98 Inbox, 1-15 Internet Explorer, 1-15 list of, 1-15 Navigation Bar screen, 1-14 Notes, 1-15 Navigation buttons, 1-4 Outlook, 1-16 NEC Computers removing from Start menu, 2-14 e-mail support, 8-3 Settings, 1-15 Technical support services, 8-3 Tasks, 1-15 web site, 8-2...
- Page 99 7-2 solutions, 7-2 Unpacking, 1-2 VoiceMessenger Force, 1-22 features, 1-23 installation, 1-24 support information, 8-3 Web site NEC Computers, 8-2 Windows Media Player features, 4-10 Work connecting via modem, 6-4 Writing converting to text, 2-7 editing on screen, 2-6...
-
Page 100: Regulatory Statements 1
Regulatory Statements for U.S. and Canada The following regulatory statements include the Federal Communications Commission (FCC) Radio Frequency Interference Statement, compliance statements for Canada, and battery disposal and replacement information. FCC Statement for United States Only Changes or modifications to this unit not expressly approved by the party responsible for compliance could void the user’s authority to operate the equipment. - Page 101 Contact your local waste management officials for other information regarding the environmentally sound collection, recycling, and disposal of used batteries. If you purchased or are using this computer outside of the U.S. or Canada, contact a local NEC dealer in your country.
- Page 102 819-200883-001 NEC Computers Inc. 15 Business Park Way 11/01 Sacramento, CA 95828 www.neccomp.com/...