Table of Contents
Advertisement
Quick Links
MS 2000
MS 2100 TMC
Quick Start Guide
Erste Schritte und wichtige Hinweise
First Steps and Important Notes
Premiers pas et instructions importantes
Primeros pasos y advertencia importante
Primi passi e avviso importante
Primeiros passos e avisos importantes
Aan de slag en belangrijke aanwijzingen
Komma igång och viktiga anvisningar
Komme i gang og viktige råd
Kom i gang og viktige anvisningar
Advertisement
Table of Contents

Related Manuals for VDO MS 2000


Summary of Contents for VDO MS 2000
- Page 1 MS 2000 MS 2100 TMC Quick Start Guide Erste Schritte und wichtige Hinweise First Steps and Important Notes Premiers pas et instructions importantes Primeros pasos y advertencia importante Primi passi e avviso importante Primeiros passos e avisos importantes Aan de slag en belangrijke aanwijzingen Komma igång och viktiga anvisningar...
-
Page 2: Table Of Contents
Contents • General Notes Contents Safety Advice and Important Information........23 Maintenance and Cleaning. -
Page 3: Maintenance And Cleaning
General Instructions The navigation system does not take the relative safety of the suggested routes into consideration. Road closures, roadworks, height and weight restrictions, traffic and weather conditions, or other factors that can influence the safety and the journey time of the route are not taken into consideration for the suggested routes. -
Page 4: What's Included
What's Included? What's Included? Your navigation system package includes the following parts: Navigation system (including lithium ion battery) Mount with suction cup to attach the device to the windscreen. Cloth for cleaning the windscreen before attaching the suction cup. TMC antenna (only for MS 2100 Traffic) for receiving traffic information DC cable 12V/24V to power the navigation system from within the vehicle (adapter for cigarette lighter) AC cable 100V/240V to power the navigation system from outside the vehicle... -
Page 5: Controls And Connection Ports
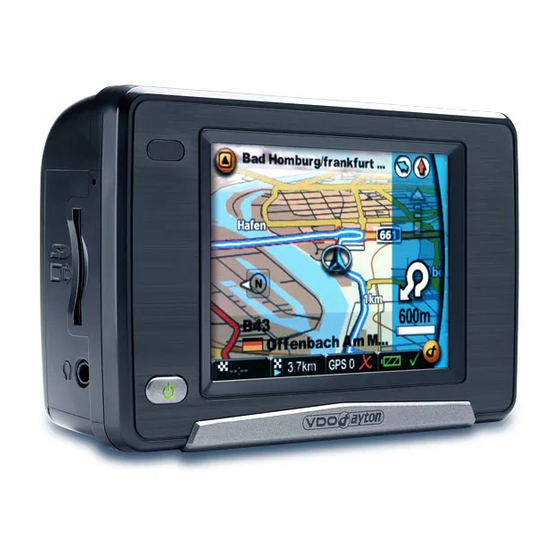
Overview of Device Controls and Connection Ports Front Display / touchscreen Infrared sensor Usable with remote control on steering wheel RCS 5100 (accessories) On-off switch / multi-function switch / status LED • Quick tap: switches the navigation system to stand-by mode. •... - Page 6 Overview of Device Left Side Right Side Slot for SD card 10 Headphone socket 11 Connection for TMC antenna (only for MS 2100 Traffic) 12 Connection for 100V/240V mains adapter or 12V/24V cigarette lighter Underside 13 Serial port Only for service pur- poses! 14 USB port for connecting to a PC...
-
Page 7: Initial Setup
Initial Setup and Mounting Initial Setup When you switch on the navigation system for the first time, you must firstly deactivate the transport safety switch. This can be done by performing the following steps: • Open the battery compartment and lift up the battery. Here it is important that the connecting cable is not unplugged. -
Page 8: Configuration
Configuration Configuration • Press the on-off switch for about 3 seconds to switch on the navigation system. The system boots and the battery starts to charge. • When you switch on the device for the first time, you may have to select the desired lan- guage for the navigation instructions as well as the country map. -
Page 9: Gps And Tmc
GPS and TMC Note: Hold the navigation system vertically to obtain a better GPS signal. If necessary, you can pivot the GPS antenna upwards to improve the reception. GPS Quality The quality of the GPS signal is indicated by the colour of the word GPS: Insufficient signal quality, less than 3 satellites found. -
Page 10: The Settings Menu (Basic Settings)
Settings The Settings Menu (Basic Settings) To configure the basic settings: • Tap Settings. A sub-menu opens. Tap the arrow button on the bottom right of the screen to scroll through the other pages of the sub-menu. Tap Back to exit the sub-menu without saving changes. You return to the previous menu. -
Page 11: The "Navigation" Menu
Navigation Mode The “Navigation” Menu The purpose of the navigation system is to guide you from your present location to your de- sired destination. The navigation function automatically determines your present location using the GPS signal. You simply have to enter the address of your destination. For the destination, you can use (new) addresses, favourite destinations, previous de- stinations, your home address (Home) or “special destinations”... - Page 12 Navigation Mode • Once you have chosen the street, you will auto- matically move on to the next screen where you can select the house number. • Using the on-screen keyboard, type in the de- sired house number, e.g. 14. •...
- Page 13 Navigation Mode The following functions are available in the navigation screen and the route list: Point en route One point en route at a time is shown in the lower area. You will see the route length and journey duration below the current point on route. Show the next/previous point en route You can browse through the route list by tapping the two arrow buttons left and right of the itinerary description.
-
Page 14: Poi - Selecting "Special Destinations
Navigation Mode Tap the button with the name of the current street in the upper part of the navigation screen. • The buttons for the extended navigation func- tions appear. Example: Navigation info page “i” This page shows the following information: dis- tance to destination, expected time of arrival, cur- rent altitude, etc. -
Page 15: The "Route Planner" Menu
Route Planner Mode The “Route Planner” Menu Navigation and Route Planner are basically structured in the same way. With the Navigation function, the point of departure is always automatically set as the current GPS position. You simply have to enter your destination. With Route Planner however, you can manually enter the point of departure (as well as the destination). -
Page 16: The "Multimedia" Menu
Multimedia The “Multimedia” Menu The navigation system offers the possibility of playing MP3 files or viewing JPEG images. In order to be able to use these multimedia functions, the MP3 or JPEG files in question must be saved on an SD card (not provided with this package). If you have a SD card reader/writer, you can copy your MP3 files and JPG pictures di- rectly from your PC to the SD card! Insert the SD card in the slot on the left side of the device. - Page 17 Multimedia Setting the Play Functions Open the Music Settings menu. The Music Settings menu offers you the follow- ing options: • Tap the Equalizer button to select the de- sired equalizer settings, e.g. Jazz, Classic, Rock. • Tap the Random and Repeat buttons to acti- vate or deactivate the corresponding func- tions.
- Page 18 Multimedia The JPEG Viewer – Viewing Pictures Tap the JPEG viewer symbol. The JPEG viewer's JPEG menu appears. Using the symbols in the menu, you can perform the following functions: Jump to previous picture Jump to next picture Switch to previous folder Switch to next folder Start slide show If you tap on the picture, the image is dis-...
-
Page 19: Connection To A Pc Pc Map Tool - Additional Map Material
Connection to a PC PC Map Tool – Additional Map Material We recommend that you copy the additional map material on the DVD-ROM to one or more SD cards. The map data will be available to use as soon as you have inserted the SD card into the slot. - Page 20 Connection to a PC The PC Map Tool allows you to add and delete map data. Please be aware that the se- lection or transfer of all categories requires a lengthy PC calculating time (many hours). The length of time will depend on the PC system resources. The navigation sys- tem does have all European POI data preloaded onto the system, therefore we recom- mend the selection "Do not change existing data sets on the PND".
-
Page 21: Troubleshooting
Troubleshooting Troubleshooting Problem Solution No GPS signal in vehicle The GPS signal can be blocked by heated windscreens or tinted windscreens with a vacuum-metallised surface. In this case, you will need an external GPS antenna. (available from accessory dealers, Article-no. MA2010/00) No GPS signal Make sure that the GPS antenna on the top of the naviga- tion system is not obstructed by other objects. -
Page 22: System Requirements For Use On A Personal Computer
The device specifications and the contents of the package may deviate from what is stated in this document. Service For current information on VDO Dayton Multimedia Systems, service addresses, software updates please visit our website: www.vdodayton.com or contact a VDO Dayton dealer. - Page 24 MS 2000/MS 2100 TMC © 01/2006 Siemens VDO Trading GmbH...
Need help?
Do you have a question about the MS 2000 and is the answer not in the manual?
Questions and answers
كيف يمكنني تحديث خرائط والعمل على الجهاز ضمن الدول العربيه