AEG Ultimate 8000, Hygienic 8000, Animal 8000 Manual
- Instruction book (28 pages)
Advertisement
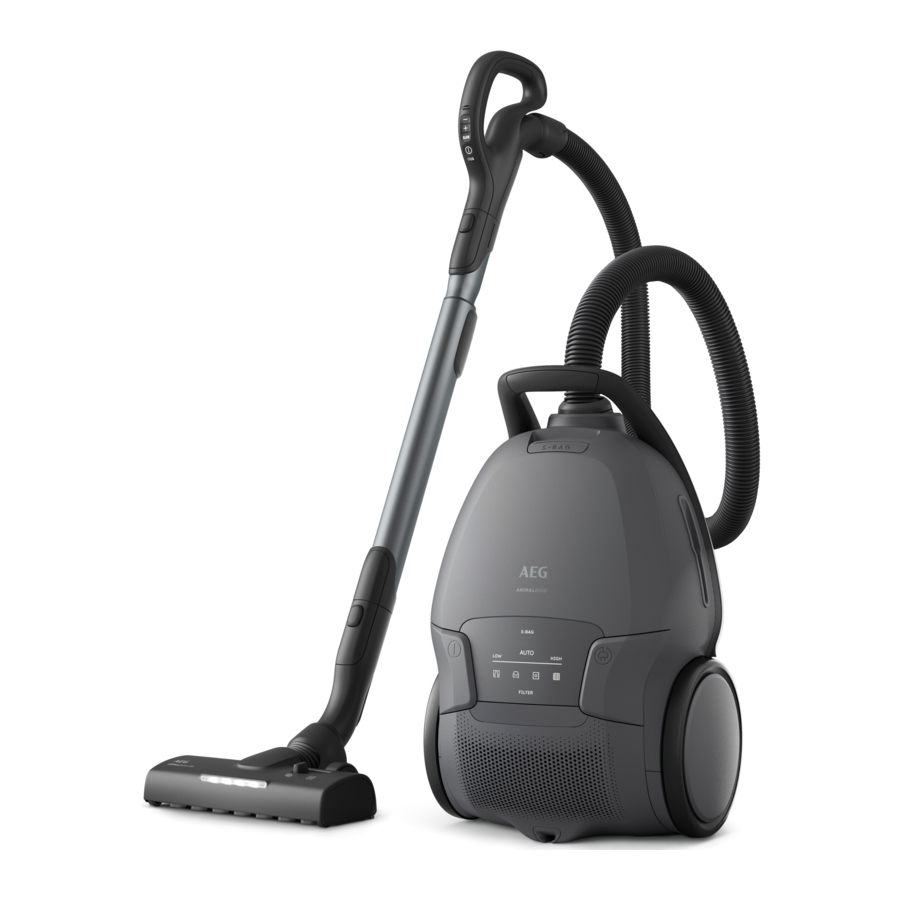
DESCRIPTION OF 8000 VACUUM CLEANER

- Display
- Exhaust filter lid
- Exhaust filter
- Parking slots
- Power cord
- Motor filter
- Motor filter holder
- S-bag®
- S-bag® holder
- Dust compartment cover
- 3in1 tool
- AeroPro hose
- AeroPro handle
- AeroPro telescopic tube
- AllFloor Auto LED nozzle
- Turbo nozzle*
- Mini Turbo nozzle*
- ParkettoPro nozzle*
- FlexProPlus nozzle*
- Furniture nozzle*
* Certain models only
Power consumption in standby: 0.5W
HOW TO USE THE VACUUM CLEANER
Open the dust compartment cover by pulling the S-BAG button. Check that the dust bag (s-bag) is in place.
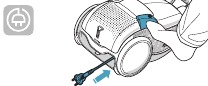
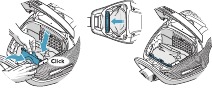
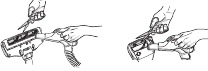
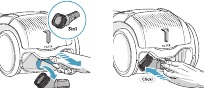
Insert the hose into the cleaner (to remove it, press the lock buttons and pull). Insert the hose into the hose handle until the lock button clicks (to release it, press the lock button and pull).

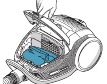
Attach the telescopic tube to the nozzle. Attach the telescopic tube to the hose handle (to remove it, press the lock button and pull).
Adjust the telescopic tube by holding the lock with one hand and pulling the handle with the other hand.

START/STOP THE VACUUM CLEANER AND ADJUST SUCTION POWER
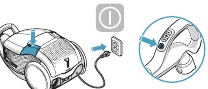
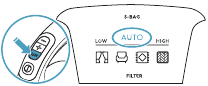
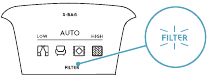
Pull out the power cord and plug it into the mains. Press the ON/ OFF button to turn the cleaner on/ off. Indicators light up, LOW/HIGH indicator lights up from left to right and back. Press the ON/OFF button on the remote control to turn the cleaner on/off.
Adjust suction power: The cleaner starts in AUTO mode (automatic power regulation). AUTO indicator is illuminated on the display and LOW/HIGH indicator pulses. To regulate power manually press +/- button on handle. Press AUTO button to return to auto-function.
After cleaning, push the REWIND button to rewind the cable.
PARKING POSITIONS
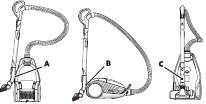
Use parking position on the side (A) or underneath (C) to carry and store the cleaner. At the back (B) when you pause (save your back).
REPLACING THE DUSTBAG, S-BAG®
Replace the s-bag when S-BAG indicator lights up in red (green light: bag is OK, yellow light: soon time to replace bag).
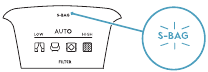
NB: Always change the s-bag when S-BAG indicator is illuminated or has red light even if the s-bag is not full (it may be blocked) and after using carpet cleaning powder. For best possible performance, use the Ultra Long Performance bag which is especially developed for your cleaner. Other synthetic s-bags can also be used. Do not use paper dust bags! www.s-bag.com
Open the dust compartment cover by pulling the S-BAG button. Pull the cardboard handle to close and remove the s-bag®
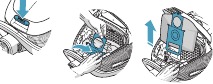
Insert a new s-bag® by pushing the cardboard straight down in its tracks. Close the lid. If the s-bag® is not properly placed or is missing, the lid will not close.
When you start the cleaner after s-bag replacement, It takes 10 seconds before the S-BAG indicator turns off or turns green.
REPLACING THE FILTERS
Replace/clean the filter when filter indicator lights up in red. Green light indicates that the filter is ok. It lights up briefly when you start the vacuum cleaner.
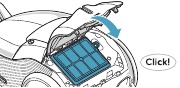
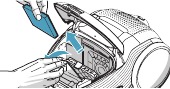
Pull the FILTER button to open the filter lid. Use original s-filters. Remove the filter and check the reference on the frame to define type. Replace with a new filter or clean it. Rinse the inside (dirty side) in lukewarm tap water. Tap the filter frame to remove the water. Repeat the process four times.
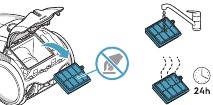
NB: Do not use cleaning agents. Avoid touching the filter surface. Let the filter dry completely (min. 24 h in room temperature) before putting back! Change the washable filter at least once a year or when it is very dirty or damaged. Do not remove the L-shaped foam under the filter.
After replacing the filter, close the filter lid until it is clicked back into place. If the filter lid comes off, position the hinges at the bottom and push the filter lid until it is clicked back into place.
NB: When you start the cleaner after filter replacement, It takes 10 seconds before the FILTER indicator turns green or turns off.
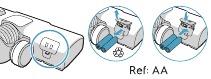
Replace the motor filter when dirty or after every 5th s-bag. Push the filter holder down and pull it out. Exchange the filter and close the lid.
VACUUMING WITH THE UNIVERSAL NOZZLE
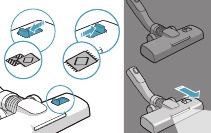
For deep cleaning on carpet, change the nozzle setting with the slider to Carpet mode. Icon illustrates recommended floor type. Move the nozzle forward. The front light turns on automatically after a few seconds. When the nozzle is not used, the light turns off automatically after a few seconds.
CLEANING
CLEANING THE UNIVERSAL NOZZLE
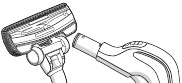
Disconnect the nozzle from the tube. Clean with the hose handle.
CLEANING THE TURBO NOZZLE
Disconnect the nozzle from the tube and remove entangled threads etc by snipping them away with scissors. Use the hose handle to clean the nozzle.
3IN1 ACCESSORY TOOL
Pull the textile tab to take out 3in1 tool. The tool has 3 functions, see pictures on next page.
After usage, put it back in its place.
CHANGING THE BATTERIES
Change batteries when front lights start blinking fast. Use 2 AA batteries.
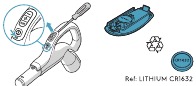
Change battery when light indicator turns red or is not responding when pressing any button. Use only batteries type LITHIUM CR1632
This appliance contains non-rechargeable batteries, these batteries are not to be recharged.
- Do not expose the appliance or battery to excessive temperatures.
- Be aware of the risk of terminals of the battery-operated appliance or battery being short-circuited by metal objects.
- Different types of batteries or new and used batteries are not to be mixed. Exhausted batteries are to be removed from the appliance and safely disposed of.
- If the appliance is to be stored unused for a long period, the batteries should be removed. Do not use modified or damaged batteries.
Remove the batteries from the product before scrapping. Follow your country's rules for collection of batteries and electrical products.
TIPS ON HOW TO GET THE BEST RESULTS
| NOZZLE/ACCESSORY | USE FOR: |
3in1 accessory tool | 3 tools in 1:
|
Turbo nozzle*  | Carpet nozzle:
|
ParkettoPro nozzle*  | Hard floor nozzle:
|
Furniture nozzle*  | Delicate Surfaces Tool:
|
| AllFloor Auto LED nozzle (with front lights)  | Universal nozzle:
|
Mini Turbo nozzle*  | Upholstery nozzle:
|
FlexProPlus nozzle*  | Hardfloor nozzle:
|
With AUTO-function the cleaner automatically adjust the suction power in order to give an optimal cleaning performance and comfort on every surface. For manual regulation, follow graphics for optimal performance.
TROUBLESHOOTING
| PROBLEM | SOLUTION |
| The vacuum cleaner does not start |
|
| The s-bag® indicator light is illuminated |
|
| The filter indicator light is illuminated | Change, or wash (if washable), the exhaust filter. |
| The cleaner stops | The cleaner might be overheated: disconnect it from the mains; check if the nozzle, tube, hose or filters are blocked. Let the cleaner cool down for 30 minutes before plugging it in again. If the cleaner still does not work, contact an authorized AEG service centre. |
| Reduction of suction capacity versus normal |
|
| Water has been sucked into the vacuum cleaner | It will be necessary to replace the motor at an authorized AEG service centre. Damage to the motor caused by the penetration of water is not covered by the warranty. |
| For any further problems, contact an authorized AEG service centre. | |
Documents / Resources
References

Download manual
Here you can download full pdf version of manual, it may contain additional safety instructions, warranty information, FCC rules, etc.
Download AEG Ultimate 8000, Hygienic 8000, Animal 8000 Manual
Advertisement


Need help?
Do you have a question about the Ultimate 8000 and is the answer not in the manual?
Questions and answers