Advertisement
- 1 Introduction of the Machine
-
2
Basic Operation
- 2.1 Power On/Off of the Vehicle Mounted Station
- 2.2 Volume Control
- 2.3 Adjust the Frequency with the Tuning Knob
- 2.4 Input the Frequency with Mic Number
- 2.5 Selecting the Output Power
- 2.6 Single Frequency/Dual Frequency Operation
- 2.7 Selection of the VFO Channel, MR Channel and CALL Channel
- 2.8 Duplex Slection
- 2.9 Programming Chanel
- 2.10 Delete the Channel
- 3 Function Set for the Overall Unit
- 4 Documents / Resources
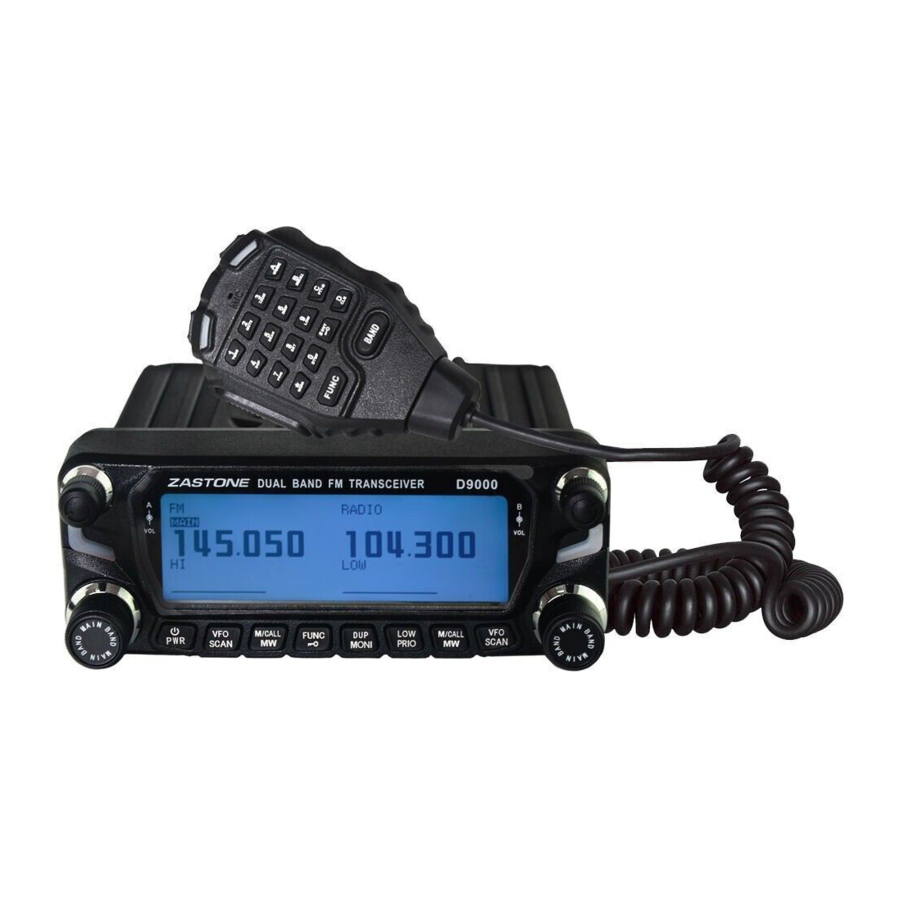
Introduction of the Machine
Front Panel

| No. | Keys and Buttons | Functions |
| 1 | left main mode key [MAIN·BAND] | press the key and set the left band to be the main band mode |
| 2 | left volume key [VOL] | switch it clockwise to increase the left side volume of the machine; switch it anticlockwise to decrease the left side volume of the machine |
| 3 | right main mode key [MAIN·BAND] | press the key and set the right band to be the main band mode |
| 4 | right volume key [VOL] | switch it clockwise to increase the right side volume of the machine; switch it anticlockwise to decrease the right side volume of the machine |
| 5 | left side on-off band key [DAIL] | switch it to choose the frequency/channel of the left side of the machine |
| 6 | left [MHz·TUNE] key | under the frequency mode, press the key to enter the adjustment mode of the MHz |
| 7 | right side on-off band key [DAIL] | switch it to choose the frequency/channel of the right side of the machine |
| 8 | right [MHz·TUNE] key | under the frequency mode, press the key to enter the adjustment mode of the MHz |
| 9 | power key [ -PWR] -PWR] | hold the key to turn on or turn off the power |
| 10 | left | under the standby mode, press the key to choose the VFO mode; hold the key to start the frequency scan |
| 11 | Left | under the standby mode, press the key to choose the channel mode/CALL channel mode; hold the key to enter the store/delete channel mode |
| 12 |  | under the standby mode, press the key to enter the second function mode; hold the key to start or close the clock key on the screen |
| 13 |  | under the standby mode, press the key to choose the DUPLEX of the main band mode; hold the key to start or close the monitor mode of the main band mode |
| 14 |  | under the standby mode, press the key to choose the power level of the main band mode; hold the key to start the double waiting and monitoring function |
| 15 | right | under the standby mode, press the key to choose VFO mode; hold the key to start the frequency scan |
| 16 | right | under the standby mode, press the key to choose the channel mode /CALL channel mode; hold the key to enter the store/delete channel mode |
LCD Screen Display

| No. | Icons | Functions |
| 1 |  | indication for the wideband frequency modulation, indication for the narrow-band frequency modulation, indication for the amplitude modulation |
| 2 |  | indications for – DUPLEX and + DUPLEX |
| 3 |  | indication for the channel name |
| 4 |  | indication for the trunk signaling, indication for the CTCSS signaling, indication for the DCS signaling |
| 5 |  | indication for the frequency reverse |
| 6 |  | indications for starting the same frequency repeater or cross repeater |
| 7 |  | indication for the talk around function |
| 8 |  | indication for the shortcut operations |
| 9 |  | indication for starting up the function of the automatic power on |
| 10 |  | indication for the clock key of the panel |
| 11 |  | indication for the present channel frequency |
| 12 |  | indication for the function of double waiting |
| 13 |  | indication for the storage channel number |
| 14 |  | indication for deleting or adding the scan channel |
| 15 |  | indication for the priority channel scan |
| 16 |  | indication for starting the meteorological warning channel |
| 17 |  | indication for TSSI/RSSI |
| 18 |  | indication for RSSI or the startup of the monitor function |
| 19 |  | indication for the high power, middle power and low power |
| 20 |  | indication for the mute subcarrier frequency |
| 21 |  | indication for the main channel |
Function Menu

| No. | Keys and Buttons | Functions |
| 1 | [MODE] (left  key) key) | Press the key to choose the channels of FM Frequency Modulation, Meteorological Warning, Air, Radio, and Amplitude Modulation (including short wave, medium wave and long wave). |
| 2 | [DTMF] (left key) key) | Press the key to set the parameters of the DTMF. |
| 3 | [FUNC] ( key) key) | Press the key to start or exit the shortcut operation, or exit the menu operation. |
| 4 | [SKIP] ( key) key) | Under the main band channel mode, press the key to start or close the present delete and add functions of the channel scan. |
| 5 | [SQL] ( key) key) | Under the main band mode, press the key to enter the adjustment mode of squelch level. |
| 6 | [SNGL] (right  key) key) | Under the standby mode, press the key to switch it into single-band mode or dual band mode. |
| 7 | [MENU] (right key) key) | Under the standby mode, press the key to enter the mode of function menu operation. |
Back Panel

| No. | Keys and Buttons | Functions |
| 1 | Crystal Interface | The interface to connect the control panel or the microphone |
| 2 | Data Interface | The interface of TNC data transmission |
| 3 | Antenna Terminal | It is used to connect the antenna wire, and the antenna impedance is 50 ohm. |
| 4 | External ACC Connector | The cigar lighter can be connected by matching it to the start line (HCC01). As the car stared, the car sill will start automatically. As the engine stops, the car sill will close automatically. |
| 5 | Radiator Fan | As the car sill start to work and the temperature increases, the radiator fan will start automatically. |
| 6 | External Dual Channel Speaker Interface | These are used to connect the distribution channel get to the external speaker. |
| 7 | Input the Power Cord | 12-24V interface |
Microphone

| No. | Keys and Buttons | Functions |
| 1 | UP | Increase the frequency value, record the position or setting value of the channel. |
| 2 | Down | Decrease the frequency value, record the position or setting value of the channel. |
| 3 | Emergency Warning Key | Hold the key to start the warning function, cancel the operation with a short press |
| 4 | Receiver/Transmitter Indicator Light | The green LED indicator light will be on as the signal is received. As the keyboard is launched through pressing the PTT key, the red LED indicator light will be on. |
| 5 | Host/Auxiliary Engine Switch | Press the key can switch the left or right engine into the main channel. |
| 6 | Keypad | It is used to set the functions, input the VFO frequency or DTMF dialing. |
| 7 | Talk Key | Press the [PTT] to enter the transmit operation. |
| 8 | Microphone | Speak with it as sending messages. |
Function Description of the Microphone Keyboard
| No. | Keys and Buttons | Functions |
| 1 | Mode of Squelch Level | Under the standby mode, press the  key first, after the " key first, after the " " is displayed on the screen then press the " is displayed on the screen then press the  key to enter the adjustment mode of squelch level. key to enter the adjustment mode of squelch level. |
| 2 | Mute Mode of the Main Channel | Under the standby mode, press the key first, after the "" is displayed on the screen then press the  key to start or close the mute function of the main channel. key to start or close the mute function of the main channel. |
| 3 | CTCSS/DCS Scan | Under the standby mode, press the key first, after the "" is displayed on the screen then press the  key to start or close the mute function of the main channel. key to start or close the mute function of the main channel. |
| 4 | Duplex Setting | Under the standby mode, press the key first, after the "" is displayed on the screen then press the  key to switch the duplex of the main channel to DUP+ and DUP – or close the duplex. key to switch the duplex of the main channel to DUP+ and DUP – or close the duplex. |
| 5 | Start the Scan Operation | Under the standby mode, press the key first, after the "" is displayed on the screen then press the  key to start the frequency scan of the main channel, channel scan, or other functions of the frequency search. key to start the frequency scan of the main channel, channel scan, or other functions of the frequency search. |
| 6 | Mode Switch of the Single Band/Dual Band | Under the standby mode, press the key first, after the "" is displayed on the screen then press the  key to switch the vehicle mounted station's operation mode to single-band or dual band mode. key to switch the vehicle mounted station's operation mode to single-band or dual band mode. |
| 7 | Start the Double Waiting Operation | Under the standby mode, press the key first, after the "" is displayed on the screen then press the  key start the double waiting function of the main channel in modes of frequency and channel. Marks: The function can not be started as there is no channel setting with the main channel. key start the double waiting function of the main channel in modes of frequency and channel. Marks: The function can not be started as there is no channel setting with the main channel. |
| 8 | Enter the Menu Mode | Under the standby mode, press the key first, after the "" is displayed on the screen then press the  key to enter the menu mode. key to enter the menu mode. |
| 9 | High and Low Power Switch | Under the standby mode, press the key first, after the "" is displayed on the screen then press the  key to switch the main channel's transmit power to high power, medium power or low power. key to switch the main channel's transmit power to high power, medium power or low power.Marks: The function can not be set as under the aeronautical frequency range and the radio frequency. |
| 10 | Function Setting of the DTMF | Under the standby mode, press the key first, after the "" is displayed on the screen then press the  key to enter the function setting mode of the DTMF. key to enter the function setting mode of the DTMF. |
| 11 | Lock or Unlock the Keyboard of the Front Panel | Under the standby mode, press the key first, after the "" is displayed on the screen then press the  key for 1 second to start the key lock of the front panel. Repeat the above step to unlock the keyboard of the front panel. key for 1 second to start the key lock of the front panel. Repeat the above step to unlock the keyboard of the front panel. |
| 12 | Start or Close the Monitor Function | Under the standby mode, press the key to start the monitor operation, press it again to close the operation. |
| 13 | Frequency Mode or MHz Adjustment Mode Setting | Under the standby mode, press the key to choose the VFO mode. Under the VFO mode, press the key to enter the MHz Adjustment Mode. |
| 14 | Channel Mode Setting or CALL Mode Setting | Under the standby mode, press the key to choose the Channel Mode/CALL Mode. |
| 15 | Key Lock of the PTT | Under the standby mode, hold the for more than 1 second to start the key lock function of the PTT. Repeat the above step to unclock the keyboard of the PTT. |
| 16 | Mode Setting of the Mian Channel and Side Channel | Under the standby mode, press the key to respectively switch the left engine and right engine to main channel mode. |
Basic Operation
Power On/Off of the Vehicle Mounted Station

- Power On of the Vehicle Mounted Station
Under the shutdown state, press the![]() key for a second to turn on the walkie-talkie. After the walkie-talkie begins to beep loudly and there appear some messages on the LCD display screen, directions and the present operating frequency will show on the screen.
key for a second to turn on the walkie-talkie. After the walkie-talkie begins to beep loudly and there appear some messages on the LCD display screen, directions and the present operating frequency will show on the screen. - Power Off of the Vehicle Mounted Station
Under the shutdown state, press the![]() key for a second to turn off the walkie-talkie.
key for a second to turn off the walkie-talkie.
As the walkie-talkie is turned off, the present parameters can be stored in it and will be shown autimatically for the next time when the power is on again.
 key for a second to turn on the walkie-talkie. After the walkie-talkie begins to beep loudly and there appear some messages on the LCD display screen, directions and the present operating frequency will show on the screen.
Volume Control

Adjust the Frequency with the Tuning Knob

Under the VFO mode, adjust and select the frequency that needs to be adjusted with the [DIAL] knob. Clockwise adjustment is to increase the frequency, and the anticlockwise adjustment is to decrease the frequency. One notch can increase or decrease it by one step value.

As 1MHz adjusting step value is selected, the number below 100kHz will disappear. As to adjust the frequency of the main engine, press the corresponding [DIAL] knob, you will enter the adjustment mode of MHz. With this state, modify the band switch, and the frequency can be immediately adjusted by 1MHz step value.
Usage of the [▼]/[▲] Keys

- Press the
![]() key to select the frequency range (left or right)as the main band.
key to select the frequency range (left or right)as the main band. - Press the [▼]/[▲] to select the frequency you want.
Notes: push the [▲] for one time can increase the value by one step, holding down the [▼]/[▲] can adjust the frequency continuously.
Input the Frequency with Mic Number
Under the mode of the main frequency range, you can input the frequency by the mic keyboard. You will fail as the input frequency is beyond the range. For example, the frequency is set as 145.36250MHz

Notes: If the frequency range has been set to a range, the frequency whatever you input or modify will be limited within the present effective frequency range of the VFO.
Selecting the Output Power
There are 3 notches of out power with the walkie-talkie to meet your needs. If you are going to communicate within a short distance, the low power output can be turned on to reduce the interference to other stations and the power consumption.
- Press the
![]() key a few times to select the output power
key a few times to select the output power
 key a few times to select the output power
| S/RF Display | POWER OUTPUT |
| VHF/UHF Taiwan | |
High Power:  | 50W/50W 25W |
Medium Power: | 15W*/15W* 15W* |
Low Power: | 5 W*/5 W* 5W* |
The output power can be changed in the process of transmission.
The output power can also be selected by microphone keyboard.
Press the  key on the microphone keyboard first, and then press the
 ![]() key to respectively select the high power, medium power and low power.
key to respectively select the high power, medium power and low power.
Single Frequency/Dual Frequency Operation
You can monitor the two frequencies during the operation of dual frequency. There are two independent receiving circuits: the left frequency range and the right frequency (can be used to different frequencies, modes and functions). Only one frequency can be monitored during the operation of single frequency.
- Press the
![]() key, the function menu will be displayed.
key, the function menu will be displayed. - Press the [SNGL(] the right frequency range
![]() )to select the mode of the single-band operation. You can operate with the [DIAL], [MAIN-BAND], [VOL], [VFO-SCAN] and the [M/CALL·MW] that are placed to the left frequency band and the right frequency band.
)to select the mode of the single-band operation. You can operate with the [DIAL], [MAIN-BAND], [VOL], [VFO-SCAN] and the [M/CALL·MW] that are placed to the left frequency band and the right frequency band.
![]()
- Press the
![]() key, the function menu will be displayed. Afterwards, you can press the [DUAL] (right frequency
key, the function menu will be displayed. Afterwards, you can press the [DUAL] (right frequency ![]() ) to back to the dual frequency operation.
) to back to the dual frequency operation.
![]()
 key, the function menu will be displayed.
  )to select the mode of the single-band operation. You can operate with the [DIAL], [MAIN-BAND], [VOL], [VFO-SCAN] and the [M/CALL·MW] that are placed to the left frequency band and the right frequency band.

Selection of the VFO Channel, MR Channel and CALL Channel

- Under the standby mode, as the vehicle mounted station is in VFO mode, you can press the
![]() key to switch it to MR storage pattern, press the
key to switch it to MR storage pattern, press the ![]() again, it can be swtiched to the mode of CALL channel.
again, it can be swtiched to the mode of CALL channel. - Under the standby mode, as the vehicle mounted station is in the mode of MR stirage or the CALL channel mode, press the
![]() key, and it can be changed to the VFO mode.
key, and it can be changed to the VFO mode.
 key to switch it to MR storage pattern, press the
  again, it can be swtiched to the mode of CALL channel.
Duplex Slection
It is used to select a transmitting frequency that is above (+) or below (-) the receiving frequency.

- Under the standby mode, press the [MAIN·BAND] key to select the left side frequency band or the right frequency band as the main mode.
- Press the
![]() key to select the –DUPLEX, + DUPLEX or the simplex mode in turn.
key to select the –DUPLEX, + DUPLEX or the simplex mode in turn.
 key to select the –DUPLEX, + DUPLEX or the simplex mode in turn.
Programming Chanel
The frequency and the related data that are used frequently can be stored in the memory channel so that you do not need to program them evey time. Only with simple opeation can you reload the programmed channel.
- Set the frequency at the expected frequency band
- Press the [VFO·SCAN] of the expected frequency band to select the VFO mode
- To set the receiving frequency, the DUPLEX, and the CTCSS/DCS according to your needs.
- Hold down the [M/CALL·MW] that is in the same channel for 1 second.
- 2 alert sounds
- The indicator of "MR" and the storage channel number begin to blink.
- Switch the [DIAL], select the storage channel to program.
- The storage channel that has not been progranmmed should be empty.
- Hold down the [S.MW]( M/CALL·MW) (the left side frequency band)for a second to enter the programming operation.
- 3 alert sounds
As the storage channel number increases automatically, press the [M/CALL·MW] to cintinue the programming.
Delete the Channel
Steps that are used to clear the single storage channel:
- Press the [VFO·SCAN] select the frequency band (the left side frequency band or the right side frequency band)that the VFO needs.
- Hold down the [M/CALL·MW] of the corresponding band for one second.
- The indicator of "MR" and the storage channel number begin to blink.
- Switch the [DIAL] and select the storage channel that needs to be cleared.
- Hold down the [CLR](DUP·MONI) for one second to clear.
- As there appears 3 alert sounds, the frequency is cleared.
- The indicator of "MR" and the storage channel number blink on and off.
- After the CALL channel is cleared, the presentVFO will reenter the CALL channel and do the programming automatically.
- Press the [BACK](V/MHz·SCAN)(the righ side frequency band) and back to the VFO mode.
Function Set for the Overall Unit
- Press the
![]() key, the operation menu screen will be displayed.
key, the operation menu screen will be displayed. - Press the
![]() key (right side ) and enter the function menu.
key (right side ) and enter the function menu. - Switch the [DIAL], select the "SET MODE" menu group and push the [MHz TUNE].
- Switch the [DIAL], select the "TIME-OUT TIMER" menu opertion, and push the [MHz TUNE].
 key (right side ) and enter the function menu.
Time-out Timer

OFF: Close the time-out timer
1-30: After 1 to 30 minutes that are set before, the power will be automatically off.
Auto Power Off

OFF: Close the function of automatical power off
30—720MIN: The power will be off automatically after 30 to 720 minutes.
Dedault: OFF
Speaker Select

MODE-1: speaker of the main engine
MODE-2: speaker of the panel
BOTH: speaker of the main engine and the panel
Default: OFF
Fan Control

OFF: Close the fan function
ON: Start the fan function
AUTO: automatic fan control
Default: AUTO
Automactic Repeater

OFF: Close the automactic repeater
RPT1: repeater function of the common frequency
RPT2: repeater function of the dissimilar frequency
Default: OFF
MIC Noise Reduction

NOR: normal mode
MOD-1: common noise reduction
MOD-2: enhance the noise reduction
Default: NOR
FM Transmitter Function

OFF: close the FM transmitter
ON: start the FM transmitter
Default: OFF
FM Transmitter Frequency

frequency range of the FM transmitter: 64-108MHz
Default: 64.5MHz
Weather Alert

OFF: close the weather alert
ON: start the weather alert
Default: OFF
Factory Reset

VFO: recover the left band, right band, redio, aviation, and the VFO frequency in the amplitude frequency range
PART: recovert the overall unit and set the menu parameters
FULL: full recovery of the machine
Default: VFO
Backlight Set

Red Backlight Set

Green Backlight Set

Shenzhen Zastone technology Co. Ltd
http://www.zastone.com.cn
Documents / Resources
References
Download manual
Here you can download full pdf version of manual, it may contain additional safety instructions, warranty information, FCC rules, etc.
Advertisement


Need help?
Do you have a question about the D9000 and is the answer not in the manual?
Questions and answers