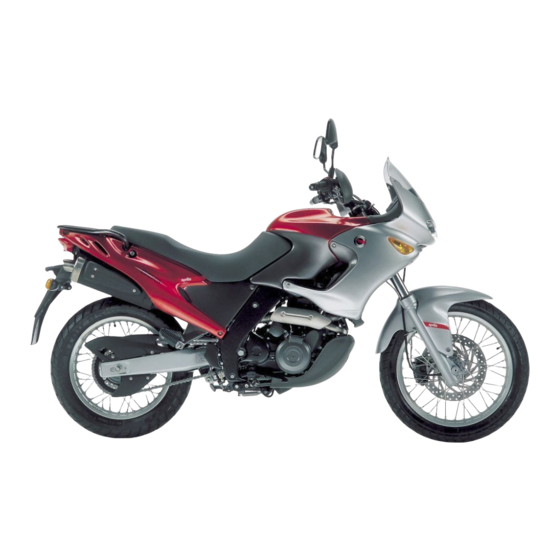
APRILIA PEGASO 650 IE - 2004 Manual
Hide thumbs
Also See for PEGASO 650 IE - 2004:
- Manual (112 pages) ,
- Use and maintenance book (112 pages) ,
- Betriebsanleitung (58 pages)
Table of Contents
Advertisement
Advertisement
Table of Contents

Related Manuals for APRILIA PEGASO 650 IE - 2004


Summary of Contents for APRILIA PEGASO 650 IE - 2004
- Page 1 PEGASO I.E. use maintenance book aprilia part# 8104312...
-
Page 2: Safety Warnings
© 2001 aprilia s.p.a. - Noale (VE) SAFETY WARNINGS TECHNICAL INFORMATION The following precautionary warnings are The operations preceded by this used throughout this manual in order to symbol must be repeated also on convey the following messages: the opposite side of the vehicle. - Page 3 (I, UK, A, ...). antipollution and noise regulations in force and are to be supplied to the aprilia Official require periodical inspections. Dealer as reference data for the purchase of spare parts or specific accessories of the model you have acquired.
-
Page 4: Table Of Contents
TABLE OF CONTENTS LEVER CLEARANCE ........36 BATTERY............76 CATALYTIC EXHAUST SILENCERS ..36 CHECKING THE ELECTROLYTE LEVEL ..77 SAFETY WARNINGS..........2 EXHAUST SILENCERS........37 CHECKING AND CLEANING THE TECHNICAL INFORMATION........2 TERMINALS............77 INSTRUCTIONS FOR USE ........37 WARNINGS - PRECAUTIONS - GENERAL ADVICE 2 REMOVING THE BATTERY ...... -
Page 5: Safe Drive
SAFE DRIVE safe drive... -
Page 6: Basic Safety Rules
BASIC SAFETY RULES Most road accidents are caused by the Avoid obstacles that could damage the driver’s lack of experience. vehicle or make you lose control. To drive the vehicle it is necessary to be in NEVER lend the vehicle to beginners and, Avoid riding in the slipstream created by p o s s e s s i o n o f a l l t h e r e q u i r e m e n t s in any case, make sure that the driver has... - Page 7 If necessary, have the vehicle inspected by Any modification of the vehicle and/or the distractions caused by people, things and an aprilia Official Dealer who should removal of original components can movements (never smoke, eat, drink, read, carefully check the frame, handlebars, compromise vehicle performance levels etc.) while driving.
-
Page 8: Clothing
CLOTHING Do not keep objects that can be dangerous ACCESSORIES in case of fall, for example pointed objects Before starting, always wear a correctly The owner of the vehicle is responsible for like keys, pens, glass vials etc. in your the choice, installation and use of any fastened crash helmet. -
Page 9: Load
( a p r i l i a... -
Page 10: Arrangement Of The Main Elements
ARRANGEMENT OF THE MAIN ELEMENTS 1) Headlight 9) Fuse carrier 15) Centre stand Rear luggage rack 2) Ignition switch/steering lock 10) Passenger grab rail 16) Side stand Left side bag 3) Left rear-view mirror 11) Glove/tool kit compartment 17) Rider left footrest (*) = Supplied as standard 4) Fuel tank filler cap 12) Rear luggage rack... - Page 11 “ B o d y - G u a r d ” the countries where 5) Rear brake fluid tank 11) Horn aprilia required) 6) Air cleaner 12) Engine oil tank 18) Rear brake pump...
-
Page 12: Arrangement Of The Instruments/Controls
ARRANGEMENT OF THE INSTRUMENTS/CONTROLS 1) Clutch lever 8) Direction indicator switch ( 2) Instruments and indicators 9) Horn push button ( 3) Ignition switch/steering lock ( 10) Dimmer switch ( 4) Front brake lever 11) High beam signalling push button ( 5) Throttle grip 12) Cold start lever ( ) 6) Engine stop switch (... -
Page 13: Instruments And Indicators
INSTRUMENTS AND INDICATORS 1) Revolution counter 8) Blue high beam warning light ( 2) Speedometer 9) Red diagnostic warning light ( ) 3) Total kilometres odometer 10) Amber low fuel warning light ( ) 4) Coolant temperature indicator ( ) 11) Green direction indicator warning light ( 5) Partial kilometres odometer 12) Green neutral indicator warning light ( ) -
Page 14: Instruments And Indicators Table
Comes on whenever the ignition switch is in position “ ” and the engine is not running, thus checking the functionality of the bulb. If the light does not come on in this phase, contact an aprilia Official Dealer. Engine oil pressure Warning light If the engine oil pressure warning light “... - Page 15 Official Dealer. It indicates the partial number of kilometres covered. To set it to zero, use the trip meter Partial kilometres odometer resetting knob.
-
Page 16: Main Independent Controls
MAIN INDEPENDENT CONTROLS 4) HIGH BEAM SIGNALLING PUSH BUTTON ( It makes it possible to use the high beam for signalling to forthcoming vehicles while overtaking and in case of peril and/or emergency. Press the push button to operate the high beam blinking NOTE To disconnect the high beam... -
Page 17: Ignition Switch
Position Function Key removal The steering It is possible is locked. It to remove the is not key. possible to Steering start the lock engine. The engine It is possible cannot be to remove the started. key. The engine It is not can be possible to IGNITION SWITCH... -
Page 18: Steering Lock
AUXILIARY EQUIPMENT STEERING LOCK WARNING UNLOCKING/LOCKING THE To lock the saddle: Never turn the key to position “ ” in SADDLE Position the tangs (3) in the seat, lower running conditions, in order to avoid and press the saddle, making the lock Position the vehicle on the stand, see p. -
Page 19: Glove/Tool Kit Compartment
“Body-Guard” aprilia (13), The tool kit (1) includes: available at the aprilia Official Dealers . – 3, 4, 5, 6, 8 mm bent hexagon spanners (2); WARNING – 5. 5 – 7 mm double fork spanner (3);... -
Page 20: Special Tools
SPECIAL TOOLS To perform some specific operations, it is advisable to use the following special tools (to be requested to an aprilia Official Dealer): Tool Operations Support pins (1) for the rear Positioning of support stand, see p. 61 the vehicle on (POSITIONING THE the rear stand. -
Page 21: Side Bags (Supplied As Standard Equipment In The Countries Where Required)
SIDE BAGS (supplied as To open the side bag, proceed as WARNING standard equipment in the follows: If it is necessary to transport more than countries where required) Position the vehicle on the stand, see p. one object, distribute the load uniformly 49 (POSITIONING THE VEHICLE ON Thanks to the use of the side bags it is on the side bags. - Page 22 To remove the side bag, proceed as Two keys are supplied together with the WARNING follows: vehicle (one spare key). Upon reassembly, make sure that the Introduce the key (4) in the lock. NOTE Do not keep the spare key on the bag is properly anchored to its support.
-
Page 23: Rear Case (Supplied As Standard Equipment In The Countries Where Required)
Maximum allowed weight: 5 kg. To remove the rear case, proceed as follows: Introduce the key (1) in the lock. Rotate the key (1) clockwise. Extract the handle (2) and grasp it firmly with one hand. Press the appropriate push button (6). Lift the case (7) and withdraw it from the relevant front couplings. -
Page 24: Main Components
MAIN COMPONENTS FUEL WARNING WARNING Further, prevent fuel from flowing out of Screw th e pl ug up carefull y after WARNING the fuel filler, as it could catch fire when refuelling. Avoid any contact of the fuel The fuel used for internal combustion getting in contact with the red-hot with the skin and the inhalation of engines is extremely inflammable and... - Page 25 To refuel, proceed as follows: CAUTION After refuelling: D o n o t p u t a d d i t i v e s o r o t h e r Raise the flap (1). NOTE The cap can be closed only when substances into the fuel.
-
Page 26: Brake Fluid - Recommendations
If the brake fluid gets in contact with the parts, since it can damage them. in case you are not able to carry out the skin or the eyes, it can cause serious usual checking operations, contact irritations. your aprilia Official Dealer. use and maintenance Pegaso 650 I.E. -
Page 27: Disc Brakes
Have the brake discs checked by an (left side). ensure your safety and for this reason aprilia Official Dealer after the first 1000 they must always be perfectly working; The rear braking system is with single disc km (625mi) and successively every 6000 check them before every trip. -
Page 28: Front Brake
FRONT BRAKE TOPPING UP Unscrew the screw (2). Carefully read p. 26 (BRAKE FLUID - WARNING CHECK recommendations). Keep the vehicle in vertical position and Avoid any prolonged exposure of the turn the handlebar, so that the fluid brake fluid to the air. CAUTION contained in the tank is parallel to the The brake fluid is hygroscopic and... - Page 29 If you use a funnel or other similar braking system, contact an aprilia items, make sure that they are perfectly O f f i c i a l D e a l e r , s i n c e i t m a y b e clean.
-
Page 30: Rear Brake
WARNING MAX= maximum level lever or reduced efficiency of the braking system, contact an aprilia Avoid any prolonged exposure of the If the fluid does not reach at least the “MIN” O f f i c i a l D e a l e r , s i n c e i t m a y b e brake fluid to the air. -
Page 31: Coolant
CAUTION Have the pads changed by your aprilia Before departure, check the coolant level, Official Dealer. see p. 32 (CHECKING AND TOPPING UP);... - Page 32 Have it repaired by expansion tank (2) is included between an aprilia Official Dealer. CAUTION the “MAX” and “MIN”. Do not put additives or other subtances MAX= maximum level into the fluid.
-
Page 33: Tyres
TYRES T h e r e a r e s e v e r a l k i n d s o f w e a r indicators. For more information on This vehicle is provided with tyres with how to check the wear, contact your tube. -
Page 34: Engine Oil
Proceed with care. the above mentioned operations carried should be required, it is advisable to Do not spill the oil! out by an aprilia Official Dealer or by a use latex gloves. Take care not to smear any component, qualified tyre repairer. -
Page 35: Clutch
49 (POSITIONING THE VEHICLE ON adjustment or if the clutch does not Adjust the clutch after the first 1000 km THE STAND). function properly, contact your aprilia (625 mi) and successively every 6000 km Withdraw the protection element (1). Official Dealer. -
Page 36: Adjusting The Rear Brake Control Lever Clearance
(1). wheel rotates freely with released Unscrew the pump control rod (4) and brake. bring it in contact with the pump piston. Check the braking efficiency. If necessary, contact your aprilia Official Dealer. use and maintenance Pegaso 650 I.E. -
Page 37: Exhaust Silencers
If the noise produced by the exhaust system the vehicle and/or the falling or overturning increases, immediately contact your of the vehicle itself. aprilia Official Dealer. WARNING Risk of falling and overturning. Proceed with care. The operations and movements required to... - Page 38 NOTE The rider is responsible for Getting on the vehicle into the riding instructing the passenger how to safely get CAUTION position with extended side stand is on and off the vehicle. p e r m i t t e d o n l y f o r t h e p u r p o s e o f Do not start the engine with the vehicle preventing the vehicle from falling or The vehicle is equipped with special...
-
Page 39: Preliminary Checking Operations
Do not hesitate to consult your aprilia Place both feet on the ground, keeping Kick the side stand completely back Official Dealer in case there is something the vehicle in balance in riding position. -
Page 40: Preliminary Checking Operations
PRELIMINARY CHECKING OPERATIONS Component Check Page Check the functioning, the idle stroke of the control levers, the fluid level and make 26 (BRAKE FLUID - recommendations), 27 Front and rear disc sure there are no leaks. (DISC BRAKES), 28 (FRONT BRAKE), 30 brakes Check the wear of the pads. -
Page 41: Starting
NOTE With the side stand down, the STARTING At this point the following lights come on engine can be started only if the gears are on the dashboard: in neutral; in this case, if you try to engage WARNING – the engine oil pressure warning light the gears, the engine stops. - Page 42 If the engine does not start in this lapse immediately and contact an aprilia of time, wait ten seconds and press the I n m a n y c a s e s t h e e n g i n e k e e p s Official Dealer.
- Page 43 STARTING WITH COLD ENGINE If the engine starts. When the room temperature is low (about Release the start push button “ ” (11) 0°C), it may be difficult to start the engine and the throttle grip (13). at the first attempt. Rotate the cold start lever “...
-
Page 44: Departure And Drive
DEPARTURE AND DRIVE To leave: WARNING Start the engine, see p. 41 (STARTING). If you drive without passenger, make WARNING Adjust the inclination of the rear-view sure that the passenger footrests are mirrors correctly. Do not position any object inside the folded. - Page 45 I n t h i s c a s e , s t o p t h e e n g i n e immediately and contact an aprilia Official Dealer. The downshifting should be carried out...
- Page 46 If you stop uphill, decelerate completely vehicle and contact an aprilia Official and use the brakes only to keep the Dealer. vehicle steady.
-
Page 47: Running-In
After the first 1000 km (625 mi), have an ensure its duration and correct functioning. obstacle or variation of the ground. aprilia Official Dealer carry out the If possible, drive on hilly roads and/or checks indicated in the column “After... -
Page 48: Stopping
WARNING The fall or excessive inclination of the vehicle may cause the fuel to flow out of the tank. The fuel used for internal combustion engines is extremely inflammable and in particular conditions it can become explosive. CAUTION Do not apply the load of your weight or of the passenger’s weight onto the side stand. -
Page 49: Positioning The Vehicle On The Stand
Press the side stand with your right foot and extend it completely (3). Incline the vehicle until the stand rests on the ground. Steer handlebar completely leftwards. WARNING Make sure that the vehicle is stable. C E N T R E S T A N D ( s u p p l i e d a s standard equipment in the countries where required) -
Page 50: Suggestions To Prevent Theft
SUGGESTIONS TO PREVENT Wr ite down your personal data and CAUTION THEFT telephone number in this page, to facilitate the identification of the owner in case of Proceed with care. finding after theft. The positioning of the vehicle on the CAUTION centre stand may be difficult, since the Do not use any “brake lock”... -
Page 51: Maintenance
Before proceeding, make sure that the INFORMATION) and (WARNINGS - room in which you are working is PRECAUTIONS - GENERAL ADVICE). Ask your aprilia Official Dealer to test the properly ventilated. vehicle on the road after a repair or WARNING Keep away from the red-hot parts of the periodic maintenance operation. -
Page 52: Regular Service Intervals Chart
(3750 mi) km (7500 mi) km (625 mi)] or 12 months or 24 months OPERATIONS TO BE CARRIED OUT BY THE aprilia Official Dealer (WHICH Battery – Clamp tightening - " " – CAN BE CARRIED OUT EVEN BY THE electrolyte level USER). - Page 53 OPERATIONS TO BE CARRIED OUT BY After running-in Every 6000 km Every 12000 km Component [1000 km (625 (3750 mi) (7500 mi) or 24 THE aprilia Official Dealer mi)] or 12 months months Rear shock absorber – – " Battery - Clamp tightening "...
-
Page 54: Identification Data
CAUTION new one having the same dimensions, Remove ONLY the clamps indicated in to be requested to an aprilia Official the maintenance procedures. Dealer. This text is not to be intended as an... -
Page 55: Checking The Engine Oil Level And Topping Up
12 months. Have the oil changed at an clean. MIN = minimum level. aprilia Official Dealer. NOTE The difference between “MAX” and “MIN” Use high-quality 5W – 40 oil, see For the check, proceed as follows: amounts to approximately 300 cm³. -
Page 56: Front Wheel
Support the front wheel and manually brake fluid. In this case consult your withdraw the wheel pin (3). DISASSEMBLY aprilia Official Dealer, who will carry Take the left spacer ring (4) (left side). Position the vehicle on the appropriate out the proper maintenance operation. - Page 57 Position the odometer control seat balancing of the wheel checked by your NOTE correctly, in correspondence with the aprilia Official Dealer, in order to avoid Weight without driver (ready for special antirotation pin (6). accidents that may be harmful for you starting): 200 kg.
-
Page 58: Rear Wheel
Check the conditions of the wheel rim operators. the crown gear (7). and change it if it is damaged. If necessary, contact your aprilia Official Dealer. Make the wheel advance and release the DISASSEMBLY drive chain (6) from the crown gear (7). - Page 59 In this case consult your Position the four flexible couplings (13) in aprilia Official Dealer, who will carry NOTE Do not unscrew the six nuts (12). the relevant seats in the flexible coupling out the proper maintenance operation.
- Page 60 Make the wheel advance and position is completely inserted. aprilia Official Dealer, in order to avoid the drive chain (6) on the crown gear (7). Position the washer (4) and tighten the accidents that may be harmful for you Uniformly apply a moderate quantity of and/or other people.
-
Page 61: Positioning The Vehicle On The Rear Support Stand
POSITIONING THE VEHICLE ON Insert the stand from the rear side of the POSITIONING THE VEHICLE ON THE REAR SUPPORT STAND vehicle and position it so that the two THE FRONT SUPPORT STAND support pins (3) rest on the lower part of NOTE Loosen the knob (1). -
Page 62: Drive Chain
(ADJUSTMENT). than in others, this means that there are Lock the rotation of the wheel pin (1) with To change the chain, contact an aprilia crushed or seized links; in this case, the appropriate key. Official Dealer, who will ensure you contact an aprilia Official Dealer. - Page 63 If this is not possible, contact an The lubricants for chains available on same reference marks can be seen aprilia Official Dealer, who will provide the market may contain substances that when looking inside the slots (5) (6). for changing the chain.
-
Page 64: Removal Of The Fuel Tank
REMOVAL OF THE FUEL TANK Turn the ignition switch to position “ ”. Release disconnect rapid Remove saddle, couplings (6) (7). Carefully read p. 24 (FUEL) and p. 51 ( U N L O C K I N G / L O C K I N G T H E (MAINTENANCE). -
Page 65: Removing The Oil Sump Guard
(2) is deteriorated, i n s i d e t h e s i d e b o d y p a n e l ( 4 ) i s contact an aprilia Official Dealer to have deteriorated, contact an aprilia Official it changed. -
Page 66: Removing The Drive Chain Guards
REMOVING THE DRIVE CHAIN INSTALLING THE SIDE BAG CAUTION GUARDS SUPPORTS (supplied as standard equipment in the H a n d l e t h e p l a s t i c a n d p a i n t e d Carefully read 51 (MAINTENANCE). - Page 67 (REMOVING THE RIGHT AND LEFT necessary have them changed by an Insert the screw (2) with the relevant SIDES). aprilia Official Dealer. washer (4) and screw it manually. Loosen and remove the nut (10) that CAUTION fastens the passenger footboard.
-
Page 68: Installing The Rear Case Supports (Supplied As Standard Equipment In The Countries Where Required)
6000 km (3750 mi) or 12 months, and if relevant washer (3). Remove the side panels, see p. 65 necessary have it changed by an aprilia Working on the lower side, position the (REMOVING THE RIGHT AND LEFT Official Dealer. -
Page 69: Rear Suspension
(clockwise). – an adjusting ring nut (2) and a locking If necessary, contact an aprilia Official ring nut (3) for the adjustment of the Normal or regular road surface – SOFT Dealer. spring preload. -
Page 70: Rear Suspension With Hydraulic Preload Adjustment
REAR SUSPENSION WITH REAR SHOCK ABSORBER ADJUSTMENT TABLE HYDRAULIC PRELOAD ADJUSTMENT Standard HARD adjustment adjustment SOFT adjustment for heavy load (for With this type of suspension it is possible Rear shock (INTERMEDIATE) for light load (for example, rider, to adjust the spring preload and the absorber for normal load (for example, rider... -
Page 71: Checking The Brake Pad Wear
– from above, on the rear part, for the WARNING 2000 km (1250 mi) and before every trip. rear brake calipers (2). Have the pads changed by your aprilia The wear of the disc brake pads depends CAUTION Official Dealer. -
Page 72: Idling Adjustment
) a n d i t i s impossible to reach an aprilia Official Dealer. use and maintenance Pegaso 650 I.E. -
Page 73: Adjusting The Accelerator Control
Carefully read p. 51 (MAINTENANCE). Put back the protection element (5). Carefully read p. 51 (MAINTENANCE). Have the accelerator control cables checked by an aprilia Official Dealer after CAUTION Have the accelerator control cables the first 1000 km (625 mi) and successively... -
Page 74: Spark Plug
SPARK PLUG For the removal, proceed as follows: For the check and cleaning: Remove the cap (1) of the spark plug (2). Carefully read p. 51 (MAINTENANCE). Key: Remove any trace of dirt from the spark – centre electrode (3); Check the spark plug every 6000 km (3750 plug base. - Page 75 For the installation: CAUTION CAUTION With the washer on (7), screw the spark When changing the spark plug, check Make sure that the cap (1) is correctly plug by hand in order not to damage the the thread pitch and length. connected to the spark plug (2).
-
Page 76: Battery
BATTERY I f t h e e l e c t r o l y t e i s a c c i d e n t a l l y CAUTION swallowed, drink a lot of water or milk, Carefully read p. -
Page 77: Checking The Electrolyte Level
CHECKING THE ELECTROLYTE Remove the red protection element (1). CAUTION LEVEL Make sure that the cable terminals (2) and the battery terminals (3) are: Do not exceed the “MAX” mark, since Carefully read p. 76 (BATTERY). the electrolyte level increases during –... -
Page 78: Removing The Battery
REMOVING THE BATTERY WARNING CAUTION Carefully read p. 76 (BATTERY). Upon reassembly, connect first the Do not force the electric cables. positive cable (+) and then the negative Make sure that the ignition switch is in Withdraw the breather pipe (8). cable (–). -
Page 79: Recharging The Battery
RECHARGING THE BATTERY Carefully read p. 76 (BATTERY). Remove battery, (REMOVING THE BATTERY). Prepare an appropriate battery charger. Set the charger for the desired type of recharge. NOTE A recharge with an amperage equal to 1/10th of the battery capacity is recommended. -
Page 80: Long Inactivity Of The Battery
LONG INACTIVITY OF THE Make sure that there are no dirt or mud CHECKING THE SWITCHES BATTERY deposits on the switch; the pin must be Carefully read p. 51 (MAINTENANCE). able to move without interferences, If the vehicle remains unused for more returning automatically to its initial than fifteen days, it is necessary to The vehicle is provided with four... -
Page 81: Changing The Fuses
If you use one of the spare fuses, put a new fuse in the proper seat. In this case it is advisable to consult an aprilia Official Dealer. If an electric component does not work or works irregularly, or if the vehicle fails to start, it is necessary to check the fuses. -
Page 82: Adjusting The Vertical Headlight Beam
If you need assistance or technical advice, 49 (POSITIONING THE VEHICLE ON NOTE To check the direction of the consult your aprilia Official Dealer, who THE STAND). headlight beam, specific procedures must can ensure you prompt and accurate Working on the lower side of the front be adopted, in accordance with the servicing. -
Page 83: Bulbs
BULBS If you touch the bulb with bare hands, CHANGING THE HEADLIGHT remove any fingerprint with alcohol, in BULBS Carefully read p. 51 (MAINTENANCE). order to avoid any damage. Carefully read p. 83 (BULBS). D O N O T F O R C E T H E E L E C T R I C WARNING The headlight contains: CABLES. - Page 84 HIGH BEAM BULBS PARKING LIGHT BULB LOW BEAM BULB/HIGH BEAM Move the protection element (4) with Move the protection element (8) with Move the protection element (10) with your hands. your hands. your hands. Grasp the electric terminal (5), pull it and CAUTION CAUTION disconnect it from the bulb (1).
-
Page 85: Changing The Front Direction Indicator Bulbs
CHANGING THE FRONT DIRECTION INDICATOR BULBS Carefully read p. 83 (BULBS). Position the vehicle on the stand, see p. 49 (POSITIONING THE VEHICLE ON THE STAND). Unscrew and remove the two screws (1). Remove the protection screen (2). CAUTION Upon reassembly, correctly position the protection screen in its seat. -
Page 86: Changing The Rear Light Bulb
CHANGING THE REAR LIGHT avoid damaging the protection screen. CHANGING THE NUMBER PLATE BULB BULB Press the bulb (1) slightly and rotate it anticlockwise. Carefully read p. 83 (BULBS). Carefully read p. 83 (BULBS). Extract the bulb (1) from its seat. NOTE The rear light houses two parking To change, proceed as follows:... -
Page 87: Transport
TRANSPORT CLEANING NOTE WARNING During transport, the vehicle must Clean the vehicle frequently if it used in be kept in vertical position, it must be firmly particular areas or conditions, such as: After the vehicle has been washed, its anchored and the 1st gear must be braking functions could be temporarily –... - Page 88 To remove dirt and mud from the painted CAUTION CAUTION surfaces use a low- pressure water jet, carefully wet the dirty parts, remove mud To clean the lights, use a sponge Do not direct high-pressure water or air a n d f i l t h w i t h a s o f t c a r s p o n g e s o a k e d w i t h w a t e r a n d a n e u t r a l jets or steam jets on to the following impregnated with a lot of water and...
-
Page 89: Long Periods Of Inactivity
LONG PERIODS OF INACTIVITY Place the vehicle in an unheated, not- AFTER A PERIOD OF INACTIVITY humid room, away from sunlight, with NOTE After a long period of inactivity of the Withdraw the plastic bags from minimum temperature variations. vehicle some precautions are necessary to the exhaust tailpipes. -
Page 90: Technical Data
TECHNICAL DATA DIMENSIONS Max. length ............2214 mm Max. width.............. 910 mm Max. height (front part of the fairing included) ..1253 mm Seat height............. 815 mm Distance between centres........1466 mm Min. ground clearance ........... 200 mm Weight ready for starting........200 kg ENGINE Model .............. - Page 91 GEAR RATIOS Ratio Primary Secondary Final ratio Total ratio 1ª 37/72 = 1 : 1.946 12/33 = 1 : 2.750 16/46 = 1 : 2.875 15.385 2ª 16/28 = 1 : 1.750 9.791 3ª 16/21 = 1 : 1.312 7.34 4ª...
- Page 92 TYRES REAR ..............130/80 – R17 65 H – alternative............140/70 – 17 66 H; 130/80 – 17 65 S; 130/80 – 17 65 T; 130/80 – 17 65 H – Inflation pressure - solo rider – off-road driving ..........210 kPa (2.1 bar) –...
-
Page 93: Lubricant Chart
LUBRICANT CHART Engine oil (recommended): SUPERBIKE 4, SAE 5W-40 or 4T FORMULA RACING, SAE 5W-40. As an alternative to the recommended oil, it is possible to use high-quality oils with characteristics in compliance with or superior to the CCMC G-4, A.P.I. SG specifications. Fork oil (recommended): F.A. -
Page 94: Wiring Diagram - Pegaso 650 I.e
WIRING DIAGRAM - Pegaso 650 I.E. use and maintenance Pegaso 650 I.E. -
Page 95: Wiring Diagram Key - Pegaso 650 I.e
WIRING DIAGRAM KEY - Pegaso 650 I.E. 1) Side stand switch 34) Injection relay CABLE COLOURS 2) Multiple connectors 35) Start relay Orange 3) Clutch control lever switch 36) Starter Light blue 4) Diode 1 37) Battery Blue 5) Diode 2 38) Voltage regulator White 6) Engine oil pressure switch... -
Page 96: Official Dealers And Service Centres
When you demand aprilia Original Parts, you are purchasing products that have been developed and tested as early as the vehicle design stage. aprilia Original Parts systematically undergo strict quality control procedures to ensure total reliability and long service life.
Need help?
Do you have a question about the PEGASO 650 IE - 2004 and is the answer not in the manual?
Questions and answers