Advertisement
SET UP & USE
INSTALLATION GUIDE
LOCATION
- Examine the dryer after unpacking. Check for damage such as a misaligned door, broken door or dent in the cavity. If any damage is visible, DO NOT install, and notify your dealer immediately.
- Check to ensure that you have four (4) leveling legs.
- Install the dryer on a flat, level surface. If the surface is uneven, adjust the leveling legs.
- Install the dryer away from direct sunlight; direct sunlight may affect the acrylic coating, plastic and electrical components. The room temperature should not fall below 320F.
- Check the ventilation. DO NOT block the air vents, especially when the dryer is installed on a carpeted floor. If the air vents are blocked during operation, the dryer may overheat and eventually fail. For proper ventilation, allow at least 5 inches of space between the dryer top, sides, rear, and adjacent surfaces. Ensure adequate space for ventilation. It is recommended that the unit be vented outdoors. (Ventilation Kit not included.) A ventilation kit with a 4" diameter duct can be purchased at your local hardware store.
- Install the dryer away from heating appliances and water taps. Keep the dryer away from heat, steam, or splashing liquids. Never splash water onto the control panel. These things can adversely affect the wiring and electrical conduction contacts of the dryer.
ADJUSTING THE LEVELING LEGS
The dryer is shipped with a bag containing the user guide and four(4)IeveIing legs. See the illustration to the right to install and adjust the leveling legs. If the dryer is placed on an uneven or weak surface, noise or vibrations will occur from the appliance. If the floor is uneven, adjust the height level of the leveling legs accordingly. DO NOT insert pieces of wood or any other objects under the legs.

INSTALLING THE EXHAUST CONNECTOR
Install the exhaust connector as shown in the illustration by lining it up with the connector on the back of the dryer and turning it clockwise so the tabs on the exhaust connector fit into the slots on the connector:

- For a downward exhaust, join the sections (I) pointing downward.
- For an upward exhaust, join the sections (2) pointing upward.
 NOTE: The dryer must be vented. A ventilation kit with a 4" diameter duct can be purchased at your local hardware store.
SPECIFICATIONS
MODEL BCED26

| Power Supply | 120V AC, 60Hz |
| Capacity | 2.6 cu. ft. |
| Unit Dimensions | 23.6" x 27.5" x 17.1" (W x H x D) |
| Net Weight | 48.4 lbs. |
MODEL BCED37

| Power Supply | 120V AC, 60Hz |
| Capacity | 3.5 cu, ft. |
| Unit Dimensions | 23.6W x 27.5H x 21.5D" |
| Net Weight | 49.5 lbs. |
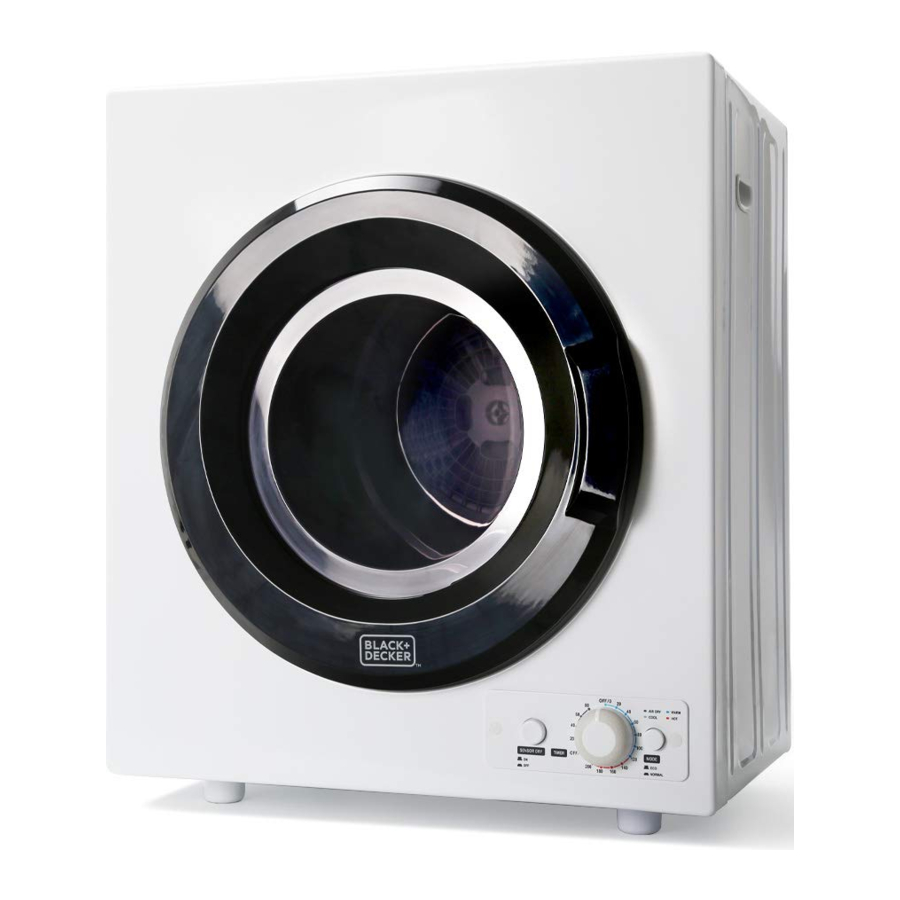
PARTS & FEATURES
FRONT

The appearance of your model may slightly differ from the illustrations in this manual.
- Door
- Window
- Door Gasket
- Lint Filter Assembly
- Drum
- Air Intake Shroud
- Timer
- Sensor Dry Mode Selector
BACK

The appearance of your model may slightly differ from the illustrations in this manual.
- Dryer Housing
- Back Cover
- Exhaust Vent
- Exhaust Connector
OPERATION
CONTROL PANEL

MODE SELECTOR
NORMAL: By default, the dryer operates under the 'NORMAL' mode (the mode button is pressed), in combination with the presets, 'SENSOR DRY' and 'TIMER', for optimal drying performance. The 'SENSOR DRY' function can be adjusted to your drying needs by using the dial and temperature guidelines.
ECO: The Dryer operates using an energy-saving mode, independent of the 'SENSOR DRY' and the 'TIMER' functions. The dryer will automatically run in 'ECO' mode for a total duration of 270 minutes. The dryer will begin air drying the laundry for 150 minutes with cool air, followed by another 120 minutes using hot air by activating the heating element. Simply open and load the dryer, close the door, then depress the 'Mode' button, and the dryer will run in the 'ECO' mode. If the power turns off while the dryer is in 'ECO' mode, the unit will remember the time remaining and resume drying when the power goes on again. Memory won't be affected if the door is opened when the unit is off. However, if the door is opened while the dryer is on, the remainder time will not be remembered and 'ECO' drying will not resume.
SENSOR DRY SELECTOR
ON: When the drying time reaches 120 minutes, the sensor dry function measures the moisture and humidity levels during the cycle and automatically adjusts the heating time for a more efficient drying performance. As a result, the dryer may stop generating heat in advance of the 'TIMER' preset, but the preset cycle continues by generating cool air until the drying time is complete and the dial is in the 'Off/O' position.
OFF: The dryer operates according to the time set by the 'TIMER' until the preset finished in the 'Off/O' position.
TIME SETTING
OFF: When the 'TIMER' is in the 'OFF/O' position, power is not supplied to the unit. Turning the dial clockwise to the desired program will start the dryer.
COOL: This setting is generally used to cool items that have just been dried to help prevent creasing.
- ANTI-WRINKLE: For laundry loads that are difficult to iron (e.g. cotton shirts and linen), set the 'TIMER' between 30-60 minutes, depending on the load size. Once the cycle stops, the items will still contain moisture, thereby making the ironing process easier. WARM: This setting is used to dry and cool, and depending on the material, leave items wrinkle free. Set the 'TIMER' by turning the dial clockwise between 60-150 minutes.
- HOT: This setting is used for drying large quantities or bulky items (i.e. the dryer drum is approximately 1/2 full). Set the 'TIMER' by turning the dial clockwise to 150+ minutes.
- AIR DRY: This setting is used without any heat to freshen items by letting cool air move through it (e.g. clothes that have been stored for an extended period of time).
NOTE: ALWAYS make sure items being dried have gone through the Spin cycle in the washing machine first. Do not put soaking wet clothes in the dryer.
DRYING TIME REFERENCE
NOTE: Drying times will usually vary between 30 minutes for smaller loads and 200 minutes for larger loads according to load size, type of fabric, degree of wetness etc.
If clothes are still damp after completing the selected dry cycle, add more drying time or a higher heat setting for future loads.
NOTE: This is a 120 volt dryer. Drying times will be longer than a 220 volt dryer.
SORTING AND LOADING LAUNDRY
NOTE: Do not load your dryer more than approximately half full to allow space for the clothes to tumble.
For the best results, your laundry should be sorted properly. Separate the lint shedders (e.g. chenille and terry cloth) from the lint collectors (e.g. synthetics, flannels, velvets, and corduroys). Separate non-colorfast from light colored items, heavy fabrics from lightweight fabrics, and permanent press from heavy, bulky items.
Delicate clothes, especially those with ribbon or lace, should be placed in a nylon mesh bag before drying to prevent tangling.
NOTE: Before drying, check all pockets. If nails, coins, or pins remain in pockets, the objects may damage the dryer and/or clothes. Place your laundry into the dryer evenly. Uneven laundry may cause noise or vibrations.
Clothes with zippers, buckles buttons or fasteners should be closed or turned inside out to reduce the impact of noise between the metal and the dryer's drum.
DO NOT TUMBLE DRY: Read all permanent care labels carefully. If the care label on the garment reads "Drip Dry", "Line Dry", or "Dry Flat", DO NOT dry the garments in the dryer. In addition, certain materials will melt or become dangerously flammable if heated, while other garments may lose their shape. Other items that should not be tumble dried are the following:
- Garments that have been dry cleaned at home.
- Garments made from wool, unless the garment manufacturer recommends it.
- Garments with fiberglass materials.
- Garments containing vinyl, rubber, plastic or similar materials, including bras, tennis shoes, rubber galoshes, bath mats, rugs, bibs, baby pants, plastic bags, pillows, etc„ as they may melt or burn. Under certain circumstances, some rubber materials, when heated, can produce fire by spontaneous combustion.
CARE AND MAINTENANCE
FABRIC CARE
- For optimum results, load the dryer with cloths of similar fabric, weight and construction.
- Check for stains that may not have been removed in washing. The dryer heat may permanently set some stains.
- Separate dark and light colored items, like you do when washing laundry.
- DRYING TIME: The drying time depends on many factors, such as the type of fabric. In addition, the drying duration is dependent on how dry you want the laundry to be when taken out of the dryer.
- DRYER ADDED FABRIC SOFTENERS: Certain dryer added fabric softeners may cause damage to automatic dryers. Therefore, only use fabric softeners with written assurance from the manufacturer that their softeners can safely be used in your dryer.
- SINGLE ITEMS: Use the timed drying mode when there is only one item to be dried. This is because the moisture sensor in the automatic drying mode may disable the heating element too early in the cycle, thereby failing to adequately dry the garment.
- OVERDRYING GARMENTS: When using the timed drying mode, it is possible to overdry the garments, especially if the timer has been set too long. This can cause the fabrics to wrinkle, shrink, or feel harsh. Synthetic materials can also become charged with static electricity.
NOTE: Refer to the Fabric Care Chart for commonly used fabric care symbols.
NOTE: Always remove the laundry load from the dryer as soon as possible.
FABRIC CARE CHART
| Fabric Care Symbol | Definition |
 | Dry flat |
 | Can be hung to dry |
 | Dry on clothes hanger |
 | Tumble dry, normal heat |
 | Tumble dry, reduced heat |
 | Do not tumble dry |
CARE AND MAINTENANCE
NOTE: Unplug the power cord before cleaning any part of the dryer.
UNIT
The dryer should be cleaned regularly, including the control panel, with a soft cloth and non-abrasive household detergents. The use of harsh detergent or abrasives is not recommended. Do not pour water on the dryer or control panel. Use a soft cloth to dry the surfaces. Failure to maintain the dryer in a clean condition could lead to deterioration of the surface which could adversely affect the life of the appliance and possibly result in a hazardous situation.
LINT FILTER ASSEMBLY
The lint filter assembly should be cleaned before or after each use. Refer to the chart below to clean each part of the lint filter assembly.
Lint Filter Assembly
| 1 | Remove the lint filter by using the four (4) grip holes in the filter assembly to rotate the filter (in either direction) until you feel a bump, then pull it outward
| |
| 2 | The lint filter assembly consists of three (3) parts: exhaust vent shroud, lint filter, and exhaust filter. |  |
| 3 | Separate the three (3) parts of the assembly and clean the individual pieces using a soft brush or a vacuum cleaner. Do not damage the filter assembly. |  |
| 4 | Reassemble the filter assembly in the following order, exhaust fitter - lint filter - exhaust vent shroud. Align the entire assembly with the recessed position in the back of the drum and press firmly until the entire filter assembly is secured |  |

Regularly clean the lint trap. Hot Surface. Do not touch the intake during the drying cycle due to high temperatures.
AIR INTAKE FILTER
The air intake filter should be cleaned before or after each use. Refer to the chart below to clean the air intake filter.
NOTE: Unplug the power cord before cleaning any part of the dryer.
Air Intake Filter
| 1 | Remove the air intake filter by pulling outward while holding the filter housing by its top and bottom.
| |
| 2 | The air intake filter consists of two (2) parts: filter housing and air intake filter. |  |
| 3 | Remove the air intake filter inside the filter housing. Clean the filter using a soft brush or a vacuum cleaner. |  Cleaning the Air Intake Filter |
| 4 | Reassemble the air intake filter inside the filter housing, then reinstall the filter housing by pushing the housing upwards with your thumb until the latch is secured to the dryer. |  |
TROUBLESHOOTING
Troubleshoot your problem by using the chart below. If the dryer still does not not work properly, contact BLACK+DECKER customer service center or the nearest authorized service center.

Users must never troubleshoot internal components.
| The 'TIMER' dial will not rotate |
|
| The dryer does not operate |
|
| The dryer drum does not rotate |
|
| The laundry is not completely dry |
|
SERVICE & WARRANTY
BEFORE YOU CALL FOR SERVICE
IF THE APPLIANCE FAILS TO OPERATE:
- Check to make sure that the dryer is plugged in securely. If it is not, remove the plug from the outlet, wait 10 seconds and plug it in again securely.
- Check for a blown circuit fuse or a tripped main circuit breaker. If these seem to be operating properly, test the outlet with another appliance.
If you can't find the answer or do not have access to the Internet, call 844-299-0879 from 10:30 a.m. to 6:30 p.m. EST Mon. - Fri. to speak with an agent. Please have the catalog number available when you call.
IF NONE OF THE ABOVE SOLVES THE PROBLEM, CONTACT A QUALIFIED TECHNICIAN. DO NOT TRY TO ADJUST OR REPAIR THE APPLIANCE YOURSELF.

DO NOT RETURN THIS PRODUCT TO THE STORE
If you have a problem with this product, please contact the BLACK+DECKER Customer Satisfaction Center at 844-299-0879 or service@equitybrands.com
DATED PROOF OF PURCHASE, MODEL # AND SERIAL # REQUIRED FOR WARRANTY SERVICE
Any repair, replacement, or warranty service and all questions about this product should be directed to BLACK+DECKER at 844-299-0879 from the USA or Puerto Rico.
SAFETY INFORMATION
ELECTRICAL REQUIREMENTS
The electrical requirement is for a 120 volt, 60Hz, electric dryer only, 12 amps. It is recommended that a separate circuit serving only the product be provided. The product is equipped with a 3-wire cord having a 3-prong grounding plug. It must be plugged into a wall receptacle that is properly installed and grounded.
This appliance must be grounded. In the event of an electrical short circuit, grounding reduces risk of electric shock by providing an escape wire for the electric current. The cord provided with this appliance is equipped with a grounding wire and a grounding plug. The plug must be plugged into an outlet that is properly installed and grounded.
Avoid the use of three prong adapters or cutting off the third grounding prong in order to accommodate a two prong outlet. This is a dangerous practice since it provides no effective grounding for the dryer and may result in shock hazard.

Improper use of the grounding plug can result in a risk of electric shock
Consult a qualified electrician or serviceman if.
- The grounding instructions are not completely understood.
- You are unsure that the appliance is properly grounded.
- You have any questions about the grounding or electrical instructions.
POWER SUPPLY CORD
- Avoid the use of an extension cord because of potential safety hazards under certain conditions. Have a qualified electrician or serviceman to install an outlet near the appliance.
- If it is absolutely necessary to use longer cord sets or an extension cord, extreme care must be exercised.
- Use only a grounding type 3-wire extension cord that has a 3-blade grounding plug and a 3-slot receptacle that will accept the plug on the appliance.
- The marked electrical rating of the cord set or extension cord must equal to or greater than the electrical rating of the appliance. The longer cord should be arranged so that it will not drape over the counter top or table top where it can be pulled on by children or tripped over unintentionally.
NOTE: Neither BLACK+DECKER nor the dealer can accept any liability for damage to the product or personal injury resulting from failure to observe the electrical connection procedures.
This dryer cannot be used upside down.
Risk of Fire
Clothes dryer installation must be performed by a qualified installer.
Install clothes dryer according to the manufacturers instructions and local codes.
Do not install a clothes dryer with flexible plastic venting materials. If flexible metal (foil type) duct is installed, it must be of a specific type identified by the appliance manufacturer as suitable for us with clothes dryers. Flexible venting materials are known to collapse, be easily crushed and trap lint. These conditions will obstruct clothes dryer airflow and increase the risk of fire.
To reduce the risk of severe injury or death, follow all installation instructions.
Connect to individual branch circuit.
This appliance must be grounded. In the event of malfunction or breakdown, grounding will reduce the risk of electric shock by providing a path of least resistance for electric current. This appliance is equipped with a cord having an equipment-grounding conductor and grounded in accordance with all local codes and ordinances.

Immediate hazards which WILL result in severe personal injury or death
Hazards or unsafe practices which COULD result in severe personal injury or death

Hazards or unsafe practices which COULD result in minor personal injury
IMPORTANT SAFETY INSTRUCTIONS
To reduce the risk of fire, electric shock, and/or injury to persons, basic safety precautions should always be followed when using electrical appliances.
When using electrical appliances, basic safety precautions should be followed, including the following:
- Read all instructions before using the appliance.
- Risk of child entrapment and suffocation; never allow children to operate, play with, or crawl inside the appliance.
- This appliance must be grounded. Connect only to a properly grounded outlet. See the "GROUNDING INSTRUCTIONS".
- Install or locate the appliance only in accordance with the provided installation instructions.
- DO NOT place the dryer in steamy rooms or where the dryer is directly exposed to rain. Moisture may destroy the electrical insulation causing an electrical shock hazard.
- Use the dryer only for its intended use as described in the user guide. This type of dryer is specifically designed to dry clothes. It is not designed for industrial or laboratory use.
- As with any appliance, close supervision is necessary when used around children or incapacitated persons.
- DO NOT operate the dryer if it has a damaged power cord or plug, if it is not working properly, or if it has been damaged or dropped in any manner.
- The dryer should be serviced only by qualified service personnel. Contact the nearest authorized service facility for examination, repair, or adjustment.
- DO NOT cover or block any openings on the appliance.
- DO NOT put your hand in the drum while it is moving. The rotating parts may cause injury to your hand.
- DO NOT immerse the power cord or plug in water.
- Keep the cord away from all heated surfaces.
- DO NOT store or use gasoline or any other flammable vapors and liquids in the vicinity of this or any other appliance. The fumes can create a fire hazard or explosion.
- When cleaning the surfaces of the door and the frame, use only mild, nonabrasive soaps or detergents applied with a sponge or soft cloth. Never clean appliance parts with flammable fluids. The fumes can create a fire hazard or explosion.
- Do not tamper with controls.
- Remove dryer door before discarding the dryer.
- Do not dry clothing that has been soiled with solvents, cooking oils, gasoline, flammable or explosive substances. Vapors could ignite or explode.
- The lint filter and air intake filter should be cleaned before or after each use.
- The dryer should be vented. The interior and exhaust vent should be cleaned periodically by a qualified service professional.
- Installation work must be done by qualified person(s) in accordance with applicable codes and standards.
- This appliance is not intended for use by persons (including children) with reduced physical, sensory or mental capabilities, or lack of experience and knowledge, unless they have been given supervision or instruction concerning use of the appliance by a person responsible for their safety.
- Do not allow children to play on or in the appliance. Close supervision of children is necessary when the appliance is used near children.
- INDOOR USE ONLY - this appliance is not intended for outdoor use.
- Do not place naked flame sources, such as candles, on the appliance.
- Do not locate the appliance or cord near heat sources such as radiators, heaters, air ducts or direct sunlight.
- Do not run the cord under floor coverings. Instead, arrange the cord away from traffic areas where it will not become a trip hazard.
- To disconnect the appliance, turn the appliance off, switch off the power outlet and remove the plug from the power outlet.
- Do not misuse the cord. Never carry the appliance by the cord or pull to disconnect it from the outlet, instead grasp the plug and pull to disconnect.
- Do not attempt to repair, disassemble or modify this appliance. The warranty becomes void if not serviced or repaired by a qualified person.
- Do not install in a tight fitting cabinet.
- Do not use fabric softeners or products to eliminate static unless recommended by the manufacturer of the fabric softener or product.
- Do not use heat to dry articles containing foam rubber or similarly textured rubber-like materials.
- Keep area around the exhaust opening and adjacent surrounding areas free from the accumulation of lint, dust and dirt.
- Ensure foreign objects do not find their way into the tub of the tumble dryer.
- The door window may be hot after a long drying cycle. Please ensure children are kept away from the machine.
- After turning off the power supply to the tumble dryer, wait at least 2 minutes before turning it back on again.
- Please remove the transport packaging at the rear of the tumble dryer, prior to use.
If this appliance is supplied from a cord extension set or an electrical portable outlet device, the cord extension set or electrical portable outlet device must be positioned so that it is not subject to splashing or ingress of moisture.
SAVE THESE INSTRUCTIONS
HOUSEHOLD USE ONLY

Oil affected items can ignite spontaneously, especially when exposed to heat sources such as in a tumbler dryer. The items become warm, causing an oxidation reaction in the oil. Oxidation creates heat. If the heat cannot escape, the items can become hot enough to catch fire. Piling, stacking or storing oil-affected items can prevent heat from escaping and so create a fire hazard.
To reduce the risk of fire, electric shock, or injury when using your appliance, follow these basic precautions.
- Read all instructions before using the appliance.
![]()
Risk of child entrapment.- Child entrapment and suffocation are not problems of the past. Junked or abandoned, appliances are still dangerous, even if they will just sit in a garage for a few days.
- Before you throw away your old appliance: Take off the door so that children may not easily climb inside.
- Never allow children to operate, play with or crawl inside the appliance.
- Never clean appliance parts with flammable fluids. The fumes can create a fire hazard or explosion.
- Do not place the dryer in steamy rooms or where the dryer is directly exposed to rain. Moisture may destroy the electrical insulation causing an electrical shock hazard.
- During spinning, don't put your hand in the spin basket. Because the spin basket is rotating at high speed, rotating parts may injure your hand.
- Do not store or use gasoline or any other flammable vapors and liquids in the vicinity of this or any other appliance. The fumes can create a fire hazard or explosion.
SAVE THESE INSTRUCTIONS
Documents / Resources
References
Download manual
Here you can download full pdf version of manual, it may contain additional safety instructions, warranty information, FCC rules, etc.
Advertisement

Need help?
Do you have a question about the BCED26 and is the answer not in the manual?
Questions and answers