Dell E310dw Manual
- User manual (216 pages) ,
- Setup manual (29 pages) ,
- Setup manual (36 pages)
Advertisement
- 1 Verify the contents of the box
- 2 Remove the packing material
- 3 Install the toner cartridge
- 4 Prepare the tray and add paper
- 5 Connect the necessary cables
- 6 Connect the power cable and turn on the printer
- 7 Install drivers and utilities
- 8 Printer Features
- 9 Operator Panel
- 10 Dell Printer Hub
- 11 Dell Document Hub
- 12 Tips and Tricks
- 13 Wireless Setup Issues
- 14 Identifying the location of paper jams
- 15 Replacing the toner cartridge
- 16 Cleaning the printer
- 17 Configuring Auto Power Off via Operator Panel
- 18 Ordering Supplies
- 19 Documents / Resources
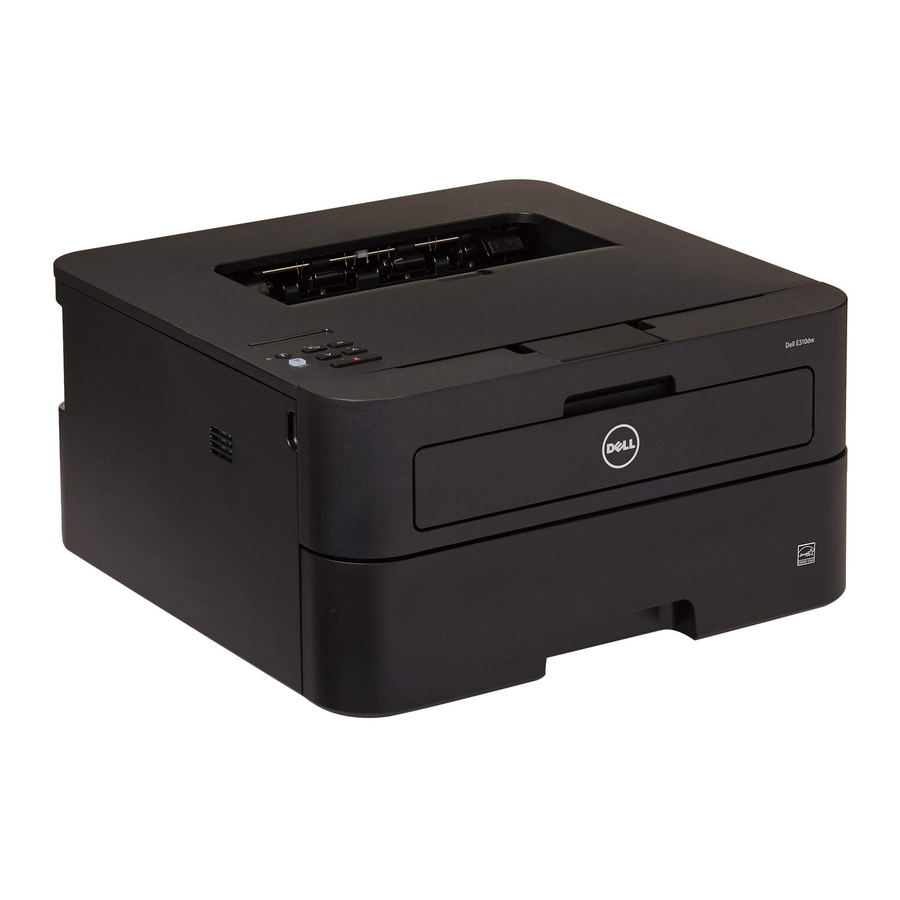
Verify the contents of the box

Before you set up and operate your Dell printer, read and follow the safety instructions in the Important Information that comes with your printer.
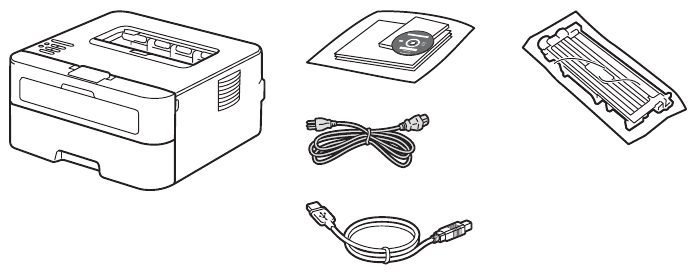
 NOTE: The contents of the box vary depending on the country or region you purchased the printer from.
Remove the packing material

NOTE: The location of adhesive tapes and the shape of the packing material may vary.
Install the toner cartridge

NOTE: Dispose of the part (C) that you detach from the toner cartridge in a proper way. It is disposable and no longer used.
Prepare the tray and add paper

Connect the necessary cables
For USB connection, connect the USB cable

For Ethernet connection, connect the ethernet cable

Connect the power cable and turn on the printer

Install drivers and utilities
Insert the Software and Documentation disc in your computer.
Alternatively, go to dell.com/support, enter the Service Tag of your printer, download the latest software and driver, and then open the file that you downloaded.
NOTE: Before you begin, for wired printer setup ensure that the printer is connected to your computer using an Ethernet or USB cable. For wireless printer setup ensure that there is no cable connected between the printer and your computer.
www.dell.com/support

NOTE: To get the latest version of software or firmware in future, always allow automatic software updates when prompted.
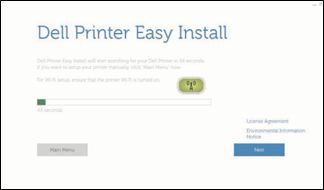
On the Dell Printer Easy Install window, click Next. Dell Printer Easy Install begins to search for your printer.
Wireless Printer
NOTE: Supported on 802.11b/g/n over 2.4 GHz but not compatible with 802.11n/ac over 5.0 GHz.
- Wait for Dell Printer Easy Install wizard to find your printer.

- When the printer is found, click Install to complete the setup.


Ethernet Printer
- Wait for Dell Printer Easy Install wizard to find your printer.
- Select the printer, and then click Next to complete the setup.


USB Printer
- Wait for Dell Printer Easy Install wizard to find and install your printer.


Printer Features

- Service Tag
- Front cover
- Paper tray
- Manual feed slot cover
- Manual feed slot
- Manual feed paper guide
- Control panel

- Network Port
- USB port
- Back cover (Face-up output tray)
- AC power connector
Operator Panel
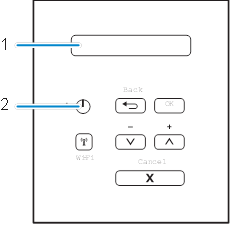
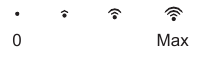
- LCD (Liquid Crystal Display)
Displays messages to help you set up and use your printer.
A four-level indicator shows the wireless signal strength if you are using a wireless connection.
![]()
![]() Power On/Off Button
Power On/Off Button
Press the![]() button to turn on your printer.
button to turn on your printer.
To turn off your printer, press and hold the![]() button for a few seconds until Shutting Down appears on the LCD display.
button for a few seconds until Shutting Down appears on the LCD display.
![]()
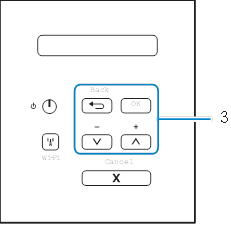
- Menu Buttons
OK Button
Press to choose from a menu option. After you select an option, the printer returns to the previous menu.
![]() (Back) Button
(Back) Button
Press to go back to the previous menu.
Press to select the previous digit when setting numbers.
![]() or
or ![]() (+ or –) Button
(+ or –) Button
Press to navigate through menus and options.
Press to enter a number or to increase or decrease the number. Hold down![]() to scroll faster. When you select the number you want, press OK.
to scroll faster. When you select the number you want, press OK.
![]()
![]() (Wi-Fi) Button
(Wi-Fi) Button
Press the![]() (Wi-Fi) button to launch the wireless installer on your computer. Follow the on-screen instructions to set up a wireless connection between your printer and your network.
(Wi-Fi) button to launch the wireless installer on your computer. Follow the on-screen instructions to set up a wireless connection between your printer and your network.
When the![]() (Wi-Fi) lights green or yellow, your Dell printer is connected to a wireless access point. When the
(Wi-Fi) lights green or yellow, your Dell printer is connected to a wireless access point. When the ![]() (Wi-Fi) blinks amber or yellow, the wireless connection is disconnected, or your printer is in the process of connecting to a wireless access point.
(Wi-Fi) blinks amber or yellow, the wireless connection is disconnected, or your printer is in the process of connecting to a wireless access point.- Cancel Button
Press to clear certain error messages. To clear all other errors, follow the control panel instructions.
Press to print any data remaining in the memory of your printer.
Press to select the displayed option. After you change a setting, the printer returns to Ready Mode.
Press and hold Cancel for about two seconds to cancel a print job.
 (Back) Button
 or
or  (+ or –) Button
 to scroll faster. When you select the number you want, press OK.
 (Wi-Fi) Button
Dell Printer Hub
Manage your printer and imaging needs with ease. The Dell Printer Hub consolidates printer management and monitoring tools, advanced scan features, cloud connectivity and more, into an easy to use console for a simplified user experience and improved workflow.
With the Dell Printer Hub, you can easily access the Dell Document Hub for document sharing and storage in supported cloud services.
For more information about using the Dell Printer Hub, see the FAQ for the Dell Printer Hub or visit Dell.com/printerhub
Dell Document Hub
Easily access and share documents, images and digital content with the Dell Document Hub. This innovative cloud collaboration solution connects your printer and devices to popular cloud services, providing a flexible and secure way to collaborate from virtually anywhere.
For more information about using Dell Document Hub, see the FAQ in Dell Document Hub or visit Dell.com/documenthub
Tips and Tricks
Setting up a wireless connection
- Insert the Software and Documentation disc that is provided with the printer into your computer. The Dell Printer Easy Install program launches automatically.
- Click Main Menu.
- Click Setup.
- Click Wireless.
- Follow the instructions on the screen, and configure the wireless setting of the printer.
Wireless Setup Issues
| Problem | Action |
Cannot setup wireless connection | Ensure that the Ethernet cable is disconnected from the printer. |
| Ensure that Wi-Fi is set to On. For more information, see User's Guide. | |
| The firewall on your computer may be blocking communication with your printer. Try disabling the firewall on your computer. | |
| Cannot setup wireless connection with WPS (Wi-Fi Protected Setup). | Ensure that the security setting of the wireless LAN access point or router is WPA or WPA2. (WEP is not supported on WPS.) |
| Cannot setup wireless connection with the WPS-PBC (Wi-Fi Protected Setup-Push Button Configuration). | Press the WPS button on the wireless LAN access point or router within two minutes after starting the WPS operation on the printer. For details about the wireless LAN access point or router, see the manual supplied with the wireless LAN access point or router. |
| Cannot setup wireless connection with WPS-PIN (Wi-Fi Protected Setup- Personal Identification Number). | Check if the PIN you have entered on the computer is correct. |
Identifying the location of paper jams
Do not attempt to clear any jams using tools or instruments. This may permanently damage the printer.
The following illustration shows where paper jams may occur along the print media path.

- Inside Path
- Fusing Unit
- 2-sided Tray
- Paper Tray
Replacing the toner cartridge
To replace the toner cartridge, see the User's Guide
Cleaning the printer
To clean the printer, see the User's Guide
Configuring Auto Power Off via Operator Panel
This printer is equipped with an "Auto Power Off" feature, to help conserve power consumption. By default, this feature automatically turns the printer off after 3 hours of inactivity.
Users may enable/disable this feature using the menu setting located on the operator-panel of the printer:
Menu / Admin Settings / System Settings / Power Saver Timer / Power Off Timer
NOTE: When the printer is connected to a network via Ethernet or Wireless and Power Off Timer is set to Auto Detect, the printer will not turn off automatically.
Ordering Supplies
You can order consumables such as toner cartridge and drum cartridge from Dell online when using a networked printer. Enter the IP address of your printer in your web browser, launch the Dell Printer Configuration Web Tool, and click the Order Supplies at: to order toner for your printer.
You can also order toner cartridges by the following method:
- Launch Dell Printer Hub.
- Windows 8 or 8.1: After pointing to the bottom right corner of the screen to display the menu bar (charms bar), click Search
![]() Apps to enter "Dell Printer Hub" in the search box
Apps to enter "Dell Printer Hub" in the search box ![]() Dell Printer Hub.
Dell Printer Hub. - Windows 7: Click Start
![]() All Programs
All Programs ![]() Dell Printers
Dell Printers ![]() Dell Printer Hub.
Dell Printer Hub.
The Dell Printer Hub window appears.
- Windows 8 or 8.1: After pointing to the bottom right corner of the screen to display the menu bar (charms bar), click Search
- Select your printer from the My Printers list.
- Click Supplies, and then follow the instructions on the screen to order from the web.
![information]() NOTE: When you cannot get information from the printer automatically by two-way communication, a window that prompts you to type the Service Tag appears. Type your Dell printer Service Tag in the field provided. See the Printer Features section of this document to locate the Service Tag of your printer.
NOTE: When you cannot get information from the printer automatically by two-way communication, a window that prompts you to type the Service Tag appears. Type your Dell printer Service Tag in the field provided. See the Printer Features section of this document to locate the Service Tag of your printer.
If you are ordering by phone, call the number that appears in the Order by Phone section.
 Apps to enter "Dell Printer Hub" in the search box
 Product support
dell.com/support
dell.com/printer
Documents / ResourcesDownload manual
Here you can download full pdf version of manual, it may contain additional safety instructions, warranty information, FCC rules, etc.
Advertisement


Need help?
Do you have a question about the E310dw and is the answer not in the manual?
Questions and answers