
Dell S2722DGM Manual
- User manual (58 pages) ,
- Simplified service manual (15 pages) ,
- Disassembly (5 pages)
Advertisement
- 1 About your monitor
- 2 Setting up the monitor
- 3 Operating the monitor
- 4 Troubleshooting
- 5 Contacting Dell
- 6 Safety instructions
- 7 Documents / Resources
About your monitor
Package contents
Your monitor ships with the components shown in the table below. Ensure that you have received all the components and Contact Dell if anything is missing.
NOTE: Some components may be optional and may not ship with your monitor. Some features may not be available in certain countries.
 | Display |
 | Stand riser |
 | Stand base |
 | Power cable (varies by country) |
 | HDMI cable |
 | DisplayPort (DP) cable (DP to DP) |
 |
|
Product features
The Dell 27 Curved Gaming Monitor-S2722DGM has an active matrix, Thin-Film Transistor (TFT), Liquid Crystal Display (LCD), and LED backlight. The monitor features include:
- 68.47 cm (27 in.) viewable area (measured diagonally), 2560 x 1440 (16:9) resolution, plus full-screen support for lower resolutions.
- Color gamut of 99% sRGB.
- Digital connectivity with DisplayPort and HDMI.
- Enabled with gaming console VRR supportability.
- Tilt and height adjustment capabilities.
- Removable-pedestal stand and Video Electronics Standards Association (VESA TM ) 100 mm mounting holes for flexible mounting solutions.
- Plug and Play capability, if supported by your computer.
- On-Screen Display (OSD) adjustments for ease of set-up and screen optimization.
- Game-enhanced features such as Timer, Frame Rate Counter and Dark Stabilizer in addition to enhanced game modes such as FPS, MOBA/RTS, SPORTS, or RPG, and 3 additional game modes to personalize your preferences.
- Power and OSD buttons lock.
- Security-lock slot.
- Stand lock. • ≤ 0.3 W in Standby mode.
- AMD FreeSync TM Premium Technology, which minimizes graphic distortions like screen tearing and stuttering for smoother, fluid gameplay.
- Supports high refresh rates of 144 Hz and 165 Hz and a rapid response time of 1 ms in MPRT mode*.
- Dell Premium Panel Exchange for peace of mind.
- Optimize eye comfort with a flicker-free screen and ComfortView feature which minimizes blue light emission.

The possible long-term effects of blue-light emission from the monitor may cause damage to the eyes, including eye fatigue, digital eye strain, and so on. The ComfortView feature is designed to reduce the amount of blue-light emitted from the monitor to optimize eye comfort.
* 1 ms is achievable in the MPRT mode and reduces visible motion blur and increases image responsiveness. However, this may introduce some slight and noticeable visual artifacts into the image. As every system setup and every gamer's needs are different, we recommend that users experiment with the different modes to find the setting that is right for them.
Identifying parts and controls
Front view

| Label | Description | Use |
| 1 | Power-status light | Solid white: The monitor is turned on and functioning correctly. Blinking white: The monitor is in Standby mode. |
Back view

| Label | Description | Use |
| 1 | VESA mounting holes (100 mm x 100 mm-behind attached VESA cover) | Wall mount the monitor using a VESAcompatible wall-mounting kit (100 mm x 100 mm). |
| 2 | Regulatory label | Lists the regulatory approvals. |
| 3 | Stand-release button | Releases stand from the monitor. |
| 4 | Joystick | Use it to control the OSD menu. |
| 5 | Function buttons | Use the function buttons to adjust items in the OSD menu. For more information, see Operating the monitor. |
| 6 | Barcode, serial number, and Service Tag label | Refer to this label if you need to contact Dell for technical support. The Service Tag is a unique alphanumeric identifier that enables Dell service technicians to identify the hardware components in your computer and access warranty information. |
| 7 | Cable-management slot | Organizes the cables when the cables are routed through the slot. |
Bottom view

| Label | Description | Use |
| 1 | Power port | Connect the power cable (shipped with your monitor). |
| 2 | Security-lock slot | Secures monitor with security cable lock (sold separately). |
| 3 | Stand lock | Lock the stand to the monitor using a M3 x 6 mm screw (screw not included). |
| 4 | HDMI port (HDMI 1) | Connect the HDMI cable (shipped with your monitor). |
| 5 | HDMI port (HDMI 2) | Connect the HDMI cable (shipped with your monitor). |
| 6 | DisplayPort | Connect the DisplayPort (DP) cable. |
| 7 | Headphone out port | Connect the headphones to the computer. Increasing the audio output beyond 50% on the volume control or equalizer may increase the output voltage on the headphones thereby increasing the sound pressure levels. |
| 8 | Downlights | The downlights are selected to on or off in the personalize menu. The factory setting is on, so the downlights are active if the power cable is connected (see Downlight). NOTE: On monitors that are manufactured from August 2021, the downlights can be turned on or off only using the OSD menu. |
Monitor specifications
| Screen type | Active matrix - TFT LCD |
| Panel type | Vertical Alignment (VA) |
| Aspect ratio | 16:9 |
| Viewable image dimensions | |
| Diagonal | 684.70 mm (27 in.) |
| Active area | |
| Horizontal | 596.73 mm (23.49 in.) |
| Vertical | 335.66 mm (13.21 in.) |
| Area | 200301.7 mm2 (310.30 in.2) |
| Pixel pitch | 0.2331 mm x 0.2331 mm |
| Pixel Per Inch (PPI) | 108.79 |
| Viewing angle | |
| Horizontal | 178° (typical) |
| Vertical | 178° (typical) |
| Brightness | 350 cd/m² (typical) |
| Contrast ratio | 3000 to 1 (typical) |
| Curvature | Curvature 1500R |
| Display screen coating | Anti-glare treatment of the front polarizer, 3H hard coating |
| Backlight | LED edge-lit system |
| Response time (Gray to Gray) | 6 ms (Fast mode) 4 ms (SuperFast mode) 2 ms (Extreme mode) 1 ms (MPRT mode) NOTE: In Extreme mode, slight artifacts may be encountered due to overdriving. Use Super Fast/Fast mode for optimal front of screen experience and game play. |
| Color depth | 16.7 million colors |
| Color Gamut | sRGB 99% (typical) |
| Connectivity |
|
| Border width (edge of monitor to active area) | |
| Top | 7.68 mm |
| Left/Right | 7.73 mm |
| Bottom | 20.94 mm |
| Adjustability | |
| Height adjustable stand | 100 mm |
| Tilt | -5° to 21° |
| Cable management | Yes |
| Dell Display Manager (DDM) Compatibility | Easy Arrange and other key features |
| Security | Security lock slot (cable lock sold separately) |
Resolution specifications
| Resolution specifications | HDMI | DisplayPort |
| Maximum preset resolution | 2560 x 1440 at 144 Hz | 2560 x 1440 at 165 Hz |
| Horizontal scan range | 30 kHz to 230 kHz | 30 kHz to 250 kHz |
| Vertical scan range | 48 Hz to 144 Hz | 48 Hz to 165 Hz |
| Video display capabilities (HDMI & DisplayPort alternate mode) | 480p@60Hz, 576p@50Hz, 720p@50Hz, 720p@60Hz, 1080p@50Hz, 1080p@60Hz, 1080p@120Hz | |
Preset display modes
| Display mode | Horizontal frequency (kHz) | Vertical frequency (Hz) | Pixel clock (MHz) | Sync polarity (Horizontal/ Vertical) |
| VGA 720 x 400 | 31.47 | 70.08 | 28.32 | -/+ |
| VGA 640 x 480 | 31.47 | 59.94 | 25.18 | -/- |
| VESA 640 x 480 | 37.50 | 75 | 31.50 | -/- |
| VESA 800 x 600 | 37.88 | 60.32 | 40 | +/+ |
| VESA 800 x 600 | 46.88 | 75 | 49.50 | +/+ |
| VESA 1024 x 768 | 48.36 | 60 | 65 | -/- |
| VESA 1024 x 768 | 60.02 | 75.03 | 78.75 | +/+ |
| MAC 1152 x 864 | 67.50 | 75 | 108 | +/+ |
| CVT 1280 x 800 | 49.70 | 59.81 | 83.50 | +/+ |
| VESA 1280 x 1024 | 64 | 60.02 | 108 | +/+ |
| VESA 1280 x 1024 | 80 | 75.02 | 135 | +/+ |
| VESA 1600x 1200 | 75 | 60 | 175.50 | +/+ |
| VEST 1680 x 1050 | 65.29 | 59.95 | 146.25 | +/+ |
| CVT 1920 x 1080 | 67.50 | 60 | 148.50 | +/+ |
| CEA 1920 x 1080 | 135 | 120 | 297 | +/+ |
| VEST 1920 x 1200 | 74.04 | 59.89 | 154 | +/+ |
| CVT 2560 x 1440 | 88.79 | 59.95 | 241.50 | +/+ |
| CVT 2560 x 1440 | 183 | 120 | 497.75 | +/+ |
| CVT 2560 x 1440 | 222.06 | 143.91 | 592 | +/+ |
| CVT 2560 x 1440 | 244.32 | 165 | 645 | +/+ |
Electrical specifications
| Video input signals |
|
| Input voltage/frequency/current | 100-240 VAC / 50 or 60 Hz ± 3 Hz / 1.50 A (maximum) |
| In-rush current | 120 V: 30 A (Max.) 240 V: 60 A (Max.) |
| Power consumption | 0.20 W (Off mode)[1] 0.21 W (Standby mode)1 25.3 W (On mode)1 56 W (Max.)[2] 20.97 W (Pon)[3] 65.55 kWh (TEC)3 |
- As defined in EU 2019/2021 and EU 2019/2013.
- Max brightness and contrast setting.
- Pon: Power consumption of On mode measured with reference to Energy Star test on method.
TEC: Total energy consumption in kWh measured with reference to Energy Star test method.
Physical characteristics
| Connector type |
|
| Signal-cable type |
|
| Dimensions (with stand): | |
| Height (extended) | 493.21 mm (19.42 in.) |
| Height (compressed) | 393.21 mm (15.48 in.) |
| Width | 608.38 mm (23.95 in.) |
| Depth | 190.37 mm (7.49 in.) |
| Dimensions (without stand) | |
| Height | 364.14 mm (14.34 in.) |
| Width | 608.38 mm (23.95 in.) |
| Depth | 96.28 mm (3.79 in.) |
| Stand dimensions: | |
| Height (extended) | 386 mm (15.20 in.) |
| Height (compressed) | 337 mm (13.27 in.) |
| Width | 230.25 mm (9.06 in.) |
| Depth | 190.37 mm (7.49 in.) |
| Weight | |
| Weight with packaging | 9.12 kg (20.10 lb) |
| Weight with stand assembly and cables | 6.17 kg (13.59 lb) |
| Weight without stand assembly (For wall mount or VESA mount considerations - no cables) | 4.24 kg (9.35 lb) |
| Weight of stand assembly | 1.59 kg (3.51 lb) |
Environmental characteristics
| Compliant Standards | |
| |
| Temperature | |
| Operating | 0°C to 40°C (32°F to 104°F) |
| Non-operating | -20°C to 60°C (-4°F to 140°F) |
| Humidity | |
| Operating | 10% to 80% (non-condensing) |
| Non-operating | 5% to 90% (non-condensing) |
| Altitude | |
| Operating | 5,000 m (16,404 ft) (maximum) |
| Non-operating | 12,192 m (40,000 ft) (maximum) |
| Thermal dissipation | 191.08 BTU/hour (maximum) 86.33 BTU/hour (On mode) |
Pin assignments
DisplayPort

| Pin number | 20-pin side of the connected signal cable | Pin number | 20-pin side of the connected signal cable |
| 1 | ML3 (n) | 11 | GND |
| 2 | GND | 12 | ML0 (p) |
| 3 | ML3 (p) | 13 | CONFIG1 |
| 4 | ML2 (n) | 14 | CONFIG2 |
| 5 | GND | 15 | AUX CH (p) |
| 6 | ML2 (p) | 16 | GND |
| 7 | ML1 (n) | 17 | AUX CH (n) |
| 8 | GND | 18 | Hot Plug Detect |
| 9 | ML1 (p) | 19 | Return |
| 10 | ML0 (n) | 20 | DP_PWR |
HDMI port

| Pin number | 19-pin side of the connected signal cable | Pin number | 19-pin side of the connected signal cable |
| 1 | TMDS DATA 2+ | 11 | TMDS CLOCK SHIELD |
| 2 | TMDS DATA 2 SHIELD | 12 | TMDS CLOCK- |
| 3 | TMDS DATA 2- | 13 | CEC |
| 4 | TMDS DATA 1+ | 14 | Reserved (N.C. on device) |
| 5 | TMDS DATA 1 SHIELD | 15 | DDC CLOCK (SCL) |
| 6 | TMDS DATA 1- | 16 | DDC DATA (SDA) |
| 7 | TMDS DATA 0+ | 17 | DDC/CEC Ground |
| 8 | TMDS DATA 0 SHIELD | 18 | +5 V POWER |
| 9 | TMDS DATA 0- | 19 | HOT PLUG DETECT |
| 10 | TMDS CLOCK+ |
Plug-and-Play
You can install the monitor in any Plug-and-Play-compatible system. The monitor automatically provides the computer system with its Extended Display Identification Data (EDID) using Display Data Channel (DDC) protocols so the computer can configure itself and optimize the monitor settings. Most monitor installations are automatic; you can select different settings if desired. For more information about changing the monitor settings, see Operating the monitor.
LCD monitor quality and pixel policy
During the LCD monitor manufacturing process, it is not uncommon for one or more pixels to become fixed in an unchanging state which are hard to see and do not affect the display quality or usability. For more information on LCD Monitor Pixel Policy, see Dell support site at:https://www.dell.com/pixelguidelines.
Ergonomics
Improper or prolonged usage of keyboard may result in injury.
Viewing the monitor screen for extended periods of time may result in eye strain.
For comfort and efficiency, observe the following guidelines when setting up and using your computer workstation:
- Position your computer so that the monitor and keyboard are directly in front of you as you work. Special shelves are commercially available to help you correctly position your keyboard.
- To reduce the risk of eye strain and neck/arm/back/shoulder pain from using the monitor for long periods of time, we suggest you to:
- Set the screen about 20 to 28 in. (50-70 cm) from your eyes.
- Blink frequently to moisten or rewet your eyes when working with the monitor.
- Take regular and frequent breaks for 20 minutes every two hours.
- Look away from your monitor and gaze at a distant object at 20 feet away for at least 20 seconds during the breaks.
- Perform stretches to relieve tension in the neck/arm/back/shoulders during the breaks.
- Make sure that the monitor screen is at eye level or slightly lower when you are sitting in front of the monitor.
- Adjust the tilt of the monitor, its contrast, and brightness settings.
- Adjust the ambient lighting around you (such as overhead lights, desk lamps, and the curtains or blinds on nearby windows) to minimize reflections and glare on the monitor screen.
- Use a chair that provides good lower-back support.
- Keep your forearms horizontal with your wrists in a neutral, comfortable position while using the keyboard or mouse.
- Always leave space to rest your hands while using the keyboard or mouse.
- Let your upper arms rest naturally on both sides.
- Ensure that your feet are resting flat on the floor.
- When sitting, make sure that the weight of your legs is on your feet and not on the front portion of your seat. Adjust your chair's height or use a footrest if necessary to maintain a proper posture.
- Vary your work activities. Try to organize your work so that you do not have to sit and work for extended periods of time. Try to stand or get up and walk around at regular intervals.
- Keep the area under your desk clear of obstructions and cables or power cords that may interfere with comfortable seating or present a potential trip hazard.


Handling and moving the monitor
To ensure the monitor is handled safely when lifting or moving it, follow the guidelines mentioned below:
- Before moving or lifting the monitor, turn off your computer and the monitor.
- Disconnect all cables from the monitor.
- Place the monitor in the original box with the original packing materials.
- Hold the bottom edge and the side of the monitor firmly without applying excessive pressure when lifting or moving the monitor.

- When lifting or moving the monitor, ensure the screen is facing away from you and do not press on the display area to avoid any scratches or damage.

- When transporting the monitor, avoid any sudden shock or vibration to it.


- When lifting or moving the monitor, do not turn the monitor upside down while holding the stand base or stand riser. This may result in accidental damage to the monitor or cause personal injury.


Maintenance guidelines
Cleaning the monitor

Before cleaning the monitor, unplug the monitor power cable from the electrical outlet.
Read and follow the Safety Instructions before cleaning the monitor.
For best practices, follow these instructions in the list below while unpacking, cleaning, or handling your monitor:
- To clean your anti-static screen, lightly dampen a soft, clean cloth with water. If possible, use a special screen-cleaning tissue or solution suitable for the antistatic coating. Do not use benzene, thinner, ammonia, abrasive cleaners, or compressed air.
- Use a lightly-dampened, soft cloth to clean the monitor. Avoid using detergent of any kind as some detergents leave a milky film on the monitor.
- If you notice white powder when you unpack your monitor, wipe it off with a cloth.
- Handle your monitor with care as a darker-colored monitor may get scratched and show white scuff marks more than a lighter- colored monitor.
- To help maintain the best image quality on your monitor, use a dynamically changing screen saver and turn off your monitor when not in use.
Setting up the monitor
Connecting the stand
NOTE: The stand riser and stand base are detached when the monitor is shipped from the factory.
NOTE: The following instructions are applicable only for the stand that was shipped with your monitor. If you are connecting a stand that you purchased from any other source, follow the set up instructions that were included with the stand.
To attach the monitor stand:

- Connect the stand base to the stand riser.
- Open the screw handle on the stand base and tighten the screw to secure the stand riser to the stand base.
- Close the screw handle.
- Open the protective cover on the monitor to access the VESA slot on the monitor.

- Slide the tabs on the stand riser into the slots on the display back cover and press down the stand assembly to snap it into place.

- Hold the stand riser and lift the monitor carefully, then place it on a flat surface.
NOTE: Hold the stand riser firmly when lifting the monitor to avoid any accidental damage.

- Lift the protective cover from the monitor.


Using the tilt and vertical extension
NOTE: The following instructions are applicable only for the stand that was shipped with your monitor. If you are connecting a stand that you purchased from any other source, follow the set up instructions that were included with the stand.
With the stand attached to the monitor, you can tilt the monitor for the most comfortable viewing angle.

NOTE: The stand is detached when the monitor is shipped from the factory.
Connecting the monitor
Before you begin any of the procedures in this section, follow the Safety instructions.
NOTE: Do not connect all cables to the computer at the same time. It is recommend to route the cables through the cable-management slot before you connect them to the monitor.
To connect your monitor to the computer:
- Turn off your computer.
- Connect the DisplayPort/HDMI cable from the monitor to your computer.
- Connect the power cable from the monitor to the wall outlet.
- Turn on your monitor.
- Select the correct input source from the OSD menu.
- Turn on your computer.
Connecting the HDMI cable

Connecting the DisplayPort cable

Organizing the cables

After attaching all necessary cables to your monitor and computer, (see Connecting your monitor for cable attachment) organize all cables as shown above.
Securing the monitor using Kensington lock (optional)
The security lock slot is located at the bottom of the monitor (see Security lock slot).
For more information on using the Kensington lock (purchased separately), see the documentation that is shipped with the lock.
Secure your monitor to a table using the Kensington security lock.
")
NOTE: The image is for the purpose of illustration only. Appearance of the lock may vary.
Removing the monitor stand
To prevent scratches on the LCD screen when removing the stand, ensure that the monitor is placed on a soft, clean surface.
NOTE: The following instructions are applicable only for the stand that was shipped with your monitor. If you are connecting a stand that you purchased from any other source, follow the set up instructions that were included with the stand.
To remove the stand:

- Place the monitor on a soft cloth or cushion.
- Press and hold the stand-release button.
- Lift the stand up and away from the monitor.
Wall mounting (Optional)
")
NOTE: Use M4 x 10 mm screws to connect the monitor to the wallmounting kit.
Refer to the instructions that come with the VESA-compatible wall mounting kit.
- Place the monitor on a soft cloth or cushion on a stable, flat table.
- Remove the stand. SeeRemoving the stand for details.
- Use a Phillips crosshead screwdriver to remove the four screws securing the plastic cover.
- Attach the mounting bracket from the wall mounting kit to the monitor.
- Mount the monitor on the wall as instructed in the documentation that shipped with the wall-mounting kit.
NOTE: For use only with UL or CSA or GS-listed wall-mounting kit with minimum weight/load bearing capacity of 16.96 kg (37.4 lb).
Operating the monitor
Turning on the monitor
Press the ![]() button to turn on the monitor.
button to turn on the monitor.

Using the joystick control
Use the joystick control on the rear of the monitor to make OSD adjustments.

- Press the joystick button to launch the OSD main menu.
- Move the joystick up/down/left/right to toggle between options.
- Press the joystick button again to confirm the settings and exit.
| Joystick | Description |
 |
|
 |
|
 |
|
Using the rear-panel controls
Use the control buttons on the rear of the monitor to adjust the display settings. As you use these buttons to adjust the settings, an OSD shows the numeric values of each feature as they change.

The following table describes the rear panel buttons:
| Rear-panel button | Description | |
| 1 |  Menu | Use this menu button to launch the on-screen display (OSD) and select the OSD menu. See Accessing the menu system. |
| 2 |  Exit | Use this button to go back to the main menu or exit the OSD main menu. |
| 3 |  Shortcut key: Preset Modes | Use this button to choose from a list of preset color modes. |
| 4 |  Shortcut key: Dark Stabilizer | Use this button to directly access the Dark Stabilizer adjustment sliders. |
| 5 |  Shortcut key: Brightness/Contrast | Use this button to directly access the Brightness/ Contrast adjustment sliders. |
When you press any of these buttons, the OSD Status Bar appears to let you know the current settings of some OSD functions.

Using the On-Screen Display (OSD) menu
Accessing the menu system
| Icon | Menu and submenus | Description |
 | Game | Use this menu to personalize your visual gameplay experience.  |
| Preset Modes | Enables you to choose from a list of preset color modes. 
| |
| ||
| Game Enhance Mode | Adjusts Game Enhance Mode to Off, Timer, Frame Rate or Display Alignment.
| |
| AMD FreeSync Premium | Enables you to set the AMD FreeSync Premium On or Off. | |
| Response Time | Enables you to set the Response Time to Fast, Super Fast, Extreme or MPRT. NOTE: To turn on MPRT, source refresh rate need to be 120 Hz or higher. NOTE: When MPRT is turned on, FreeSync will be turned off. MPRT and FreeSync feature cannot be both turned on at the same time. | |
| Dark Stabilizer | Improves the visibility in the dark gaming scenarios. The higher the value (between 0 to 3), the better visibility in dark area of the display image. | |
| Hue | Shifts the color of the video image to green or purple. This is used to adjust the desired flesh-tone color. Use the joystick to adjust the hue from 0 to 100. Move the joystick up to increase the green shade of the video image. Move the joystick down to increase the purple shade of the video image. NOTE: Hue adjustment is available only for FPS, RTS, RPG, SPORTS mode. | |
| Saturation | Adjusts the color saturation of the video image. Use the joystick to adjust the saturation from 0 to 100. Move the joystick up to increase the colorful appearance of the video image. Move the joystick down to increase the monochrome appearance of the video image. NOTE: Saturation adjustment is available only for FPS, RTS, RPG, SPORTS mode. | |
| Reset Game | Resets your monitor's Game settings to the factory defaults. | |
 | Brightness/ Contrast | Use this menu to activate Brightness/Contrast adjustment.  |
| Brightness | Brightness adjusts the luminance of the backlight (minimum 0; maximum 100). Move the joystick up to increase brightness. Move the joystick down to decrease brightness. | |
| Contrast | Adjust the Brightness first, and then adjust Contrast only if further adjustment is necessary. Move the joystick up to increase contrast and Move the joystick down to decrease contrast (between 0 and 100). The Contrast function adjusts the degree of difference between darkness and lightness on the monitor screen. | |
 | Input Source | Use the Input Source menu to select between different video inputs that are connected to your monitor.  |
| DP | Select DP input when you are using the DP (DisplayPort) connector. Press the joystick button to confirm the selection. | |
| HDMI 1 HDMI 2 | Select HDMI 1 or HDMI 2 input when you are using a HDMI connector. Press the joystick button to confirm the selection. | |
| Auto Select | Turn on the function to allow the monitor to automatically scan for available input sources. Press the joystick button to confirm the selection. | |
| Reset Input Source | Resets your monitor's Input Source settings to the factory defaults. | |
 | Display | Use the Display menu to adjust the image. |
| Aspect Ratio | Adjusts the image ratio to 16:9, Auto Resize, 4:3 or 1:1. | |
| Input Color Format | Enables you to set the video input mode to:
| |
| Sharpness | Makes the image look sharper or softer. Move the joystick up and down to adjust the sharpness from '0' to '100'. | |
| Reset Display | Restores the display settings to factory defaults. | |
 | Audio |  |
| Volume | Enables you to set the volume level of headphone output. Use the joystick to adjust the volume level from 0 to 100. | |
| Reset Audio | Restores the audio settings to factory defaults. | |
 | Menu | Select this option to adjust the settings of the OSD, such as the languages of the OSD, the amount of time the menu remains on screen, and so on.  |
| Language | Sets the OSD display to one of eight languages. (English, Spanish, French, German, Brazilian Portuguese, Russian, Simplified Chinese, or Japanese). | |
| Transparency | Select this option to change the menu transparency by moving the joystick up or down (min. 0/max. 100). | |
| Timer | OSD Hold Time: Sets the length of time the OSD remains active after you press a button. Move the joystick to adjust the slider in 1-second increments, from 5 to 60 seconds. | |
| Reset Menu | Restores the menu settings to factory defaults. | |
 | Personalize |  |
| Shortcut key 1 | Select from Preset Modes, Game Enhance Mode, AMD FreeSync Premium, Dark Stabilizer, Brightness/ Contrast, Input Source, Aspect Ratio, Volume set as shortcut key. | |
| Shortcut key 2 | ||
| Shortcut key 3 | ||
| Power Button LED | Enables you to set the state of the power light to save energy. | |
| Downlight | The factory default setting of the downlights are on, and you can turn them on or off in the personalize menu. When the downlights are on, they light up blue. To turn off the touch sensor, select Off. NOTE: On monitors that are manufactured from August 2021, the downlights can be turned on or off only using the OSD menu. | |
| Reset Personalization | Restores shortcut keys to factory defaults. | |
 | Others | Select this option to adjust the OSD settings such as the DDC/CI, LCD conditioning, and so on. |
| Display Info | Displays the monitor's current settings. | |
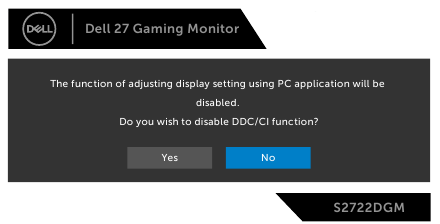
| DDC/CI | DDC/CI (Display Data Channel/Command Interface) allows you to adjust the monitor settings using software on your computer. Select Off to turn off this feature. Enable this feature for best user experience and optimum performance of your monitor.  | |
| LCD Conditioning | Helps reduce minor cases of image retention. Depending on the degree of image retention, the program may take some time to run. Select On to start the process.  | |
| Firmware | Displays the firmware version of your monitor. | |
| Service Tag | Displays the Service Tag. The Service Tag is a unique alphanumeric identifier that allows Dell to identify the product specifications and access warranty information. NOTE: The Service Tag is also printed on a label located at the back of the cover. | |
| Reset Others | Restores other settings, such as DDC/CI, to factory defaults. | |
| Factory Reset | Restores all preset values to the factory default settings. |
OSD warning messages
When the monitor does not support a particular resolution mode, the following message is displayed:
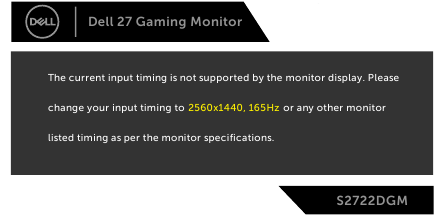
This means that the monitor cannot synchronize with the signal that it is receiving from the computer. See Monitor specifications for the Horizontal and Vertical frequency ranges addressable by this monitor. Recommended mode is 2560 x 1440. Before the DDC/CI function is disabled, the following message is displayed:
When MPRT attempts to work but the frame rate is less that 120 Hz, the following message is displayed:

When the monitor enters the Standby mode, the following message is displayed:
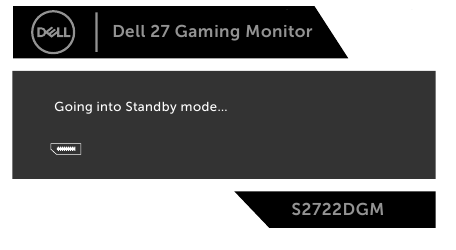
Activate the computer and wake up the monitor to gain access to the OSD.
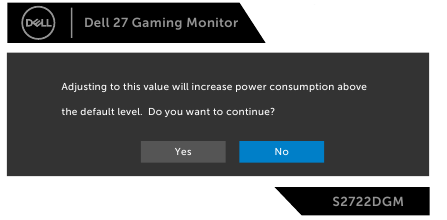
If you adjust the Brightness level above the default level(default level is 75%), the following message is displayed:
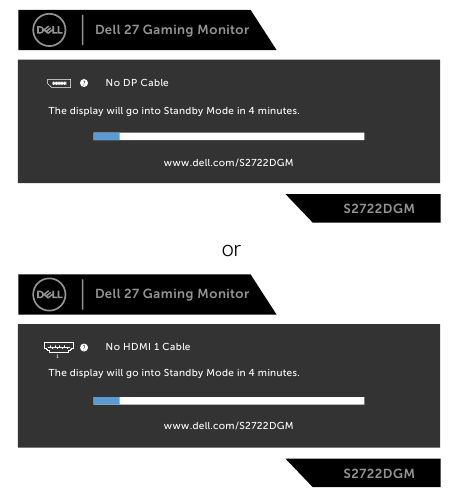
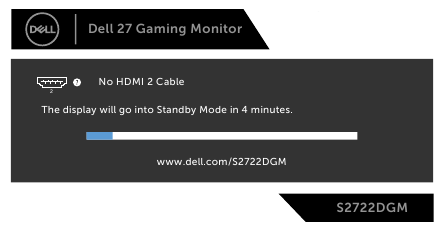
If you press any button other than the power button, the following messages is displayed depending on the selected input:
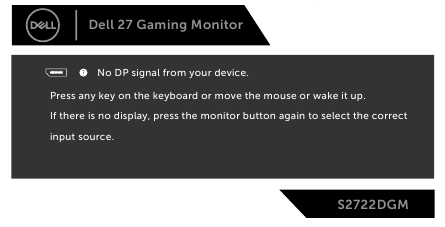
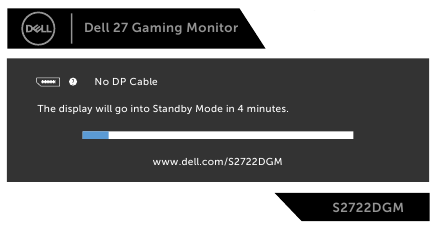
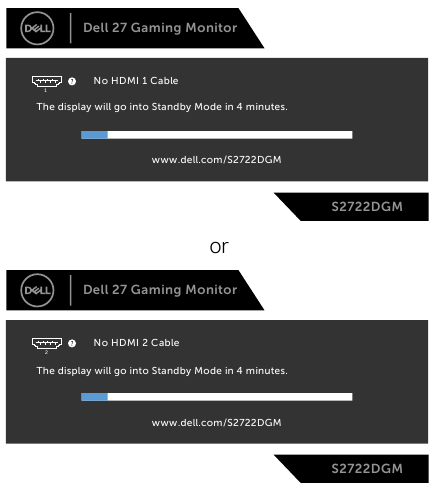
If either DisplayPort, HDMI 1 and HDMI 2 input is selected and the corresponding cable is not connected, a floating dialog box as shown below appears.
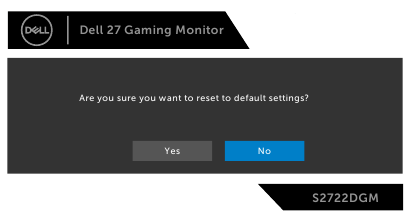
When you select OSD items of Factory Reset in Other feature, the following message is displayed:
See Troubleshooting for more information.
Locking the rear-panel control buttons
You can lock the rear-panel control buttons to prevent access to the OSD menu and/or power button.

To lock the button(s):
- Press and holdButton 5 for four seconds, a menu appears on the screen.
- Select one of the following options:
- Menu Buttons: Choose this option to lock all OSD menu buttons except the Power button.
- Power Button: Choose this option to lock only the Power button.
- Menu + Power Buttons: Choose this option to lock all the buttons on the rear-panel control.
To unlock the button(s), press and hold Button 5 for four seconds until a menu appears on the screen. Select the Unlock icon ![]() to unlock the button(s).
to unlock the button(s).
Setting the maximum resolution
To set the maximum resolution for the monitor:
In Windows 7, Windows 8 or Windows 8.1:
- For Windows 8 or Windows 8.1 only, select the Desktop tile to switch to classic desktop. For Windows Vista and Windows 7, skip this step.
- Right-click on the desktop and clickScreen Resolution.
- Click the Dropdown list of theScreen Resolution and select 2560 x 1440.
- ClickOK.
In Windows 10:
- Right-click on the desktop and clickDisplay Settings.
- ClickAdvanced display settings.
- Click the dropdown list ofResolution and select 2560 x 1440.
- ClickApply.
If you do not see 2560 x 1440 as an option, you may need to update your graphics driver. Depending on your computer, complete one of the following procedures:
If you have a Dell desktop or portable computer:
- Go to https://www.dell.com/support, enter your service tag, and download the latest driver for your graphics card.
If you are using a non-Dell computer:
- Go to your computer manufacturer's support website and download the latest graphic drivers.
- Go to your graphics card manufacturer's website and download the latest graphic drivers.
Troubleshooting
Before you begin any of the procedures in this section, follow the Safety instructions.
Self-test
Your monitor provides a self-test feature that allows you to check whether your monitor is functioning properly. If your monitor and computer are properly connected but the monitor screen remains dark, run the monitor self-test by performing the following steps:
- Turn off both your computer and the monitor.
- Unplug the video cable from the back of the computer. To ensure proper Self-Test operation, remove all digital and the analog cables from the back of computer.
- Turn on the monitor.
The floating dialog box should appear on-screen (against a black background), if the monitor cannot sense a video signal and is working correctly. While in self-test mode, the power LED remains white. Also, depending upon the selected input, one of the dialogs shown below will continuously scroll through the screen.
![]()
![]()
- This box also appears during normal system operation if the video cable becomes disconnected or damaged.
- Turn off your monitor and reconnect the video cable; then turn on both your computer and the monitor.
If your monitor screen remains blank after you use the previous procedure, check your video controller and computer, because your monitor is functioning properly.
Built-in diagnostics
Your monitor has a built-in diagnostic tool that helps you determine if the screen abnormality you are experiencing is an inherent problem with your monitor, or with your computer and video card.

To run the built-in diagnostics:
- Ensure that the screen is clean (no dust particles on the surface of the screen).
- Unplug the video cable(s) from the back of the computer or monitor. The monitor then goes into the self-test mode.
- Press and hold Button 5 for 4 seconds, system will pop OSD message, select
![]() and press Button 1. A gray screen appears.
and press Button 1. A gray screen appears. - Carefully inspect the screen for abnormalities.
- Move joystick (Button 1) to right. The color of the screen changes to red.
- Inspect the display for any abnormalities.
- Repeat steps 5 and 6 to inspect the display in green, blue, black, white, and text screens.
The test is complete when the text screen appears. To exit, press Button 5 again.
If you do not detect any screen abnormalities upon using the built-in diagnostic tool, the monitor is functioning properly. Check the video card and computer.
Common problems
The following table contains general information about common monitor problems you might encounter and the possible solutions:
| Common Symptoms | What You Experience | Possible Solutions |
No Video/Power LED off | No picture |
|
No Video/Power LED on | No picture or no brightness |
|
Missing Pixels | LCD screen has spots |
|
Stuck-on Pixels | LCD screen has bright spots |
|
Brightness Problems | Picture too dim or too bright |
|
Safety Related Issues | Visible signs of smoke or sparks |
|
Intermittent Problems | Monitor malfunctions on & off |
|
Missing Color | Picture missing color |
|
Wrong Color | Picture color not good |
|
| Image retention from a static image left on the monitor for a long period of time | Faint shadow from the static image displayed appears on the screen |
|
Product specific problems
| Problem | What you experience | Possible solutions |
Screen image is too small | Image is centered on screen, but does not fill entire viewing area |
|
| Cannot adjust the monitor with the buttons on the front panel | OSD does not appear on the screen |
|
| No Input Signal when user controls are pressed | No picture, the LED light is white |
|
The picture does not fill the entire screen | The picture cannot fill the height or width of the screen |
|
Contacting Dell
For customers in the United States, call 800-WWW-DELL (800-999-3355).
NOTE: If you do not have an active Internet connection, you can find contact information on your purchase invoice, packing slip, bill, or Dell product catalog.
Dell provides several online and telephone-based support and service options. Availability varies by country and product, and some services may not be available in your area.
To get online monitor support content:
See https://www.dell.com/support/monitors.
To contact Dell for sales, technical support, or customer service issues:
- Go to https://www.dell.com/support.
- Verify your country or region in the Choose A Country/Region drop-down menu at the bottom-right corner of the page.
- Click Contact Us next to the country dropdown.
- Select the appropriate service or support link based on your need.
- Choose the method of contacting Dell that is convenient for you.
Safety instructions
NOTE:
A NOTE indicates important information that helps you make better use of your computer.
A CAUTION indicates potential damage to hardware or loss of data if instructions are not followed.
A WARNING indicates a potential for property damage, personal injury, or death.
Use of controls, adjustments, or procedures other than those specified in this documentation may result in exposure to shock, electrical hazards, and/or mechanical hazards.
- Place the monitor on a solid surface and handle it carefully. The screen is fragile and can be damaged if dropped or hit sharply.
- Always be sure that your monitor is electrically rated to operate with the AC power available in your location.
- Keep the monitor in room temperature. Excessive cold or hot conditions can have an adverse effect on the liquid crystal of the display.
- Do not subject the monitor to severe vibration or high impact conditions. For example, do not place the monitor inside a car trunk.
- Unplug the monitor when it is going to be left unused for an extended period of time.
- To avoid electric shock, do not attempt to remove any cover or touch the inside of the monitor.
For information on safety instructions, see the Safety, Environmental, and Regulatory Information (SERI) document.
Documents / ResourcesDownload manual
Here you can download full pdf version of manual, it may contain additional safety instructions, warranty information, FCC rules, etc.
Advertisement


Need help?
Do you have a question about the S2722DGM and is the answer not in the manual?
Questions and answers