Siemens iQ700 EX NY Series, iQ700 EX677NYV6E - Induction Hob Manual
- Instruction manual (32 pages) ,
- Information for use (28 pages) ,
- Information for use (28 pages)
Advertisement
- 1 Avoiding material damage
- 2 Environmental protection and saving energy
- 3 Suitable cookware
- 4 Familiarising yourself with your appliance
- 5 Before using for the first time
- 6 Basic operation
- 7 flexInduction
- 8 flexInduction Plus
- 9 powerMove Plus
- 10 Time-setting options
- 11 powerBoost
- 12 shortBoost
- 13 Keep-warm function
- 14 flexMotion
- 15 fryingSensor
- 16 Childproof lock
- 17 Wipe protection
- 18 Individual safety switch-off
- 19 Basic settings
- 20 Cookware test
- 21 Home Connect
- 22 Hob-based hood control
- 23 Cleaning and servicing
- 24 Troubleshooting
-
25
Test dishes
- 25.1 Melting the chocolate coating
- 25.2 Heating and keeping lentil stew warm
- 25.3 Heating and keeping lentil stew warm
- 25.4 Béchamel sauce
- 25.5 Cooking rice pudding with the lid on
- 25.6 Cooking rice pudding without a lid
- 25.7 Cooking rice
- 25.8 Roasting a pork loin
- 25.9 Preparing crêpes
- 25.10 Deep-fat frying frozen chips
- 26 Safety
- 27 Documents / Resources
Avoiding material damage
This is where you can find the most common causes of damage and tips on how to avoid them.
| Damage | Cause | Measure |
| Stains | Unsupervised cooking process. | Monitor the cooking process. |
| Stains, blisters | Spilled food, especially food with a high sugar content. | Remove immediately with a glass scraper. |
| Stains, blisters or fractures in the glass | Defective cookware, cookware with melted enamel or cookware with copper or aluminium base. | Use suitable cookware that is in a good condition. |
| Stains, discolouration | Unsuitable cleaning methods. | Only use cleaning agents that are suitable for glass ceramic, and only clean the hob when it is cold. |
| Blisters or fractures in the glass | Knocks or falling cookware, cooking accessories or other hard or pointed objects. | When cooking, do not hit the glass or let objects fall onto the hob. |
| Scratches, discolouration | Rough cookware bases or moving the cookware on the hob. | Check the cookware. Lift the cookware when moving it. |
| Scratches | Salt, sugar or sand. | Do not use the hob as a work surface or storage space. |
| Damage to the appliance | Cooking with frozen cookware. | Never use frozen cookware. |
| Damage to the cookware or the appliance Glass damage | Cooking without contents. | Never place or heat empty cookware on a hot cooking zone. |
| Melted material on the hot cooking zone or hot pot lid on the glass. | Do not place greaseproof paper or aluminium foil nor plastic containers or pot lids on the hob. | |
| Overheating | Hot cookware on the control panel or on the frame. | Never place hot cookware on these areas. |
 ATTENTION
A fan is located on the underside of this hob.
- If a drawer is located on the underside of the hob, do not store any small or pointed objects, paper or tea towels in it. These objects may be sucked in and damage the fan or impair the cooling.
- There must be a clearance of at least 2 cm between the contents of the drawer and the fan entry point.
Environmental protection and saving energy
Disposing of packaging
The packaging materials are environmentally compatible and can be recycled.
- Sort the individual components by type and dispose of them separately.
Saving energy
If you follow these instructions, your appliance will use less energy.
Select the cooking zone to match the size of your pan. Centre the cookware on the hob.
Use cookware whose base diameter is the same diameter as the hotplate.
 Tip: Cookware manufacturers often give the upper diameter of the saucepan. It is often larger than the base diameter.
- Unsuitable cookware or incompletely covered cooking zones consume a lot of energy.
Cover saucepans with suitable lids. - Cooking without a lid consumes considerably more energy.
Lift lids as infrequently as possible.
- When you lift the lid, a lot of energy escapes.
Use a glass lid.
- You can see into the pan through a glass lid without having to lift it.
Use pots and pans with flat bases.
- Uneven bases increase energy consumption.
Use cookware that is suitable for the quantity of food.
- Large items of cookware containing little food need more energy to heat up.
Cook with only a little water.
- The more water that is contained in the cookware, the more energy is required to heat it up.
Turn down to a lower power level early on.
- If you use an ongoing power level that is too high, you will waste energy.
Product Information according (EU) 66/2014 can be found online on the product page for your appliance.
Suitable cookware
Cookware that is suitable for induction cooking must have a ferromagnetic base, i.e. it must be attracted by a magnet. The base must also match the size of the cooking zone. If cookware is not detected on a cooking zone, place this on the cooking zone with the next smallest diameter.
Size and characteristics of the cookware
To be able correctly detect the cookware, you must take the size and the material of the cookware into consideration. All cookware bases must be perfectly flat and smooth.
Use Cookware test to check whether the cookware is suitable. Refer to → "Cookware test" for more details.
| Cookware | Materials | Properties |
Recommended cookware | Stainless steel cookware in a sandwich design that distributes the heat well. | This cookware distributes the heat evenly, heats up quickly, and ensures that it can be detected easily. |
| Ferromagnetic cookware made of enamelled steel, cast iron or special induction cookware made of stainless steel. | This cookware distributes the heat evenly, heats up quickly, and ensures that it can be detected. | |
Suitable | The base is not fully ferromagnetic. | If the ferromagnetic area is smaller than the base of the cookware, only the area that is ferromagnetic heats up. As a result, the heat is not distributed evenly. |
 | Cookware bases that contain aluminium. | These cookware bases reduce the ferromagnetic area, which means that less power is emitted to the cookware. This cookware may not be sufficiently detected or may not be detected at all, and therefore does not heat sufficiently. |
| Not suitable | Cookware made from normal thin steel, glass, clay, copper or aluminium. |
Notes
- Do not use adapter plates between the hob and the cookware.
- Do not heat up empty cookware and do not use cookware with a thin base, as this may become very hot.
Familiarising yourself with your appliance
Cooking with induction
In comparison to conventional hobs, induction technology brings with it a series of changes and has a number of benefits such as time savings when cooking and frying, energy savings as well as greater ease of cleaning and care. It also offers improved heat control as the heat is generated directly in the cookware.
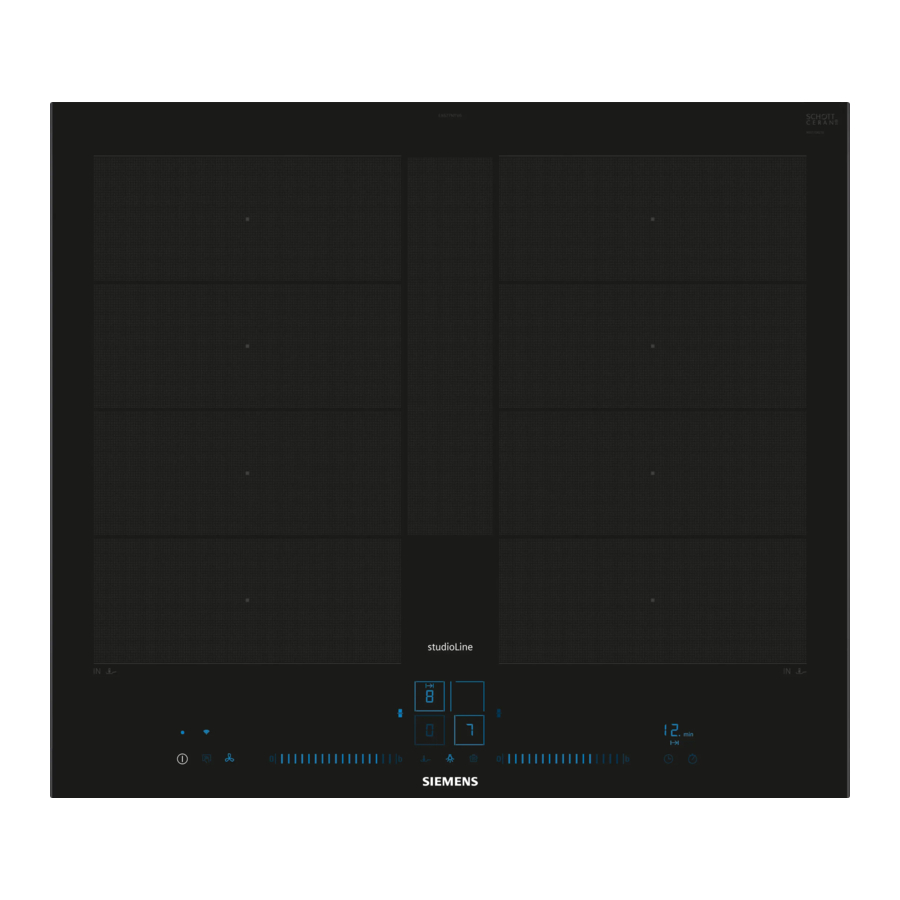
Control panel
Individual details, such as colour and shape, may differ from the figure.

Tip: Always keep the control panel clean and dry.
Note: Do not place any cookware near the displays or sensors. The electronics may overheat.
Selection sensors
When you switch on the hob, the symbols for the controls available at this time light up.

Depending on the status of the hob, the displays for the cooking zones and the various activated and available functions also light up.
Distribution of the cooking zones
The specified power has been measured with the standard pots, which are described in IEC/EN 60335-2-6. The power may vary depending on the size of the cookware or cookware material.

Cooking zone
Before you start cooking, check whether the size of the cookware fits the cooking zone that you want to use for cooking:
| Area | Cooking zone type |
 | Single-circuit cooking zone |
 | Flex Zone → "flexInduction". |
 | Extended FlexZone → "flexInduction Plus". |
Residual heat indicator
The hob has a residual heat indicator for each cooking zone. Do not touch the cooking zone if the residual heat indicator is lit.
| Display | Meaning |
 | The cooking zone is hot. |
 | The cooking zone is warm. |
Before using for the first time
Observe the following recommendations.
Initial cleaning
Remove any leftover packaging from the hob surface and wipe the surface with a damp cloth. You can find a list of recommended detergents on the official website siemens-home.bsh-group.com.
More information on care and cleaning. → "Cleaning and servicing" section.
Cooking with induction
In comparison to conventional hobs, induction technology brings with it a series of changes and has a number of benefits such as time savings when cooking and frying, energy savings as well as greater ease of cleaning and care. It also offers improved heat control as the heat is generated directly in the cookware.
Cookware
You can find a list of recommended cookware on the official website siemens-home.bsh-group.com. Further information on suitable cookware.
Setting Home Connect
When you first switch on the appliance, you are prompted to set up your home network. The ![]() symbol lights up for a few seconds on the display panel. To begin setting up the connection, touch the
symbol lights up for a few seconds on the display panel. To begin setting up the connection, touch the ![]() sensor and proceed in accordance with the information given in the section entitled
sensor and proceed in accordance with the information given in the section entitled
→ "Home Connect ". To exit initial set-up, touch any sensor.
Basic operation
Switching on the hob
- Touch
![]() .
.
The symbols for the cooking zones and the currently available functions light up.- The hob is ready for use.
reStart
- If you switch the appliance on within four seconds of switching it off, the hob operates with the settings that were previously set.
Switching the hob off
- Touch
![]() until the displays go out.
until the displays go out. - All cooking zones are switched off.
![warning]() Note: If all of the cooking zones are switched off for longer than 20 seconds, the hob is automatically switched off.
Note: If all of the cooking zones are switched off for longer than 20 seconds, the hob is automatically switched off.
- All cooking zones are switched off.
Setting the power level in the cooking zones
The cooking zone has 17 power levels, which are displayed from 1 to 9 with intermediate values. Select the best power level for the food and the planned cooking process.
- Touch
![]() for the required cooking zone.
for the required cooking zone. - The
![]() display lights up brighter.
display lights up brighter.
- The
- Select the required power level in the settings area.
- The power level has been set.
 for the required cooking zone.
  display lights up brighter.
 Note: If no cookware is placed on the cooking zone or the pot is not suitable, the selected power level flashes. After a certain period of time, the cooking zone switches itself off.
quickStart
- If you place cookware on the hob before you switch it on, the cookware is detected when you switch on and the corresponding cooking zone is selected automatically. Select the power level in the next 20 seconds, or the hob switches itself off.
Changing the power level and switching off the cooking zone
- Select the cooking zone.
- Select the required power level in the settings area or set it to
![]() .
. - The cooking zone's power level changes or the cooking zone switches itself off and the residual heat indicator appears.
Cooking tips
- When heating up puree, cream soups or thick sauces, stir occasionally.
- To preheat, set the power level 8-9.
- When cooking with the lid on, reduce the power level as soon as you see steam escaping. The cooking result is not affected by the steam escaping.
- After cooking, place a lid on the cookware until you serve the dish.
- To cook with the pressure cooker, observe the manufacturer's instructions.
- Do not cook food for too long, otherwise nutrients will be lost. The kitchen timer enables you to set the optimal cooking time.
- Ensure that the oil does not smoke.
- To brown the food, fry it in small portions, one after the other.
- Some items of cookware may reach high temperatures while the food is cooking. You should therefore use oven gloves.
- You can find recommendations for energy-efficient cooking under →"Saving energy".
Cooking recommendations


flexInduction
The flexible cooking zone allows you to position cookware of any shape or size any way you like. It consists of four inductors that work independently of each other. When the flexible cooking zone is in use, only the area that is covered by cookware is activated.
Positioning the cookware
The flexible cooking zone can be configured in two ways, depending on which cookware is used. In order to guarantee good thermal detection and heat distribution, we recommend positioning the cookware in the centre, as shown in the figures.
As a connected cooking zone
Recommended for cooking with just one item of cookware.
- Position the cookware depending on the size:
![]()
- Recommended oblong cookware
![]()


As two separate cooking zones
Recommended for cooking with two items of cookware.
You can use the front and rear zone independently of one another, and set a separate power level for each zone.


Do not place cookware in the middle between the right and left zones. The cooking zones are not activated correctly and you do not achieve a good cooking result.

Switching on flexInduction
- Place the cookware on the cooking zone.
- Select the cooking zone.
- The cooking zones split or connect automatically depending on the size and position of the cookware.
- The FlexZone is connected and
![]() lights up.
lights up.
Notes
- By touching
![]() , you can manually change the settings for the cooking zone.
, you can manually change the settings for the cooking zone. - You can change the default configuration of the flexible cooking zone. You can find out how to do this in the "Basic settings" section.
- If you move or lift the cookware from an active connected cooking zone, an automatic search starts. Each item of cookware that is found within the cooking zone during this search is heated at the previously selected power level.
flexInduction Plus
With the extended cooking zone, you can cook with larger cookware or position long cookware sideways on. The extension always switches on in conjunction with one of the two flexible cooking zones. You cannot switch the extension on separately
Position the cookware according to weight and size
Position the cookware in the middle over the rear part of the flexible cooking zone and its extension.
Depending on the size of the cookware and the covered cooking surface, you can switch on the flexible cooking zone as two separate cooking zones or as one connected cooking zone:

Activating flexInduction Plus
- Place the cookware on the flexible cooking zone so that it covers the extension.
- Select the cooking zone and the power level. The displays for the cooking zone and for the extended zone light up.
- The zone is activated.
![warning]() Note: If the display does not light up, lift the cookware and place it back on the cooking zone.
Note: If the display does not light up, lift the cookware and place it back on the cooking zone.
- The zone is activated.
Deactivating flexInduction Plus
- Select the cooking zone and set it to in the settings range.
- The function has been deactivated.
powerMove Plus
You can use this function to change the power level of an item of cookware by simply sliding it forwards or backwards in the flexible cooking zone. The zone is divided into three areas with different power levels.
Positioning and moving the cookware
Only use one item of cookware. The cooking area depends on the cookware used, as well as its size and positioning.
Each cooking area has a preset power level:
- Front area = power level 9
- Middle area = power level 5
- Rear area = power level
![]()

You can change the standard setting of the preset power levels. You can find out how to do this in the "Basic settings" section

Activating powerMove Plus
Requirement: Only place one item of cookware on a flexible zone.
- Select one of the two cooking zones in the flexible zone.
- Press
![]() .
. ![]() lights up brighter and the power level for the area in which the container is located lights up.
lights up brighter and the power level for the area in which the container is located lights up.- The function is switched on.
Note: You can change the power levels during cooking.
Deactivating powerMove Plus
- Touching
![]()
![]() lights up dimly.
lights up dimly.- The function has been deactivated.
Time-setting options
Your hob has various functions for setting the cooking time:
- Switch-off timer
- Timer
- countUp function
Switch-off timer
Allows you to program a cooking time for one or more cooking zones. Once the time has elapsed, the cooking zone is automatically switched off.
Switching on Switch-off timer
- Touch
![]() twice.
twice. - The
![]() and
and ![]() displays light up.
displays light up.
- The
- Select the required cooking zone and cooking time.
- The
![]() indicator for the hotplate will light up.
indicator for the hotplate will light up.
- The
- Press
![]() to confirm.
to confirm. - Select the required power level.
- The cooking time begins to count down.
- Once the cooking time has elapsed, the cooking zone switches itself off and an audible signal sounds.
 twice.
  and
and  displays light up.
 Note: If a cooking time has been programmed in a cooking zone in which the fryingSensor is activated, the programmed cooking time will start to count down as soon as the selected temperature level has been reached.
Changing or switching off Switch-off timer
- Touch
![]() twice.
twice. - Select the cooking zone.
- In the settings area, change the time or set to
![]() to delete the time.
to delete the time. - Press
![]() to confirm.
to confirm.
Timer
Enables the activation of a timer of 0–99 minutes. This function can be used independently of the cooking zones and other settings. It does not automatically switch off the cooking zones.
Switching on Timer
- Touch
![]()
![]() and
and ![]() light up.
light up.
- Set the required time in the settings area.
- Press
![]() to confirm.
to confirm. - The time begins to count down.
- An audible signal sounds and the displays flash once the time has elapsed.
 and
and  light up.
Changing or switching off the Timer
- Touch
![]() .
. - In the settings range, change the time or set to
![]() to delete the time.
to delete the time. - Press
![]() to confirm.
to confirm.
countUp function
The stopwatch function displays the time that has elapsed since activation.
Switching on countUp function
- Touch
![]() .
. ![]() light up.
light up.- The time begins to count down.
 .
.  light up.
Switching off countUp function
- Touch
![]() .
. - The displays for the run time programming function go out.
- The function has been deactivated.
powerBoost
You can use this function to heat up large volumes of water more quickly than with ![]() .
.
This function is available for all cooking zones, provided the other cooking zone in the same group is not in use.

Switching on powerBoost
- Select the cooking zone.
- Touch
![]() . The
. The ![]() display lights up. a The function is switched on.
display lights up. a The function is switched on.
Note: You can also switch on this function when cooking with a connected FlexZone.
Switching off powerBoost
- Select the cooking zone.
- Touch
![]() . The
. The ![]() display goes out and the cooking zone switches back to the
display goes out and the cooking zone switches back to the ![]() power level.
power level. - The function has been deactivated
Note: In certain circumstances, this function may switch itself off automatically in order to protect the electronic elements inside the hob.
shortBoost
You can use this function to heat up pans more quickly than with ![]() .
.
This function is available for all cooking zones, provided the other cooking zone in the same group is not in use.

Recommended applications
- Do not place a lid on the pan.
- Never leave pans unattended when they are heating up.
- Only use cold pans.
- Use pans with a completely flat base. Do not use pans with a thin base.
Switching on shortBoost
- Select the cooking zone.
- Touch
![]() twice.
twice. ![]() lights up.
lights up. - The function is switched on.
 lights up.
 Note: You can also switch on this function when cooking with a connected FlexZone.
Switching off shortBoost
- Select the cooking zone.
- Touch
![]() .
. ![]() goes out and the cooking zone switches back to the
goes out and the cooking zone switches back to the ![]() power level.
power level. - The function has been deactivated.14 Keep-warm function
Note: To avoid high temperatures, this function automatically switches itself off after 30 seconds.
Keep-warm function
You can use this function to melt chocolate or butter and to keep meals warm.
Switching on Keep-warm function
- Press
![]() .
. - Select the required cooking zone within the next 10 seconds.
![]() lights up.
lights up. - The functions starts.
 .
. lights up.
 Switching off Keep-warm function
- Touch
![]() .
. - Select the cooking zone.
![]() goes out.
goes out.
The cooking zone switches itself off and the residual heat indicator lights up.- The function has been deactivated.
flexMotion
You can use this function to transfer the power level and the programmed cooking time from one cooking zone to another.
Requirement: Move the cookware to a cooking zone which is not switched on, which you have not yet preset and on which no other cookware has been placed.
- Move the cookware.
![]()
The cookware is detected and the previously selected power level and![]() flash alternately on the display for the new cooking zone.
flash alternately on the display for the new cooking zone. - Select the new cooking zone to implement the settings.
The appliance sets the power level for the original cooking zone to![]() .
. - The settings are transferred to the new cooking zone.

 flash alternately on the display for the new cooking zone.
 Note: If you place a new item of cookware on a different cooking zone before you have confirmed the settings, you can use this function for both items of cookware.
fryingSensor
Suitable for cooking or reducing sauces, pancakes or frying eggs with butter, for frying vegetables or steaks up to the required level of boiling, and for keeping the temperature under control.
Instead of frequently adjusting the power level during cooking, select the required target temperature once at the start. The sensors under the glass ceramic measure the temperature of the cookware and keep this constant throughout the entire cooking process. This function is available on all cooking zones marked with this symbol ![]() .
.
Advantages
- The temperature is automatically kept constant without you having to change the power level.
- Oil does not overheat. This prevents the food from burning.
- The cooking zone only continues heating for as long as this is necessary to maintain the temperature. This saves energy.
Temperature levels
Temperature levels for preparing meals.
| Level | Temperature | Functions |
| 1 | 120 ºC | Boiling and reducing sauces, fry vegetables |
| 2 | 140 ºC | Searing in olive oil or butter |
| 3 | 160 ºC | Frying fish and coarse foods |
| 4 | 180 ºC | Deep-fat frying breaded, frozen and grilled food |
| 5 | 215 ºC | High-temperature grill and griddle plate |
Recommended cookware
Special cookware has been developed for this function, which delivers the best results.
The recommended cookware is available from customer service, specialist retailers or our online shop siemens-home.bsh-group.com.
Note: You can also use other cookware. Depending on the composition of the cookware, the achieved temperature may differ from the selected temperature level.
Switching on the fryingSensor
- Place empty cookware on the cooking zone.
- Touch
![]() and then select the cooking zone.
and then select the cooking zone. - Within the next 10 seconds, select the required temperature setting on the control panel.
- The functions starts.
![]() flashes until the set target temperature is reached.
flashes until the set target temperature is reached. - Once the target temperature has been reached, a signal tone sounds and
![]() stops flashing.
stops flashing.
- The functions starts.
- Add the frying fat and then the food to the frying pan.
 and then select the cooking zone.
 stops flashing.
 Note: If you need to cook with more than 250 ml oil, add the oil and wait a few seconds before you add the food.
Switching off fryingSensor
- Select the cooking zone and touch
![]() .
. - The function has been deactivated.
Recommendations for cooking with fryingSensor
The following table shows the ideal temperature levels for a selection of dishes. The temperature and the cooking time min depend on the amount, condition and quality of the food.


Childproof lock
The hob is equipped with a childproof lock. This prevents children from switching on the hob.
Switching on Childproof lock
Requirement: The hob must be switched off.
- Touch
![]() .
. - Touch and hold
![]() for 4 seconds.
for 4 seconds. - The
![]() display lights up for 10 seconds.
display lights up for 10 seconds. - The hob is locked.
- The
 .
. for 4 seconds.
  display lights up for 10 seconds.
Switching off Childproof lock
- Touch
![]() .
. - Touch and hold
![]() for 4 seconds.
for 4 seconds. - The lock is released.
Automatic childproof lock
You can also activate the childproof lock automatically every time the hob is switched off. You can find out how to switch the function on and off in the "Basic settings" section.
Wipe protection
Allows the control panel to be locked for cleaning so that the settings are not inadvertently adjusted. The lock has no effect on the main switch.
Switching on Wipe protection
- Press
![]() . A warning tone sounds and
. A warning tone sounds and ![]() lights up.
lights up. - The control panel remains locked for 35 seconds. A signal tone sounds 5 seconds before the appliance is switched off.
Switching off Wipe protection
To switch off the function early:
- touch
![]() .
. - The control panel is unlocked.
Individual safety switch-off
The safety function is activated if one cooking zone is in operation for an extended period and you do not change any settings. The cooking zone displays  and switches itself off.
The time from 1 to 10 hours depends on the selected power level.
Press any button to switch on the cooking zone.
Basic settings
You can configure the basic settings for your appliance to meet your needs.
Overview of the basic settings

1 Factory setting
To go to the basic settings
Requirement: The hob must be switched off.
- To switch on the hob, touch
![]() .
. - Within the next 10 seconds, press and hold
![]() for 4 seconds.
for 4 seconds.
 for 4 seconds.
| Product information | Display |
| Directory for the technical after-sales service (TK) |  |
| Production number |  |
| Production number 1 |  |
| Production number 2 |  |
- The first four displays provide the product information. To call up the individual displays, touch the control panel.
- Touch
![]() to access the basic settings.
to access the basic settings. ![]() and
and ![]() light up as a presetting.
light up as a presetting.
 to access the basic settings.
  and
and  light up as a presetting.
- Touch
![]() repeatedly until the desired setting appears.
repeatedly until the desired setting appears. - Select the required setting in the settings area.
- Touch and hold
![]() for 4 seconds.
for 4 seconds. - The settings are saved.
Discarding changes to the basic settings
- Touch
![]() .
. - All changes are discarded and not saved.
 .
. Cookware test
The quality of the cookware has a major influence on the speed and the result of the cooking process. You can use this function to test the quality of the cookware.
Before the test, ensure that the size of the cookware base corresponds to the size of the cooking zone being used.
Access is via the basic settings.
Carrying out Cookware test
As a single cooking zone, the flexible cooking zone is set in such a way that only the individual item of cookware is checked.
- At room temperature, place the cookware with approx. 200 ml water in the centre of the cooking zone that best fits the base of the cookware in terms of size.
- Call up the basic settings and select
![]() .
. - Touch the settings area. The
![]() display flashes in the cooking zones.
display flashes in the cooking zones. - The test is running.
- After 10 seconds, the result appears in the cooking zone displays.
 .
. display flashes in the cooking zones.
 Checking the result
You can see what the result means for the quality and speed of the cooking process in the following table.
| Result | |
 | The cookware is not suitable for the cooking zone and therefore does not heat up. |
 | The cookware is taking longer to heat up than expected and cooking is not progressing as well as it ought to. |
 | The cookware is heating up correctly and cooking is progressing well. |
To activate this function, touch the settings range.
Home Connect
This appliance is network-capable. Connecting your appliance to a mobile device lets you control its functions via the Home Connect app, adjust its basic settings and monitor its operating status.
The Home Connect services are not available in every country. The availability of the Home Connect function depends on the availability of Home Connect services in your country. You can find information about this at: www.home-connect.com.
The Home Connect app guides you through the entire login process. Follow the instructions in the Home Connect app to configure the settings.
Tip: Please also follow the instructions in the Home Connect app.
Notes
- Please note the safety precautions in this instruction manual and make sure that they are also observed when operating the appliance via the Home Connect app. →"Safety".
- Operating the appliance on the appliance itself always takes priority. During this time it is not possible to operate the appliance using the Home Connect app.
- In networked standby mode, the appliance requires a maximum of 2 W.
- Hobs are not designed to be left unattended. Always monitor the cooking process.
Setting up the Home Connect app
- Install the Home Connect app on your mobile device.
- Start the Home Connect app and set up access for Home Connect.
Setting up Home Connect
Requirements
- The appliance is connected to the power supply and is switched on.
- You have a mobile device with a current version of the iOS or Android operating system, e.g. a smartphone.
- The Home Connect app has been installed on your mobile device.
- The appliance is receiving signals from the WLAN home network (Wi-Fi) at its installation location.
- The mobile device and the appliance are within range of your home network's Wi-Fi signal.
- Open the Home Connect app and scan the following QR code.
![]()
- Follow the instructions in the Home Connect app.

Overview of the Home Connect settings
You can adjust the settings and network settings for Home Connect by going to your hob's basic settings.

1 Factory setting
Changing settings via the Home Connect app
You can use the Home Connect app to change the settings for the cooking zones and send them to the hob.
Requirements
- The hob is connected to the Wi-Fi and to the Home Connect app.
- To use the Home Connect app to set the hob,
![]() must be switched on in the basic settings.
must be switched on in the basic settings.![]() is switched on on delivery. If the option for the transmission of settings has been deactivated, only the hob's operating statuses are displayed in the Home Connect app.
is switched on on delivery. If the option for the transmission of settings has been deactivated, only the hob's operating statuses are displayed in the Home Connect app.
 must be switched on in the basic settings.
- Select the setting in the Home Connect app and send it to the hob. Follow the instructions in the Home Connect app. Settings that you send from the Home Connect app to the hob must be confirmed on the hob.
- As soon as cooking settings are transmitted to a cooking zone, the display starts to flash, depending on the setting.
- To confirm the setting, press the hotplate display for the required cooking zone.
- To discard the setting, touch any other touch field on the hob.
22.5 Software update
Your appliance's software can be updated using the software update function, e.g. for the purposes of optimisation, troubleshooting or security updates. To do this, you must be a registered Home Connect user, have installed the app on your mobile device and be connected to the Home Connect server. As soon as a software update is available, you will be informed via the Home Connect app and will be able to start the software update via the app. Once the update has been successfully downloaded, you can start installing it via the Home Connect app if you are in your home network (Wi-Fi). The Home Connect app informs you once installation is successful.
Notes
- The software update consists of two steps.
- The first step is the download.
- The second step is the installation on your appliance.
- You can continue to use your appliance as normal while updates are downloading. Depending on your personal settings in the app, software updates can also be set to download automatically.
- Installation takes a few minutes. You cannot use your appliance during installation.
- We recommend that you install security updates as soon as possible.
Remote diagnostics
Customer Service can use Remote Diagnostics to access your appliance if you contact them, have your appliance connected to the Home Connect server and if Remote Diagnostics is available in the country in which you are using the appliance.
Tip: For further information and details about the availability of Remote Diagnostics in your country, please visit the service/support section of your local website: www.home-connect.com.
Data protection
Please see the information on data protection. The first time your appliance is registered on a home network connected to the Internet, your appliance will transmit the following types of data to the Home Connect server (initial registration):
- Unique appliance identification (consisting of appliance codes as well as the MAC address of the installed Wi-Fi communication module).
- Security certificate of the Wi-Fi communication module (to ensure a secure data connection).
- The current software and hardware version of your appliance.
- Status of any previous resetting to factory settings.
This initial registration prepares the Home Connect functions for use and is only required when you want to use the Home Connect functions for the first time.
Note: Please note that the Home Connect functions can only be utilised with the Home Connect app. Information on data protection can be retrieved in the Home Connect app.
Hob-based hood control
If the hob and the extractor hood are Home Connect compatible, connect the appliances in the Home Connect app. To do this, connect the two appliances to Home Connect and follow the instructions in the app.
Notes
- Using the controls on the extractor hood always takes priority. It is not possible to use the hob-based hood control during this time.
- You can only connect to the extractor hood via the Home Connect app. Other connection routes are no longer supported.
Resetting Home Connect settings
If you have problems connecting your appliance to the WLAN home network (Wi-Fi) or if you want to log your appliance onto a different WLAN home network (Wi-Fi), you can reset the Home Connect settings.
Note: If you reset the Home Connect settings, the connection to any extractor hood will also be terminated.
- Press and hold
![]() for 4 seconds.
for 4 seconds. - The display will show the product information.
- Touch
![]() repeatedly until the display alternately shows and
repeatedly until the display alternately shows and ![]() .
. - Set the value
![]() on the control panel.
on the control panel.
 for 4 seconds.
  .
. on the control panel.
Controlling the extractor hood via the hob
In the basic settings for your hob, you can adjust the behaviour of your extractor hood depending on whether the hob or individual cooking zones are switched on or off.
You can select other settings using the controls on the hob.
Setting the fan
- Touch
![]() .
. - Select a fan setting on the control panel.
You can choose between the levels 1, 2 and 3. To select an intensive setting, touch 4 or 5 on the control panel. Alternatively, you can repeatedly touch![]() until the required intensive setting is displayed.
until the required intensive setting is displayed.
Switching off the fan
- Select the fan setting 0 on the control panel.
Switching on automatic mode
- Press and hold
![]() until the display shows
until the display shows ![]() .
. - The fan will start automatically when steam is produced.
Switching off automatic mode
- Press and hold
![]() until
until ![]() goes out.
goes out.
Automatic mode will also end if you select a different fan setting.
Setting the hood lighting
You can switch the hood lighting on and off using the control panel of the hob.
- To switch the lighting on, touch
![]() .
. - To switch the lighting off, touch
![]() again.
again.
 .
.Overview of the hood control settings
In the basic settings for your hob, you can adjust the behaviour of your extractor hood depending on whether the hob or individual cooking zones are switched on or off.

1 Depending on the appliance specifications
2 Factory setting (may vary according to model)
Cleaning and servicing
To keep your appliance working efficiently for a long time, it is important to clean and maintain it carefully.
Cleaning products
You can obtain suitable cleaning products and glass scrapers from customer service, a retailer or the online shop
siemens-home.bsh-group.com.
ATTENTION
Unsuitable cleaning products may damage the surfaces of the appliance.
- Never use unsuitable cleaning products.
- Do not use cleaning products while the hob is still hot. This may cause marks on the surface.
Unsuitable cleaning products
- Undiluted detergent
- Detergent intended for dishwashers
- Abrasive cleaning products
- Aggressive cleaning products such as oven spray or stain remover
- Abrasive sponges
- High-pressure or steam jet cleaners
24.2 Cleaning the hob
Clean the hob after every use to stop cooking residues from getting burnt on.
Requirement: The hob must be cold. Do not allow the hob to cool down if it has sugar stains, rice starch, plastic or aluminium foil on it.
- Remove heavy soiling using a glass scraper.
- Clean the hob with a cleaning agent for glass ceramic.
Follow the cleaning instructions on the packaging of the cleaning agent.
![information]() Tips:
Tips: - You can achieve good cleaning results using a special sponge for glass ceramic.
- If you keep the base of the cookware clean, the hob surface remains in a good condition.
Cleaning the hob surround
If the hob frame is dirty or stained after use, clean this.
Note: Do not use a glass scraper.
- Clean the hob frame with hot soapy water and a soft cloth.
Wash new sponge cloths thoroughly before use. - Dry with a soft cloth.
Troubleshooting
You can rectify minor faults on your appliance yourself. Read the troubleshooting information before contacting after-sales service. This will avoid unnecessary costs.

Risk of injury!
Improper repairs are dangerous.
- Repairs to the appliance should only be carried out by trained specialist staff.
- If the appliance is defective, call Customer Service. → "Customer Service".

Risk of electric shock!
Improper repairs are dangerous.
- Repairs to the appliance should only be carried out by trained specialist staff.
- Only use genuine spare parts when repairing the appliance.
- If the power cord or the appliance power cable of this appliance is damaged, it must be replaced with a special power cord or special appliance power cable, which is available from the manufacturer or its Customer Service.
Warnings
Notes
- If
![]() appears in the displays, press and hold the sensor for the respective cooking zone and read the fault code.
appears in the displays, press and hold the sensor for the respective cooking zone and read the fault code. - If the fault code is not listed in the table, disconnect the hob from the power supply and wait 30 seconds before reconnecting it. If this display appears again, contact the technical after-sales service and specify the exact fault code.
- If an error occurs, the appliance does not switch to standby mode.
- In order to protect the appliance's electronic parts from overheating or surge currents, the hob may temporarily reduce the power level.
 appears in the displays, press and hold the sensor for the respective cooking zone and read the fault code.
Information on the display panel
| Fault | Cause and troubleshooting |
| No displays light up. | The power supply has been disconnected.
|
The appliance has not been connected as shown in the circuit diagram.
| |
Electronics fault
| |
| The displays flash. | The control panel is wet or an object is covering it.
|
 | The electronics have overheated and one or all of the cooking zones have been switched off.
|
 + power level and audible signal + power level and audible signal | There is hot cookware in the vicinity of the control panel. This may cause the electronics to overheat.
|
 and signal tone and signal tone | There is hot cookware in the vicinity of the control panel. The cooking zone has been switched off to protect the electronics.
|
 | The cooking zone has overheated and has been switched off to protect the work surface.
|
 | flexMotion is not activated.
|
 | The extended FlexZone does not switch on.
|
 | The cooking zone has been operating continuously for an extended period.
|
 | The operating voltage is incorrect and outside of the normal operating range.
|
 | The hob is not connected correctly.
|
 | Demo mode is activated.
|
| Home Connect is not working properly. | Different causes are possible.
|
Normal noises from your appliance
An induction hob may sometimes cause noises or vibrations, such as buzzing, crackling, hissing noises, fan noises or rhythmic noises.
Test dishes
These recommended settings are intended for test institutes to facilitate the testing of our appliances. The tests were carried out using our cookware sets for induction hobs. If required, these accessory sets can be purchased at a later point from specialist retailers, or through our technical after-sales service or our online shop.
Melting the chocolate coating
Ingredients: 150 g dark chocolate (55% cocoa).
- 16 cm saucepan without lid
- Boiling: Power level 1.5
Heating and keeping lentil stew warm
Recipe in accordance with DIN 44550
Initial temperature 20°C
Heating up without stirring
- 16 cm saucepan with lid, amount: 450 g
- Heating up: Duration 1 min. 30 sec., power level 9
- Simmering: Power level 1.5
- 20 cm saucepan with lid, amount: 800 g
- Heating up: Duration 2 min. 30 sec., power level 9
- Simmering: Power level 1.5
Heating and keeping lentil stew warm
E.g.: Lentil diameter 5–7 mm. Initial temperature 20°C
Stir after heating for 1 minute
- 16 cm saucepan with lid, amount: 500 g
- Heating up: Duration approx. 1 min. 30 sec., power level 9
- Simmering: Power level 1.5
- 20 cm saucepan with lid, amount: 1 kg
- Heating up: Duration approx. 2 min. 30 sec., power level 9
- Simmering: Power level 1.5
Béchamel sauce
Milk temperature: 7°C
- 16 cm saucepan without lid, ingredients: 40 g butter, 40 g flour, 0.5 l milk with 3.5% fat content and a pinch of salt
Preparing Béchamel sauce
- Melt the butter, stir in the flour and salt, and heat up the mixture.
- Heating up: Duration 6 min., power level 2
- Add the milk to the roux and bring to the boil, stirring continuously.
- Heating up: Duration 6 min. 30 sec., power level
- Once the Béchamel sauce comes to the boil, leave it on the cooking zone for a further two minutes.
- Simmering: Power level 2
Cooking rice pudding with the lid on
Milk temperature: 7°C
- Heat the milk until it starts to rise up. Heat up without a lid. Stir after heating for 10 min.
- Set the recommended power level and add rice, sugar and salt to the milk.
The cooking time, including heating up, is approx. 45 minutes.- 16 cm saucepan, ingredients: 190 g short-grain rice, 90 g sugar, 750 ml milk with 3.5% fat content and 1 g salt
- Heating up: Duration approx. 5 min. 30 sec., power level 8.5
- Simmering: Power level 3
- 20 cm saucepan, ingredients: 250 g short-grain rice, 120 g sugar, 1 l milk with 3.5% fat content and 1.5 g salt
- Heating up: Duration approx. 5 min. 30 sec., power level 8.5
- Simmering: Power level 3, stir after 10 minutes
- 16 cm saucepan, ingredients: 190 g short-grain rice, 90 g sugar, 750 ml milk with 3.5% fat content and 1 g salt
Cooking rice pudding without a lid
Milk temperature: 7°C
- Add the ingredients to the milk and heat the mixture up while stirring continuously.
- Once the milk has reached approx. 90°C, select the recommended power level and leave it to simmer on a low heat for approx. 50 minutes.
- 16 cm saucepan without lid, ingredients: 190 g short-grain rice, 90 g sugar, 750 ml milk with 3.5% fat content and 1 g salt
- Heating up: Duration approx. 5 min. 30 sec., power level 8.5
- Simmering: Power level 3
- 20 cm saucepan without lid, ingredients: 250 g short-grain rice, 120 g sugar, 1 l milk with 3.5% fat content and 1.5 g salt
- Heating up: Duration approx. 5 min. 30 sec., power level 8.5
- Simmering: Power level 2.5
- 16 cm saucepan without lid, ingredients: 190 g short-grain rice, 90 g sugar, 750 ml milk with 3.5% fat content and 1 g salt
Cooking rice
Recipe in accordance with DIN 44550
Water temperature: 20°C
- 16 cm saucepan with lid, ingredients: 125 g long grain rice, 300 g water and a pinch of salt
- Heating up: Duration approx. 2 min. 30 sec., power level 9
- Simmering: Power level 2
- 20 cm saucepan with lid, ingredients: 250g long grain rice, 600 g water and a pinch of salt
- Heating up: Duration approx. 2 min. 30 sec., power level 9
- Simmering: Power level 2.5
Roasting a pork loin
Initial temperature of the loin: 7°C
- 24 cm pan without lid, ingredients: 3 pork loins, total weight approx. 300 g, 1 cm thick, and 15 g sunflower oil
- Heating up: Duration approx. 1 min. 30 sec., power level 9
- Simmering: Power level 7
Preparing crêpes
Recipe in accordance with DIN EN 60350-2
- 24 cm pan without lid, ingredients: 55 ml batter per crêpe
- Heating up: Duration 1 min. 30 sec., power level 9
- Simmering: Power level 7
Deep-fat frying frozen chips
- Pot dia. 20 cm without lid: ingredients: 2 l sunflower oil. For each frying time: 200 g frozen chips, 1 cm thick.
- Heating up: Power level 9, until the oil temperature reaches 180°C.
- Simmering: Power level 9
Safety
Observe the following safety instructions.
General information
- Read this instruction manual carefully.
- Keep the instructions, the appliance and the product information safe for future reference or for the next owner.
- Do not connect the appliance if it has been damaged in transit.
Intended use
Only a licensed professional may connect appliances without plugs. Damage caused by incorrect connection is not covered under the warranty.
The appliance can only be used safely if it is correctly installed according to the safety instructions. The installer is responsible for ensuring that the appliance works perfectly at its installation location.
Only use this appliance:
- To prepare meals and drinks.
- Under supervision. Never leave the appliance unattended when cooking for short periods.
- in private households and in enclosed spaces in a domestic environment.
- up to an altitude of max. 4000 m above sea level.
Do not use the appliance:
- With an external timer or a separate remote control. This does not apply if operation with appliances included in EN 50615 is switched off.
If you wear an active implantable medical device (e.g. a pacemaker or defibrillator), check with your doctor that it complies with Council Directive 90/385/EEC of 20th June 1990, EN 45502-2-1 and EN 45502-2-2, and that it has been chosen, implanted and programmed in accordance with VDE-AR-E 2750-10. If these conditions are satisfied, and if, in addition, non-metal cooking utensils and cookware with non-metal handles are used, it is safe to use this induction hob as intended.
Restriction on user group
This appliance may be used by children aged 8 or over and by people who have reduced physical, sensory or mental abilities or inadequate experience and/or knowledge, provided that they are supervised or have been instructed on how to use the appliance safely and have understood the resulting dangers.
Do not let children play with the appliance. Children must not perform cleaning or user maintenance unless they are at least 15 years old and are being supervised. Keep children under the age of 8 years away from the appliance and power cable.
Safe use
Risk of fire!
Leaving fat or oil cooking on an unattended hob can be dangerous and may lead to fires.
- Never leave hot oil or fat unattended.
- Never attempt to extinguish a fire using water; instead, switch off the appliance and then cover with a lid or a fire blanket.
The cooking surface becomes very hot.
- Never place flammable objects on the cooking surface or in its immediate vicinity.
- Never place objects on the cooking surface.
The appliance will become hot.
- Do not keep combustible objects or aerosol cans in drawers directly underneath the hob.
Hob covers can cause accidents, for example due to overheating, catching fire or materials shattering.
- Do not use hob covers.
After every use, switch off the hob using the main switch.
- Do not wait until the hob turns off automatically as there are no longer any pots and pans on it.
Food may catch fire.
- The cooking process must be monitored. A short process must be monitored continuously.
Risk of burns!
The appliance and its parts that can be touched become hot during use, particularly the hob surround, if fitted.
- Caution should be exercised here in order to avoid touching heating elements.
- Young children under 8 years of age must be kept away from the appliance.
Hob protective grilles may cause accidents.
- Never use hob protective grilles.
The appliance becomes hot during operation.
- Allow the appliance to cool down before cleaning.
Metal objects on the hob quickly become very hot.
- Never place metal objects (such as knives, forks, spoons and lids) on the hob.
Risk of electric shock!
Improper repairs are dangerous.
- Repairs to the appliance should only be carried out by trained specialist staff.
- Only use genuine spare parts when repairing the appliance.
- If the power cord or the appliance power cable of this appliance is damaged, it must be replaced with a special power cord or special appliance power cable, which is available from the manufacturer or its Customer Service.
If the appliance or the power cord is damaged, this is dangerous.
- Never operate a damaged appliance.
- If the surface is cracked, you must switch off the appliance in order to prevent a possible electrical shock. To do this, switch off the appliance via the fuse in the fuse box rather than at the main switch.
- Never pull on the power cord to unplug the appliance. Always unplug the appliance at the mains.
- If the appliance or the power cable is damaged, immediately switch off the fuse in the fuse box.
- Call customer services.
An ingress of moisture can cause an electric shock.
- Do not use steam- or high-pressure cleaners to clean the appliance.
The insulation on cables of electrical appliances may melt if it touches hot parts of the appliance.
- Never bring electrical appliance cables into contact with hot parts of the appliance.
If metallic objects come into contact with the fan that is located on the underside of the hob, this may cause an electric shock. - Do not store long, pointed metallic objects in the drawers below the hob.
Risk of injury!
Saucepans may suddenly jump due to liquid between the saucepan base and the hotplate.
- Always keep hotplates and saucepan bases dry.
- Never use icy-cold cookware that has been in the freezer.
When cooking in a bain marie, the hob and cooking container could shatter due to overheating.
- The cooking container in the bain marie must not directly touch the bottom of the water-filled pot.
- Only use heat-resistant cookware.
An appliance with a cracked or broken surface can cause cuts.
- Do not use the appliance if it has a cracked or broken surface.
Risk of suffocation!
Children may put packaging material over their heads or wrap themselves up in it and suffocate.
- Keep packaging material away from children.
- Do not let children play with packaging material.
Children may breathe in or swallow small parts, causing them to suffocate.
- Keep small parts away from children.
- Do not let children play with small parts.
Documents / Resources
References
Download manual
Here you can download full pdf version of manual, it may contain additional safety instructions, warranty information, FCC rules, etc.
Download Siemens iQ700 EX NY Series, iQ700 EX677NYV6E - Induction Hob Manual
Advertisement


Need help?
Do you have a question about the iQ700 EX NY Series and is the answer not in the manual?
Questions and answers