Table of Contents
Advertisement
Quick Links
Advertisement
Table of Contents

Related Manuals for Pioneer Elite VSX-21TXH


Summary of Contents for Pioneer Elite VSX-21TXH
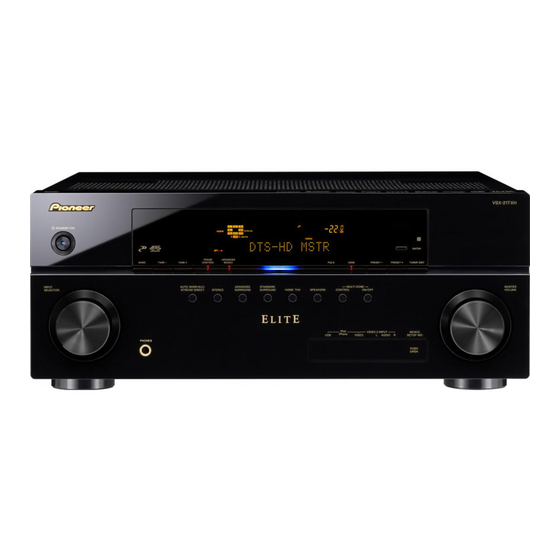
- Page 1 Operating Instructions audio/video multi-channel receiver...
- Page 2 Product Name: AUDIO/VIDEO MULTI-CHANNEL RECEIVER Model Number: VSX-23TXH, VSX-21TXH Responsible Party Name: PIONEER ELECTRONICS SERVICE, INC. Address: 1925 E. DOMINGUEZ ST. LONG BEACH, CA 90801-1760, U.S.A. Phone: 1-800-421-1404 IMPORTANT NOTICE THE SERIAL NUMBER FOR THIS EQUIPMENT IS LOCATED IN THE REAR.
-
Page 3: Operating Environment
IMPORTANT CAUTION RISK OF ELECTRIC SHOCK DO NOT OPEN The lightning flash with arrowhead symbol, CAUTION: The exclamation point within an equilateral TO PREVENT THE RISK OF ELECTRIC within an equilateral triangle, is intended to triangle is intended to alert the user to the alert the user to the presence of uninsulated SHOCK, DO NOT REMOVE COVER (OR presence of important operating and... - Page 4 CAUTION If the AC plug of this unit does not match the AC STANDBY/ON switch on this unit will not outlet you want to use, the plug must be removed completely shut off all power from the AC outlet. and appropriate one fitted. Replacement and Since the power cord serves as the main disconnect mounting of an AC plug on the power supply cord of device for the unit, you will need to unplug it from...
-
Page 5: Table Of Contents
Thank you for buying this Pioneer product. Please read through these operating instructions so you will know how to operate your model properly. After you have finished reading the instructions, put them away in a safe place for future reference. - Page 6 Listening in stereo ......58 Data Management ......88 Using Front Stage Surround Advance .
-
Page 7: Flow Of Settings On The Receiver
Flow of settings on the receiver The unit is a full-fledged AV receiver equipped with an abundance of functions and terminals. It can be used easily after following the procedure below to make the connections and settings. The colors of the steps indicate the following: Required setting item Setting to be made as necessary ... -
Page 8: Before You Start
Advanced Direct Energy design This receiver offers a new advancement in discrete DTS-EXPRESS is a low-bitrate encoding technology design unique to Pioneer for high-power drivability, low supporting up to 5.1 channels, with fixed data transfer distortion and stable imaging. Through a circuit design... -
Page 9: Checking What's In The Box
Before you start • XM and SIRIUS Ready With the XM and SIRIUS Radio terminals, you’ll be up Loading the batteries and running in no time. This receiver’s enhanced compatibility makes XM HD Surround playback as well as on-screen control of your XM and SIRIUS Radio an added possibility. -
Page 10: Controls And Displays
Controls and displays Chapter 2: Controls and displays Remote control RECEIVER This switches between standby and on for this receiver. Input function buttons RECEIVER SOURCE Press to select control of other components (see Controlling the rest of your system on page 73). HDMI Number buttons and other receiver/component CD-R... - Page 11 Controls and displays AUDIO – Changes the audio or channel on DVD or Tuner/component control buttons/HOME MENU These button controls can be accessed after you have BD discs. selected the corresponding input function button (DVD, DISP – Switches between named station presets and DVR, TV, etc.).
-
Page 12: Front Panel
MCACC VIDEO 2 INPUT iPhone VIDEO AUDIO SETUP MIC VSX-21TXH INPUT SELECTOR dial ENTER Use to select an input function. Remote sensor STANDBY/ON Receives the signals from the remote control (see Switches the receiver between on and standby. Power Operating range of remote control unit on page 9). -
Page 13: Display
(see Using the MULTI-ZONE component to the front panel input on page 37. controls on page 69). 16 VSX-21TXH only: VIDEO 2 INPUT terminals 13 MCACC SETUP MIC jack Use to connect your portable equipment such as Use to connect the supplied microphone (page 41). - Page 14 Controls and displays 11 Analog signal indicators Light to indicate reducing the level of an analog signal (page 70). 12 Tuner indicators TUNED – Lights when a broadcast is being received. STEREO – Lights when a stereo FM broadcast is being received in auto stereo mode.
-
Page 15: Connecting Your Equipment
This receiver provides you with many connection possibilities, but it doesn’t have to be difficult. This page explains the kinds of components you can connect to make up your home theater system. Important • Illustration shows the VSX-23TXH, however connections for the VSX-21TXH are the same except where noted. Rear panel ASSIGN-... - Page 16 See also The Input Setup menu on page 43 to assign 15 Control input/output the inputs. Use to connect other Pioneer components so that you XM Radio input can control all your equipment from a single IR remote See Connecting an XM Radio tuner on page 32.
-
Page 17: Determining The Speakers' Application
Connecting your equipment [3] 5.1ch surround & ZONE 2 connection Determining the speakers’ application (Multi Zone) With these connections you can simultaneously enjoy Surround sound with a strong sense of presence can be 5.1-channel surround sound in the main zone with stereo enjoyed by connecting 7 speakers and 1 subwoofer. -
Page 18: Placing The Speakers
Connecting your equipment THX speaker system setup Placing the speakers If you are using a THX certified subwoofer use the THX INPUT jack on the subwoofer (if your subwoofer has one) To achieve the best possible surround sound, install your or switch the filter position to THX on your subwoofer. -
Page 19: Connecting The Speakers
Connecting your equipment Connecting the speakers Each speaker connection on the receiver comprises a positive (+) and negative (–) terminal. Make sure to match these up with the terminals on the speakers themselves. CAUTION • These speaker terminals carry HAZARDOUS LIVE voltage. -
Page 20: Installing Your Speaker System
Connecting your equipment Installing your speaker system At the very least, front left and right speakers only are necessary. Note that your main surround speakers should always be connected as a pair, but you can connect just one surround back speaker if you like (it must be connected to the left surround back terminal). -
Page 21: Bi-Amping Your Speakers
Connecting your equipment Bi-amping your speakers Bi-amp compatible Bi-amp compatible speaker speaker Center Subwoofer High High Front left Front right HDMI BD IN OUT 1 ( KURO OUT 2 COAXIAL ASSIGNABLE ASSIGN- OPTICAL ABLE LINK ) SIRIUS AC IN ASSIGNABLE ANTENNA COMPONENT VIDEO... -
Page 22: Selecting The Surr Back System
Connecting your equipment Selecting the Surr Back system About the audio connection The surround back terminals can be used for bi-amping, There are several types of audio input and output Speaker B and ZONE 2 connections, in addition to for the terminals on this receiver. -
Page 23: About The Video Converter
Connecting your equipment About the video converter The video converter ensures that all video sources are output through all of the MONITOR OUT jacks. The only exception is HDMI: since this resolution cannot be downsampled, you must connect your monitor/TV to the receiver’s HDMI video outputs when connecting this video source. -
Page 24: Connecting Your Tv And Playback Components
If you have an HDMI or DVI (with HDCP) equipped component (Blu-ray disc player, etc.), you can connect it to this receiver using a commercially available HDMI cable. If the TV and playback components support the Pioneer KURO LINK feature, the convenient KURO LINK functions can be used (see KURO LINK on page 63). -
Page 25: Connecting Your Dvd Player With No Hdmi Output
Connecting your equipment Connecting your DVD player with no HDMI output This diagram shows connections of a TV (with HDMI input) and DVD player (or other playback component with no HDMI output) to the receiver. DVD player, etc. HDMI/DVI-compatible monitor or flat panel TV Select one Select one HDMI IN... -
Page 26: Connecting Your Tv With No Hdmi Input
Connecting your equipment Connecting your TV with no HDMI input This diagram shows connections of a TV (with no HDMI input) and DVD player (or other playback component) to the receiver. • With these connections, the picture is not output to the TV even if the DVD player is connected with an HDMI cable. Connect the DVD player’s video signals using a composite, or component cord. - Page 27 Audio, CD, SACD (DSD signal), Video CD, Super VCD a. VSX-23TXH only • Synchronized operation with components using the b. VSX-21TXH only KURO LINK function (see KURO LINK on page 63) HDMI, the HDMI logo and High-Definition Multimedia Interface are trademarks or registered trademarks of HDMI Licensing, LLC.
-
Page 28: Connecting An Hdd/Dvd Recorder, Vcr And Other Video Sources
Connecting your equipment Connecting an HDD/DVD recorder, VCR and other video sources This receiver has two sets of audio/video inputs and outputs suitable for connecting analog or digital video devices, including HDD/DVD recorders and VCRs. When you set up the receiver you’ll need to tell the receiver which input you connected the recorder to (see also The Input Setup menu on page 43). -
Page 29: Connecting A Satellite/Cable Receiver Or Other Set-Top Box
Connecting your equipment Connecting a satellite/cable receiver or Connecting the multichannel analog other set-top box inputs Satellite and cable receivers, and terrestrial digital TV For DVD Audio and SACD playback, your DVD player may tuners are all examples of so-called ‘set-top boxes’. have 5.1 channel analog outputs. -
Page 30: About The Wma9 Pro Decoder
Connecting your equipment When you set up the receiver you’ll need to tell the receiver which input you connected the component to Connecting additional amplifiers (see also The Input Setup menu on page 43). This receiver has more than enough power for any home use, but it’s possible to add additional amplifiers to every CD-R, MD, DAT, etc. -
Page 31: Connecting Am/Fm Antennas
Connecting your equipment Connecting external antennas Connecting AM/FM antennas To improve FM reception connect an external FM antenna to the FM UNBAL 75 Ω. Connect the AM loop antenna and the FM wire antenna as shown below. To improve reception and sound quality, connect external antennas (see Connecting external antennas below). -
Page 32: Connecting An Xm Radio Tuner
Connecting your equipment Connecting an XM Radio tuner Connecting a SiriusConnect™ tuner After purchasing an XM Mini-Tuner and Home Dock To receive SIRIUS Satellite Radio broadcasts, you will (both sold separately), you will also need to activate the need to activate your SiriusConnect™ tuner. XM Radio service to begin receiving broadcasts. -
Page 33: Multi-Zone Setup
Connecting your equipment MULTI-ZONE setup This receiver can power up to two (VSX-21TXH)/three (VSX-23TXH) independent systems in separate rooms after you have made the proper MULTI-ZONE connections. An example MULTI-ZONE setup is shown below, but the number of MULTI- ZONE connections (and the way you choose to connect them) depends on how you want to set up your system. - Page 34 Connecting your equipment Basic MULTI-ZONE setup (ZONE 2) Secondary MULTI-ZONE setup (ZONE 3) (VSX-23TXH only) • Connect a separate amplifier to the AUDIO ZONE 2 OUT jacks and a TV monitor to the VIDEO ZONE 2 OUT • Connect a separate amplifier to the AUDIO ZONE 3 jack, both on this receiver.
-
Page 35: Connecting An Ir Receiver
Continue the chain in the same way for as many the type of cable necessary for the connection. components as you have. • If you want to link a Pioneer component to the IR receiver, see Operating other Pioneer components with this unit’s sensor below to connect to the CONTROL jacks instead of the IR OUT jack. -
Page 36: Switching Components On And Off Using The 12 Volt Trigger
ZONE2 ZONE3 TV/SAT VIDEO The software to output the results is available from the MONITOR support area of the Pioneer website (http:// MONITOR VIDEO www.pioneerelectronics.com/PUSA/ Home+Entertainment+Custom+Install). Instructions S-VIDEO for using the software are also available here. If you have... -
Page 37: Connecting An Hdmi-Equipped Component To The Front Panel Input
Connecting your equipment • Connect your computer to the RS-232C jack on the rear panel of the receiver. Connecting an HDMI-equipped Make sure that the receiver and all connected component to the front panel input components are switched off and disconnected from the power outlet when you do this. -
Page 38: Connecting A Component To The Front Panel Inputs
This receiver has a dedicated iPod terminal that will allow you to control playback of audio content from your iPod (VSX-21TXH only) using the controls of this receiver. The front panel inputs comprise a composite video jack •... -
Page 39: Connecting A Usb Device
MCACC SETUP MIC HDMI 4 cause a fire or give you an electric shock. Check the power cord once in a while. If you find it damaged, ask your nearest Pioneer authorized independent service company for a replacement. USB mass storage device •... -
Page 40: Basic Setup
Basic Setup Chapter 4: Basic Setup Switch on the receiver and your TV. Use RECEIVER to switch on. Switching the speaker impedance We recommend using speakers of 8 Ω with this system, RECEIVER Press on the remote control, then press but it is possible to switch the impedance setting if you HOME MENU. -
Page 41: Automatically Setting Up For Surround Sound (Auto Mcacc)
• VSX-23TXH: When you set ZONE 2, ZONE 3 or ZONE 2&3 to ON (page 69), you can’t use the HOME MENU. • VSX-21TXH: When you set ZONE 2 to ON (page 69), you can’t use the HOME MENU. • If you leave the GUI screen for over five minutes, the screen saver will appear. - Page 42 Basic Setup • If you see an ERR message (or the speaker Select Surr Back System setting, select an MCACC preset , press and then select START. configuration displayed isn’t correct), there may be a RECEIVER Select Normal (Surround back), Speaker B, Front Bi- problem with the speaker connection.
-
Page 43: Problems When Using The Auto Mcacc Setup
Basic Setup Problems when using the Auto MCACC Setup Select the input function that you want to set up. The default names correspond with the names next to the If the room environment is not optimal for the Auto terminals on the rear panel (such as DVD or VIDEO) MCACC Setup (too much background noise, echo off the which, in turn, correspond with the names on the remote walls, obstacles blocking the speakers from the... -
Page 44: Input Function Default And Possible Settings
COAX-2 CD-R/TAPE TUNER MULTI CH IN SIRIUS a.With KURO LINK set to ON, assignments cannot be made (see KURO LINK on page 63). b.This assignment is fixed and cannot be changed. c. VSX-23TXH only d. VSX-21TXH only... -
Page 45: Basic Playback
Basic playback Chapter 5: Basic playback When using a surround back speaker, 2D+PLIIx MOVIE is displayed when playing Dolby Digital 5.1- Playing a source channel signals, and DTS+Neo:6 is displayed when Here are the basic instructions for playing a source (such playing DTS 5.1-channel signals. -
Page 46: Selecting The Multichannel Analog Inputs
• Features such as the equalizer cannot be controlled using this receiver, and we recommend switching the equalizer off before connecting. • Pioneer cannot under any circumstances accept responsibility for any direct or indirect loss arising from any inconvenience or loss of recorded material resulting from the iPod failure. -
Page 47: Basic Playback
Basic playback Continue browsing until you arrive at what you Basic playback controls want to play, then press to start playback. The following table shows the basic playback controls for • Main Zone: your iPod. Press iPod USB to switch the remote control to the iPod/USB operation mode. -
Page 48: Playing A Usb Device
(MP3 players) of format FAT16/32. It is not possible to connect this unit to a personal computer for USB playback. • Pioneer cannot guarantee compatibility (operation and/or bus power) with all USB mass storage devices and assumes no responsibility for any loss of data that may occur when connected to this receiver. -
Page 49: Playing Back Photo Files Stored On A Usb Memory Device
Basic playback Use / to select a folder, then press ENTER to Basic playback controls browse that folder. The following table shows the basic playback controls for • To return to the previous level any time, press RETURN your USB memory device. Press iPod USB to switch the remote control to the iPod/USB operation mode. -
Page 50: About Playable File Formats
Basic playback About playable file formats The USB function of this receiver supports the following file formats. Note that some file formats are not available for playback although they are listed as playable file formats. Music files Category Extension Stream .mp3 MPEG-1, 2, 2.5 Audio Layer-3 Sampling frequency... -
Page 51: Listening To The Radio
Basic playback Tuning directly to a station Listening to the radio Sometimes, you’ll already know the frequency of the station you want to listen to. In this case, you can simply The following steps show you how to tune in to FM and enter the frequency directly using the number buttons on AM radio broadcasts using the automatic (search) and the remote control. -
Page 52: Listening To Station Presets
Basic playback Input the name you want. Choose from the following characters for a name up to Listening to Satellite Radio eight characters long. To listen to Satellite Radio, you’ll need to connect either ABCDEFGHIJKLMNOPQRSTUVWXYZ a SIRIUS or XM Satellite Radio tuner (sold separately) to your satellite-ready receiver. -
Page 53: Using Xm Hd Surround
Basic playback Press / to enter the XM Channel Guide, then After connecting, you will be able to use this receiver to • navigate through the channels one at time with /, select channels and navigate categories using the GUI screen. -
Page 54: Using The Xm Menu
Basic playback Listening to channel presets Listening to SIRIUS Radio Press CLASS to select the class in which the channel For more details, see About SIRIUS and XM on page 111. is stored. Press repeatedly to cycle through classes A to G. •... -
Page 55: Saving Channel Presets
Basic playback Selecting channels and browsing by genre From the SIRIUS Channel Guide, you can browse SIRIUS Radio channels in the order that they appear, or you can • You can also press MEMORY during reception narrow your channel search by genre. display to save the information of up to five songs. -
Page 56: Listening To Your System
Listening to your system Chapter 6: Listening to your system Important • The listening modes and many features described in • When an ALC is selected, the effect level can be this section may not be available depending on the adjusted using the EFFECT parameter in Setting the current source, settings and status of the receiver. -
Page 57: Using The Home Thx Modes
Listening to your system • 2 Pro Logic IIx MUSIC – Up to 7.1 channel sound, AUTO/ALC/ MENU DIRECT STEREO STANDARD ADV SURR especially suited to music sources PHASE CTRL STATUS • 2 Pro Logic IIx GAME – Up to 7.1 channel sound, especially suited to video games PQLS MEMORY... -
Page 58: Using The Advanced Surround Effects
Listening to your system Using the Advanced surround effects The Advanced surround effects can be used for a variety of • When an Advanced Surround listening mode is additional surround sound effects. Most Advanced Surround selected, the effect level can be adjusted using the modes are designed to be used with film soundtracks, but EFFECT parameter in Setting the Audio options on some modes are also suited for music sources. -
Page 59: Using Stream Direct
Listening to your system • PURE DIRECT – Analog sources are heard without • While listening to a source, press RECEIVER , then press STEREO to select Front Stage Surround Advance any digital processing. No sound is output from the Speaker B in this mode. -
Page 60: Using The Virtual Surround Back Mode
Listening to your system • Depending on the positions of the speakers and the Using the Virtual Surround Back mode sound source, in some cases it may not be possible • Default setting: OFF to achieve good results. In this case, set the setting to When you’re not using surround back speakers, OFF. -
Page 61: Selecting Mcacc Presets
Listening to your system • PCM – For PCM input signals. The receiver selects the first available signal in the following order: HDMI; Selecting MCACC presets DIGITAL. • Default setting: MEMORY 1 When set to DIGITAL, HDMI or AUTO (only selected If you have calibrated your system for different listening DIGITAL or HDMI), the indicators light according to the positions... - Page 62 Listening to your system Phase Control OFF Front speaker Listening position Sound Sound muffled due Subwoofer source to a delay in time • Rhythms blurred and difficult to hear • Bass sound with loss of depth • Sound of musical instruments with no reality Phase Control ON Front speaker Listening...
-
Page 63: Kuro Link
Synchronized operation with a KURO LINK-compatible • VSX-23TXH only: To use the KURO LINK function, Pioneer flat panel TV or Blu-ray disc player or with a connect this receiver and flat panel TV using the component of another make that supports the KURO HDMI OUT 1 terminal. -
Page 64: About Connections With A Product Of A Different Brand That Supports The Kuro Link Function
KURO LINK function. For more information the receiver’s KURO LINK function is connected to a TV see the operating instructions for each component. of a brand other than Pioneer that supports the KURO LINK function. (Depending on the TV, however, some of PQLS... -
Page 65: Setting The Pqls Function
SETUP than one connected by HDMI. ZONE 2 ZONE 3 MAIN The operations below can also be used on Pioneer KURO • Press RECEIVER , then press PQLS to select PQLS LINK-compatible flat panel TVs. -
Page 66: Using Other Functions
Using other functions Chapter 8: Using other functions Setting What it does Option(s) Setting the Audio options Applies the treble and bass tone BYPASS TONE controls to a source, or bypasses There are a number of additional sound settings you can (Tone them completely. - Page 67 Using other functions g.• HDMI Audio setting cannot be switched while performing Setting What it does Option(s) synchronized amp mode operations. Brings out detail in SACDs by SACD • The synchronized amp mode must be turned on in order to play maximizing the dynamic range the receiver’s HDMI audio and video input signals from the TV with GAIN...
-
Page 68: Setting The Video Options
• These functions do not affect inputs other than DVD, TV/SAT, DVR, VIDEO (VSX-21TXH), VIDEO1 and 2 (VSX- Adjusts the motion and still picture –4 to +4 P.MOTION set to 23TXH). -
Page 69: Switching The Speaker System
Using other functions Switching the speaker system Using the MULTI-ZONE controls If you selected Speaker B in Surround back speaker The following steps use the front panel controls to adjust setting on page 91, three speaker system settings are the sub zone volume and select sources. See MULTI- possible using SPEAKERS. -
Page 70: Making An Audio Or A Video Recording
Using other functions For more information about video connections, see Use the MASTER VOLUME dial to adjust the volume for the zone you have selected. Connecting an HDD/DVD recorder, VCR and other video This is only possible if you selected the Variable volume sources on page 28. -
Page 71: Using The Sleep Timer
Using other functions INPUT SELECT HDMI OUT AUDIO INFO DISP Using the sleep timer SIGNAL SEL MCACC SLEEP RECEIVER TV CTRL The sleep timer switches the receiver into standby after a REMOTE SBch A.ATT DIMMER SETUP specified amount of time so you can fall asleep without worrying about the receiver being left on all night. -
Page 72: Resetting The System
Using other functions Setting Default Resetting the system Use this procedure to reset all the receiver’s settings to Surround back channel Processing the factory default. Use the front panel controls to do this. Phase Control Set MULTI-ZONE to OFF. Sound Retriever iPod/USB function •... -
Page 73: Controlling The Rest Of Your System
Controlling the rest of your system Chapter 9: Controlling the rest of your system Operating multiple receivers Setting the remote to control other The remote control included with this receiver can be components used to operate up to three other receivers (of the same Most components can be assigned to one of the input model as this receiver) in addition to this receiver. -
Page 74: Resetting The Remote Control Presets
Controlling the rest of your system Resetting the remote control presets Controls the components This will erase all preset remote control preset codes and This remote control can control components after programmed buttons. entering the proper codes (see Setting the remote to control other components on page 73 for more on this). - Page 75 Controlling the rest of your system Button(s) TV (Monitor) BD/DVD HDD/DVR SAT/CATV SOURCE POWER ON/OFF POWER ON/OFF POWER ON/OFF POWER ON/OFF POWER ON/OFF POWER ON/OFF Number buttons numerics numerics numerics numerics numerics numerics KURO LINK CLEAR • (dot) •...
- Page 76 Controlling the rest of your system Button(s) CD/CD-R/SACD MD/DAT TAPE Button(s) TV (Projector) SOURCE POWER ON/OFF POWER ON/OFF POWER ON/OFF POWER ON/OFF SOURCE POWER ON MOVIE Number buttons numerics numerics numerics • (dot) >10/CLEAR CLEAR CLEAR STANDARD ENTER ENTER DISK/ENTER OPEN/CLOSE...
-
Page 77: The Advanced Mcacc Menu
2 • You can’t use the HOME MENU when the iPod/USB, XM or SIRIUS Radio input function is selected (in either the main or sub zone). • VSX-23TXH: When you set ZONE 2, ZONE 3 or ZONE 2&3 to ON (page 69), you can’t use the HOME MENU. • VSX-21TXH: When you set ZONE 2 to ON (page 69), you can’t use the HOME MENU. -
Page 78: Automatic Mcacc (Expert)
The Advanced MCACC menu Select the parameters you want to set. Use / to select the item, then use / to set. Automatic MCACC (Expert) If your setup requires more detailed settings than those 1b.Auto MCACC 1b.Auto MCACC A/V RECEIVER A/V RECEIVER provided in Automatically setting up for surround sound Speaker Setting... -
Page 79: The Advanced Mcacc Menu
If there doesn’t seem to be a problem, you can simply select GO NEXT and continue. If necessary, confirm the speaker configuration in the GUI screen. VSX-21TXH: The configuration shown on-screen should reflect the actual speakers you have. iPod VIDEO 2 INPUT... -
Page 80: Manual Mcacc Setup
The Advanced MCACC menu • If you see an ERR message (or the speaker You can also choose to view the settings by selecting configuration displayed isn’t correct), there may be a individual parameters from the MCACC Data Check problem with the speaker connection. screen: If selecting RETRY doesn’t work, turn off the power •... -
Page 81: Fine Channel Level
The Advanced MCACC menu Fine Channel Level Important • Default setting: 0.0dB (all channels) • You will need to first specify the MCACC preset you You can achieve better surround sound by properly want to adjust by pressing MCACC before pressing adjusting the overall balance of your speaker system. -
Page 82: Fine Speaker Distance
The Advanced MCACC menu Fine Speaker Distance • Default setting: 10’00” (all speakers) For proper sound depth and separation with your system, it is necessary to add a slight bit of delay to some speakers so that all sounds will arrive at the listening position at the same time. -
Page 83: Acoustic Calibration Eq Adjust
2 This system allows you to customize your system calibration with the help of a graphical output that can be displayed on-screen, or using a computer (with software available from Pioneer—see Output PC on page 88 for more on this). - Page 84 The Advanced MCACC menu • Reverberance of high vs. low frequencies – How to interpret the graphical output Depending on your room, you may find that lower The graph shows decibels on the vertical axis and time (in frequencies seem overly reverberant compared to milliseconds) on the horizontal axis.
- Page 85 The Advanced MCACC menu • EQ OFF – You will see the reverb characteristics of Select an option and press ENTER. • Reverb Measurement – Use this to measure the your listening area without the equalization reverb characteristics before and after calibration. performed by this receiver (before calibration).
-
Page 86: Checking Mcacc Data
The Advanced MCACC menu If ‘Advanced EQ Setup’ is selected, select the MCACC memory to be stored, then enter the desired Checking MCACC Data time setting for calibration, and then select START. At the procedure of Automatically setting up for surround Based on the reverb measurement above, you can sound (Auto MCACC) on page 41, the procedure of choose the time period that will be used for the final... -
Page 87: Speaker Setting
The Advanced MCACC menu When ‘MCACC’ is highlighted, use / to select Speaker Setting the MCACC preset you want to check. Use this to display the speaker size and number of The distance from the various channels set at the speakers. -
Page 88: Output Pc
The Advanced MCACC menu Output PC Data Management Before continuing, make sure you have completed step 2 in Checking MCACC Data on page 86. The data measured This system allows you to store up to six MCACC presets, with the Advanced MCACC function is transmitted to the allowing you to calibrate your system for different connected computer. -
Page 89: Renaming Mcacc Presets
The Advanced MCACC menu Renaming MCACC presets Select ‘OK’ to confirm and copy the settings. When MCACC Memory Copy? is displayed, select YES. If you have several different MCACC presets that you’re If NO is selected, the memory is not copied. using, you may want to rename them for easier identification. -
Page 90: The System And The Other Setup
2 • You can’t use the HOME MENU when the iPod/USB, XM or SIRIUS Radio input function is selected (in either the main or sub zone). • VSX-23TXH: When you set ZONE 2, ZONE 3 or ZONE 2&3 to ON (page 69), you can’t use the HOME MENU. • VSX-21TXH: When you set ZONE 2 to ON (page 69), you can’t use the HOME MENU. -
Page 91: Surround Back Speaker Setting
The system and the other setup • Surr Back System – Specifies how you are using your When ‘Setting Change?’ is displayed, select Yes. surround back speakers (see below). If No is selected, the setting is not changed. • Speaker Setting – Specifies the size and number of You will return to the Manual SP Setup menu. -
Page 92: Channel Level
The system and the other setup • SB – Select the number of surround back speakers Select a setup option. you have (one, two or none). Select LARGEx2 or • MANUAL – Move the test tone manually from LARGEx1 if your surround back speakers reproduce speaker to speaker and adjust individual channel bass frequencies effectively. -
Page 93: Speaker Distance
The system and the other setup • If you select OFF, the frequency curve will be flat and Speaker Distance the X-Curve has no effect. For good sound depth and separation from your system, you need to specify the distance of your speakers from When you’re finished, press RETURN. -
Page 94: The Other Setup Menu
If you are doing this for the first time, you may want to adjust these settings in order: • KURO LINK Setup – Synchronizes this receiver with your Pioneer component supporting KURO LINK (see KURO LINK Setup on page 64). -
Page 95: Zone Audio Setup
A/V RECEIVER A/V RECEIVER Volume Limit 1. KURO LINK Setup integrated amplifier (such as another Pioneer VSX 2. Multi Ch In Setup 3. ZONE Audio Setup 4. Power ON Level Setup receiver) in the sub room and want to use that 5. -
Page 96: Remote Control Mode Setup
The system and the other setup Remote Control Mode Setup • Default setting: 1 This sets this receiver’s remote control mode to prevent erroneous operation when multiple units of the receiver are being used. Select ‘Remote Control Mode Setup’ from the Other Setup menu. -
Page 97: Additional Information
Testing by the Pioneer Multi-channel Research Group The three major elements in positioning the speakers are has shown that a good sense of sound positioning can be... -
Page 98: Positional Relationship Between Speakers And Monitor
If so, re-attach the speaker wires, making sure there are no stray strands. indicator blinks. • The receiver may have a serious problem. Disconnect from the power and call a Pioneer authorized independent service company. During loud playback the •... -
Page 99: No Sound
• Wait at least 1 minute, then try turning the power on again. power turns off. The Receiver suddenly power • The power unit is damaged. Unplug the receiver from the wall and call a Pioneer authorized off or the blue indicator at the independent service company. -
Page 100: Other Audio Problems
Additional information Symptom Remedy No sound from one speaker. • Check the speaker connection (see Connecting the speakers on page 19). • Check the speaker level settings (see Channel Level on page 92). • Check that the speaker hasn’t been set to NO (see Speaker Setting on page 91). •... -
Page 101: Video
Additional information Symptom Remedy Can’t select some Input • Make sure that the Input Skip settings in the INPUT SETUP menu. functions by the INPUT • Make sure that the HDMI Input assign in the INPUT SETUP menu then try OFF. SELECTOR on the front panel or the INPUT SELECT button on the remote control. -
Page 102: Professional Calibration Eq Graphical Output
Additional information Symptom Remedy After using the Auto MCACC • There may have been some low frequency noise in the room from an air-conditioner, motor, etc. Setup, the speaker size setting Switch off all other appliances in the room and use Auto MCACC Setup again. is incorrect. -
Page 103: Remote Control
• Check that there are no obstacles between the receiver and the remote control. • Make sure that there is no fluorescent or other strong light shining on to the remote sensor. • Check the connections of the CONTROL IN jack (see Operating other Pioneer components with this unit’s sensor on page 35). -
Page 104: Important Information Regarding The Hdmi Connection
Additional information Symptom Remedy Noisy or distorted picture. • Sometimes a video deck may output a noisy video signal (during scanning, for example), or the video quality may just be poor (with some video game units, for example). The picture quality may also depend on the settings, etc. -
Page 105: Usb Interface
Additional information USB interface Symptoms Causes Remedies The folders/files stored on a The folders/files are currently stored in a region Store the folders/files in the FAT region. USB memory device are not other than the FAT (File Allocation Table) region. displayed. -
Page 106: Sirius Radio Messages
Additional information Message Cause Action CH Unauthorized You selected an XM channel that is blocked or Consult the latest channel guide at cannot be received with your XM subscription www.xmradio.com for the current list of channels. package. For information on receiving this channel, visit www.xmradio.com or contact XM Satellite Radio at 1-800-967-2346. -
Page 107: Surround Sound Formats
Additional information Dolby Surround is an encoding system which embeds surround sound information within a stereo soundtrack, Surround sound formats which a Dolby Pro Logic decoder can then use for Below is a brief description of the main surround sound enhanced surround listening with greater sound detail. -
Page 108: Dts
Additional information DTS-HD Master Audio DTS-HD Master Audio is a technology that delivers master The DTS technologies are explained below. See audio sources recorded in a professional studio to listeners www.dtstech.com for more detailed information. without any loss of data, preserving audio quality. DTS-HD Master Audio adopts variable data transfer rates, facilitating data transfer to the maximum rate of 24.5 Mbps in the Blu-ray disc format, 18.0 Mbps in the HD-DVD... -
Page 109: About Thx
Additional information speakers sound like headphones that lack spaciousness and envelopment. The surround sounds will also collapse into the closest About THX speaker as you move away from the middle seating position. Adaptive The THX technologies are explained below. See Decorrelation slightly changes one surround channel’s time and phase relationship with respect to the other surround channel. -
Page 110: About Neural - Thx Surround
This product is manufactured under license from Neural Audio directional surround sounds. Corporation and THX Ltd. PIONEER Corporation hereby grants the user DTS-ES (Matrix and 6.1 Discrete) and Dolby Digital Surround EX a non-exclusive, non-transferable, limited right of use to this product... -
Page 111: About Sirius And Xm
Additional information About SIRIUS and XM SIRIUS, XM and all related marks and logos are trademarks of Sirius XM Radio Inc. and its subsidiaries. All other marks and logos are the property of their respective owners. All rights reserved. SIRIUS and XM subscriptions sold separately. -
Page 112: Auto Surround, Alc And Stream Direct With Different Input Signal Formats
Additional information Auto Surround, ALC and Stream Direct with different input signal formats The following charts show what you will hear with different input signal formats, depending on the Stream Direct mode (see Using Stream Direct on page 59) you have selected. Stereo (2 channel) signal formats Input signal format Auto Surround / ALC / DIRECT... -
Page 113: Preset Code List
Manufacturer General Commercial Solutions 11447, Granada 10037 MAG 11498, 11687 10047 Grundig 10037, 10672, 10683 Magnasonic 10000, 10054, Pioneer 10166, 10679, 11260, Conic 10178 Grundy 10180 10156, 10093, 10092 11398 Contec 10180 Magnavox 10000, 10250, 11454, Grunpy 10180 A-Mark 10047, 10054, 10160... - Page 114 Audiovox 10180 NEC 11797 Spectravision 10156, 10178 Norcent 11365 Emerson 10236 Plasma Television Spectroniq 11498, 11687 Olevia 11610, 11144, 11240, Squareview 10171 Pioneer 10679, 11260, 11398, 11331 SR2000 10154, 10171 11633, 14000, 14001, 14003, SSS 10180 Panasonic 11480, 10650 14004...
- Page 115 General Goodmans 20037, 20081, 20000, Panasonic 21062, 20035, 20162, Toshiba 20045, 20000, 20043, 20278 20000, 20225, 20226, 20614, 21972, 21996 Pioneer 20162, 20081, 20042, Gradiente 20000 20616, 21162, 21244, 21293, Tosonic 20278 20067, 20058, 22306, 22465, 21562 Granada 20081, 20042...
- Page 116 Additional information General Firstline 30651 NEC 30785, 30869 Technika 30770 Fisher 30670 Next Base 30826 Technosonic 30730 Pioneer 30525, 30571, 30142, Funai 30675, 31268, 31334 Nintaus 31051 Tevion 30651 30631, 30632, 31460, 31512, Norcent 30872, 31107 Theta Digital 30571 31571, 32442...
- Page 117 Accurian 30675 General Kenwood 70626, 70000, 70029, Polk Audio 70157 Thule Audio 70157 70028, 70037 Proton 70157 Victor 70072 Pioneer 71063, 70032, 71087, Krell 70157 QED 70157 70468, 73468 Wards 70032, 70157, 70053, Linn 70157 Quad 70157 70087 Aiwa 70157...
-
Page 118: Cassette Deck
General General Instrument 00476, Panasonic 00000, 00008, 00144, US Electronics 00276, 00008 00810, 00276 00107, 01982 Videoway 00000 Pioneer 01877, 00877, 00144, GoldStar 00144 Paragon 00000, 00008, 00525 00533, 01021, 01782 Zenith 00000, 00525 Penney 00000 Hitachi 00008 A-Mark 00008, 00144... -
Page 119: Specifications
HDMI terminal ......19-pin (Not DVI) Pioneer is dedicated to making your home theater HDMI output type ......5 V, 100 mA listening experience as close as possible to the vision of USB terminal. -
Page 120: Index
Additional information Index Numerics 12V trigger 36 Effect 67 Acoustic Cal EQ 87 Fine Channel Level 81 Acoustic Calibration EQ 66 Fine Speaker Distance 82 Acoustic Calibration EQ Adjust 83 Flicker Reduction 96 Acoustic Calibration EQ Professional 83 Front Stage Surround Advance 58 Advanced MCACC 77-89 Output PC 36, 88 Advanced surround 58... - Page 121 Additional information Panorama 67 Up Mix 60 Phase control 61 USB 39, 48-50, 105 Placing 18 Playable file formats 50 Play 45 Power cord 39 Power ON Level 95 Video cable 23 PQLS 65 Video converter 23 Pre-out 30 VIDEO PARAMETER 68 Preset code 113 Volume Limit 95 Progressive Motion 68...
- Page 122 Additional information We Want You Listening For A Lifetime Used wisely, your new sound equipment will provide a lifetime of fun and enjoyment. Since hearing damage from loud noise is often undetectable until it is too late, this manufacturer and the Electronic Industries Association’s Selecting fine audio equipment such as the unit Consumer Electronics Group recommend you avoid you’ve just purchased is only the start of your...
- Page 123 à un distributeur autorisé Pioneer du Canada pour Service Company, or if you wish to purchase replacement obtenir le nom du Centre de Service Autorisé Pioneer le plus parts, operating instructions, service manuals, or près de chez-vous. Vous pouvez aussi contacter le Service à...
Need help?
Do you have a question about the Elite VSX-21TXH and is the answer not in the manual?
Questions and answers