Table of Contents
Advertisement
Advertisement
Table of Contents

Related Manuals for GE 30522EE1


Summary of Contents for GE 30522EE1
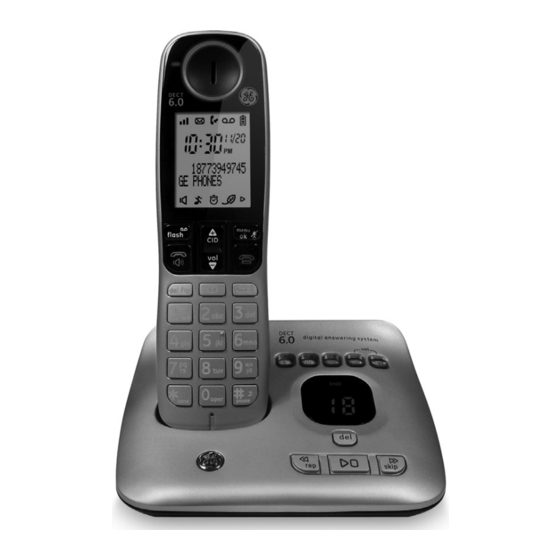
- Page 1 DECT 6.0 CORDLESS TELEPHONE Model number: 30522...
- Page 2 Thank you for choosing GE! Register your product Please take a moment to register your product online. Just go to www.gephones.com and click “register here” from the home page. Provide your email address and receive product updates, special offers, or discounts on future purchases.
-
Page 3: Table Of Contents
Table of contents Getting started Handset settings Parts checklist ..........1 Ringer volume ..........19 Telephone jack requirements ....2 Ringer melody ..........19 Telephone base installation .....2 Key tone ............20 Charger installation ........3 Display language ........20 Battery installation........4 Equalizer ............21 Wall mount installation......5 Energy save .......... - Page 4 Caller ID Advanced settings Using Caller ID service ......33 Dialing mode..........42 Phonebook Caller-ID matching ... 33 Programming your area code Review/call from the call log ....33 (optional) ............ 42 Save a number to the phonebook ..34 Reset ..............
-
Page 5: Getting Started
Getting started Parts checklist Your telephone contains the following items. Save your sales receipt and original packaging in the event warranty service is necessary. Power adapter for Telephone base telephone base Handset (1 for 30522XE1 2 for 30522XE2 3 for 30522XE3 4 for 30522XE4) Power adapter Charger... -
Page 6: Telephone Jack Requirements
Getting started Telephone jack requirements Wall plate To use this phone, you need a RJ11C type modular telephone jack, which might look like the one pictured here. If you do not have a modular jack, call your telephone service provider to find out how to have one installed. Modular telephone If you have DSL high speed Internet service, a DSL filter is... -
Page 7: Charger Installation
Getting started Charger installation (For models with additional handsets) 1. Plug the smaller end of the power adapter into the charger. 2. Plug the larger end of the power adapter into an electrical outlet not controlled by a wall switch. CAUTION: 1. -
Page 8: Battery Installation
Getting started Battery installation CAUTION: 1. Use only the supplied rechargeable battery or equivalent replacement battery. See battery specifications on the Technical specification page or visit our website at www.gephones.com to find out how to order a replacement battery if necessary. -
Page 9: Wall Mount Installation
Getting started Wall mount installation The telephone comes ready for desktop use. If you want to mount your telephone on the wall, follow the steps below. 1. Make sure the telephone line cord is unplugged from the modular jack and the power adapter cord is unplugged from the electrical outlet before installation. - Page 10 Getting started 3. Plug the power adapter cord into the jack on the back of the telephone base. Align the tabs at the top of the wall bracket with the recessed slots on the back of the base unit. Align the lower tabs of the wall bracket with the slots on the bottom of the base.
- Page 11 Getting started 5. Route the telephone line cord through the open slot at the bottom of the wall mount bracket, leaving about 8 inches from the slot to the end of the cord as shown. Plug the line cord into the jack on the wall plate.
- Page 12 Getting started 7. To test the installation, pick up the handset, press the button. If you hear a dial tone, the installation is correct. 8. Neatly tie the excess telephone line cord with a twist tie so it is held close to the bottom of the base unit.
-
Page 13: Overview
Overview Telephone base layout vol down Press to decrease the locator ans. on/off telephone base ringer Press to page Press to turn the Press to turn DND volume when in idle all system mode on or off. answering system mode. handsets. -
Page 14: Handset Layout
Overview Handset layout CID/volume up off/cancel • Press to review the call • During a call, press to hang up. log when the telephone • During programming, press to cancel and is not in use. exit without making changes. • While in menu, press to scroll up. -
Page 15: Battery Charging
Overview Battery charging The following table summarizes the battery charge indicators and what actions need to be taken. Battery Battery status Action indicators Battery icon is Battery is charging. Keep the handset in the telephone scrolling. base or charger when not in use. Battery icon is Battery is completely The handset is ready for use. -
Page 16: Screen Display Icon
Overview Screen display icon Item Meaning • Displays when the telephone base is within reception range. • Flashes when the telephone base is out of range. • Scrolls to indicate battery charging when handset is in the telephone base or charger. •... -
Page 17: Initial Settings
Initial settings In order for your answering system to accurately mark your messages, you must set the time and date. Please see page 26 for Time and date setting instructions. Telephone operation Make a call 1. Press 2. Dial the phone number after you hear the dial tone. Predial a call 1. -
Page 18: Volume Control
Telephone operation Volume control You can adjust the volume of the handset or speakerphone anytime during a call. On the handset, press to increase or to decrease the volume. NOTE: Only the listening volume can be adjusted. Make a call using the redial memory The last ten telephone numbers previously dialed are stored in the redial list (up to 24 digits each). -
Page 19: Mute
Telephone operation Mute The mute function allows you to turn off the microphone while on a call. You can hear the other party but the other party cannot hear you. 1. Press during a call. 2. Press again to resume conversation. NOTE: The screen shows MUTE ON when mute feature is activated. -
Page 20: Intercom
Telephone operation Intercom The system allows an intercom call between two handsets registered to the same telephone base. To initiate an intercom call: 1. Press del/int. • If your telephone system has only two handsets registered, the intercom call will be automatically directed to the other system handset. -
Page 21: To Initiate An Intercom During A Call
Telephone operation To initiate an intercom during a call You can intercom with another system handset during a call, or invite another system handset to join. 1. Press del/int during a call. • If your telephone system has only two handsets registered, the intercom call will be automatically directed to the other system handset. -
Page 22: Push To Talk (Ptt)
Telephone operation Push to talk (PTT) You can directly broadcast messages to the speakerphone of any registered handset in the system. To initiate a PTT: 1. Press the PTT button on the right side of the handset. • If your telephone system has only two handsets registered, the broadcast will be automatically directed to the other system handset. -
Page 23: Handset Settings
Handset settings Ringer volume You can set the handset ringer volume from level 1 to 10:30 11/20 level 5 or turn the ringer off. HANDSET TONES >RING VOLUME 1. Press 2. Press to select HANDSET TONES and then 10:30 11/20 press RING VOLUME 3. -
Page 24: Key Tone
Handset settings Key tone The handset can be programmed to emit a tone with each key press. You can choose to turn this feature on or off. The default setting is ON. To change the key tone setting: 1. Press 10:30 11/20 2. -
Page 25: Equalizer
Handset settings Equalizer This feature allows you to change the balance of the audio of the handset to best suit your hearing. 1. Press 10:30 11/20 2. Press to select SETTINGS and then press SETTINGS >EQUALIZER 3. Press to select EQUALIZER and then press 10:30 11/20 4. -
Page 26: Base Settings
Base settings Base ringer melody You can select from 5 ringer tones. 10:30 11/20 1. Press BASE TONES 2. Press to select BASE TONES and then >BASE MELODY press 3. Press again to select BASE MELODY. 10:30 11/20 4. Press to select the desired setting and BASE MELODY >MELODY 1... -
Page 27: Block List
Block list You can program telephone numbers into the block list so that the telephone silences when a call is received from one of the blocked numbers. The handset shows BLOCK LIST when the programmed numbers call and will not record the number in the caller ID history. To add a new entry 1. -
Page 28: To Delete An Entry
Block list To delete an entry 1. Press 2. Press to select BLOCK LIST and then press 3. Press to select the desired entry and then 10:30 11/20 press BLOCK LIST 4. Press to select DELETE ENTRY and then >DELETE ENTRY press 3 times to confirm. -
Page 29: Do Not Disturb
Do not disturb When DO NOT DISTURB (DND) mode is activated, all incoming calls will be silent. This feature only silences the ringer, the incoming number, if you have subscribed to the caller ID service from your telephone service provider, will be recorded in the caller ID history as normal. Global DND When global DND is activated, all system handsets and the telephone base will be silent when there is an incoming call. -
Page 30: Clock And Alarm
Clock and alarm Date and time You can set the date and time of the telephone system as follows. 1. Press 10:30 11/20 2. Press to select CLOCK & ALARM and then CLOCK & ALARM press >SET DATE/TIME 3. Press again to select SET DATE/TIME. -
Page 31: Date Format
Clock and alarm Date format The display format of date can either be selected as Month/Day or Day/Month. The default setting is Month/Day. To change your setting: 1. Press 10:30 11/20 2. Press to select CLOCK & ALARM and then CLOCK &... -
Page 32: Alarm Tone
Clock and alarm Alarm tone You can select from 3 alarm melodies. 1. Press 10:30 11/20 2. Press to select CLOCK & ALARM and then CLOCK & ALARM >ALARM TONE press 3. Press to select ALARM TONE and then 10:30 11/20 press ALARM TONE... -
Page 33: Phonebook
Phonebook Add a phonebook record 1. Press 10:30 11/20 2. Press to select PHONEBOOK and then MAIN MENU >PHONEBOOK press 3. Press again to select ADD NEW. 4. Enter the name (max. 14 character). Press the key to 10:30 11/20 the corresponding character to display the correct PHONEBOOK >ADD NEW... -
Page 34: Character Table
Phonebook Character table Use the dial pad and the chart below to enter a name (up to 14 characters). Each press of a particular key displays the character in the following order: Dial pad Character by number of key presses space <... -
Page 35: To View/Call A Phonebook Record
Phonebook To view/call a phonebook record Records are stored alphabetically in the phone book. To search the phonebook: 1. Press when handset is not in use. NOTE: You can also access the phonebook by pressing and selecting PHONEBOOK. 2. Press to find an entry. -
Page 36: Edit A Phonebook Entry
Phonebook Edit a phonebook entry 1. Press when the handset is not in use. 2. Press to locate a desired entry and then 10:30 11/20 press PHONEBOOK 3. Press to select EDIT CONTACT and then >EDIT CONTACT press twice. 4. Edit the name by using the del/int key to erase and backspace, then enter new characters using the dial pad keys and press 5. -
Page 37: Caller Id
Caller ID Using Caller ID service IMPORTANT: To use the Caller-ID capabilities of this telephone system, you must subscribe to Caller-ID services from your service provider. Check with your telephone service provider for details. Caller ID records are stored in the order that they are received. Your telephone stores caller ID memory for the 50 most recent calls. -
Page 38: Save A Number To The Phonebook
Caller ID Save a number to the phonebook 1. Press 10:30 2. Press to locate the desired record and 11/20 CALL LIST then press >COPY TO PHBK 3. Press to select COPY TO PHBK and then press 10:30 11/20 4. Enter the name by using the dial pad keys if ENTER NAME necessary, and then press 5. -
Page 39: Answering System
Answering system This section explains how to set up your answering system. Before you begin the setup process, please make sure that the answering system is on. Turning the answering system on or off Using the telephone base: Press on the telephone base to turn the answering system on or off. button will light when the answering system is on. -
Page 40: New Message Indicator
Answering system New message indicator When there are new messages on the answering system, the number of new messages flashes on the message window on the telephone base, the icon flashes and XX TAM MSG displays on the handset screen. Outgoing Announcement (OGA) When the answering system answers a call, the pre-recorded outgoing announcement is played to the caller unless you have recorded your... -
Page 41: Play The Current Outgoing Announcement
Answering system Play the current outgoing announcement The following steps allow you to listen to the current outgoing announcement. The answering system plays the pre-recorded outgoing message if you have not recorded your own. To listen to the current outgoing announcement: 1. -
Page 42: Security Code For Remote Access
Answering system Security code for remote access Your answering system allows you to program a 4-digit security code to get access to the system through any touch-tone telephone. The default security code is 0000. To view the current remote code: 1. -
Page 43: Message Playback Using The Telephone Base
Answering system Message playback using the telephone base 1. Press on the telephone base to listen to the messages. 2. The system announces the number of messages and date and time when the message was recorded. 3. Press again to stop the playback. Options during playback Operation Press to adjust the listening volume. -
Page 44: Delete All Messages
Answering system Delete all messages Using the telephone base Press and hold the del key. The system announces “All old messages erased.” Using a handset 1. Press 2. Press to select ANS SYSTEM and then press 3. Press to select DEL. ALL OLD. 4. -
Page 45: Access The Answering System Remotely
Answering system Access the answering system remotely 1. Dial your phone number from any touch-tone telephone. 2. Once your answering system takes your call and you hear your outgoing announcement, press the # key. The answering system will ask you to enter your security code. 3. -
Page 46: Advanced Settings
Advanced settings Dialing mode The default dialing mode is TONE for touch tone dialing. If you have pulse or rotary service, you can change this setting to accommodate your telephone line service. 1. Press 10:30 11/20 2. Press to select ADV SETTING and then ADV SETTING press >DIAL MODE... -
Page 47: Reset
Advanced settings Reset This feature allows you to restore all system settings, except the answering system messages and phonebook, to default settings. This feature could be useful, for example, if you have forgotten the security code to access the answering system remotely. 10:30 1. -
Page 48: Deregistering A Handset
Advanced settings Deregistering a handset This feature is intended for base replacement procedures. Handset deregistration is not recommended for normally functioning systems. For more information concerning deregistration, visit us online at www.gephones.com 1. Press 2. Press to select ADV SETTING and then press 3. -
Page 49: Appendix
Appendix Troubleshooting guide If your telephone system is not operating properly, first try this general reset procedures: 1. Unplug all power adapters from the power outlets. 2. Disconnect the telephone line cord from the base or modular jack. 3. Remove the battery compartment covers and unplug all handset battery packs. - Page 50 Appendix Handset does • The ringer may be off. Increase the ringer not ring. volume. • Make sure your handset is charged. You experience • The handset may be near the end of range limit. audible static, Move the handset closer to the base unit. noise, or fading •...
-
Page 51: General Product Care
Appendix Answering system Problem Cause/solution The unit does • Make sure the answering system is on. not record new • The message memory may be full. Some messages. messages will need to be deleted. Cannot access • The system may be in use by another party. the answering •... -
Page 52: Important Safety Instructions
Appendix Important Safety Instructions Some of the following information may not apply to your particular product; however, when using telephone equipment, basic safety precautions should always be followed to reduce the risk of fire, electric shock and injury to persons, including the following: 1. - Page 53 Appendix 13. Do not expose the product to extreme temperatures such as areas near a hot radiator, stove or in a hot car. Do not place product upon other consumer electronic products such as; computer monitors, power amplifiers, etc. 14. Do not place lighted candles, cigarettes, cigars, etc., on or near the telephone.
- Page 54 Appendix 4. Do not dispose of the battery(ies) in fire. They may explode. Check with local codes for possible special disposal instructions. 5. Do not open or mutilate the battery(ies). Released electrolyte is corrosive and may cause damage to the eyes or skin. It may be toxic if swallowed. 6.
-
Page 55: Save These Instructions
Appendix 16. Battery safety precautions • Do not burn, disassemble, mutilate, or puncture. Like other batteries of this type, toxic materials could be released which might cause injury to persons or property damage. • To reduce the risk of fire or personal injury, use only the supplied battery or replacement battery. -
Page 56: Fcc Parts 15, 68 And Acta
Appendix FCC Parts 15, 68 and ACTA This equipment is in compliance with parts 15 and 68, FCC Rules and Regulations and the Technical Requirements for Telephone Terminal Equipment published by ACTA. On the bottom of this equipment is a label indicating, among other information, the US number and Ringer Equivalence Number (REN) for the equipment. - Page 57 Appendix equipment, operations or procedures where such action is required in the operation of its business and not inconsistent with FCC Rules and Regulations. If these changes are expected to affect the use or performance of your telephone equipment, the telephone company must give you adequate notice, in writing, to allow you to maintain uninterrupted service.
- Page 58 Appendix these numbers down so that you can still dial the number manually of the memory dialing fails. This feature is included as a convenience only. The manufacturer assumes no responsibility for customer reliance on the memory feature of this product. Testing emergency telephone numbers is not recommended.
- Page 59 Appendix This product meets ENERGY STAR program requirements for energy conservation. Selecting ENERGY STAR products is a responsible way to save energy and money while protecting our environment. ENERGY STAR is a U.S. registered mark. The RBRC seal on the battery used in your product indicates that CCT is participating in the Rechargeable Battery Recycling Corporation (RBRC) program to collect and recycle rechargeable batteries.
-
Page 60: One Year Limited Warranty
Appendix One Year Limited Warranty CCT Tech USA Inc. (CCT), the licensed manufacturer of this GE® branded product, warrants this product to the original retail purchaser to be free of material and/or workmanship defects for a period of one year after the date of original retail purchase. - Page 61 Appendix • Products that have been repaired, altered or modified by anyone other than CCT or its authorized service representative. • Problems caused by signal conditions, radio interference, network reliability, cable or antenna systems. • Damage caused by use of non CCT accessories or misapplication. •...
-
Page 62: Technical Specification
Appendix Technical specification Radio frequency band DECT 6.0 (1910MHz to 1920MHz) Telephone base input voltage 6VDC 500mA and current Charger input voltage and 6VAC 300mA current Battery specifications 2.4V 400mAh... -
Page 63: Index
Appendix Index Alarm 27 FCC 52 Alarm tone 28 Answer a call 13 Answering system Handset deregistration 44 turn on or off 35 Handset layout 10 Area code 42 Handset locator 15 Handset registration 43 Base ringer melody 22 Base ringer volume 22 Important safety instructions 48 Battery charging 11 Initiate an intercom during a call 17... - Page 64 Appendix Parts checklist 1 Voice mail 15 Phonebook Volume control 14 add an entry 29 delete all entries 32 delete an entry 32 Warranty 56 edit an entry 32 search entry 31 view/call an entry 31 Phonebook Caller-ID matching 33 Predial a call 13 Push to talk 18 Redial...
-
Page 65: Remote Access Operation Card
Appendix Remote access operation card The remote access card below lists the commands needed to operate your answering system remotely from any touch-tone telephone. Cut along dotted line Remote access operation card 1. Call your telephone number from a touch-tone telephone. - Page 66 visit our website: www.gephones.com is a trademark of General Electric Company and is under license by CCT Tech USA Inc., Irving, TX 75039 ©2011 CCT Tech USA Inc. Model 30522 P/N: 480-98790-000002 Distributed in the U.S.A. by Version 1 02/2011 CCT Tech USA Inc.