Table of Contents
Advertisement
Advertisement
Table of Contents

Related Manuals for TRENDnet TEW-653AP


Summary of Contents for TRENDnet TEW-653AP
-
Page 2: Table Of Contents
Table of Content Introduction ............................4 Features and Benefits ........................4 Wireless Performance Considerations ..................5 Package Contents ......................... 6 System Requirement ........................6 Hardware Installation ........................6 Front Panel ........................... 6 Rear Panel ..........................6 ... - Page 3 Repeater Mode ........................... 25 Wireless Basic ..........................25 Advanced ........................... 26 Repeater Mode Security ......................27 WEP ........................... 27 WPA pre-shared key ......................28 Filter ............................29 WPS ............................29 Client List ........................... 30 ...
-
Page 4: Introduction
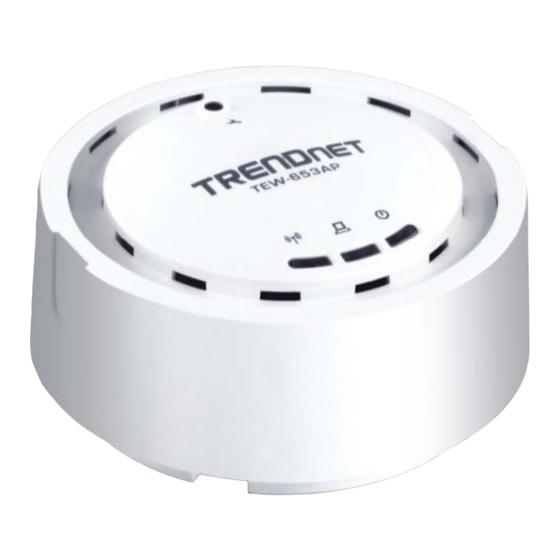
AP/WDS/Universal Repeater. Smoke detector appearance will minimize visibility. So this model can work properly at Hotel or public area. TEW-653AP is a Wireless Network device that delivers up to 6x faster speeds and 7x extended coverage than 802.11g devices. Product’s RF performance is finely tuned so it will bring best wireless signal for each client. -
Page 5: Wireless Performance Considerations
Wireless Performance Considerations There are a number of factors that can impact the range of wireless devices. 1. Adjust your wireless devices so that the signal is traveling in a straight path, rather than at an angle. The more material the signal has to pass through the more signal you will lose. 2. -
Page 6: Package Contents
Front Panel The image below shows the front panel of the TEW-653AP Reset Button: This button will reset the TEW-653AP to its factory default settings. To do this, press and hold the Reset button for 10seconds. Power LED: On - Power on... -
Page 7: Mounting Installation
Use the mounting plate as a template and mark the wall or ceiling for the correct screw position Drill holes for the screws at the marked positions. Align the TEW-653AP with the mounting plate Follow the arrow to secure the TEW-653AP to the mounting plate... -
Page 8: Modes
Modes You are allowed to configure TEW-653AP into different modes: AP, WDS Bridge and Repeater. AP/WDS/Universal Repeater Access Point In AP (Access Point) mode, your device acts as a communication hub for users with a wireless device to connect to a wired LAN/WAN. -
Page 9: Setup Wizard
Setup Wizard Setup wizard is provided as part of the web configuration utility. User can simply follow the step-by-step process to get the wireless Access Point configuration ready to run in these easy steps by clicking on` the “Wizard” button on the function menu. The following screen will appear. Please click “Next”... -
Page 10: System
Step 3: Your settings will appear and click Reboot to apply settings. System Operation Mode This window allows you to configure the TEW-653AP into different operating modes: AP, WDS Bridge and Repeater. Status This selection displays the current applied settings of the Access Point. -
Page 11: Lan
WLAN Settings: WLAN channel. SSID_1: SSID information. This screen allows users to configure the LAN settings of the access point and to configure the DHCP settings. Bridge Type: Select Static IP or Dynamic IP from the drop-down list. If you select Static IP, you will be required to specify an IP address and subnet mask. -
Page 12: Schedule
Read Community Name: Specify the password for access the SNMP community for read only access. Set Community Name: Specify the password for access to the SNMP community with read/write access. System Location: Specify the location of the device. System Contact: Specify the contact details of the device. Trap Active: Choose to enable or disable the SNMP trapping feature. -
Page 13: Monitor
Monitor This screen provides users to view a graphical diagram of the data rates running through the access point. Detail: Displays a historical record of the access point’s data rates. Wireless Access Point Mode The wireless section is used to configure the wireless settings for your Access Point. Note that changes made in this section may also need to be duplicated on wireless clients that you want to connect to your wireless network. -
Page 14: Basic
Basic When Access point is selected this screen allows users configure the wireless settings of the access point. Radio: To enable/disable wireless signal. Mode: Select AP or WDS mode. When WDS is selected the access point becomes a AP+ WDS mode allowing the access point to interlink with other AP devices through WDS connection, while maintaining the AP feature to be enabled. -
Page 15: Security
Fragment Threshold: Packets over the specified size will be fragmented in order to improve performance on noisy networks. Specify a value between 256 and 2346. The default value is 2346. RTS Threshold: Packets over the specified size will use the RTS/CTS mechanism to maintain performance in noisy networks and preventing hidden nodes from degrading the performance. -
Page 16: Encryption: Wep
Encryption: WEP ESSID Selection: As this device supports multiple SSIDs, it is possible to configure a different security mode for each SSID (profile). Select an SSID from the drop-down list. Broadcast SSID: Select Enable or Disable from the drop-down list. This is the SSID broadcast feature. -
Page 17: Encryption: Wpa Pre-Shared Key
allow this Gateway to authenticate users. You will then be required to specify the RADIUS Server’s IP address, port, and password. Encryption: WPA pre-shared key ESSID Selection: As this device supports multiple SSIDs, it is possible to configure a different security mode for each SSID (profile). -
Page 18: Encryption: Wpa Radius
Encryption: WPA RADIUS ESSID Selection: As this device supports multiple SSIDs, it is possible to configure a different security mode for each SSID (profile). Select an SSID from the drop-down list. Broadcast SSID: Select Enable or Disable from the drop-down list. This is the SSID broadcast feature. -
Page 19: Wps
Enable Wireless Access Control: Check box to enable feature Description: Enter the name of the device MAC address: Enter the device’s MAC address ADD: Click to add MAC address into table Reset: Click to reset entry Delete Selected: Allows you to delete selected entry Delete All: Deletes all entries in the MAC address table Reset: Reset all entries Apply: Cllick to apply changes made... -
Page 20: Client List
WPS: Place a check in this box to enable this feature. WPS Current Status: Displays the current status of the WPS configuration. Self Pin Code: Displays the current PIN. SSID: Displays the current SSID. Authentication Mode: Displays the current authentication mode. Passphrase Key: Displays the current passphrase. -
Page 21: Wmm
Virtual LAN: Choose to Enable or Disable the VLAN features. SSID1 Tag: Specify the VLAN tag. This screen allows users to configure the WMM (Wireless Multi-Media) settings of the access point under AP mode. Wireless WDS Bridge Mode When WDS mode is selected, the access point functions as a wireless bridge and is able to wirelessly communicate with other access points via WDS links. -
Page 22: Basic
Basic When WDS (Wireless Distribution System) is selected this screen allows users configure the wireless settings of the device. Radio: To enable/disable radio frequency. Mode: WDS mode allows you to interlink with other AP devices. Setting MAC address and encryption algorithm Band: Configure the device into different wireless modes. -
Page 23: Security: Wpa Pre-Shared Key
Key Format: Select a key type from the drop-down list. 128-bit encryption requires a longer key than 64-bit encryption. Keys are defined by entering in a string in HEX (hexadecimal - using characters 0-9, A-F) or ASCII (American Standard Code for Information Interchange - alphanumeric characters) format. -
Page 24: Advanced
Advanced This screen allows users to configure the advance wireless settings of the devicein WDS mode. Fragment Threshold: Packets over the specified size will be fragmented in order to improve performance on noisy networks. Specify a value between 256 and 2346. The default value is 2346. RTS Threshold: Packets over the specified size will use the RTS/CTS mechanism to maintain performance in noisy networks and preventing hidden nodes from degrading the performance. -
Page 25: Wmm
This screen allows users to configure the WMM (Wi-Fi Multi-Media) settings of the access point in WDS mode. Repeater Mode When Repeater Mode is selected, the access point functions as a wireless repeater and is able to repeat the wireless signal of an access point. This feature is used to expand your existing wireless network on places your current access point is unable to reach. -
Page 26: Advanced
Radio: To enable/disable radio frequency. Mode: Universal Repeater Band: Configure the device into different wireless modes. 2.4 GHz (B) 2.4 GHz (N) 2.4 GHz (B+G) 2.4 GHz (G) 2.4 GHz (B+G+N) Enabled SSID#: The device allows you to add up to 4 unique SSID ESSID#: Description of each configured SSID Channel: You can manually configure a channel to be used. -
Page 27: Repeater Mode Security
Beacon Interval: Beacons are packets sent by a wireless Access Point to synchronize wireless devices. Specify a Beacon Interval value between 25 and 1000. The default value is set to 100 milliseconds. DTIM Period: A DTIM is a countdown informing clients of the next window for listening to broadcast and multicast messages. -
Page 28: Wpa Pre-Shared Key
Authentication Type: Select Open System, Shared Key, or auto. Authentication method from the drop-down list. An open system allows any client to authenticate as long as it conforms to any MAC address filter policies that may have been set. All authentication packets are transmitted without encryption. -
Page 29: Filter
WMM: Choose to Enable or Disable WMM. This is the Quality of Service (QoS) feature for prioritizing voice and video applications. This option can be further configured in WMM under the Wireless drop-down menu. Encryption: Select WPA pre-shared key from the drop-down list. WPA Type: Select TKIP, AES, or WPA2 Mixed. -
Page 30: Client List
wireless client and switch it to WPS mode, then fill-in the PIN code of the wireless client through the web configuration interface of the wireless router. WPS: Place a check in this box to enable this feature. WPS Current Status: Displays the current status of the WPS configuration. Self Pin Code: Displays the current PIN. -
Page 31: Tools
mode. Tools Admin You can change the password required to log into the access point’s web-based management. By default, the password is: admin. Passwords can contain 0 to 12 alphanumeric characters, and are case sensitive. Current Password: Fill in the current password to allow changing to a new password. New Password: Enter your new password and type it again in Repeat New Password for verification purposes Time Setting... -
Page 32: Power Saving
Time Zone: Select the time zone of the country you are currently in. The router will set its time based on your selection. NTP Time Server: The router can set up external NTP Time Server. Daylight Savings: The router can also take Daylight Savings into account. If you wish to use this function, you must select the Daylight Savings Time period and check/tick the enable box to enable your daylight saving configuration. -
Page 33: Diagnosis
Diagnosis Diagnosis screen allows users to check whether a network destination is reachable with ping service. Firmware This page allows you to upgrade the access point’s firmware. To upgrade the firmware of your you need to download the firmware file to your local hard disk, and enter that file name and path in the appropriate field on this page. -
Page 34: Restart
Backup Settings: This can save the current configuration to a file named "config.bin" on your PC. You can also use the Upload button to restore the saved configuration to the Broadband router. Alternatively, you can use the "Restore to Factory Defaults" tool to force the Broadband router to perform a power reset and restore the original factory settings. -
Page 35: Fcc Interference Statement
FCC Interference Statement Federal Communication Commission Interference Statement This equipment has been tested and found to comply with the limits for a Class B digital device, pursuant to Part 15 of the FCC Rules. These limits are designed to provide reasonable protection against harmful interference in a residential installation. -
Page 36: Ic Interference Statement
IC Interference Statement Industry Canada statement: This device complies with RSS-210 of the Industry Canada Rules. Operation is subject to the following two conditions: (1) This device may not cause harmful interference, and (2) this device must accept any interference received, including interference that may cause undesired operation. IMPORTANT NOTE: Radiation Exposure Statement: This equipment complies with IC radiation exposure limits set forth for an uncontrolled environment. -
Page 37: Specifications
Specifications Hardware IEEE 802.3 (10Base‐T), IEEE 802.3u (100Base‐TX), IEEE 802.11b, IEEE Standards 802.11g, IEEE 802.11n (draft 2.0), 802.3af Interface 1 x 10/100Mbps Auto‐MDIX PoE LAN port LED Indicators Power/Status, LAN, WLAN Button Reset button – restores factory default settings Active Ethernet (Power over Ethernet, IEEE802.3af )‐48VDC/0.375A Power Supply Power adapter 12V/1A Power Consumption 6 watts (max) Dimensions 120mm (4.72in.)/ 50mm (1.97in) (Diameter/Height) Weight 280g (9.87oz) Operating: 0° ~ 45°C (32° ~ 113°F) Temperature Storage: ‐20°C ~ 70°C (‐4° ~ 158° F) Humidity 5% ~ 95% typical (non‐condensing) Certifications CE, FCC Wireless OFDM: BPSK, QPSK, 16‐QAM, 64‐QAM Module Technique DBPSK, DQPSK, CCK Modes Access Point, WDS Bridge, Universal Repeater Antenna 4dBi Smart Internal Antenna Frequency 2.412 ~ 2.472 GHz Management Web Browser (HTTP); SNMP v1, v2c ... -
Page 38: Limited Warranty
TRENDnet products. Products that are sent to TRENDnet for RMA service must have the RMA number marked on the outside of return packages and sent to TRENDnet prepaid, insured and packaged appropriately for safe shipment. - Page 39 Download section and look for the desired TRENDnet product to access to the GPL Code or LGPL Code. These codes are distributed WITHOUT WARRANTY and are subject to the copyrights of the developers. TRENDnet does not provide technical support for these codes. Please go to http://www.gnu.org/licenses/gpl.txt...
Need help?
Do you have a question about the TEW-653AP and is the answer not in the manual?
Questions and answers