
Related Manuals for Brother 3034D


Summary of Contents for Brother 3034D
- Page 1 HANDBOOK FOR COMPACT OVERLOCK MACHINE MANUAL DE INSTRUCCIONES DE LA MAQUINA COMPACTA OVERLOCK...
-
Page 2: Important Safety Instructions
3. Never operate this sewing machine if it has a damaged cord or plug, if it is not working properly, if it has been dropped or damaged, or dropped into water. Return the sewing machine to the nearest authorized dealer or service center for examination, repair, electrical or mechanical adjustment. - Page 3 The plug severed from the mains lead must be destroyed as a plug with bared flexible cords is hazardous if engaged in a live socket outlet. In the event of replacing the plug fuse, use a fuse approved by ASTA to BS 1362, i.e. carrying the mark, rating as marked on plug.
- Page 4 - Continuous operation of the sewing machine can cause heat to build in the motor area, but not enough to adversely affect its performance. It is important to keep fabric and paper away from the air openings on the back and sides of the machine so air can get to these openings.
-
Page 5: Table Of Contents
Contents Chapter 1: Names of parts and their functions ..............4 Accessories ......................... 5 Powering the machine ......................6 Turning direction of hand wheel ..................6 Opening/ Closing front cover ....................6 Attaching/ Removing presser foot ..................6 Trim trap ..........................7 Free-arm sewing (removing bed extension) .............. -
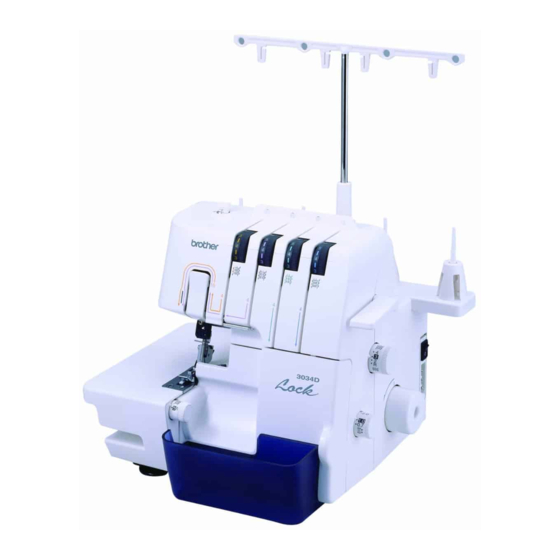
Page 6: Chapter 1: Names Of Parts And Their Functions
B Right needle thread tension dial t Front cover compartment C Upper looper thread tension dial You can hold the included accessories and the removed D Lower looper thread tension dial stitch finger in this front cover compartment. E Front cover <A>: Needle set, <B>: Stitch finger (when removed, see... -
Page 7: Accessories
Optional accessory Accessories For further information about the following items, see CHAPTER 8. Included accessory A Blind stitch foot: X76590002 1 Soft cover: X77871000 2 Accessory bag: 122991052 3 Tweezers: XB1618001 4 Thread net (4): X75904000 5 Thread spool cap (4): X77260000... -
Page 8: Powering The Machine
2. Raise the presser foot lever. 1 3. Turn the hand wheel 2 so that the mark on the hand wheel is aligned to the line on the machine. (See CHAPTER1 "Turning direction of hand wheel".) NOTE (For U.S.A. -
Page 9: Trim Trap
Be careful not to lose the removed bed extension. 2. Position the fabric, and start sewing. (See CHAPTER 5.) To install: Insert the trim trap <A> until it contacts the front cover. NOTE: Be sure to position the positioning guide <B> to the one on the machine. -
Page 10: Retracting Knife
Be sure to unplug the power supply cord from the wall outlet before retracting the knife. 1. Pull up the knife lever <A>, then pull it to the right. 1 Shorten the stitch length to a minimum of 2 mm (5/64 inch). -
Page 11: Differential Feed
The differential feed controls the movement of both the front and the rear feed dogs. When set at 1, the feed dogs are moving at the same speed (ratio of 1). -
Page 12: Tension Adjustment Dial
The correct thread tension may vary according to the type and thickness of the fabric and the type of thread used. Thread tension adjustments may be necessary for any change in sewing materials. -
Page 13: Chart Of Thread Tension Adjustment, Two Needle (Four-Thread)
Chart of thread tension adjustment, Two-needle (Four-thread) A: Reverse B: Surface C: Left needle thread D: Right needle thread E: Upper looper thread F: Lower looper thread Left needle thread Tighten left is loose. needle thread. (yellow) Right needle Tighten right thread is loose. -
Page 14: Chart Of Thread Tension Adjustment, One Needle (Three-Thread)
Chart of thread tension adjustment, One-needle (Three-thread) A: Reverse B: Surface C: Needle thread D: Upper looper thread E: Lower looper thread Tighten needle Needle thread is thread. loose. (yellow or pink) Needle thread is Loosen needle tight. thread. (yellow or pink) -
Page 15: Needle
How to check the needle 4. Tighten the needle set screw securely with 4 Flat surface turning the included hexagonal driver toward 5 Place the needle on its flat side and check to see if the 1 in the figure. space is parallel. NOTE: Make sure to insert the needles all the way. -
Page 16: Chapter 2 : Preparation Before Threading
Make sure that the spool notch is on the bottom. 3. Turn the hand wheel so that the mark on the hand wheel <A> is aligned to the line <B> on the machine. (See CHAPTER 1 "Turning direction of hand wheel".) -
Page 17: Chapter 3: Threading
3. Right needle illustration. 4. Left needle NOTE: Make sure to thread both of the thread take ups 7 . Threading the lower looper Continue on "Lower looper easy threading Run the thread in the sequence illustrated, operation". - Page 18 3. Pass the thread through the eye of the lower looper. 4. Slowly turn the hand wheel, and make sure the returns to the original position. NOTE: If the lower looper thread breaks during sewing, cut and remove thread from both of the needles.
-
Page 19: Threading The Upper Looper
1. Open the front cover by sliding to the right and guiding the top toward you. 2. Pull the thread off the spool and directly up through the thread holder 1 and the thread plate 2 on the thread tree from back to front. -
Page 20: Threading The Right Needle
2 on the thread tree from back to front. plate 2 on the thread tree from back to front. 2. Pass the thread thourgh the hole 3 on the top 2. Pass the thread thourgh the hole 3 on the top of machine. -
Page 21: Chapter 4: Sewing Materials,Threads And Needles Comparison Chart
Looper thread : Woolly nylon thread Spun #60-80 Tetron #60-80 Cotton #50-60 SCHMETZ Heavy materials: Overlock stitch 3.0-4.0 Spun #60 130/705H Tweed Tetron #50-60 Denim Knits NOTE: Decorative thread will work best in the upper looper for fashion sewing. -
Page 22: Chapter 5: Sewing
Use: Produces strong seam. Ideal for sewing knits and wovens. NOTE: You can use the optional accessory foot for even more varieties of stitches. See CHAPTER 8 for details. Test sewing Three-thread overlock stitch 5 mm (3/16 inch) Test-sew before you start sewing. -
Page 23: Chaining-Off
3. The fabric will be fed automatically. You need only guide it in the required direction. 4. Check the stitch formation (stitch chain) to see if it is uniform. If the stitch is not uniform, re- check that the threading has been done properly and in sequence. -
Page 24: To Secure Chain
1. Tie the thread unpicked from chain. At the end of a stitch 1. At the end of the seam, sew one stitch out of the fabric before stopping the machine. 2. Insert the chain into the end of the seam, using a hand sewing needle with large eye. -
Page 25: If Threads Break During Sewing
(to re-thread, see fabrics. It is often used to complete the edge of a CHAPTER 3 "Threading"). Replace the material fabric. This stitch is sewn by removing the left under the presser foot and sew 3-5 cm (1-1/8 to 2 needle and using the 3-thread overlock stitch. - Page 26 <A> NOTE: Make sure to install stitch finger when sewing regular overlock stitches. 4. Adjust the stitch width dial up to the "R" position. <A> <A> Selection mark 5. Adjust the stitch length.
-
Page 27: Chart Of Narrow Overlock/ Rolled Hemming Stitch
Chart of narrow overlock/ Rolled hemming stitch Narrow overlock stitch Rolled hemming stitch Underside of material Underside of material Stitch Style Top of material Top of material See CHAPTER 4 "Sewing See CHAPTER 4 "Sewing materials, materials, threads, and needles Materials threads, and needles comparison chart". -
Page 28: Chapter 6: Troubleshooting
CHAPTER 6 TROUBLESHOOTING This sewing machine is designed for trouble-free operation. However, the following chart indicates trouble which may occur if basic adjustments are not made properly. Cause Remedy Trouble Turn the pressure adjustment screw clockwise to Presser foot pressure too loose 1. -
Page 29: Chapter 7: Maintenance
Be sure to oil your sewing machine before use. Always clean the lint off your machine before you apply oil. Oil the machine once or twice a month for normal use. If the machine is used more often, oil it once a week. -
Page 30: Chapter 8: Introduction Of Optional Feet
2. Set up the machine for 3 thread overlock stitch with one needle in the left position. The right needle should be removed. 3. Turn the wrong side of the fabric out, fold the fabric once and then back to the required width, as illustrated. - Page 31 If you 1 Surface sew with the right sides together, the needle 4. Turn the hand wheel so that the line on the thread ladder will decorate the right side when hand wheel is aligned to the line on the pulled flat.
-
Page 32: Taping Foot
- Tapes or elastics from 6mm up to 12mm width will be set along the guide 4. can be sewn. 7. Flip shut the tape guide 1 so that it will be set - Attatching tapes is very useful for reinforcement at the lefthand side of tapes / elastics. -
Page 33: Pearl Sequence Foot
1 "Attaching/ Removing presser foot"). fabric by hand. 3. Set up the machine for 3 thread overlock stitch 3. Tie both end of thread at the beginnig and end. with one needle in the left position. NOTE: The right needle should be removed. -
Page 34: Piping Foot
A> 1 Surface 2 Reverse 1. Put piping tape between the 2 pcs of fabric and adjust both edges of the fabric as illustrated. Keep 3cm piping tape over the edge of fabric Preparation for steady sewing. -
Page 35: Gathering Foot
How to set fabric 1 Surface 2 Reverse 1. Raise the presser foot lever. 2. Turn the hand wheel so that the mark on the hand wheel is aligned to the line on the machine (see CHAPTER 1 "Turning direction of hand wheel"). -
Page 36: Specifications
Three/Four threads convertible Two needles or single needle Machine net weight 5.2 kgs. Machine dimensions 33.5 cm (W) x 29.8 cm (H) x 27.9 cm (D) (Approx. 13-2/5 (W) x 11-24/25 (H) x 11-4/25 (D) inches) Needle set SCHMETZ 130/705H. #80 (2) -
Page 38: Instrucciones Importantes De Seguridad
9. No desconecte el enchufe de la corriente tirando del cable. Para desenchufar, sujete el enchufe, no el cable. 10. Mantenga los dedos alejados de las piezas en movimiento. Hay que tener especial cuidado con la zona de la aguja en la máquina de coser. - Page 39 Si éste es el caso, haga lo siguiente. El cable de color azul deberá estar conectado al terminal marcado con la letra “N” o que sea de color negro o azul. El cable de color marrón deberá estar conectado al terminal que esté marcado con la letra “L” o que sea de color...
- Page 40 ¡Diviértase! PRECAUCIÓN Al enhebrar, cambiar la aguja o la bombilla de luz, el interruptor de alimentación principal y de luz de la máquina debe estar apagado o se debe desconectar el enchufe de la toma de corriente. Cuando no se utilice la maquina, se recomienda que el enchufe esté desconectado de la toma de corriente de la pared, a fin de evitar cualquier peligro.
- Page 41 Enhebrado de la aguja derecha ..................54 Enhebrado de la aguja izquierda ..................54 Capítulo 4: Tabla de relación entre los distintos tejidos, hilos y agujas de costura ..55 Capítulo 5: Costura ....................... 56 Selección de las distintas puntadas .................. 56 Costura de prueba ......................
-
Page 42: Capítulo 1: Nombres De Las Partes Y Sus Funciones
CAPÍTULO 5 “Puntada overlock estrecha/de G Interruptor de alimentación principal y de luz dobladillo enrollado”), <C>: Pinzas, <D>: Llave hexagonal H Disco de ajuste del largo de las puntadas * Aberturas de ventilación de la parte trasera y de los lados. -
Page 43: Accesorios
SA213 (EE.UU., CANADÁ) 7 Llave hexagonal: XB0393001 X77459001 (OTROS) 8 Juego de agujas (SCHMETZ 130/705H): X75917001 n° 80: 2 unidades, n° 90: 2 unidades 9 Pedal: C Prensatelas para tiras de perlas: SA211 (EE.UU., CANADÁ) XC7359022 (zona con 120 V) -
Page 44: Encendido De La Máquina
2. Levante la palanca del prensatelas. 1 3. Gire la ruedecilla 2 hasta que la marca de la misma queda alineada con la línea de la máquina (véase el CAPÍTULO 1 “Cambio de la dirección de la ruedecilla”). -
Page 45: Orificio De Corte
Orificio de corte Costura de mangas (extracción del suplemento para la mesa) El orificio de corte opcional <A> sostiene el hilo y el tejido cortado generados al coser. La costura sin brazo permite coser trozos tubulares de tejido de forma más sencilla. -
Page 46: Repliegue De La Cuchilla
Un ajuste normal para el largo de las puntadas se sitúa replegar la cuchilla de la siguiente forma. en 3 mm. Para cambiar el largo de las puntadas, gire el disco de ajuste del largo de las puntadas en el lado derecho de la máquina. -
Page 47: Alimentador Con Diferencial
El tejido se los tejidos 1,0 - 2,0 contrae o extensibles Gire el tornillo de ajuste de la presión situado en la parte se junta. se estiren o superior izquierda de la máquina. Puede realizar el frunzan. ajuste haciendo referencia al valor del tornillo. -
Page 48: Disco De Ajuste De La Tensión
3 El disco de tensión con marca verde es para el áncora superior. 4 El disco de tensión con marca azul es para el áncora inferior. Control de la tensión Se puede coser en la posición “4”, en la mayoría de los casos (estándar: SPAN 60/3Z). -
Page 49: Tabla De Ajuste De Tensión De Los Hilos, Dos Agujas (Cuatro Hilos)
Tabla de ajuste de tensión de los hilos, dos agujas (cuatro hilos) A: Revés B: Derecho C: Hilo de la aguja izquierda D: Hilo de la aguja derecha E: Hilo del áncora superior F: Hilo del áncora inferior El hilo de la aguja Tense el hilo de izquierda está... -
Page 50: Tabla De Ajuste De Tensión De Los Hilos, Una Aguja (Tres Hilos)
Tabla de ajuste de tensión de los hilos, una aguja (tres hilos) A: Revés B: Derecho C: Hilo de las agujas D: Hilo del áncora superior E: Hilo del áncora inferior Tense el hilo El hilo de la aguja de la aguja está... -
Page 51: Aguja
Cómo comprobar la aguja la aguja girando la llave hexagonal incluida 4 Superficie plana hacia 1 en la figura. 5 Coloque la aguja en su lado plano y compruebe que el espacio sea paralelo. NOTA: Asegúrese de insertar las agujas hasta el tope. -
Page 52: Capítulo 2: Preparación Antes Del Enhebrado
Asegúrese de que la muesca del carrete quede hacia abajo. 3. Gire la ruedecilla hasta que la marca de la misma <A> queda alineada con la línea <B> de la máquina (véase el CAPÍTULO 1 “Cambio de la dirección de la ruedecilla”). -
Page 53: Capítulo 3: Enhebrado
CAPÍTULO 3 ENHEBRADO El enhebrado debe realizarse en el siguiente orden. 5. Guíe el hilo por el canal y pase el hilo por los puntos de enhebrado 5678 situados al 1. Áncora inferior lado de las marcas de color azul siguiendo el 2. - Page 54 4. Gire lentamente la ruedecilla y asegúrese de que vuelve a su posición inicial. NOTA: Si el hilo del áncora inferior se rompe al coser, corte y deseche el hilo de ambas agujas. Antes de volver a enhebrar el áncora inferior, asegúrese de que este proceso se realiza exactamente según lo...
-
Page 55: Enhebrado Del Áncora Superior
5. Guíe el hilo por el canal y pase el hilo por los Enhebrado del áncora superior puntos de enhebrado 5678 situados al lado de las marcas de color verde siguiendo el Enhebre el hilo según lo ilustrado en la orden numérico de la ilustración. -
Page 56: Enhebrado De La Aguja Derecha
<A>. separador <A>. 5. Baje el hilo por la guía de hilo de la barra de la 5. Baje el hilo por la guía de hilo de la barra de la aguja y por la aguja derecha 8 desde delante aguja y por la aguja izquierda 8 desde a detrás. -
Page 57: Capítulo 4: Tabla De Relación Entre Los Distintos Tejidos, Hilos Y Agujas De Costura
Tetron n° 60-80 Algodón n° 50-60 SCHMETZ Tejidos gruesos: Puntada overlock 3,0-4,0 Hilo de hilvanar n° 60 130/705H Tweed Tetron n° 50-60 n° 90 Tejano Punto NOTA: El hilo decorativo funcionará mejor en el áncora superior para la costura de diseño. -
Page 58: Capítulo 5: Costura
5 mm coser. Utilice tres hilos y la aguja izquierda para producir 1. Ajuste todas las tensiones de los hilos en “4”. costuras de 5 mm. 2. Enhebre la máquina y saque todos los hilos Uso: Para puntadas overlock en trajes, blusas, unos 15 cm detrás del prensatelas. -
Page 59: Cadeneta
10 cm. Los hilos se entrelazarán automáticamente en forma de cadena. 1 Prensatelas 2 Cuchilla superior 3 Guía de Tolerancia de Costura Para retirar el trabajo Una vez terminada la costura, siga cosiendo a baja velocidad para formar una cadeneta. -
Page 60: Para Asegurar La Cadeneta
6. Corte los hilos con unas tijeras. Método 2 Con este método, se puede asegurar la cadeneta del principio y del fin de una puntada de la misma manera. 1. Cosa el hilo suelto de la cadeneta. Al final de una puntada 1. -
Page 61: Si Los Hilos Se Rompen Al Coser
3. Retire la uñeta de puntadas <A>. 2. Afloje la tensión del hilo pero no olvide que si 1 Levante la palanca del prensatelas. la tensión queda demasiada floja, el hilo se 2 Tire de todos los hilos hacia la parte trasera puede romper y algunas puntadas podrían... - Page 62 <A> NOTA: Asegúrese de instalar la uñeta de puntadas antes de coser con puntadas overlock normales. 4. Ajuste el disco de ancho de las puntadas hacia arriba en la posición “R”. <A> <A> Marca de selección 5. Ajuste el largo de las puntadas.
-
Page 63: Tabla De Puntada Overlock Estrecha/De Dobladillo Enrollado
Tabla de puntada overlock estrecha/de dobladillo enrollado Puntada overlock estrecha Puntada de dobladillo enrollado Parte inferior del tejido Parte inferior del tejido Estilo de puntada Parte superior del tejido Parte superior del tejido Véase el CAPÍTULO 4 “Tabla de Véase el CAPÍTULO 4 “Tabla de relación entre los distintos tejidos,... -
Page 64: Capítulo 6: Guía De Localización De Problemas
CAPÍTULO 6 GUÍA DE LOCALIZACIÓN DE PROBLEMAS Esta máquina de coser ha sido concebida para un funcionamiento sin problemas. Sin embargo, la siguiente tabla le indica los problemas que podrían presentarse si los ajustes básicos no fueron realizados correctamente. Causa... -
Page 65: Capítulo 7: Mantenimiento
Asegúrese siempre de engrasar la máquina antes de utilizarla. Siempre limpie la pelusa antes de proceder al engrasado. Engrase la maquina una o dos veces al mes para un uso normal. Si se utiliza la maquina más a menudo, engrásela cada semana. -
Page 66: Capítulo 8: Introducción De Prensatelas Opcional
Prensatelas para puntadas invisibles tela. En este caso, el criterio es el grosor de la tela. Al girar el tornillo hacia delante (hacia usted), Características... - Page 67 La aguja de la derecha se debe quitar. Cualquier lado de las puntadas puede utilizarse 3. Doble el tejido como se muestra en la en el derecho del tejido. Si va a coser con los ilustración. reveses juntos, el hilo del áncora superior va a decorar el derecho al aplanar el tejido.
-
Page 68: Prensatelas Para Cintas
(véase el CAPÍTULO 1 “Cambio de Prensatelas para cintas la dirección de la ruedecilla”). 4. Abra la guía de la cinta 1 y gire el disco de Características ajuste del prensatelas 2 hasta “0”. Mediante el prensatelas para cintas, puede coser 5. -
Page 69: Prensatelas Para Tira De Perlas
El rizo aumentará cuanto mayor sea el número. 7. Realice una costura de prueba y ajuste la tensión de los hilos. 2. Ajuste el ancho de las puntadas de 3 a 5 mm. Ejemplo para una costura adecuada: 3. Ajuste la tensión del hilo como sigue: Hilo de la aguja: reducir un poco <C>... -
Page 70: Prensatelas Para Ribeteados
Ajuste de la máquina (tipo de canal <A> del prensatelas y empiece a coser. puntada): Empiece a coser 1. Guíe el tejido y la cinta de ribetear con la mano uniformemente durante la costura. 2. Gire ambos lados del tejido después de coser. NOTA: - overlock de 2 agujas y 4 hilos Para una costura fácil, hilvane el tejido y la cinta de... -
Page 71: Prensatelas Fruncidor
(véase el CAPÍTULO 1 “Cambio de la dirección de la ruedecilla”). 3. Coloque el trozo inferior del tejido (el tejido que se va a fruncir 1 bajo la guía 3 justo bajo la aguja). 4. Coloque el trozo superior del tejido 2 entre el prensatelas fruncidor y la guía 3 sobre el... -
Page 72: Especificaciones
Conmutación posible entre 3 y 4 hilos Dos agujas o una sola Peso neto de la máquina 5,2 kg Dimensiones de la máquina 33,5 cm (An) x 29,8 cm (Al) x 27,9 cm (Pr.) Juego de agujas SCHMETZ 130/705H nº 80 (2) nº 90 (2) -
Page 73: Setting Record
SETTING RECORD / NOTAS DE AJUSTES THREAD TENSION NOTE TENSION DE HILO NOTA left right upper- lower- STITCH FABRIC THREAD NEEDLE needle needle looper looper TYPE TEJIDO HILO AGUJA aguja aguja áncora áncora TIPO DE izquier- derecha superior inferior PUNTADA... - Page 76 3034D XB1621001 Printed in Taiwan...
Need help?
Do you have a question about the 3034D and is the answer not in the manual?
Questions and answers