Table of Contents
Advertisement
Advertisement
Table of Contents

Related Manuals for Daewoo DF-4501P


Summary of Contents for Daewoo DF-4501P
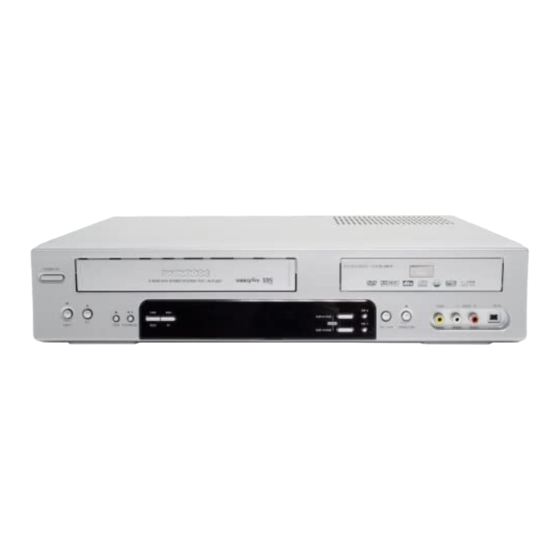
- Page 1 DVD Recorder + VCR DVD Recorder + VCR DF-4501P User Manual...
-
Page 2: Safety Instructions
Safety Instructions Safety Instructions Please keep the product’s guarantee sheet and receipt in a safe place. Precautions • Read this booklet carefully. • Make sure the rating of your household electricity supply matches that shown on the back of your product. •... -
Page 3: Important Safeguards
Important Safeguards Important Safeguards CAUTION RISK OF ELECTRIC SHOCK DO NOT OPEN CAUTION: TO REDUCE THE RISK OF ELECTRIC SHOCK, DO NOT REMOVE COVER (OR BACK). NO USER-SERVICEABLE PARTS INSIDE. REFER SERVICING TO QUALIFIED SERVICE PERSONNEL. WARNING TO REDUCE THE RISK OF FIRE OR ELECTRIC SHOCK, DO NOT EXPOSE THIS APPLIANCE TO RAIN OR MOISTURE. -
Page 4: Table Of Contents
personal injury and serious damage to the 23 HEAT product. The product should be situated away from heat sources such as radiators, heat registers, stoves, 17 DISC or other products (including amplifiers) that Do not use a cracked, deformed or repaired disc. produce heat. -
Page 5: Overview
Old recordings can be deleted but they can no longer be overwritten. The deleted recordings (titles) are marked 'deleted title'. Before a DVD+R can be played in a DVD player, it must be finalized in the DVD Recorder+VCR. Once this process is complete, no further recordings can be added. -
Page 6: About Dvd Recording
• Video that is ‘copy-once only’ can only be recorded using DVD+RW discs with CPRM. Copyright Notice • Audio and video recordings you make using the DVD Recorder+VCR are for your personal use only. You may not sell, lend, or rent them to other people. -
Page 7: Identification Of Controls
& DF-x7xx & DF-x4xx & POWER (STANDBY/ON) Turns the DVD Recorder+VCR on and off. Cassette Compartment (VCR deck) Insert a video cassette here. Disc Tray (DVD deck) Insert a disc here. VCR EJECT Ejects the tape in the VCR deck. -
Page 8: Front Panel Display
- Ejects the tape in the VCR deck in VCR mode. Selects VCR mode. Selects DVD mode. Switches the DVD Recorder+VCR input to TV tuner, AV1, AV2, FAV or DV. - Selects numbered options in menus. - Selects TV channels. -
Page 9: Rear Panel
Progressive Scan Mode • If your TV supports Progressive Scan, you can view high quality video by setting the DVD Recorder+VCR to Progressive Scan mode. If your TV does not support Progressive Scan, do NOT change to Progressive Scan mode. -
Page 10: Connections
Connections Connections • There are a variety of ways to connect the DVD Recorder+VCR to your TV and other equipment. Use only one of the connections described below. Whichever TV connection you use will work with all input sources. • Please refer to the manuals for your TV, VCR, stereo system, or other devices as necessary to make the best connections. -
Page 11: Connecting An Amplifier/Receiver
Connecting to an amplifier equipped with two channel analog stereo or Dolby Pro Logic ll/Pro Logic Connect the Left and Right AUDIO OUT jacks on the DVD Recorder+VCR to the left and right audio in jacks on your amplifier, receiver, or stereo system, using the supplied audio cables (A). -
Page 12: Initial Installation
Initial Installation Initial Installation After successfully connecting your DVD Recorder+VCR to your TV and other devices, this chapter will show you how to complete the initial installation. You must follow the initial installation process to set the time, date, channels, and language preferences for the DVD Recorder+VCR. - Page 13 21-69 and CATV channels 1-41. PR No. NAME P-04 Store Preparation: Cancel Connect the DVD Recorder+VCR to the desired type of antenna or cable TV Manual Set system, as shown in ‘Connecting Antenna/Cable‘ on page 11. Standard Reception Auto Search Fine Tune …...
-
Page 14: 'Recording Options' Settings
Use […/†] to select the PR number you want to adjust. Then press [ENTER]. Delete After tuning TV stations into your DVD Recorder+VCR, you may wish to delete a station. Select the PR number you want to delete using […/†]. -
Page 15: 'Language' Settings
‘Language’ Settings OSD Language Select a language for the DVD Recorder+VCR Setup menu and on-screen displays. Press [SETUP]. The Setup menu appears. While ‘Init Setup‘ is selected, press [ENTER] to go to the initial setup page. Use [œ] and [√] to select ‘Language ‘. -
Page 16: Preference / Audio Settings
LPCM Select when connected to a digital amplifier. The DVD Recorder+VCR's digital audio signal will be output in the PCM format when you play a DVD recorded with a Dolby Digital (only for DVD) or MPEG soundtrack. If the DVD is recorded with a DTS sound track then no sound will be heard. -
Page 17: Various Preference Settings
Press [√]. The ‘Auto Settings‘ submenu is displayed. Auto Clock Set Auto Clock enables the DVD Recorder+VCR to set the clock automatically whenever it is in Standby mode (plugged in but powered off). Auto Clock is only available for models with the VPS/PDC function. -
Page 18: System Information
Initial Setup On-Screen Display Overview On-Screen Display Overview The On-Screen Display provides feedback on the status of the DVD Recorder+VCR and/or the currently loaded disc. To access the On-Screen Display (or OSD), press the [DISPLAY] button. System Info Version... -
Page 19: Displaying Tv Information
‘Set Parental Level‘ on page 25. • The DVD Recorder+VCR will not play discs with Region codes different from the DVD Recorder+VCR. The Region code for this DVD Recorder+VCR is 2 (two). - Page 20 Slow Motion Press [SLOW+] or [SLOW–] to enter Slow Motion mode. The default speed is 1/2. When you press [SLOW+] or [SLOW–] repeatedly, the speed will be set to 1/4, 1/8, 1/16, and normal speed. Changing the Audio Language (DVD) Press [AUDIO] and then press [AUDIO] repeatedly during playback to hear a different audio language or audio track.
-
Page 21: Vcr Playback
Press [REW] or [FF] during playback. Search mode will be activated. If the DVD Recorder+VCR is left in Search mode for more than 3 minutes, the DVD Recorder+VCR will automatically resume Play mode to protect the tape and video heads. -
Page 22: Other Disc Playback
Other Disc Playback Audio CD/MP3 PLAYBACK The DVD Recorder+VCR can play audio CDs and MP3 files on CD-ROM, CD-R or CD-RW discs. Insert the CD disc and close the tray. The Audio CD or MP3 CD menu appears on the TV screen after a few moments to load the disc. -
Page 23: Basic Recording
To record for a fixed length of time, see One Touch Record on the next page. Press [STOP ( )] to stop recording. • The maximum number of DVD titles per disc is 49. If the DVD Recorder+VCR is powered off during DVD recording, the recording will not be saved. -
Page 24: Checking The Recording Time
For example: To change channels during recording, first press [PLAY/PAUSE] to put the unit in Pause mode. Then select the desired channel on the DVD Recorder+VCR, and press [REC ( )] again to resume recording. • You cannot record on the VCR deck and DVD deck at the same time. -
Page 25: Timer Recording
• The Timer indicator lights on the front panel display when the DVD Recorder+VCR is ready for the Timer Recording. • The DVD Recorder+VCR will record the audio according to the current TV tuner setting (Stereo, Mono or SAP). Use the [AUDIO] button to set the audio before switching the DVD Recorder+VCR to Standby mode. -
Page 26: Recording From An External Input
To record for a fixed length of time, see ‘One Touch Record‘ on page 39. Press [STOP ( )] to stop recording. Note If your source is copy-protected, you will not be able to record it using the DVD Recorder+VCR. See ‘Copyright Notice‘ on page 4 for more details. Recording from a Digital Camcorder You can record from a digital camcorder connected to the DV IN jack on the front panel of the DVD Recorder+VCR. -
Page 27: Disc Operation
What is DV? DV model only Using DV, also known as i.LINK, you can connect a DV-equipped camcorder to the DVD Recorder+VCR using a single DV cable for input and output of audio, video, data and control signals. The i.LINK interface is also known as IEEE 1394-1995. -
Page 28: Disc Operation In Dvd±R, Dvd-Rw Disc
When a recordable DVD disc is recorded in another brand DVD recorder, the Disc has a different Disc menu structure from DAEWOO DVD recorders. So, the Disc menu should be changed to DAEWOO Disc menu to be compatible with DAEWOO DVD Recordings. -
Page 29: Disc Edit
After erasing is complete, the erased title remains as an empty title. You can erase titles on DVD±RW discs only. Divide (DVD±RW) This feature allows you to divide a title into two titles. DVD Recorder Select the title to be divided using [ENTER]. Init Setup Disc Edit Select ‘Divide’... -
Page 30: Troubleshooting
Select the correct input mode on the audio cable is not set to receive audio receiver so you can listen to the DVD Recorder+VCR signal output. sound from the DVD Recorder+VCR. The audio cables are not connected Connect the audio cables securely. securely. -
Page 31: Moisture Condensation
Troubleshooting Moisture Condensation Solution Moisture condensation can occur: Finalise the disc; see page 49. When the DVD Recorder+VCR is moved from a cold place to a warm place. No solution. Under extremely humid conditions. No solution. Use another disc. -
Page 32: Technical Specifications
Technical Specifications Technical Specifications Frequency response DVD (PCM 48 kHz): 8 Hz to 22 General Power requirements 200-240V,50/60Hz Video S/N Audio S/N Power consumption Maximum 26W (Stand-by :3.7W) Dimensions (approx.) Harmonic distortion Less than 0.06% 430 *92 *312 (w*h*d) Dynamic range Resolution Mass (approx.) 4.96 Kg...
Need help?
Do you have a question about the DF-4501P and is the answer not in the manual?
Questions and answers