
Related Manuals for Teledyne PI-MAX 4


Summary of Contents for Teledyne PI-MAX 4
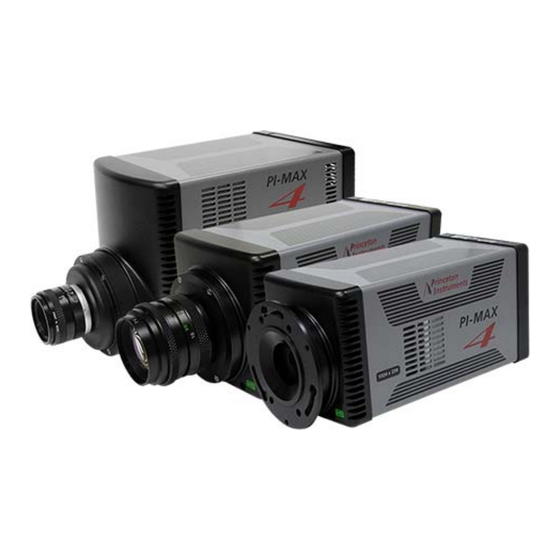
- Page 1 ® PI-MAX 4 Camera System 4411-0139 Issue 10 March 19, 2019 www.princetoninstruments.com...
- Page 2 Trenton, NJ 08619 TEL: 800-874-9789 / 609-587-9797 FAX: 609-587-1970 All rights reserved. No part of this publication may be reproduced by any means without the written permission of Teledyne Princeton Instruments. Printed in the United States of America. Pentium is a registered trademark of Intel Corporation.
- Page 3 ® Issue 10 PI-MAX 4 Camera System Revision History (Sheet 2 of 2) Issue Date List of Changes Issue 5 September 8, 2015 Issue 5 of this document incorporates the following changes: • Global text and graphic updates for LightField 5; •...
- Page 4 ® PI-MAX 4 Camera System Issue 10 This page is intentionally blank.
-
Page 5: Table Of Contents
Table of Contents Chapter 1: Introduction ..........17 PI-MAX4 System Components . - Page 6 ® PI-MAX 4 Camera System Issue 10 Chapter 4: First Light ..........43 Required Equipment and Cables .
- Page 7 Issue 10 Table of Contents Chapter 6: LightField and Gated Operation ......93 Gating .
- Page 8 ® PI-MAX 4 Camera System Issue 10 Trigger Setup ............155 9.3.1 Trigger Response .
- Page 9 Issue 10 Table of Contents Chapter 14: PI-MAX4: EM Family ........213 14.1 Electron Multiplication .
- Page 10 ® PI-MAX 4 Camera System Issue 10 16.2.11 Monitor........... . . 249 16.2.12 Power Connector .
- Page 11 Appendix F: Spectrograph Mount Information ......293 Mount PI-MAX4 to a Teledyne Acton Research SpectraPro Series Spectrograph .
- Page 12 ® PI-MAX 4 Camera System Issue 10 List of Figures Figure 1-1: Typical PI-MAX4 System Components ......17 Figure 1-2: Major Components of the Intensifier-CCD .
- Page 13 Figure 7-6: Typical WinSpec/32 Installation Sequence: Teledyne Acton Research 300I Spectrograph ......131 Figure 7-7: Typical Move Spectrograph Dialog.
- Page 14 ® PI-MAX 4 Camera System Issue 10 Figure 7-28: Typical Repetitive Gating Setup Dialog......145 Figure 7-29: Single Shot Result: Fluorescence Spot, Width = 100 ns, Delay = 10 ns .
- Page 15 Issue 10 List of Figures Figure 13-3: Typical Edit Custom Phase Modulations Window ....200 Figure 13-4: Add a Single Modulation Phase ....... . 200 Figure 13-5: Add Phase Sweep .
- Page 16 ® PI-MAX 4 Camera System Issue 10 Figure B-4: Outline Drawing: PI-MAX4: 512 EM/512 EM(B) with C-mount Adapter ....... . . 274 Figure B-5: Outline Drawing: PI-MAX4: 512 EM/512 EM(B) with F-mount Adapter .
-
Page 17: Introduction
Chapter 1: Introduction ® The Teledyne Princeton Instruments PI-MAX 4 Intensified CCD camera is designed for general macro-imaging and microscopy imaging applications. It is ideal for applications involving ultra low light measurements, or measurements of transient effects. PI-MAX4 uses a proximity-focused micro-channel plate (MCP) image intensifier (Gen II and Filmless Gen III intensifiers available) fiber-optically coupled to a CCD array. - Page 18 Clear PVC tubing, 3’, 5/32” OD, 1/32” wall (McMaster-Carr 5006K42) for dry nitrogen cooling of photocathode. • Manuals PI-MAX4 System manual and optional application software manual. • Optional Application Software — Teledyne Princeton Instruments' WinView/32 or WinSpec/32. — Teledyne Princeton Instruments’ LightField.
-
Page 19: Summary Of Pi-Max4 Data Acquisition
Chapter 1 Introduction Summary of PI-MAX4 Data Acquisition Figure 1-2 illustrates the major components that comprise an Intensifier-CCD. Figure 1-2: Major Components of the Intensifier-CCD Intensifier Gated On Electrical Connection Rings Electr on Flow Input Window Input Window Photocathode Microchannel Plate (MCP) Incident Light CCD Array Fiberoptic Bundle... -
Page 20: Safety Related Symbols Used In This Manual
® PI-MAX 4 Camera System Issue 10 4. When the electrons exit the channels they are further accelerated by a constant high voltage (5-6 kV) and strike the phosphor coating on the fluorescent screen causing it to release photons. Because of the MCP gain, there are now many photons for each photon that struck the photocathode surface. -
Page 21: Grounding And Safety
WARNINGS! If the PI-MAX4 camera system is used in a manner not specified by Teledyne Princeton Instruments, the protection provided by the equipment may be impaired. 2. If the equipment is damaged, the protective grounding could be disconnected. -
Page 22: Intensifier Modes And Safety
® PI-MAX 4 Camera System Issue 10 1.4.1 Intensifier Modes and Safety WinX Applications The Experiment Setup Main screen in WinX applications allows you to select one of two intensifier modes: Gate Mode or Safe Mode. In Gate Mode, the photocathode is biased on only for the time that each gate pulse is applied. -
Page 23: High Intensity Light Damage
Chapter 1 Introduction 1.4.3 High Intensity Light Damage When biased ON, intensified CCD cameras (e.g., PI-MAX4,) can be irreparably damaged if continuously exposed to light levels greater than twice the A/D saturation level. Therefore, it is critical that conditions not be created which could result in damage to the intensifier. -
Page 24: Cleaning And Maintenance
310 for complete contact information. Repairs Save the original packing materials. Since the PI-MAX4 system contains no user-serviceable parts, repairs must be done by Teledyne Princeton Instruments. Should a system need repair, contact Teledyne Princeton Instruments customer support for instructions. Refer to... -
Page 25: About This Manual
Chapter 1 Introduction About this Manual This section provides information about the organization of this manual. 1.8.1 Conventions Used in this Manual WinX is a generic term for WinView/32, WinSpec/32, and WinXTest application software. In this manual, detector and camera are used interchangeably. Most features supported by the PI-MAX4 are also supported by the PI-MAX4-RF and PI-MAX4: EM family. - Page 26 Appendix F, Spectrograph Mount Information, provides instructions for the mounting a PI-MAX4 camera with a spectroscopy adapter to a Teledyne Acton Research SpectraPro Series or IsoPlane spectrograph. Additional instructions describe how to perform rotational alignment and focusing of the camera to the spectrograph optics.
-
Page 27: Chapter 2: System Installation
Chapter 2: System Installation Table 2-1 describes the sequence of actions required to install a PI-MAX4 system and prepare to gather data. Where available, refer to the references specified with each step to obtain additional information. Table 2-1: PI-MAX4 System Installation Procedure (Sheet 1 of 2) For additional information, Action refer to…... - Page 28 ® PI-MAX 4 Camera System Issue 10 Table 2-1: PI-MAX4 System Installation Procedure (Sheet 2 of 2) For additional information, Action refer to… 10. Turn on the computer and launch either LightField or WinX. Section 3.8, Configure Default Camera System Parameters, on When the computer boots, it may prompt for the location of interface page 41...
-
Page 29: System Configuration Diagrams
Chapter 2 System Installation System Configuration Diagrams This section provides block diagrams of typical system configurations. Figure 2-1: Typical PI-MAX4 System Diagram Computer Dry Nitrogen Tank GigE Trigger In Spectrograph Power 90-264 PI-MAX4 Acton SP2300i* Supply AUX I/O Cable Power Supply CoolCUBE II 100-240... - Page 30 ® PI-MAX 4 Camera System Issue 10 This page is intentionally blank.
-
Page 31: System Setup
During unpacking, check the system components for possible signs of shipping damage. If there are any, notify Teledyne Princeton Instruments and file a claim with the carrier. Be sure to save the shipping carton for inspection by the carrier. If damage is not apparent but system specifications cannot be achieved, internal damage may have occurred in shipment. -
Page 32: Checking The Equipment And Parts Inventory
User-provided GigE interface card. (Intel Pro1000 recommended.) • System Dependent Components CoolCUBE Coolant Circulator and Coolant Tubing If there are any problems, contact the Teledyne Princeton Instruments Customer Support department. Refer to Contact Information on page 310 for complete contact information. -
Page 33: General System Requirements And Information
Chapter 3 System Setup General System Requirements and Information This section provides general information about PI-MAX4 system requirements. REFERENCES: For detailed technical specifications, refer to Appendix A, Technical Specifications, on page 263. 3.4.1 Ventilation A PI-MAX4 System requires the following ventilation conditions: •... -
Page 34: Host Computer Specifications
® PI-MAX 4 Camera System Issue 10 3.4.3 Host Computer Specifications Host Computer specifications vary based on which data acquisition software is being used. This section provides minimum host computer specifications by software package. NOTES: Computers and operating systems undergo frequent revisions. -
Page 35: Lightfield Host Computer Requirements
Chapter 3 System Setup 3.4.3.2 LightField Host Computer Requirements When running LightField data acquisition software, the host computer must meet, or exceed, the following specifications: • 64-bit Operating System ® — Windows Vista ® — Windows 7, 8.1, or 10. ®... -
Page 36: Mounting The Camera
® PI-MAX 4 Camera System Issue 10 Mounting the Camera This section provides information necessary to mount PI-MAX4 camera for various applications. 3.5.1 Imaging Applications The camera is supplied with the lens mount specified when the system was ordered, normally either a screw-type C-mount lens or a bayonet type F-mount lens, allowing a lens of the corresponding type to be mounted quickly and easily. -
Page 37: Spectroscopy Applications
REFERENCES: For additional information, refer to: • Quick Start: Mounting a PI-MAX3 or PI-MAX4 (3.60 3- hole Slotted) to a Teledyne Acton Research SpectraPro Series Spectrograph; • Quick Start: Teledyne Princeton Instruments Camera with Slotted Flange to an IsoPlane SCT-320 Spectrograph;... -
Page 38: Figure 3-1: Typical Winview/32 Setup Dialog
® PI-MAX 4 Camera System Issue 10 Figure 3-1: Typical WinView/32 Setup Dialog 3. Click Next > to continue with the installation, and continue to follow on-screen prompts. 4. Once the installation has been completed, connect the camera to the host computer and turn on the camera’s power supply. -
Page 39: Lightfield Applications
Chapter 3 System Setup 3.6.2 LightField Applications This section provides the installation procedure for LightField application software. NOTE: Install the GigE Adapter card BEFORE installing the LightField application software. Before beginning to install LightField, verify that: • The operating system on the desired host computer is supported; •... -
Page 40: Connect The Circulator [Liquid-Cooled Cameras Only]
® PI-MAX 4 Camera System Issue 10 Connect the Circulator [Liquid-Cooled Cameras Only] For liquid-cooled cameras, the CoolCUBE circulator provides a vibration-free method of heat removal. REFERENCES: For additional information about coolant hoses, refer to Section A.7, CoolCUBE Circulator Specifications, on page 269. -
Page 41: Configure Default Camera System Parameters
2. Launch the WinX application. • The Camera Detection Wizard will automatically run if this is the first time a Teledyne Princeton Instruments WinX application (WinView/32, WinSpec/32, or WinXTest/32) has been installed with a supported camera. • If simply installing a new camera type, click on the Launch Camera Detection Wizard…... -
Page 42: Lightfield
® PI-MAX 4 Camera System Issue 10 4. Follow the on-screen prompts to perform the initial hardware setup. The wizard automatically populates Hardware configuration parameters with default values and provides the opportunity to acquire a test image to verify the system is working properly. -
Page 43: First Light
The equipment and cables listed below are required to set up and run the PI-MAX4 camera system in accordance with the procedures described in this chapter. • Teledyne Princeton Instruments PI-MAX4 camera with C-mount adapter; • User-supplied C-mount lens (with smallest aperture of f/16 or f/22);... -
Page 44: Before Turning On The System
® PI-MAX 4 Camera System Issue 10 Before Turning on the System Before turning on the system: • Set the PI-MAX4 I.I.T. On/Off switch to OFF. • Confirm that only room light will be present. • If a C-mount adapter is not already mounted on the camera, refer to Section G.4, Standard C-, F-, and Spectroscopy-Mount Adapters, on page 302 for... -
Page 45: Lightfield First Light Instructions
Chapter 4 First Light LightField First Light Instructions This section provides step-by-step instructions for acquiring an imaging measurement in LightField for the first time. The intent of this procedure is to gain basic familiarity with the operation of the system and to determine that it is functioning properly. Once basic familiarity has been established, operation with other operating configurations, ones with more complex timing modes, may be performed. -
Page 46: Parameter Configuration
® PI-MAX 4 Camera System Issue 10 4.5.3 Parameter Configuration NOTE: This procedure is based on LightField. Basic familiarity with the LightField software is assumed. If this is not the case, review the software manual or have it available while performing this procedure. -
Page 47: Figure 4-2: Camera Icon In Experiment Devices Area
Chapter 4 First Light 2. Drag the desired camera icon into the Experiment Devices area of the desktop. See Figure 4-2. Figure 4-2: Camera Icon in Experiment Devices Area Once a camera has been placed in the Experiment Devices area, the Experiment Settings stack on the left displays several expanders, including the SuperSYNCHRO Timing expander just above the Status bar along the bottom of the application window. -
Page 48: Acquiring Data
® PI-MAX 4 Camera System Issue 10 4.5.4 Acquiring Data Perform the following procedure to verify the system’s ability to acquire data: Verify that the I.I.T. Power switch on the rear of the camera is in the ON position 2. Verify that Enable Intensifier is selected on the Common Acquisition Settings expander. -
Page 49: Figure 4-4: Typical Supersynchro Timing Expander
Chapter 4 First Light 4. Open the SuperSYNCHRO Timing expander (located above the Status bar.) See Figure 4-4. Figure 4-4: Typical SuperSYNCHRO Timing Expander 5. Configure the Gating parameters as desired. The list of configuration parameters varies depending on the specific Mode selected. Refer to Table 4-1. -
Page 50: Focusing
® PI-MAX 4 Camera System Issue 10 6. Click on the Acquire button to begin image acquisition. • If an image is displayed, PI-MAX4 is able to acquire an image. If the image is out of focus, reposition the target and/or rotate the lens. Click on Acquire to determine the degree to which the focus has changed. -
Page 51: Winx First Light Instructions
Chapter 4 First Light WinX First Light Instructions This section provides step-by-step instructions for acquiring an imaging measurement in WinX for the first time. The intent of this procedure is to help you gain basic familiarity with the operation of your system and to show that it is functioning properly. Once basic familiarity has been established, then operation with other operating configurations, ones with more complex timing modes, can be performed. -
Page 52: Figure 4-7: Typical Supersynchro Dialog: Trigger In Tab
® PI-MAX 4 Camera System Issue 10 2. Select the SuperSYNCHRO radio button, and then click on the Setup Pulser… button. The SuperSYNCHRO dialog is displayed, as shown in Figure 4-7. Figure 4-7: Typical SuperSYNCHRO Dialog: Trigger In Tab 3. On the Trigger In tab, verify the following settings: •... -
Page 53: Figure 4-9: Typical Repetitive Gating Setup Dialog
Chapter 4 First Light 5. Click Setup… to display the Repetitive Gating Setup dialog, similar to that shown in Figure 4-9. Figure 4-9: Typical Repetitive Gating Setup Dialog 6. Configure the following settings: • Gate Width: 50 ms; • Gate Delay: 10 ns; •... -
Page 54: Figure 4-11: Typical Experiment Setup Dialog: Adc Tab
® PI-MAX 4 Camera System Issue 10 11. Click on the ADC tab. 12. From the Rate: pull-down list of camera-specific frequencies, select a frequency that is closest to mid-range. Figure 4-11. Figure 4-11: Typical Experiment Setup Dialog: ADC Tab 13. -
Page 55: Initial Data Acquisition
Chapter 4 First Light 4.6.4 Initial Data Acquisition Perform the following procedure to begin initial data acquisition for a test image: NOTE: When using a C-mount lens, PI-MAX4 will typically focus on objects at a distance of approximately 9 inches [22.86 cm.] Verify that room or ambient lighting is subdued. -
Page 56: Focusing
® PI-MAX 4 Camera System Issue 10 4.6.5 Focusing REFERENCES: For complete information about focusing the PI-MAX4 camera when using C-, F-, or spectroscopy mounts, refer • Section E.4, Focusing C- and F-Mount Lenses; • Section F.3, Spectrograph-Camera Rotational Alignment and Focusing... -
Page 57: Gate Mode Operation
Chapter 5: Gate Mode Operation The purpose of the First Light chapter was to guide a user through initial system configuration and verification. The step-by-step procedures provided appropriate configuration settings without explaining why those settings had been selected. This chapter provides detailed information about factors affecting Gate Mode operation of a PI-MAX4 system including: •... -
Page 58: Winx System On/Off Sequences
® PI-MAX 4 Camera System Issue 10 Figure 5-1: Block Diagram: Signal Path in a Standard PI-MAX4 System Incoming photons Camera HV Electronics Intensifier & Gate Driver Signal Processing Drivers Digital Control Timing & Processing Generator GigE Interface Ext. Trigger AUX1, AUX2, etc. -
Page 59: Pre-Exposure Removal Of Accumulated Charge
If a sudden change in the baseline signal is observed, there may be excessive humidity in the camera's CCD enclosure. Turn off the controller IMMEDIATELY. Then, contact Teledyne Princeton Instruments Customer Support for further instructions. Refer to Contact Information page 310 for complete information. -
Page 60: Cleaning
® PI-MAX 4 Camera System Issue 10 5.3.2 Cleaning The basic cleaning function is implemented by clean cycles. These cycles start when you turn the camera on and a clean pattern is programmed into the camera. Their purpose is to remove charge that accumulates on the array while the camera not acquiring data (i.e., exposing and reading out the array.) The timing diagram below is for an experiment set up to acquire three (3) images using Internal trigger mode selected on SuperSYNCHRO Trigger In tab {Trigger expander} and Gate Mode selected on... -
Page 61: Phosphor Decay Delay
Chapter 5 Gate Mode Operation • Skip Serial Register Clean (deselected) {Clean Serial Register} The Top margin inactive parallel strips on a CCD are made up of the dark pixels that come before the active strips on a sensor as they exit to the serial register. When these are available (i.e., Pre Dummies {Top Margin} >... -
Page 62: Figure 5-3: Winx: Phosphor Decay Delay
® PI-MAX 4 Camera System Issue 10 Figure 5-3: WinX: Phosphor Decay Delay NTER HOSPHOR ECAY ELAY Figure 5-4: LightField: Phosphor Decay Delay Parameters... -
Page 63: Temperature Control
In addition, it will be possible to achieve temperature lock at lower temperatures, typically 10-15 degrees lower than would be possible with air-cooling alone. Use the Teledyne Princeton Instruments CoolCUBE coolant circulator. It is a closed circulation system that depends on ambient air-cooling of the circulating coolant. -
Page 64: Setting The Temperature
® PI-MAX 4 Camera System Issue 10 5.5.3 Setting the Temperature Regardless of the type of cooling, the CCD array temperature is set via the application software. When WinX is the controlling software, temperature control is done via Setup — >... -
Page 65: Exposure Timing
Chapter 5 Gate Mode Operation 5.6.1.1 Exposure Timing Exposure is controlled by the gate width setting and the number of gates per frame. The total exposure time is the product of gate width and number of gates per frame. The time of the opening of the gate is controlled by the delay (i.e., time from trigger to optical opening.) This is set in WinX or LF. -
Page 66: Background Subtraction
® PI-MAX 4 Camera System Issue 10 Background Subtraction Each CCD has its own dark charge pattern or background that can be subtracted from the total acquired signal. By subtracting this background, you can eliminate the dark charge, which might otherwise hide low-intensity signal. When setting up for background subtraction, set up the experiment conditions for acquiring the actual image (i.e., camera temperature, gating sequences, region of interest, timing mode, etc.,) and then, while blocking the incoming signal from the... -
Page 67: Interline Ccd Readout
Chapter 5 Gate Mode Operation 5.8.1 Interline CCD Readout In this section, a simple 6 x 3 pixel interline CCD, shown in Figure 5-5, is used to demonstrate how charge is shifted and digitized using a single port. Figure 5-5: Interline CCD Readout CCD Array Dual Port Readout Single Port Readout... -
Page 68: Figure 5-6: Step 1: Non-Overlapped, Early Exposure
® PI-MAX 4 Camera System Issue 10 Figure 5-6: Step 1: Non-Overlapped, Early Exposure 1 Empty Readout Register. Exposure has ended and image is being transferred to masked areas. Figure 5-7 shows the situation early in the readout cycle. The charge in the imaging areas has been transferred to the adjacent masked areas and up- shifting to the readout register has started. -
Page 69: Figure 5-8: Step 3: Non-Overlapped, Transfer To Output Node
Chapter 5 Gate Mode Operation Figure 5-8: Step 3: Non-Overlapped, Transfer to Output Node 3 Charge from first pixel has been shifted to the Output Node. Figure 5-9 illustrates the end of the readout. Both the imaging and storage areas are empty. When the intensifier is gated on again, signal charge will again be accumulated. -
Page 70: Full-Frame Ccd Readout
® PI-MAX 4 Camera System Issue 10 5.8.2 Full-Frame CCD Readout The following PI-MAX4 cameras use a full-frame architecture CCDs for data acquisition: • PI-MAX4: 1024f; • PI-MAX4: 2048f; • PI-MAX4:1024x256. Figure 5-10 illustrates the various stages of this process. Step 1 in Figure 5-10 represents a CCD immediately after exposure but before the beginning of readout. -
Page 71: Binned Readout (Hardware Binning)
Chapter 5 Gate Mode Operation After the accumulated charge has been shifted out of each pixel, the remaining charge is zero, meaning that the array is immediately ready for the next exposure. The equations that determine the rate at which the CCD can be read are described below. -
Page 72: Ccd Type And Readout Port(S)
® PI-MAX 4 Camera System Issue 10 Limitations of hardware binning include: • Lowered resolution because charge from adjacent pixels is summed into a super pixel. • Increased possibility to blooming. Because shift register pixels typically hold only twice as much charge as image pixels, the binning of large sections may result in saturation and spilling of charge back into the image area •... -
Page 73: Figure 5-11: Dual Port Readout: 2 × 2 Binning Of Interline Ccd
Chapter 5 Gate Mode Operation Full Frame Binning Figure 5-11 shows an example of 2 x 2 binning with dual port operation for an interline array. Each pixel of the image displayed by the software represents 4 pixels of the array. Figure 5-11: Dual Port Readout: 2 ×... -
Page 74: Figure 5-13: Single Port Readout: 2 × 2 Binning Of Full Frame Ccd
® PI-MAX 4 Camera System Issue 10 Figure 5-13 shows an example of single port operation for a full frame array. Figure 5-13: Single Port Readout: 2 × 2 Binning of Full Frame CCD + + + + + + WinX and Partial Frame ROI Binning Regardless of the type of array (i.e., full-frame or interline,) when setting up a partial frame ROI, keep in mind that for the PI-MAX4 the number of pixels in the serial... -
Page 75: Figure 5-14: Experiment Setup: Roi Configuration Dialog
Chapter 5 Gate Mode Operation Figure 5-14: Experiment Setup: ROI Configuration Dialog OTE THAT A VALUE OF IS NOT VALID FOR AN 200. TART ND OF... -
Page 76: Lightfield And Partial Frame Roi Binning
® PI-MAX 4 Camera System Issue 10 5.8.3.2 LightField and Partial Frame ROI Binning Partial Frame ROI binning can be defined via the Region of Interest expander’s Custom Region(s) of Interest function and the Edit Regions of Interest window similar to that shown in Figure 5-15. -
Page 77: Figure 5-16: Single Port Readout: Partial Frame, 2×2 Binning, Interline Ccd
Chapter 5 Gate Mode Operation Figure 5-16: Single Port Readout: Partial Frame, 2×2 Binning, Interline CCD Empty Readout Register. Exposure has ended Charges from two masked areas in each column have and image has been shifted to masked area been shifted to Readout Register and added. of each pixel. -
Page 78: Software Binning
® PI-MAX 4 Camera System Issue 10 Figure 5-17: Dual Port Readout: LightField Settings, 5×3 Binning, Interline CCD Software Binning Software binning is a software-averaging post-acquisition process that can be performed on either non-binned or hardware-binned data. This type of binning can improve the S/N ratio by as much as the square root of the number of binned pixels. -
Page 79: Controller Gain {Analog Gain
Chapter 5 Gate Mode Operation • WinX Automatic software binning is configured by entering Group parameters on the Acquisition —> Experiment Setup… —> ROI Setup tab card and then selecting the Use Software Binning check box. The drawback to automatic binning is that the raw data is lost. -
Page 80: Logic Out Control
® PI-MAX 4 Camera System Issue 10 5.12 Logic Out Control The TTL-compatible logic level output (0 to +3.3 V) from the LOGIC OUT connector on the rear panel can be used to monitor camera status and control external devices. By default, the logic output level is high while the action is occurring. - Page 81 Chapter 5 Gate Mode Operation • Image Shift {Shifting Under Mask} Driven high (logic 1) as a detected image is shifted under the mask. Specific signal timing is CCD-dependent as follows: — Interline CCD Driven high (logic 1) as the entire image is shifted under the CCD mask. —...
-
Page 82: Winx Experiment Setup
® PI-MAX 4 Camera System Issue 10 5.13 WinX Experiment Setup This section provides information about configuring an experiment using the WinX application software. 5.13.1 Main Tab Within WinX, experiment setup parameters are typically configured on the Experiment Setup —> Main tab. See Figure 5-20. -
Page 83: Timing Tab
Chapter 5 Gate Mode Operation • Intensifier Gain The Intensifier gain setting provides continuous adjustment over a range of 1 to 100. Gain is approximately proportional to the number entered: — 100 corresponds to the maximum gain, or 100%; — 1 corresponds to approximately 1% of the maximum gain. The default value will provide good results in many applications. -
Page 84: Figure 5-22: Fast Mode/Slow Mode Flow Charts
® PI-MAX 4 Camera System Issue 10 With the exception of Fast Mode/Safe Mode, which is described in full, the following paragraphs briefly describe these timing parameters. The settings appropriate to the intensifier mode and selected pulser are discussed in Chapter 6, LightField and Gated Operation. - Page 85 Chapter 5 Gate Mode Operation The two modes are described here: — Fast Mode Fast mode is primarily used for collecting “real-time” sequences of experimental data, where timing is critical and events cannot be missed. Once the PI-MAX4 has been issued the Start Acquisition command by the computer, all frames are collected without further intervention from the computer.
-
Page 86: Lightfield Experiment Setup
® PI-MAX 4 Camera System Issue 10 5.14 LightField Experiment Setup Initial experiment setup for LightField is an easy process. If the PI-MAX4 is powered on when LightField is launched, the camera will automatically be detected and its icon will be placed in the Available Devices area. -
Page 87: Figure 5-24: Typical Advanced Intensifier Dialog
Chapter 5 Gate Mode Operation From this expander, the following parameters are configured: • Frames to Save Configures how many images will be acquired. • On-CCD Accumulations Configures whether multiple frames will be used to create a single frame. • Exposures per Frame Configures whether multiple exposures will occur while a frame is being acquired. -
Page 88: Region Of Interest Expander
® PI-MAX 4 Camera System Issue 10 5.14.2 Region of Interest Expander Figure 5-25 illustrates a typical Region of Interest expander. Figure 5-25: Typical Region of Interest Expander The Region of Interest expander is used to configure how much of the total sensor image area will be used to acquire the data (i.e., full sensor, or one or more regions of interest.) Hardware or software binning are configured on this expander. -
Page 89: Trigger Expander
Chapter 5 Gate Mode Operation 5.14.3 Trigger Expander The Trigger expander is used to configure the trigger source to be used for trigger gating. Valid sources for the Trigger Input are: • Internal Figure 5-26 illustrates typical configuration parameters for Internal triggering. Figure 5-26: Typical Trigger Expander: Internal Trigger Source Parameters Internal triggering uses the user-specified Internal Trigger Frequency that has been selected on the SuperSYNCHRO Timing expander. -
Page 90: Supersynchro Timing Expander
® PI-MAX 4 Camera System Issue 10 5.14.4 SuperSYNCHRO Timing Expander The Super SYNCHRO Timing expander is located at the bottom of the LightField desktop. See Figure 5-28. NOTE: The top of the SuperSYNCHRO Timing expander can be: • Dragged up to view more of the SuperSYNCHRO panel;... - Page 91 Chapter 5 Gate Mode Operation This expander is used to access and configure parameters such as: • Gating Mode; Valid values for PI-MAX4 are: — Repetitive; — Sequential; — DIF. • Gate Delay; • Gate Width; • AUX Output Delay; •...
- Page 92 ® PI-MAX 4 Camera System Issue 10 This page is intentionally blank.
-
Page 93: Chapter 6: Lightfield And Gated Operation
Chapter 6: LightField and Gated Operation This chapter discusses gated operation with the SuperSYNCHRO™ timing generator as well as aspects of PI-MAX4 operation that are not covered in Chapter 4, First Light. Chapter 15, Tips and Tricks, should also be reviewed since it provides helpful information about how to achieve desired results when performing more complex measurements. -
Page 94: Safety Precautions
® PI-MAX 4 Camera System Issue 10 Safety Precautions When biased ON, intensified CCD cameras such as the PI-MAX4 can be permanently damaged if continuously exposed to light levels exceeding twice the A/D saturation level. It is critical that a camera not be operated under lighting conditions which may damage the intensifier. -
Page 95: Timing Mode
Chapter 6 LightField and Gated Operation Timing Mode In Gate Mode, the internal timing generator uses Internal Sync timing which initiates a readout cycle following each internally-generated timing pulse sequence. Internal handshakes are used to prevent: • A readout from being initiated when the timing generator is busy; •... -
Page 96: Micro-Channel Plate (Mcp) Bracket Pulsing
® PI-MAX 4 Camera System Issue 10 Micro-Channel Plate (MCP) Bracket Pulsing The primary advantage gained from incorporating gating is that it allows temporal discrimination against background light. By allowing the photocathode to “see” only during the event of interest, very high background illumination levels can be tolerated without materially degrading experiment results. -
Page 97: Bracket Pulsing In Lif Measurements
Chapter 6 LightField and Gated Operation 6.4.1 Bracket Pulsing in LIF Measurements Most experiments using laser-induced fluorescence to probe combustion flows are performed with UV probe/lasers. Atomic emission from flames also has significant UV content. If the flame is continuous, the UV background will also be continuous. Even where a flame is transient (e.g. -
Page 98: Impact Of Bracket Pulsing On Delay
® PI-MAX 4 Camera System Issue 10 Also, keep in mind that MCP bracket pulsing adds 10 ns delay to the photocathode gating. Even though the bracket timing is controlled automatically by the software, in an experiment where it is necessary to delay the arrival of the laser pulse at the sample, this will mean inserting an additional delay of 10 ns (min gate delay = ~25 ns, with bracket = 35 ns) to accomplish coincidence at the camera. -
Page 99: Configuration
Chapter 6 LightField and Gated Operation 6.4.5 Configuration MCP Bracket pulse implementation is enabled by selecting Bracket Pulsing ON from within the host software. Figure 6-2 illustrates the timing diagram for bracket pulsing. NOTE: Because Gen III Intensifiers do not respond in the UV, bracket pulsing is not available for these intensifiers. -
Page 100: Experiments
® PI-MAX 4 Camera System Issue 10 Experiments Figure 6-3 illustrates the types of experiments that can be performed with a PI-MAX4 camera. Figure 6-3: Typical PI-MAX4 Experiments All I Experiments Gated Cooled Photocathode Photon Starved Repetitive One Shot Swept Gate Static Gate Single Shot Kinetics... -
Page 101: Swept Gate Experiment [Fixed Width, Variable Delay]
Chapter 6 LightField and Gated Operation • Single Shot A single shot experiment is one where there is only one chance to obtain the data. Any experiment that can not be repeated more often than once a minute, such as high power lasers and explosives, is considered a single shot. You have to catch the trigger when it comes. -
Page 102: Figure 6-4: Block/Timing Diagram: Swept Gate Experiment
® PI-MAX 4 Camera System Issue 10 Figure 6-4: Block/Timing Diagram: Swept Gate Experiment Computer 110/220 GigE 96 – 264 Trigger In Power PI-MAX4 Spectrograph Supply Photodiode Trigger In ~12 nS remains high for the duration of the pulse ensemble * Photocathode Gating Photocathode Gating MCP Gating... -
Page 103: Figure 6-6: Typical Sensor Cleaning Dialog
Chapter 6 LightField and Gated Operation 4. On the Sensor expander, click on the Sensor Cleaning button to configure the desired cleaning parameters. See Figure 6-6. Figure 6-6: Typical Sensor Cleaning Dialog If a Restore to Default button is displayed on the dialog, click it to restore the associated parameter to its default value. -
Page 104: Figure 6-8: Typical Spectrometer Expanders
PI-MAX 4 Camera System Issue 10 5. When using a Teledyne Acton Research SpectraPro Series spectrograph, verify it was turned on when LightField was launched. If using an LS-785, an icon should be shown in the Available Devices area. When the spectrograph icon is dragged into the Experiment Devices area, the Spectrometer expander is added to the Experiment Settings stack with appropriate parameters provided. -
Page 105: Figure 6-9: Typical Regions Of Interest Expander: Full Sensor
Chapter 6 LightField and Gated Operation 7. On the Regions of Interest expander, select Full Sensor. See Figure 6-9. Figure 6-9: Typical Regions of Interest Expander: Full Sensor 8. Verify that the camera is operating and is properly focused by running it in “Internal Trigger”... -
Page 106: Figure 6-10: Typical Common Acquisition Settings Expander
® PI-MAX 4 Camera System Issue 10 Figure 6-10: Typical Common Acquisition Settings Expander b. On the Analog to Digital Conversion expander, configure the following parameters: • Speed; • Analog Gain. Figure 6-11. Figure 6-11: Typical Analog to Digital Conversion Expander... -
Page 107: Figure 6-12: Typical Trigger Expander
Chapter 6 LightField and Gated Operation c. On the Trigger expander, configure the following parameters as indicated: • Trigger Source: Internal. Figure 6-12. Figure 6-12: Typical Trigger Expander d. Verify the ambient light level is low. Adjust the light level as required. e. -
Page 108: Figure 6-13: Typical Regions Of Interest Expander: Full Sensor Binned
® PI-MAX 4 Camera System Issue 10 9. On the Regions of Interest expander, configure the following parameters as indicated: • Select Full Sensor, Binned; • Bin H: 1024. Figure 6-13. Figure 6-13: Typical Regions of Interest Expander: Full Sensor Binned... -
Page 109: Figure 6-14: Trigger Expander: External Trigger Source Configuration
Chapter 6 LightField and Gated Operation 10. On the Trigger expander, configure the following Trigger In parameters as indicated: • Source: External; • Threshold: 1.5; • Coupling: DC; Termination: 50 ; • • Trigger Determined By: Rising Edge; Figure 6-14. Figure 6-14: Trigger Expander: External Trigger Source Configuration... -
Page 110: Figure 6-15: Typical Supersynchro Timing Expander
® PI-MAX 4 Camera System Issue 10 11. Open the SuperSYNCHRO Timing expander (located above the Status bar.) Figure 6-15. Figure 6-15: Typical SuperSYNCHRO Timing Expander Perform the following procedure to configure gate timing parameters as indicated: a. Mode: Sequential If using a Gen II intensifier, deselect Enable Bracket Pulsing for this experiment. -
Page 111: Figure 6-16: Typical Supersynchro Timing: Syncmaster On
Chapter 6 LightField and Gated Operation c. The SyncMASTER ON button enables the SyncMASTER trigger output from the SyncMASTER1 and SyncMASTER2 connectors on the AUX I/O cable. The frequency for the SyncMASTER outputs may then be configured, as well as the AUX Output signal at the AUX OUT connector on the rear of the PI-MAX4. -
Page 112: Figure 6-17: Typical Experiment Results: Frame Cross Section
® PI-MAX 4 Camera System Issue 10 Figure 6-17 illustrates the graph for a Sequential -Repetitive experiment with fixed width and variable delay. Show Frame Cross Section has been selected. The intensity of the selected point was at it maximum in Frame 23. Figure 6-17: Typical Experiment Results: Frame Cross Section... -
Page 113: Syncmaster1 Supplies The Master Clock
Chapter 6 LightField and Gated Operation 6.5.1.2 SyncMASTER1 Supplies the Master Clock When using a light source that has a Trigger In, the PI-MAX4 SyncMASTER function can be used as the Master clock. The setup procedure is similar that described in Section 6.5.1.1, Experiment Supplies the Master Clock, with the following changes:... -
Page 114: Single Shot Experiment
® PI-MAX 4 Camera System Issue 10 6.5.2 Single Shot Experiment A single shot experiment offers only one chance to capture an event. As with any gated experiment, the time budget of the experiment is critical. If there is no pre-trigger from the experiment, a photodiode can be used to generate an electrical trigger from the laser light. -
Page 115: Figure 6-21: Cleaning Cycles, Cleaning And Skipping Expander
Chapter 6 LightField and Gated Operation Figure 6-21: Cleaning Cycles, Cleaning and Skipping Expander The sequence of operations is similar to that for Sequential experiments. After focusing the camera on the fluorescing sample, an appropriate Gain is configured. See Figure 6-22. -
Page 116: Figure 6-23: Typical Repetitive Gating Setup: 100 Ns Width, 25 Ns Delay
® PI-MAX 4 Camera System Issue 10 Gate Width and Gate Delay should be configured so that the intensifier is gated ON during the entire event. For example, in this case the event is a 60 ns fluorescence. See Figure 6-23. -
Page 117: Figure 6-24: Single Shot Result: Fluorescence Spot, Width = 100 Ns
Chapter 6 LightField and Gated Operation Figure 6-24 shows the result of this experiment. Figure 6-24: Single Shot Result: Fluorescence Spot, Width = 100 ns, Delay = 10 ns... -
Page 118: Figure 6-25: Single Shot Result: Fluorescence Spot, Width = 100 Ns
® PI-MAX 4 Camera System Issue 10 Figure 6-25 shows the peak obtained by binning the entire region around the fluorescence spot in the vertical direction. Figure 6-25: Single Shot Result: Fluorescence Spot, Width = 100 ns, Delay = 10 ns, Binned Vertically... -
Page 119: Swept Gate Experiment [Variable Width, Variable Delay]
Chapter 6 LightField and Gated Operation 6.5.3 Swept Gate Experiment [Variable Width, Variable Delay] The procedure for conducting a Swept Gate experiment with variable width and variable delay is the same as that for conducting a Swept Gate experiment with fixed width and variable delay with the following parameter configuration changes: •... - Page 120 ® PI-MAX 4 Camera System Issue 10 This page is intentionally blank.
-
Page 121: Chapter 7: Winx And Gated Operation
Chapter 7: WinX and Gated Operation This chapter discusses gated operation with the SuperSYNCHRO™ timing generator as well as aspects of PI-MAX4 operation that are not covered in Chapter 4, First Light. Chapter 15, Tips and Tricks, should also be reviewed since it provides helpful information about how to achieve desired results when performing more complex measurements. -
Page 122: Safety Precautions
® PI-MAX 4 Camera System Issue 10 Safety Precautions When biased ON, intensified CCD cameras such as the PI-MAX4 can be permanently damaged if continuously exposed to light levels exceeding twice the A/D saturation level. It is critical that a camera not be operated under lighting conditions which may damage the intensifier. -
Page 123: Alarms
Chapter 7 WinX and Gated Operation 7.2.2 Alarms NOTE: It is normal for an alarm to sound briefly when the system is initially turned on. To reduce the risk of camera damage, the PI-MAX4 camera is equipped with an audible alarm in the camera head, activated when the intensity of light falling on the image intensifier exceeds a preset threshold. -
Page 124: Micro-Channel Plate (Mcp) Bracket Pulsing
® PI-MAX 4 Camera System Issue 10 Refer to Table 7-1 for additional Internal Sync information when using Gated mode. Table 7-1: Internal Sync Information for Gated Operation Timing Mode Shutter Control Ext. Trigger Input Controlled by Internal Timing Controlled by Internal Timing Trigger In BNC Generator Generator... -
Page 125: Bracket Pulsing In Lif Measurements
Chapter 7 WinX and Gated Operation Figure 7-1: Timing Diagram: MCP Bracket Pulsing Photocathode Gating MCP Gating ~1 μs For emitted photoelectrons to be accelerated in the MCP, the MCP must be biased ON. In conventional intensified cameras, the MCP is biased ON continuously. In PI-MAX4, however, when bracket pulsing is ON, the MCP is biased OFF until just before the photocathode is gated ON and is biased OFF shortly after the photocathode is biased OFF. -
Page 126: Bracket Pulsing In Nanosecond Pump Probe Experiments
® PI-MAX 4 Camera System Issue 10 7.4.2 Bracket Pulsing in Nanosecond Pump Probe Experiments Some nanosecond pump-probe experiments combine a nanosecond or faster pump with a flashlamp probe. The duration of the probe flash can be 10-50 s and a gate is used to select the specific nanosecond-scale time slice to be observed within the much longer probe flash. -
Page 127: Impact Of Bracket Pulsing On Delay
Chapter 7 WinX and Gated Operation 7.4.4 Impact of Bracket Pulsing on Delay If operating in the UV when bracket pulsing is activated (Gen II Intensifier only,) the MCP gate automatically brackets the photocathode gate pulse to further enhance the on/off ratio. -
Page 128: Experiments
® PI-MAX 4 Camera System Issue 10 Experiments Figure 7-3illustrates a breakdown of the types of experiments that can be performed with a PI-MAX4 camera. Figure 7-3: Typical PI-MAX4 Experiments All I Experiments Gated Cooled Photocathode Photon Starved Repetitive One Shot Swept Gate Static Gate Single Shot... -
Page 129: Swept Gate Experiment [Fixed Width, Variable Delay]
Chapter 7 WinX and Gated Operation • Single Shot A single shot experiment is one where there is only one chance to obtain the data. Any experiment that can not be repeated more often than once a minute, such as high power lasers and explosives, is considered a single shot. You have to catch the trigger when it comes. -
Page 130: Figure 7-4: Block/Timing Diagram: Swept Gate Experiment
® PI-MAX 4 Camera System Issue 10 Figure 7-4: Block/Timing Diagram: Swept Gate Experiment GigE 96-264 PI-MAX4 Photodiode Trigger In ~12 ns Aux Out Delay is programmable. * Level changes for T0 depend on the pulse sequence(s) defined by the user. 2. -
Page 131: Figure 7-6: Typical Winspec/32 Installation Sequence: Teledyne Acton
Install/Remove Spectrograph to install the hardware prior to configuring any parameters. Figure 7-6 illustrates the general sequence required to install a Teledyne Acton Research 300I spectrograph using WinSpec/32. If installing a different spectrograph, select it from the list of Supported Spectrographs during step 2. -
Page 132: Figure 7-7: Typical Move Spectrograph Dialog
® PI-MAX 4 Camera System Issue 10 11. After the spectrograph and been installed and configured, move the grating to the desired wavelength. See Figure 7-7. Figure 7-7: Typical Move Spectrograph Dialog 12. Verify that the camera is operating and is properly focused by running it in Internal Trigger mode. -
Page 133: Figure 7-9: Typical Experiment Setup Dialog: Timing Tab
Chapter 7 WinX and Gated Operation b. Within the Intensifier section, configure the following parameters: • Select Gate Mode [radio button]; • Gain: Between 0 and 100. Configure MCP Gain for between 0 and 100. c. Click the Timing tab, and configure the following parameters: •... -
Page 134: Figure 7-10: Typical Experiment Setup Dialog: Adc Tab
® PI-MAX 4 Camera System Issue 10 Figure 7-10: Typical Experiment Setup Dialog: ADC Tab e. Click the ROI Setup tab, and configure parameters for the appropriate ROI. Figure 7-11. Figure 7-11: Typical Experiment Setup Dialog: ROI Tab Click OK to save all Experiment Setup configuration information and dismiss the dialog. -
Page 135: Figure 7-12: Typical Winx Pulsers Dialog
Chapter 7 WinX and Gated Operation g. From the Setup pull-down menu, select Pulsers. The Pulsers dialog is displayed, similar to that shown in Figure 7-12. Figure 7-12: Typical WinX Pulsers Dialog h. Select the SuperSYNCHRO radio button, and then click on the Setup Pulser… button. -
Page 136: Figure 7-14: Typical Winx Pulsers Dialog
® PI-MAX 4 Camera System Issue 10 n. Click on Focus. • If Readout Mode has been configured to Use Region of Interest, data acquisition will immediately begin. • If, however, Readout Mode has been configured to Use Full Chip, the system will display a pop-up dialog asking if this setting should be changed to Use Region of Interest before entering focus mode. -
Page 137: Figure 7-16: Typical Supersynchro Dialog: Gating Tab
Chapter 7 WinX and Gated Operation c. Click on the Gating tab to configure the following parameters: • Mode: Sequential [radio button]; • Bracket Pulsing: OFF [available for Gen II Intensifiers ONLY]. Figure 7-16. Figure 7-16: Typical SuperSYNCHRO Dialog: Gating Tab VAILABLE II I NTENSIFIERS... -
Page 138: Figure 7-18: Typical View Width/Delay Sequence Dialog
® PI-MAX 4 Camera System Issue 10 Configure the following Sequential Gating parameters: • Number of Spectra to be acquired (e.g., 41); • Increment Type: Fixed [radio button] • Gate Width Start This is the desired initial Gate Width. Both numeric value (e.g., 5,) and an associated unit (e.g., sec,) must be configured. -
Page 139: Figure 7-19: Typical Supersynchro Dialog: Trigger Out Tab
Chapter 7 WinX and Gated Operation e. Click on the Trigger Out tab to configure the following parameters: • SyncMASTER Trigger Out When Enabled (i.e., checked,) the frequency of the SyncMASTER1 output is the same as the frequency of the Trigger In signal. Refer to step 13.b on page 136. -
Page 140: Figure 7-20: Experiment Setup: Timing Tab
® PI-MAX 4 Camera System Issue 10 14. Configure experiment parameters from the Experiment Setup dialog. a. Click on the Timing tab and configure the timing as shown in Figure 7-20. Figure 7-20: Experiment Setup: Timing Tab b. Click on the Main tab, select Gate Mode, and enter the desired Intensifier Gain. The number of spectra is automatically updated depending on the number entered on the Sequential Gating Setup dialog. -
Page 141: Figure 7-22: Typical Experiment Results Shown In 3-D
Chapter 7 WinX and Gated Operation 15. After verifying all connections and equipment readiness, click on Acquire to begin acquiring spectra or images. Figure 7-22 illustrates a 3-D graph obtained for a Sequential-Repetitive experiment with Fixed Width and Variable Delay. See Figure 7-15 through Figure 7-18... -
Page 142: Syncmaster1 Supplies The Master Clock
® PI-MAX 4 Camera System Issue 10 7.5.1.2 SyncMASTER1 Supplies the Master Clock When using a light source that has a Trigger In, the PI-MAX4 SyncMASTER function can be used as the Master clock. The setup procedure is similar that described in Section 7.5.1.1, Experiment Supplies the Master Clock, with the following changes:... -
Page 143: Single Shot Experiment
Chapter 7 WinX and Gated Operation 7.5.2 Single Shot Experiment A single shot experiment offers only one chance to capture an event. As with any gated experiment, the time budget of the experiment is critical. If there is no pre-trigger from the experiment, a photodiode can be used to generate an electrical trigger from the laser light. -
Page 144: Figure 7-26: Hardware Setup Dialog: Cleans/Skips Tab
® PI-MAX 4 Camera System Issue 10 Once the equipment has been set up, default values for Cleans/Skips are configured. Figure 7-26. NOTE: If the CCD has to wait more than a few seconds for an external trigger, the number of cleans should be increased. Figure 7-26: Hardware Setup Dialog: Cleans/Skips Tab The sequence of operations is similar to that for Sequential experiments. -
Page 145: Figure 7-27: Experiment Setup Dialog: Main Tab
Chapter 7 WinX and Gated Operation Figure 7-27: Experiment Setup Dialog: Main Tab Gate Width and Gate Delay should be configured so that the intensifier is gated ON during the entire event. For example, in this case the event is a 60 ns fluorescence. See Figure 7-28. -
Page 146: Figure 7-29: Single Shot Result: Fluorescence Spot, Width = 100 Ns
® PI-MAX 4 Camera System Issue 10 Figure 7-29 shows the result of this experiment. Figure 7-29: Single Shot Result: Fluorescence Spot, Width = 100 ns, Delay = 10 ns Figure 7-30 shows the peak obtained by binning the entire region around the fluorescence spot in the vertical direction. -
Page 147: Swept Gate Experiment [Variable Width, Variable Delay]
Chapter 7 WinX and Gated Operation 7.5.3 Swept Gate Experiment [Variable Width, Variable Delay] The procedure for conducting a Swept Gate experiment with variable width and variable delay is the same as that for conducting a Swept Gate experiment with fixed width and variable delay with the following parameter configuration changes: •... - Page 148 ® PI-MAX 4 Camera System Issue 10 This page is intentionally blank.
-
Page 149: Timing Generator
Chapter 8: Timing Generator This chapter describes the internal timing generator for the PI-MAX4. Pulse Set A Pulse Set comprises the following signals: • MCP_GATE; • START; • STOP; • AUX1; • SyncMASTER. START and STOP define the photocathode gate pulse. See Figure 8-1. -
Page 150: Supported Timing Generator Trigger Modes
® PI-MAX 4 Camera System Issue 10 8.1.1 Supported Timing Generator Trigger Modes Trigger per Pulse: The pulse set is initiated by its own trigger (either internal or external.) Figure 8-2. Figure 8-2: Timing Diagram: Trigger Per Pulse TRIGGER PULSE SET PULSES EXPOSE EXPOSE... -
Page 151: Supported Timing Generator Trigger Modes
Chapter 8 Timing Generator 8.2.1 Supported Timing Generator Trigger Modes Trigger per Pulse: Each pulse of the single sequence is initiated by its own trigger. NOTE: All triggers must be: • Generated from the same source, and • Must all be either an internal or an external trigger. The use of a combination of internal and external triggers is not supported. - Page 152 ® PI-MAX 4 Camera System Issue 10 This page is intentionally blank.
-
Page 153: Chapter 9: Lightfield And Dual Image Feature
Chapter 9: LightField and Dual Image Feature The purpose of the PI-MAX4 Dual Image Feature (DIF) is to acquire a pair of gated images in rapid succession. The time between frames can be as short as 450 ns: the second image will have some remnants from the first image due to the longer persistence of the P46 phosphor. -
Page 154: Interline Ccd Operation
® PI-MAX 4 Camera System Issue 10 Frames to Save must be a multiple of two (2) and is configured on the Common Acquisitions Settings expander. See Figure 9-2. Figure 9-2: Common Acquisition Settings Expander In addition, it is recommended that the intensifier have a fast decay phosphor (P46.) Since DIF operation involves acquiring images in rapid succession, phosphor persistence can become the limiting factor in the rate of image acquisition. -
Page 155: Trigger Setup
Chapter 9 LightField and Dual Image Feature Trigger Setup Triggering for DIF operation is configured on the Trigger and the SuperSYNCHRO Timing expanders. Trigger configuration begins by selecting the desired Trigger Response and Trigger Source, both of which are found on the Trigger expander. See Figure 9-3. -
Page 156: Trigger Source
® PI-MAX 4 Camera System Issue 10 • Shift Per Trigger Two triggers are used to acquire the two images (i.e., one trigger per image.) Figure 9-5 illustrates the timing diagram for a dual-trigger DIF acquisition. Figure 9-5: Timing Diagram: Dual-Trigger (Shift Per Trigger) DIF SHIFT FIRST FRAME SECOND FRAME... -
Page 157: External Trigger Source
Chapter 9 LightField and Dual Image Feature 9.3.2.2 External Trigger Source When Trigger Source is configured to External, additional configuration parameters are required in order to allow the PI-MAX4 to be triggered from an external source. See Figure 9-7. Figure 9-7: Trigger Expander: External Trigger Source The additional configuration parameters required for an External source are: •... -
Page 158: Using Pre-Trigger
® PI-MAX 4 Camera System Issue 10 • Trigger Determined By; Specifies on which edge of the incoming trigger pulse the camera is triggered. Valid values are: — Rising Edge; — Falling Edge. • Anticipate Trigger. When enabled, a second trigger pulse (i.e., Pre-Trigger,) is used to allow sufficient time for the camera hardware to prepare for an acquisition prior to receiving the trigger pulse to initiate image acquisition. -
Page 159: Figure 9-9: Timing Diagram: Pre-Trigger, Single Trigger
Chapter 9 LightField and Dual Image Feature Within LightField, the nominal delay from the Pre-Trigger pulse to the event of interest is configured on the Trigger expander. When the trigger Source is configured to be ≥ 86 S, is External, and Anticipate Trigger is enabled, the nominal delay, which must be configured in the Delay from Pre-Trigger parameter, and the actual delay must be within 2 S of this configured value. -
Page 160: Figure 9-10: Timing Diagram: Pre-Trigger, Dual Trigger (Shift Per Trigger)
® PI-MAX 4 Camera System Issue 10 Figure 9-10: Timing Diagram: Pre-Trigger, Dual Trigger (Shift Per Trigger) Pre-Trigger Shift Behind Jitter Mask PRE-TRIGGER TRIGGER FIRST FRAME SECOND FRAME IMAGES : Time between Pre-Trigger and D2: Pulse 2 Gate Delay, Shift Behind Mask S ±... -
Page 161: Figure 9-12: Timing Diagram: Pre-Trigger With Very Late Input Trigger
Chapter 9 LightField and Dual Image Feature Because the Shift Behind Mask operation occurs during the acquisition of the first frame of image intensity data, not all Frame 1 data are shifted. Consequently, the unshifted data are then added to the subsequent Frame 2 image data, resulting in: •... -
Page 162: Configure A Single-Trigger Dif Acquisition
® PI-MAX 4 Camera System Issue 10 Configure a Single-Trigger DIF Acquisition The operation of the PI-MAX4 in DIF mode is similar to standard operation of a PI-MAX4 with SuperSYNCHRO Timing. This section describes the minor operational differences that are due to the special timing modes required for DIF. Figure 9-13 is a block diagram of the typical equipment configuration for a single-trigger DIF acquisition. - Page 163 Chapter 9 LightField and Dual Image Feature Perform the following procedure to configure a single trigger DIF acquisition: The PI-MAX4 camera must be aligned and focused on the area of interest for this experiment. This is best accomplished while the PI-MAX4 is operating in Full Frame readout mode (i.e., before switching to DIF mode on the Readout expander.) Verify that the Phosphor Decay Delay is appropriate to the phosphor used by the camera.
-
Page 164: Configure A Dual-Trigger Dif Acquisition
® PI-MAX 4 Camera System Issue 10 d. Configure the following AUX Output Trigger parameters as required: • AUX Output Delay; • AUX Output Width. e. To enable trigger outputs on the AUX I/O cable’s SyncMASTER1 and SyncMASTER2 connectors, click on the SyncMASTER: ON button. When SyncMASTER is enabled, the output of the SyncMASTER1 connector is driven at the frequency specified by the Internal Trigger Frequency. -
Page 165: Figure 9-16: Timing Diagram: Dual-Trigger Dif Acquisition
Chapter 9 LightField and Dual Image Feature Figure 9-16 illustrates the timing diagram for a dual-trigger DIF acquisition. Figure 9-16: Timing Diagram: Dual-Trigger DIF Acquisition SHIFT FIRST FRAME SECOND FRAME BEHIND MASK TRIGGER IMAGES D2: Pulse 2 Gate Delay PD: Phosphor Decay Time W1: Pulse 1 Gate Width W2: Pulse 2 Gate Width Perform the following procedure to configure a dual-trigger DIF acquisition:... - Page 166 ® PI-MAX 4 Camera System Issue 10 4. On the Trigger expander, select Internal or External triggering. External: Verify the trigger characteristics on the Trigger expander match the active trigger edge for the trigger pulse being used. Internal: Perform the following procedure to configure the Internal Trigger parameters on the SuperSYNCHRO Timing expander: a.
-
Page 167: Tips And Tricks
Chapter 9 LightField and Dual Image Feature Tips and Tricks Experiments using the DIF feature of the PI-MAX4 can be complex, and timing of the events is usually rather exacting. Here are several points to consider that may make the experiment setup or troubleshooting much smoother and easier. - Page 168 ® PI-MAX 4 Camera System Issue 10 This page is intentionally blank.
-
Page 169: Chapter 10: Winx And Dual Image Feature
Chapter 10: WinX and Dual Image Feature The purpose of PI-MAX4 Dual Image Feature (DIF) is to acquire a pair of gated images in rapid succession with delay time between two images as short as 450 ns. The second image will have some remnants from the first image due to the longer persistence of the P46 phosphor. -
Page 170: Timing Modes
® PI-MAX 4 Camera System Issue 10 10.3 Timing Modes The following two DIF timing/readout modes are available in WinX: • Single Trig. Mode Two shot, one trigger for both shots. • Dual Trig. Mode Two shot, each shot requires a trigger. The trigger(s) can be generated by an external source connected to the PI-MAX4 or the PI-MAX4 can generate the trigger(s) internally. -
Page 171: Operation
Chapter 10 WinX and Dual Image Feature 10.4.3 Operation The operation of the PI-MAX4 in DIF mode is similar to standard operation of a PI-MAX4 with SuperSYNCHRO. This section describes the minor operational differences that are due to the special timing modes required for DIF. Figure 10-2 illustrates the timing diagram for a single trigger DIF experiment. -
Page 172: Figure 10-3: Winx Hardware Setup Dialog: Controller/Camera Tab
® PI-MAX 4 Camera System Issue 10 Figure 10-3: WinX Hardware Setup Dialog: Controller/Camera Tab 2. After the alignment and focus, the PI-MAX4 system needs to be put into DIF mode. On the Setup —> Hardware Setup —> Controller/Camera tab, select Dual Image Feature as the Readout Mode, and then click OK. -
Page 173: Figure 10-5: Winx Experiment Setup Dialog: Timing Tab
Chapter 10 WinX and Dual Image Feature 4. On the Acquisition —> Experiment Setup… —> Timing tab, verify that Single Trig. Mode is the selected timing mode. Additionally, Continuous Cleans is recommended for DIF. See Figure 10-5. Figure 10-5: WinX Experiment Setup Dialog: Timing Tab 5. -
Page 174: Figure 10-7: Winx Supersynchro Dialog: Gating Tab
® PI-MAX 4 Camera System Issue 10 7. Click on the Gating tab, select DIF Gating, and click on the Setup button. See Figure 10-7. Figure 10-7: WinX SuperSYNCHRO Dialog: Gating Tab 8. On the DIF Gating Setup dialog, enter the desired Gate Width and Gate Delay times. ≥... -
Page 175: Figure 10-9: Winx Supersynchro Dialog: Trigger In Tab
Chapter 10 WinX and Dual Image Feature 9. Click on the Trigger In tab, and select Internal or External triggering. When using External triggering, verify the trigger characteristics match the active trigger edge, etc., for the trigger pulse being used. Figure 10-9. -
Page 176: Configure A Dual Trigger Dif Experiment
® PI-MAX 4 Camera System Issue 10 10.5 Configure a Dual Trigger DIF Experiment This section describes the configuration of a dual trigger DIF experiment. 10.5.1 Hardware Figure 10-11 illustrates a block diagram of the equipment setup. Figure 10-11:Block Diagram: DIF Experiment Computer Trigger 1 Trigger 2... -
Page 177: Figure 10-12:Timing Diagram: Dif Operation, Dual Trigger
Chapter 10 WinX and Dual Image Feature Figure 10-12 illustrates the timing diagram for a single trigger DIF experiment. Figure 10-12:Timing Diagram: DIF Operation, Dual Trigger FIRST FRAME SECOND FRAME Perform the following procedure to configure a dual trigger DIF experiment: The PI-MAX4 camera must be aligned and focused on the area of interest for this experiment. -
Page 178: Figure 10-14:Winx Experiment Setup Dialog: Main Tab
® PI-MAX 4 Camera System Issue 10 2. After the alignment and focus, the PI-MAX4 system needs to be put into DIF mode. On the Setup —> Hardware Setup —> Controller/Camera tab, select Dual Image Feature as the Readout Mode, and then click OK. 3. -
Page 179: Figure 10-15:Winx Experiment Setup Dialog: Timing Tab
Chapter 10 WinX and Dual Image Feature 4. On the Acquisition —> Experiment Setup… —> Timing tab, verify that Dual Trig. Mode is the selected timing mode. Additionally, Continuous Cleans is recommended for DIF. See Figure 10-15. Figure 10-15:WinX Experiment Setup Dialog: Timing Tab 5. -
Page 180: Figure 10-17:Winx Supersynchro Dialog: Gating Tab
® PI-MAX 4 Camera System Issue 10 7. Click on the Gating tab, select DIF Gating, and click on the Setup button. See Figure 10-17. Figure 10-17:WinX SuperSYNCHRO Dialog: Gating Tab 8. On the DIF Gating Setup dialog, enter the desired Gate Width and Gate Delay times. ≥... -
Page 181: Figure 10-19:Winx Supersynchro Dialog: Trigger In Tab
Chapter 10 WinX and Dual Image Feature 9. Click on the Trigger In tab, and select Internal or External triggering. When using External triggering, verify the trigger characteristics match the active trigger edge, etc., for the trigger pulse being used. Figure 10-19. -
Page 182: Tips And Tricks
® PI-MAX 4 Camera System Issue 10 10.6 Tips and Tricks Experiments using the DIF feature of the PI-MAX4 can be complex, and timing of the events is usually rather exacting. Here are several points to consider that may make the experiment setup or troubleshooting much smoother and easier. -
Page 183: Chapter 11: Mcp Gating Option
Chapter 11: MCP Gating Option In MCP Gating (not to be confused with MCP bracket pulsing,) the micro-channel plate (MCP) is gated, and the photocathode gating brackets the high speed, 800 V, MCP gating pulse. This technology allows fast gating (<10 ns) of the Super Blue (SB,) slow gate intensifiers (typical gating speed ~ 200 ns) without sacrificing high QE. -
Page 184: Setup And Operation
® PI-MAX 4 Camera System Issue 10 Figure 11-3: Timing Diagram: MCP Gated Operation for Gen II Intensifiers Photocathode Gating (Slow Gate Intensifier) ~50 – 175 nS* MCP Gating Effective Gate Width * Lead time is tube-dependent and is individually calibrated at the factory. Figure 11-4: QE Curves: Gen II Intensifiers 1000 RB Fast Gate... -
Page 185: Gain Variation
Chapter 11 MCP Gating Option 11.2 Gain Variation MCP gain approximately doubles for each 50 V increase in voltage. Therefore, small ripples in the MCP voltage as a result of the gating waveform will cause gain changes that vary with time after the rising edge of the gate pulse. A gain overshoot of 20% to 30% during the first 20 ns of a gate pulse is typical, with smaller variations later in time if a wider gate pulse is used. -
Page 186: Figure 11-6: Timing Diagram: Mcp Gated Operation
® PI-MAX 4 Camera System Issue 10 Figure 11-6 is a timing diagram for MCP gating of the photocathode. Figure 11-6: Timing Diagram: MCP Gated Operation Trigger In ~18 ns Gate Start Bracket Aux Out... -
Page 187: Chapter 12: Picosecond Gating Option
Chapter 12: Picosecond Gating Option The picosecond gating option for the PI-MAX4 allows optical gates down to less than 500 ps or to the lowest gate width the intensifier will support, whichever is greater. It consists of a picosecond gating board installed in the PI-MAX4 and some other modifications to support the board. -
Page 188: Monitor Operation
® PI-MAX 4 Camera System Issue 10 12.3 MONITOR Operation The MONITOR output at the BNC on the rear panel may be used with an oscilloscope to determine when the intensifier is being gated on. The MONITOR output is calibrated to provide a rising edge at the time the optical gate is opening (±500 ps.) The start of the MONITOR pulse coincides with the opening of the intensifier, but the width of the MONITOR pulse is unrelated to the total intensifier ON time. -
Page 189: Timing
Chapter 12 Picosecond Gating Option 12.5 Timing When using optical gate widths from a few nanoseconds to a fraction of a nanosecond, timing is obviously critical. The PI-MAX4 is calibrated with respect to the optical input plane (located on the front mounting plane) and the rear panel. All other propagation paths must be accounted for by the user. - Page 190 ® PI-MAX 4 Camera System Issue 10 2. Next, set the sequential gating parameters for 20 ns gate width and 101 images/ spectra {frames} at 10 ns per image/spectra {frames}. This swill pan the 1 s. The starting gate delay is set to 25 ns, the ending gate delay is set to 1025, and take the sequence.
-
Page 191: Chapter 13: Pi-Max4: 1024I-Rf And Rf Modulation
Chapter 13: PI-MAX4: 1024i-RF and RF Modulation The unique features of the PI-MAX4: 1024i-RF camera and LightField (Teledyne Princeton Instruments 64-bit software) allow researchers to quickly and easily create experimental setups for Frequency domain or Time domain fluorescence lifetime measurements. The PI-MAX4: 1024i-RF packs two camera capabilities in one. For... -
Page 192: Advantages Of Pi-Max4: 1024I-Rf
® PI-MAX 4 Camera System Issue 10 13.2 Advantages of PI-MAX4: 1024i-RF Classically, the experimenter wishing to use the RF technique had to collect and interconnect and control various devices, including the ICCD itself, one or two RF sources, two (usually) RF power amplifiers, a light source and a modulator. With the PI-MAX4: 1024i-RF, the two RF sources and one RF amplifier are integrated in the ICCD. -
Page 193: Rf Experiment Design In Lightfield
Chapter 13 PI-MAX4: 1024i-RF and RF Modulation 13.3 RF Experiment Design in LightField NOTE: When launching LightField, click on the New Experiment icon. When the PI-MAX4: 1024i-RF icon is moved to the Experiment Devices area, the camera’s default settings will be active for the Experiment Settings stack. -
Page 194: Gating Mode
® PI-MAX 4 Camera System Issue 10 13.3.3 Gating Mode LightField supports three Gating Modes for RF experiments: • Repetitive; • Sequential; • Custom. The desired option is selected from the Mode drop down list on the SuperSYNCHRO Timing panel. See Figure 13-2. - Page 195 Chapter 13 PI-MAX4: 1024i-RF and RF Modulation 3. On the Trigger expander, select Internal or External triggering. External: Verify the trigger characteristics on the Trigger expander match the active trigger edge for the trigger pulse being used. Internal: Perform the following procedure to configure the Internal Trigger parameters on the SuperSYNCHRO Timing expander: a.
-
Page 196: Sequential
® PI-MAX 4 Camera System Issue 10 13.3.3.2 Sequential Perform the following procedure to configure Sequential Gating Mode: The first requirement is that the PI-MAX4: 1024i-RF camera be aligned and focused on the area of interest in the experiment. This is best accomplished while the camera is operating in Full Frame readout mode. - Page 197 Chapter 13 PI-MAX4: 1024i-RF and RF Modulation d. To enable trigger outputs on the AUX I/O cable’s SyncMASTER1 and SyncMASTER2 connectors, click on the SyncMASTER: ON button. When SyncMASTER is enabled, the output of the SyncMASTER1 connector is driven at the frequency specified by the Internal Trigger Frequency. The SyncMASTER2 frequency is also specified by the Internal Trigger Frequency, but can be delayed from 0 ns to 6,553,500 ns, in 100 ns increments, by configuring SyncMASTER...
-
Page 198: Custom
® PI-MAX 4 Camera System Issue 10 13.3.3.3 Custom Perform the following procedure to configure Custom Gating Mode: The first requirement is that the PI-MAX4: 1024i-RF camera be aligned and focused on the area of interest in the experiment. This is best accomplished while the camera is operating in Full Frame readout mode. - Page 199 Chapter 13 PI-MAX4: 1024i-RF and RF Modulation d. To enable trigger outputs on the AUX I/O cable’s SyncMASTER1 and SyncMASTER2 connectors, click on the SyncMASTER: ON button. When SyncMASTER is enabled, the output of the SyncMASTER1 connector is driven at the frequency specified by the Internal Trigger Frequency. The SyncMASTER2 frequency is also specified by the Internal Trigger Frequency, but can be delayed from 0 ns to 6,553,500 ns, in 100 ns increments, by configuring SyncMASTER...
-
Page 200: Figure 13-3: Typical Edit Custom Phase Modulations Window
® PI-MAX 4 Camera System Issue 10 g. Click on the Edit Phase Modulations… button to display the Edit Custom Phase Modulations dialog similar to that shown in Figure 13-3. Figure 13-3: Typical Edit Custom Phase Modulations Window h. To add a single point to the table, within the Add Phase section, enter the desired modulation, in degrees, and click Add. - Page 201 Chapter 13 PI-MAX4: 1024i-RF and RF Modulation To add a phase sweep, within the Add Phase Sweep section, configure the following parameters: • Enter the desired modulation Range, in degrees, by specifying the Start Range and End Range values. Valid values for the Start/End Ranges are -36000 … +36000. In addition: —...
-
Page 202: Figure 13-5: Add Phase Sweep
® PI-MAX 4 Camera System Issue 10 Table 13-1 shows the corresponding/calculated values for each step in the sweep. Table 13-1: Phase Sweep Information for Sweep > 360° Phase Phase Table Programmed Cumulative Increment Table Step Value Phase Angle Sweep Total °... -
Page 203: Figure 13-6: Typical Modulation Phase Curve
Chapter 13 PI-MAX4: 1024i-RF and RF Modulation Depending on the total number of points within the table, LightField will raise an Experiment Warning if the number of frames that has been configured on the Common Acquisition Settings expander is: • Less than the total number of points in the table;... -
Page 204: Figure 13-7: Typical Modulation Phase Curve With Points Shuffled
® PI-MAX 4 Camera System Issue 10 Points that comprise the curve can be rearranged/reordered as follows: • The set of points can be sorted in ascending or descending order by clicking on the Phase (°) column header; • Individual points can be shifted up or down within the table by selecting them and then clicking the ... -
Page 205: Phase Modulation Sorting Add-In
Chapter 13 PI-MAX4: 1024i-RF and RF Modulation 13.3.4 Phase Modulation Sorting Add-In When activated, this add-in provides the ability to sort SPE frames by Phase after each acquisition has been completed. NOTE: Sorting SPE frames with the Phase Modulation Sorting add-in is non-destructive and preserves the original Phase order for the set of SPE frames. -
Page 206: Figure 13-9: Typical Phase Modulation Sorting Add-In
® PI-MAX 4 Camera System Issue 10 4. Perform the following procedure to sort SPE frames by phase after each acquisition: a. Click on the Add-ins tab and locate the Phase Modulation Sorting expander. If necessary, click on the to expand it. See Figure 13-9. -
Page 207: Figure 13-11:Typical Sort Phases Dialog
Chapter 13 PI-MAX4: 1024i-RF and RF Modulation The Sort Phases dialog is displayed, similar to that shown in Figure 13-11. Figure 13-11:Typical Sort Phases Dialog c. Click on Select a File…, navigate to, and select the desired SPE file. Click Open. The name of the selected file will be shown in the File: field. -
Page 208: Pi-Max4: 1024I-Rf Rear Panel Information
® PI-MAX 4 Camera System Issue 10 13.4 PI-MAX4: 1024i-RF Rear Panel Information The rear panel of the PI-MAX4: 1024i-RF is illustrated in Figure 13-13 with connectors, indicators, and switches identified. Refer to Table 13-2 for complete descriptions and information. REFERENCES: Refer to Section 13.4.1, PI-MAX4: 1024i-RF Power Supply... -
Page 209: Table 13-2: Pi-Max4: 1024I-Rf Connectors, Indicators, And Switches
Chapter 13 PI-MAX4: 1024i-RF and RF Modulation Table 13-2: PI-MAX4: 1024i-RF Connectors, Indicators, and Switches (Sheet 1 of 2) Label Description MON RF OUT Provides an approximate indicator of the user-defined RF applied to the photocathode. MONITOR Provides an output for TTL logic 1 pulse delayed ± 3 ns with respect to photocathode gating. - Page 210 Standard ¼-inch barbed brass fitting for circulating coolant located on the back panel. Either port may be used as the inlet. The coolant must not be chilled. Use the Teledyne Princeton Instruments CoolCUBE coolant circulator. Refer to Section 3.7, Connect the Circulator [Liquid-Cooled Cameras Only], on page 40, for complete information.
-
Page 211: Pi-Max4: 1024I-Rf Power Supply Rear Panel Information
Chapter 13 PI-MAX4: 1024i-RF and RF Modulation 13.4.1 PI-MAX4: 1024i-RF Power Supply Rear Panel Information The rear panel of the PI-MAX4: 1024i-RF Power Supply is illustrated in Figure 13-14 with connectors, indicators, and switches identified. Refer to Table 13-3 for complete descriptions and information. -
Page 212: Rf Modulator Specifications
® PI-MAX 4 Camera System Issue 10 Table 13-3: PI-MAX4: 1024i-RF Power Supply Connectors, Indicators, and Switches (Sheet 2 of 2) Item Description AC Power Input Connects the Power Supply to an external AC receptacle using a standard AC cable. 13.5 RF Modulator Specifications Modulation Frequency: 1 MHz –... -
Page 213: Chapter 14: Pi-Max4: Em Family
Chapter 14: PI-MAX4: EM Family The PI-MAX4: EM family of scientific intensified EMCCD (emICCD) camera systems features frame transfer EMCCDs that are fiber-optically coupled with a variety of Gen II and Gen III filmless intensifiers. NOTE: WinX provides limited support of advanced PI-MAX4: EM features. -
Page 214: Figure 14-1: Block Diagram: Emccd With Dual Output Registers
® PI-MAX 4 Camera System Issue 10 The block diagram in Figure 14-1 illustrates this dual serial output register configuration. Figure 14-1: Block Diagram: EMCCD with Dual Output Registers Extended Multiplication Register Output or Sensor Node High Voltage Clock Readout Amplifier Multiplication Gain For high speed, low light level... -
Page 215: Enabling Em
Chapter 14 PI-MAX4: EM Family illustrates a typical ICCD hardware stack. Figure 14-2 Figure 14-2: Typical emICCD Hardware Stackup Intensifier Gated On Electrical Connection Rings Electron Flow: Input Window Input Window emICCD Photocathode Microchannel Plate (MCP) Incident Light EMCCD Array Fiberoptic Bundle Phosphor (Fluorescent Screen) 6 kV... -
Page 216: Emiccd Gain Mode
® PI-MAX 4 Camera System Issue 10 14.1.2 emICCD Gain Mode In emICCD Gain mode, the PI-MAX4: EM family supports two additional modes of operation (i.e., Optimal and Manual.) Depending on the specific mode selected, the available set of mode-specific configuration parameters is automatically updated within LightField. -
Page 217: Optimal
Chapter 14 PI-MAX4: EM Family 14.1.2.1 Optimal This is the default mode and is recommended for most applications. In Optimal mode, camera gain is set by configuring only one parameter, emICCD Gain which is located on the Common Acquisition Settings expander as part of the Intensifier configuration settings block. -
Page 218: Figure 14-7: Typical Em Gain Configuration Parameters: Manual Mode
® PI-MAX 4 Camera System Issue 10 • EM Gain is configured on the Analog to Digital Conversion expander. Figure 14-7 shows the EM Gain configuration parameters available for Manual Mode. Figure 14-7: Typical EM Gain Configuration Parameters: Manual Mode The desired EM Gain can be specified manually using the keyboard, or adjusted using the slider bar located just below the field. -
Page 219: Figure 14-8: Typical Em Gain Configuration Display For Em Gain > 100
Chapter 14 PI-MAX4: EM Family Once an EM Gain value in excess of 100 has been entered, an Experiment Warning is raised by LightField. See Figure 14-8. Figure 14-8: Typical EM Gain Configuration Display for EM Gain > 100 NOTE: When switching operation between Optimal and Manual modes, any configuration settings or adjustments made within Manual mode will be retained. -
Page 220: Kinetics
® PI-MAX 4 Camera System Issue 10 14.2 Kinetics Kinetics is a specialized imaging mode in which a small region of a CCD’s sensor area (typically referred to as a window) is exposed to incoming light while the balance of the sensor area is temporarily masked to prevent exposure. -
Page 221: Figure 14-10:Typical Full-Frame And Frame Transfer Ccds, Kinetics Masking
Chapter 14 PI-MAX4: EM Family For example, when using a 16 x 16 full frame CCD matrix, possible mask and window sizes, based on their size ratios, are shown in Table 14-1. Table 14-1: Mask/Window Sizes for 16 x 16 CCD, Full Frame Mask Size Window Size Mask:Window... -
Page 222: Trigger Sources
® PI-MAX 4 Camera System Issue 10 14.2.2 Trigger Sources The trigger source for the Exposure-Shift cycle can be either internally generated by the camera and controlled by LightField, or supplied from an external source via the Trigger In connector on the rear of the PI-MAX4: EM. For example, when each exposure cycle must be synchronized with an external light source (e.g., a laser,) external triggering is used. -
Page 223: Figure 14-11:Timing Diagrams: Kinetics Exposure-Shift
Chapter 14 PI-MAX4: EM Family Figure 14-11:Timing Diagrams: Kinetics Exposure-Shift... -
Page 224: Data Readout
® PI-MAX 4 Camera System Issue 10 14.2.4 Data Readout At the end of each programmed Exposure-Shift cycle, the data stored on the CCD are transferred to computer memory. 14.2.5 Binning As with standard data readout, Binning may be implemented to reduce readout times. NOTE: Refer to Section 5.8.3, Binned Readout (Hardware... -
Page 225: Figure 14-12: Timing Diagram: Kinetics Readout And Data Storage
Chapter 14 PI-MAX4: EM Family Figure 14-12:Timing Diagram: Kinetics Readout and Data Storage, No Binning, 4 Row Kinetics Frame... -
Page 226: Figure 14-13: Timing Diagram: Kinetics Readout And Data Storage
® PI-MAX 4 Camera System Issue 10 Figure 14-13:Timing Diagram: Kinetics Readout and Data Storage, 2 x 1 Binning, 4 Row Kinetics Frame... -
Page 227: File Storage Conventions
Chapter 14 PI-MAX4: EM Family 14.2.5.1 File Storage Conventions LightField saves data for each exposure/frame as an individual file once it has been read/output from the shift register. Figure 14-14 Figure 14-14:File Storage Convention Frame 1 Image date_aa_bb_01.spe Frame 2 Image date_aa_bb_02.spe Frame 3 Image date_aa_bb_03.spe... -
Page 228: Configuring Kinetics
® PI-MAX 4 Camera System Issue 10 14.2.6 Configuring Kinetics Perform the following procedure to configure a PI-MAX4: EM camera for Kinetics mode: Click on the Readout expander and select Kinetics within the Readout Mode field. 2. Specify the desired Kinetics Window Height in number of rows. NOTE: The number of Frames per Readout is automatically calculated and displayed in the Readout expander. -
Page 229: Cleaning The Ccd
Chapter 14 PI-MAX4: EM Family 3. Click on the Trigger expander and select the desired Trigger Response: • Readout Per Trigg; • Shift Per Trigger. Figure 14-16. Figure 14-16:Configuring Trigger Response 14.2.7 Cleaning the CCD Since kinetics is most often used in asynchronous, single-shot experiments, it is important that CCD be cleared of accumulating background or dark charge while it is waiting for an external trigger. -
Page 230: Configuring A Kinetics Experiment
® PI-MAX 4 Camera System Issue 10 14.2.8 Configuring a Kinetics Experiment This procedure assumes: • The system has already been setup per instructions in previous chapters. • Previous sections of this chapter have been read and are understood. • Familiarity with the application software. -
Page 231: Configuring The Software Parameters
Chapter 14 PI-MAX4: EM Family 14.2.8.1 Configuring the Software Parameters: NOTE: The following procedure is based on LightField. When using different application software, modifications to this procedure may be required. Basic familiarity with the LightField software is assumed. If this is not the case, review the software manual or have it available while performing this procedure. -
Page 232: Photon Detection
® PI-MAX 4 Camera System Issue 10 14.3 Photon Detection Photon Detection is a method of estimating the number of photons collected by an emICCD under extremely low-light conditions. By comparing the intensity of the incoming light with a predefined minimum intensity level (measured in counts,) an estimated photon count can be derived. -
Page 233: Configuring Photon Detection
Chapter 14 PI-MAX4: EM Family 14.3.1 Configuring Photon Detection Perform the following procedure to configure Photon Detection: Photon Detection is enabled and configured on the Online Processes expander. See Figure 14-18. Figure 14-18:Typical Online Processes Expander: Photon Detection 2. Within the Photon Detection section, select the desired Mode. Supported modes are: •... -
Page 234: High Speed Camera Add-In
® PI-MAX 4 Camera System Issue 10 14.4 High Speed Camera Add-in The High Speed Camera add-in automatically modifies experiment settings to maximize the number of frames that can be acquired per second. NOTE: The High Speed Camera add-in is available only when a PI-MAX4: 512 EM or PI-MAX4: 1024EM camera is connected. -
Page 235: Configuring The High Speed Camera
Chapter 14 PI-MAX4: EM Family 14.4.1 Configuring the High Speed Camera Perform the following procedure to configure a PI-MAX4: 512 EM/1024 EM camera for high speed operation: Click on the Add-ins tab and open the High Speed Camera expander. • When Experiment Type is selected to be Spectroscopy, specify the number of rows to be binned. -
Page 236: Figure 14-24: Typical Configuration Options: Time Stamping
® PI-MAX 4 Camera System Issue 10 3. Return to the Experiment Settings panel and, if necessary, open the Common Acquisition Settings expander. From here, the following features/options may be enabled/disabled: • Time Stamping — Exposure Started — Exposure Ended •... -
Page 237: Chapter 15: Tips And Tricks
15.1 Overexposure Protection WARNING! Image intensified cameras such as the PI-MAX4 can be destroyed if exposed to excessive light levels. Teledyne Princeton Instruments cannot take responsibility for damage due to misuse. Intensified cameras must not be continuously exposed to high-level radiation ( 10 foot candles.) When the illumination level is not quantitatively known, toggle the I.I.T. -
Page 238: Signal Delay
® PI-MAX 4 Camera System Issue 10 15.2 Signal Delay For the camera to see a transient signal, it is essential that it be gated on when the signal arrives at the camera. If this requirement is not given careful consideration, it is possible to set up an experiment in which the signal will come and go before the camera is gated on. -
Page 239: Measuring Coincidence
Chapter 15 Tips and Tricks 15.2.2 Measuring Coincidence In addition to preparing a Time Budget, it is advantageous if you can directly measure the timing of the critical signals. A fast oscilloscope can be used for this purpose. Without an oscilloscope to monitor the signals, it will be difficult to determine the timing with sufficient accuracy. -
Page 240: Adjusting The Signal Delay
® PI-MAX 4 Camera System Issue 10 15.2.3 Adjusting the Signal Delay The PI-MAX4 internal timing generator gives the user wide latitude with respect to adjusting the delay between the time the timing generator is triggered and the time the Gate On and Off edges are generated. -
Page 241: Lasers
Chapter 15 Tips and Tricks 15.3 Lasers Pulsed lasers are used in many experiments where a gated intensified camera might be used to recover the signal. For example, in combustion measurements, a laser pulse might be applied to a flame and the resulting fluorescence studied as the signal to be analyzed. -
Page 242: Jitter
® PI-MAX 4 Camera System Issue 10 15.3.3 Jitter Jitter, uncertainty in the timing of the laser output, is a critical laser performance parameter in gated experiments. If the jitter is significant relative to the duration of the signal pulse, the gate width will have to be wide enough to accommodate it, and the temporal discrimination against unwanted signal will be reduced. -
Page 243: Baseline Signal
In addition, a small offset is built in to prevent noise or pattern from going below zero. Every device has been thoroughly tested to ensure its compliance with Teledyne Princeton Instruments’ demanding specifications. 15.7 Temperature Lock... - Page 244 ® PI-MAX 4 Camera System Issue 10 This page is intentionally blank.
-
Page 245: Chapter 16: Component Descriptions
Chapter 16: Component Descriptions PI-MAX4 is an advanced intensified CCD (ICCD) camera system used for low light and time resolved applications. It consists of an imaging (square) or spectroscopy (rectangular) format CCD coupled to Gen II (PI-MAX4 RB, SB, UV) or Filmless Gen III (PI-MAX4 HQ) intensifiers. -
Page 246: Switches, Connectors, And Indicators
® PI-MAX 4 Camera System Issue 10 16.2 Switches, Connectors, and Indicators This section provides information about the switches, connectors, and indicators found on the PI-MAX4 family of cameras. • Figure 16-1 shows the typical PI-MAX4 Rear Panel; • Figure 16-2 shows the PI-MAX4: 1024i-RF Rear Panel. -
Page 247: Aux I/O
Two standard ¼-inch barbed brass fittings for circulating coolant are located on the back panel. Either port may be used as the inlet. CAUTION! The coolant cannot be chilled. Use Teledyne Princeton Instruments’ CoolCUBE coolant circulator. REFERENCES: For additional information, refer to: •... -
Page 248: Error Led
® PI-MAX 4 Camera System Issue 10 16.2.5 Error LED Red LED indicator to warn of excessive repetition rate. Must be off for proper operation. NOTE: With the PI-MAX4, the Error LED is also activated by MCP bracket pulsing. The MCP bracket repetition rate limit is 6.25 kHz. -
Page 249: Logic Out
Chapter 16 Component Descriptions 16.2.9 Logic Out This is a standard female BNC connector. 0 to +3.3V programmable logic level output (TTL-compatible.) The output can be programmed via software as one of the following signals: • ACQUIRING; • IMAGE SHIFT; •... -
Page 250: Trigger In
® PI-MAX 4 Camera System Issue 10 16.2.15 Trigger In This is a standard BNC connector, and serves as the main trigger input to the timing generator when external triggering is used. When external triggering is selected in the software, the internal timing generator will be triggered by an externally-derived trigger pulse (range of ±5.5 V) applied to this input. -
Page 251: Spectrograph (Option)
Chapter 16 Component Descriptions 16.6 Spectrograph (Option) The system may also include a spectrograph. If so, the camera must be properly mounted to it as described in the manual supplied with the spectrograph. If the spectrograph will be computer-controlled, a suitable interface cable will additionally be required. -
Page 252: Application Software
10X greater accuracy across the entire focal plane than competing routines. • PICam™ The standard 64-bit software interface for cooled CCD cameras from Teledyne Princeton Instruments. PICam is an ANSI C library of camera control and data acquisition functions. NOTE: Refer to the PICam Programmer’s Manual for a complete list... -
Page 253: User Manuals
NOTE: Up-to-date copies of Teledyne Princeton Instruments manuals are available for download as a pdf from: • ftp://ftp.princetoninstruments.com/Public/Manuals/ Princeton Instruments/ Up-to-date copies of Teledyne Acton Research manuals are available for download as a pdf from: • ftp://ftp.princetoninstruments.com/Public/Manuals/ Acton/... - Page 254 ® PI-MAX 4 Camera System Issue 10 This page is intentionally blank.
-
Page 255: Chapter 17: Troubleshooting
Chapter 17: Troubleshooting CAUTION! If a sudden change in the baseline signal is observed, there may be excessive humidity within the CCD enclosure of the camera. Contact the factory for information about having the camera checked or repaired. WARNING! Do not attach or remove any cables while the camera system is powered on. -
Page 256: Alarm Sounds Repetitively
An excess humidity condition should be corrected promptly or permanent damage not covered by the Warranty could occur. Have the unit serviced by Teledyne Princeton Instruments or an authorized service facility of Teledyne Princeton Instruments. -
Page 257: Camera Stops Working
Chapter 17 Troubleshooting 17.5 Camera Stops Working Problems with the host computer system or software may have side effects that appear to be hardware problems. If you are sure the problem is in the camera system hardware, begin with these simple checks: •... -
Page 258: Cooling Troubleshooting
® PI-MAX 4 Camera System Issue 10 5. The next time WinX is launched, the new name will be displayed on the Hardware Setup dialog. See Figure 17-3. Figure 17-3: Updated Hardware Setup Dialog NOTE: If the Camera Detection Wizard is launched and run at a later time, the name will be revert back to the default name (i.e., Camera1.) 17.7 Cooling Troubleshooting... -
Page 259: Data Loss Or Serial Violation
Chapter 17 Troubleshooting • The target array temperature is not appropriate for the specific camera and CCD array. • The camera's internal temperature may be too high. This may occur if the operating environment is particularly warm, if you are attempting to operate at a temperature colder than the specified limit, or if you have turned off the fan and are not circulating coolant through the camera. -
Page 260: Ethernet Network Is Not Accessible
Issue 10 17.10 Ethernet Network is Not Accessible When the Teledyne Princeton Instruments software is installed, all Intel Pro/1000 interface card drivers found on the host computer are updated with the Intel Pro/1000 Grabber Adapter (Vision High-Performance IP Device) driver provided by Pleora Technologies, Inc. -
Page 261: Winx Applications
300 ADU. If these types of spikes occur, especially after the camera has been in use for an extended period, turn off the system immediately. Have the unit serviced by Teledyne Princeton Instruments or an authorized service facility of Teledyne Princeton Instruments. -
Page 262: Gating Pulse Artifact Strings Displayed
® PI-MAX 4 Camera System Issue 10 17.12 Gating Pulse Artifact Strings Displayed PI-MAX4:512/1024 EM(B) cameras may experience noise in the form of gating pulse artifacts, sometimes referred to as Machine Gun” dots, during readout. Figure 17-6 shows a typical display with numerous gating pulse artifact strings displayed. Figure 17-6: Typical Diagonal Line of Gating Pulse Artifacts ATING ULSE... -
Page 263: Appendix A: Technical Specifications
All specifications provided in this appendix are subject to change. For complete and up-to-date information about performance, available options, and accessories, contact the factory or visit the Teledyne Princeton Instruments website at www.princetoninstruments.com. This appendix provides technical information and specifications for the family of PI-MAX4 cameras and, where appropriate, optional accessories. -
Page 264: Environmental Specifications
Although operation to -25 C is achievable, operation below 0 C is not guaranteed. b. Circulating water enhances cooling performance but is not required. Intensifier Specifications For information about compatible intensifiers, refer to the Teledyne Princeton Instruments website: http://www.princetoninstruments.com CCD Specifications Table A-3 provides CCD array specifications for Electron Multiplied PI-MAX4 detectors. -
Page 265: Table A-4: Ccd Array Specifications For Non-Em Pi-Max4 Detectors
Appendix A Technical Specifications a. Binning-dependent Table A-4 provides CCD array specifications for non-EM PI-MAX4 detectors. Table A-4: CCD Array Specifications for non-EM PI-MAX4 Detectors Parameter 1024i 1024f 1024i-RF 2048f 1024 x 256 KAI-1003 e2v CCD47-10 KAI-1003 e2v CCD42-40 e2v CCD30-11 Illumination Front Front... -
Page 266: Aux I/O Interface
® PI-MAX 4 Camera System Issue 10 AUX I/O Interface The AUX I/O interface provides access to the trigger function, DAC, and TTL signals via a rear panel connector and an AUX I/O cable that is supplied with each PI-MAX4 system. This section provides pinout information for both the rear panel AUX I/O connector as well as the AUX I/O Cable. - Page 267 Appendix A Technical Specifications Table A-6: AUX I/O Connector Pinout and Signal Descriptions (Sheet 2 of 2) Pin # Signal Name Description Lockout Output LOW indicates I.I.T. is locked off. — Not Used System chassis ground. Any external circuitry intended to interface with the trigger control signals must reference this ground connection.
-
Page 268: Aux I/O Cable
® PI-MAX 4 Camera System Issue 10 A.6.1 AUX I/O Cable Each PI-MAX4 system includes an AUX I/O cable that provides convenient access to several system signals. The AUX I/O interface cable is comprised of a male DB26 connector on one end, and five female BNC cables on the other end, each of which provides access to a system signal. -
Page 269: Coolcube Ii Circulator Specifications
0.3 m [2 ft] piece of ¼” ID hose joined by a reducer to a 2.4 m [8 ft] piece of 3/8” ID hose. Refer to the coolant circulator’s specifications regarding circulator-compatible hose fittings. If a Teledyne Princeton Instruments CoolCUBE circulator is ordered with the camera, hoses are supplied with appropriate CoolCUBE connectors. - Page 270 ® PI-MAX 4 Camera System Issue 10 This page is intentionally blank.
-
Page 271: Appendix B: Outline Drawings
Appendix B: Outline Drawings NOTE: Dimensions are in inches and [mm] unless otherwise noted. PI-MAX4: 1024i/1024f/2048f/1024x256 Figure B-1: Outline Drawing: PI-MAX4: 1024i/1024f/2048f/1024x256 with C-mount Adapter... -
Page 272: Figure B-2: Outline Drawing: Pi-Max4: 1024I/1024F/2048F/1024X256
® PI-MAX 4 Camera System Issue 10 Figure B-2: Outline Drawing: PI-MAX4: 1024i/1024f/2048f/1024x256 with F-mount Adapter... -
Page 273: Figure B-3: Outline Drawing: Pi-Max4: 1024I/1024F/2048F/1024X256
Appendix B Outline Drawings Figure B-3: Outline Drawing: PI-MAX4: 1024i/1024f/2048f/1024x256 with Spectroscopy-mount Adapter... -
Page 274: Pi-Max4: 512 Em/512 Em(B)
® PI-MAX 4 Camera System Issue 10 PI-MAX4: 512 EM/512 EM(B) Figure B-4: Outline Drawing: PI-MAX4: 512 EM/512 EM(B) with C-mount Adapter... -
Page 275: Figure B-5: Outline Drawing: Pi-Max4: 512 Em/512 Em(B)
Appendix B Outline Drawings Figure B-5: Outline Drawing: PI-MAX4: 512 EM/512 EM(B) with F-mount Adapter... -
Page 276: Figure B-6: Outline Drawing: Pi-Max4: 512 Em/512 Em(B) With Spectroscopy-Mount Adapter
® PI-MAX 4 Camera System Issue 10 Figure B-6: Outline Drawing: PI-MAX4: 512 EM/512 EM(B) with Spectroscopy-mount Adapter... -
Page 277: Pi-Max4 Power Supply
Appendix B Outline Drawings PI-MAX4 Power Supply Figure B-7: Outline Drawing: PI-MAX4 Power Supply 9.82 2.15 4.29... -
Page 278: Pi-Max4: 1024I-Rf
® PI-MAX 4 Camera System Issue 10 PI-MAX4: 1024i-RF Figure B-8: Outline Drawing: PI-MAX4: 1024i-RF with C-mount Adapter... -
Page 279: Figure B-9: Outline Drawing: Pi-Max4: 1024I-Rf With F-Mount Adapter
Appendix B Outline Drawings Figure B-9: Outline Drawing: PI-MAX4: 1024i-RF with F-mount Adapter... -
Page 280: Figure B-10: Outline Drawing: Pi-Max4: 1024I-Rf
® PI-MAX 4 Camera System Issue 10 Figure B-10: Outline Drawing: PI-MAX4: 1024i-RF with Spectroscopy-mount Adapter... -
Page 281: Pi-Max4: 1024I-Rf Power Supply
Appendix B Outline Drawings PI-MAX4: 1024i-RF Power Supply Figure B-11: Outline Drawing: PI-MAX4: 1024i-RF Power Supply... -
Page 282: Coolcube Ii Circulator
® PI-MAX 4 Camera System Issue 10 CoolCUBE Circulator Figure B-12: Outline Drawing: CoolCUBE Circulator... -
Page 283: Appendix C: Winx/Lightfield Cross Reference
Appendix C: WinX/LightField Cross Reference This appendix provides cross reference information for terminology used within the WinX and LightField application software packages. WinX-to-LightField Terminology Refer to Table C-1 for a list of WinX terms and their corresponding LightField terms. Table C-1: WinX-to-LightField Cross Reference (Sheet 1 of 2) WinX Term LightField Term Active Rows Parallel to Shift Register... - Page 284 ® PI-MAX 4 Camera System Issue 10 Table C-1: WinX-to-LightField Cross Reference (Sheet 2 of 2) WinX Term LightField Term Logic Out: Shutter Output Signal: Shutter Open Minimum Block Size Final Section Height Normal Shutter Normal (Shutter) Number of Blocks Final Section Count Number of Cleans Number of Clean Cycles...
-
Page 285: Lightfield To Winx
Appendix C WinX/LightField Cross Reference LightField to WinX Refer to Table C-2 for a list of LightField terms and their corresponding WinX terms. Table C-2: LightField-to-WinX Cross Reference (Sheet 1 of 2) LightField Term WinX Term Active Area: Bottom Margin Post-Dummy Rows Parallel to Shift Register Active Area: Left Margin Pre-Dummy Shift Register Columns... - Page 286 ® PI-MAX 4 Camera System Issue 10 Table C-2: LightField-to-WinX Cross Reference (Sheet 2 of 2) LightField Term WinX Term Preview Focus Quality Readout Port Readout Per Trigger External Sync Readout Per Trigger (DIF) Single Trigger (DIF) Sensor Readout Region expander functions Easy Bin Shift Per Trigger (DIF) Dual Trigger Mode (DIF)
-
Page 287: Appendix D: Extender Bracket Kit
Appendix D: Extender Bracket Kit An Extender Bracket kit (P/N: 2530-0085) is shipped with each PI-MAX4. After securing the bracket at the rear of the PI-MAX4, the PI-MAX4 can be mounted to any laboratory table with either 25 mm or 1 inch hole spacing. Perform the following procedure to secure the plate to the camera: Remove the extender bracket and three (3) 6-32x1/4”... - Page 288 ® PI-MAX 4 Camera System Issue 10 4. Secure the plate with the three screws. 5. Turn the camera right side up and secure it to the laboratory table. If you will be using one or more mounting holes at the bottom front of the camera, tighten the fastener(s) there before tightening down the fastener(s) at the extender bracket.
-
Page 289: Appendix E: C- And F-Mount Information
Appendix E: C- and F-Mount Information This appendix provides information necessary in order to use C- and F-mount lenses with a PI-MAX4 camera. Both types of lenses typically have provisions for focusing and aperture adjustment, with the details varying according the make and model of the lens being used. -
Page 290: F-Mount Lens Adapter
® PI-MAX 4 Camera System Issue 10 F-Mount Lens Adapter Figure E-1 illustrates a typical F-Mount, or Nikon, lens adapter. Figure E-1: F-Mount (Nikon) Lens Adapter Lens release lever E.2.1 Installation Perform the following procedure to install an F-mount lens onto a PI-MAX4 camera: Locate the large indicator dot on the side of the lens. -
Page 291: Camera Orientation
Appendix E C- and F-Mount Information Camera Orientation In general, a PI-MAX4 can be mounted at any attitude or angle, and the camera can rest on any secure surface. Take care not to block the ventilation openings. CAUTION! When an F-mount lens has been installed on the PI-MAX4, NEVER mount the camera nose-up such that the lens mount would be required to support the camera’s weight. - Page 292 ® PI-MAX 4 Camera System Issue 10 This page is intentionally blank.
-
Page 293: Appendix F: Spectrograph Mount Information
• (3) 10-32x ½” hex head stainless steel screws a. Included in Spectrometer Kit bag F.1.2 Procedure Perform the following procedure to install a PI-MAX4 on a Teledyne Acton Research SpectraPro Series Spectrograph Remove shipping plate and store. Remove spacer and store. - Page 294 ® PI-MAX 4 Camera System Issue 10 Loosen set screw with 3/32” hex wrench. Loosen set screw. Gently rotate and pull. Finger tighten hex head screws. Leave about ¼” thread exposed. Mount tube to camera, align baffle with Gently rotate while inserting. bottom/top of camera, and tighten mounting screws.
-
Page 295: Mount A Pi-Max4 To An Isoplane Sct-320 Spectrograph
Appendix F Spectrograph Mount Information Mount a PI-MAX4 to an IsoPlane SCT-320 Spectrograph This section provides the procedure for mounting a PI-MAX4 to an IsoPlane SCT-320 spectrograph. F.2.1 Required Tools and Equipment The following tools and equipment are required: • 5/16”... -
Page 296: Spectrograph-Camera Rotational Alignment And Focusing
Aligning and Focusing a Teledyne Acton Research SpectraPro Series Spectrograph Perform the following procedure to align and focus a Teledyne Acton Research SpectraPro Series spectrograph: Mount a light source such as a mercury pen-ray type in front of the entrance slit of the spectrograph. - Page 297 Note that the way focusing is accomplished depends on the spectrograph, as follows: • Long focal-length spectrographs such as the Teledyne Acton Research SP- 2300i The mounting adapter includes a tube that slides inside another tube to move the camera in or out as required to achieve optimum focus.
-
Page 298: Align And Focus An Isoplane Sct-320 Spectrograph
Perform the following procedure to align and focus an IsoPlane SCT-320 spectrograph: Mount a light source such as a Teledyne Princeton Instruments Hg and Ne/Ar Dual Switchable light source in front of the entrance slit. 2. With the IsoPlane properly connected to the computer, turn the power on, wait for the spectrograph to initialize. - Page 299 Appendix F Spectrograph Mount Information 10. While continuously acquiring data, click on the peak being monitoring for the alignment. This will display the data cursor which can be positioned at the top of the peak. When using LightField, the data cursor spans the ROIs (graphs) and the data cursor can be used as the vertical reference.
- Page 300 ® PI-MAX 4 Camera System Issue 10 This page is intentionally blank.
-
Page 301: Appendix G: Accessories
When the additional adapter is a spectroscopy mount adapter, a quick start guide will be provided which describes how to mount the camera to Teledyne Acton Research SpectraPro Series spectrograph. A similar quick start is shipped when an IsoPlane spectrograph is ordered. -
Page 302: Quick Start Guide
Quick Start Guide When a camera system is shipped with a spectroscopy-mount adapter kit, a quick start guide for mounting a PI-MAX4 with spectroscopy-mount adapter to a Teledyne Acton Research spectrograph is included. Typically, the guide assumes that there is a spectroscopy-mount adapter pre-mounted to the PI-MAX4 camera. -
Page 303: Spectroscopy-Mount For Ivuv And Nvuv Cameras
Appendix G Accessories Spectroscopy-Mount for IVUV and NVUV Cameras In addition to the spectroscopy adapter, IVUV/NVUV cameras require two o-rings to be installed: • A 2.739” inner diameter o-ring is installed between the face the camera and the spectrograph’s adapter; •... -
Page 304: Figure G-4: Positioning The 2.739" (Id) O-Ring
® PI-MAX 4 Camera System Issue 10 4. Position the 2.739” inner-diameter o-ring into the groove on the face of the camera. See Figure G-4. Figure G-4: Positioning the 2.739” (ID) O-ring 2.739” (ID) O-ring In Groove 5. Using the four (4) screws removed in step 1, mount the spectroscopy-mount adapter to the front of the PI-MAX4. -
Page 305: Optical Distance From Mounting Face To Image Plane
Appendix G Accessories Optical Distance from Mounting Face to Image Plane Each adapter has a preset optical distance from the mounting face to the image plane. The distance varies from one adapter type to another and is described in greater detail on the PI-MAX4 outline drawings. - Page 306 ® PI-MAX 4 Camera System Issue 10 This page is intentionally blank.
-
Page 307: Warranty And Service
(1) year after shipment. During this period, Teledyne Princeton Instruments will repair the product or, at its sole option, repair or replace any defective part without charge to you. You must deliver the entire product to the Teledyne Princeton Instruments factory or, at our option, to a factory-authorized service center. -
Page 308: Sealed Chamber Integrity Limited 12 Month Warranty
(1) year from shipment. Teledyne Princeton Instruments does not warrant that the function of the software will meet your requirements or that operation will be uninterrupted or error free. -
Page 309: Owner's Manual And Troubleshooting
3. All warranty service must be made by the Teledyne Princeton Instruments factory or, at our option, an authorized service center. 4. Before products or parts can be returned for service you must contact the Teledyne Princeton Instruments factory and receive a return authorization number (RMA.) Products or parts returned for service without a return authorization evidenced by an RMA will be sent back freight collect. -
Page 310: Contact Information
In no event shall Teledyne Princeton Instruments’ liability exceed the cost of the repair or replacement of the defective product or part. -
Page 311: Index
IsoPlane SCT-320 spectrograph ..295 Bracket pulsing Teledyne Acton SpectraPro Series effect on coincidence timing ..97 spectrograph ..... . . 293 impact on coincidence timing . - Page 312 ® PI-MAX 4 Camera System Issue 10 Coincidence, how to measure....239 Equivalent Background Illumination (EBI) 83 Connectors Error LED ....... . 248 AUX I/O.
- Page 313 Issue 10 Index Intensifier alarm disabling of photocathode and Machine Gun string ..... . . 262 MCP power ......243 Maintenance .
- Page 314 ....277 Teledyne Acton SpectraPro Series..293 Power/Signal connector, PI-MAX4 ..249...
- Page 315 Issue 10 Index Timing modes Warranties Readout Per Trigger (Kinetics) ..222 image intensifier detector ....308 Shift Per Trigger (Kinetics)....222 one year .
- Page 316 This page is intentionally blank.
- Page 317 This page is intentionally blank.
- Page 318 info@princetoninstruments.com USA +1 877-474-2286 | France +33 (1) 60 86 03 65 | Germany +49 (0) 89 660 7793 | UK & Ireland +44 (0) 1628 472 346 Singapore +65 6408 6240 | China +86 10 659 16460 | Japan +81 (3) 5639 2741...
Need help?
Do you have a question about the PI-MAX 4 and is the answer not in the manual?
Questions and answers