Advertisement
Quick Links
Advertisement

Summary of Contents for GYMOST 7315CA
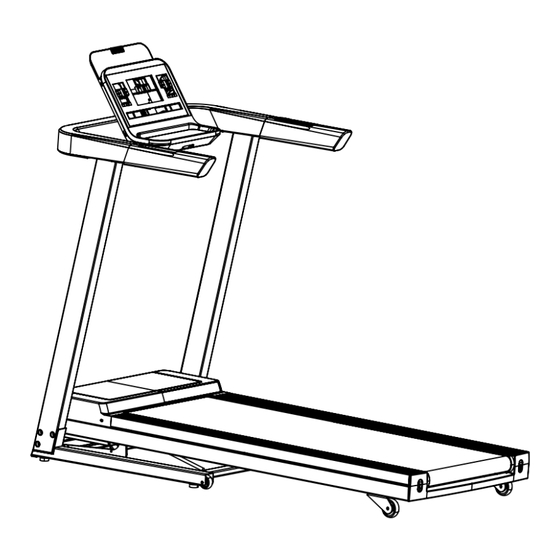
- Page 1 NO--7315CA Treadmills for Home- Owner Manual gymostfitness.com...
- Page 2 SERVICE IMPORTANT: FOR GYMOST ONLY For damaged or defective products, questions, replacement parts or any other service support, please contact our customer service department as follows: info@gymostfitness.com Response Time: Within 24 hours Emailing us with the Order lD will be the best method to receive a response during peak business hours.
- Page 3 *RF warning for Mobile device: This equipment complies with FCC radiation exposure limits set forth for an uncontrolled environment. This equipment should be installed and operated with minimum distance 20cm between the radiator & your body. FCC ID:2BDTT-OMA-7315CA...
-
Page 4: Packing List
PACKING LIST Console Set LCD Monitor Upright Post Console Back Cover Hardware Kit Silicon Bottle Safety Key Treadmill 3 / 17... -
Page 5: Hardware List
HARDWARE LIST 5 x 30 x 85S*1PCS 6 x 80 * 1 PCS M8 x 15 * 4 PCS 6 x 35 x 80*1PCS M8 x 35*6 PC M8 x 22 * 2 PCS M5 x 20*4 PCS 4 / 17... -
Page 6: Assembly Guide
ASSEMBLY GUIDE 5 / 17... - Page 7 6 / 17...
-
Page 8: Console Panel
CONSOLE PANEL CONSOLE DESCRIPTION 1. P0 is User-defined training program, P1-P36 are Built-in automatic training program, 3 USER, BMI 2. Display and Operation: LCD display for clear visibility.8 operation keys for easy navigation and control. 3. Speed and Distance: Speed and distance can be displayed in both metric and inch units.Conversion function available for seamless switching. -
Page 9: Keyboard Instructions
CONSOLE FUNCTION 1. Time Window: displays numeric values for distance and TIME. 2. “DISTANCE”“CALORIES” window: displays DISTANCE and CALORIES burned during your workout. 3. "INCLINE" “PULSE” window: shows the value of incline and heart rate. 4. “SPEED” window: displays SPEED values. 5.Bluetooth Connection Options The treadmill's display has built-in speakers. - Page 10 2.“MODE”: In the manual mode, the initial state is the normal mode. Pressing the "MODE" key allows you to cycle through different modes, including manual mode, countdown mode (distance or calories), and normal mode. In programs P1-P36, pressing the "MODE" key will reset the default countdown time (30 minutes).
-
Page 11: Exploded Diagram
EXPLODED DIAGRAM 10 / 17... - Page 12 EXPLODED CHART LIST Part Name Part Name Part Name Base frame flat washerφ8 Power Cable Buckle Main frame flat washerφ5 Communication wire upright post L flat washerφ10 Console Serrated lock upright post R Tray lock washersΦ5 hexagon lock nut Lifting frame spray parts console lower Console frame spring washer Φ5...
- Page 13 Allen Socket Button Head Cap Screw (half thread) Rear cover Hydraulic M10×35×20 Phillips Truss Head Self-tapping Side rail Round pipe plug Screw ST4×10 Allen Socket Flat CSK Head Bolt (full thread) Square cushion M6×55×Φ16 Wheels φ46 Phillips Truss Head Bolt (PE+PU)...
-
Page 14: Common Faults And Solutions
COMMON FAULTS AND SOLUTIONS Problems Reason Treatment and codes Connect the power, or turn the power switch to the“No” A.No power on or off position B. the safety lock is not in place Put the safety lock in place The system C.No power to the controller or doesn't work Replace the controller or electronic meter head... - Page 15 FOLDING AND MOVING OF TREADMILL 1 .Folding the Treadmill: 1) Disconnect the power before folding. 2) Set the incline of the treadmill to the lowest position. 3) Lift the treadmill to an upright position, and the Ezfit linking Ezfit linking parts will automatically lock onto the hydraulic mechanism Hydraulic 4) Verify that the Ezfit linking parts are securely locked onto the...
-
Page 16: Treadmill Maintenance
TREADMILL MAINTENANCE 1. Lubrication(1-3 ml each time) After the running belt has been used for a period of time, it is necessary to lubricate it with the provided methyl silicone oil. Here are some suggestions based on usage time: If you use the treadmill for less than 3 hours per week, lubricate the running belt once every 5 months. -
Page 17: Belt Adjustment
BELT ADJUSTMENT -Clockwise rotation tightens the bolt. -Counterclockwise rotation loosens the bolt. -The running belt will shift towards the looser side. ①If the running belt shifts to the left: This indicates that the left side is too loose. Adjust the left bolt clockwise to tighten the left side. Alternatively, adjust the right screw counterclockwise to loosen the right side. -
Page 18: Warranty
WARRANTY Your purchase is backed by the following warranty: a one-year warranty starting from the date of purchase, covering all parts. Note: We provide replacement parts at no charge, but on-site repair service is not included. 1.1. This warranty complements your statutory rights and does not affect them. Proof of purchase will be required for Warranty Service, if requested.
Need help?
Do you have a question about the 7315CA and is the answer not in the manual?
Questions and answers