Advertisement
English version
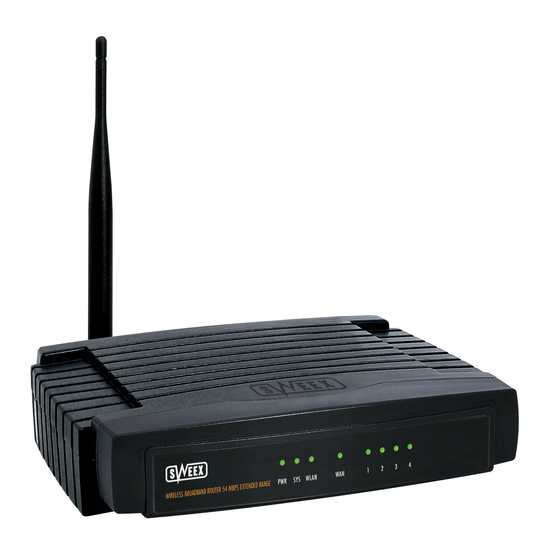
LW050v2/LW050v2UK Sweex Wireless Broadband Router 54 Mbps
Introduction
First of all, many thanks for purchasing this Sweex Wireless Broadband Router 54 Mbps. The Sweex Wireless Broadband Router 54 Mbps enables
you to share a broadband Internet connection and to set up your own wireless network.
To ensure this product operates correctly, we advise you to carefully read this manual first. If despite this manual you still experience problems during
installation or operation of this product, go to www.sweex.com and look under the heading service & support.
In order to fully enjoy the Sweex Wireless Broadband Router 54 Mbps, it is important to observe a number of things:
• Do not expose the Sweex Wireless Broadband Router 54 Mbps to extreme temperatures.
Do not place the device in direct sunlight or in the direct vicinity of heating elements.
• Do not use the Sweex Wireless Broadband Router 54 Mbps in extremely dusty or moist surroundings.
• Protect the device against powerful shocks or jolts - they may damage the internal electronics.
• Never attempt to open the device yourself - it will cause the warranty to lapse.
Contents of the box
Prior to using the Sweex Wireless Broadband Router 54 Mbps, check if all required parts are present. The following parts must be present in the box:
• Wireless broadband router 54 Mbps
• Antenna
• Power supply adaptor
• RJ-45 UTP Ethernet network cable
• CD-ROM with manual and Panda Anti-virus trial software
If one of the above parts is missing, please contact the shop or supplier.
Advertisement
Table of Contents

Related Manuals for SWEEX LW050V2


Summary of Contents for SWEEX LW050V2
- Page 1 • Never attempt to open the device yourself - it will cause the warranty to lapse. Contents of the box Prior to using the Sweex Wireless Broadband Router 54 Mbps, check if all required parts are present. The following parts must be present in the box: • Wireless broadband router 54 Mbps •...
-
Page 2: Specifications
No device is connected to this port Link/Act WAN and 1 to 4 A computer or other network device is connected to this port Blinking There is data traffic between the router and the connected device The wireless part is switched off... -
Page 3: Rear View
2. Switch on the computer and connect it to the rear of the modem using a network cable (RJ-45 UTP). You can select any of the ports 1, 2, 3 and 4. -
Page 4: Windows Xp
Select the options “Obtain an IP address automatically” and “Obtain DNS server address automatically”. Confirm the settings by clicking “OK”. The network settings for Windows XP have now been configured correctly. The correct settings for the Internet browser will be discussed later in this manual. - Page 5 Select the options “Obtain an IP address automatically” and “Obtain DNS server address automatically”. Click “OK” twice. The network settings for Windows 2000 have now been configured correctly. The correct settings for the Internet browser will be discussed later in...
- Page 6 ” which corresponds to your (wireless) network card and click “Properties”. Under the tab “IP Address”, select the option “Obtain an IP address automatically”. Under the tab “Gateway”, the list of “Installed gateways” must be empty. If so required, select each gateway and click “Remove”.
-
Page 7: Setting The Wireless Network
You could compare a wireless network to radio signals. However, the range of a wireless network at home is not as big. Your home wireless network often has a range of 20 to 30 metres. This means that neighbours and passers-by too can make use of your network. As a result they can get away with surfing on your Internet connection, and they may gain access to your shared folders and files on your network. - Page 8 We recommend securing the wireless part of the router. How to do this is described further down in this manual. Once secured, the network will show as “Sweex LW050v2” with a message below detailing “Security-enabled wireless network”. When connecting to this secured network, you will be prompted for the “Network key”.
- Page 9 The default router IP address is: 192.168.50.1 An IP address is a unique number required by each network device, including a computer or router, in order to be active within that network. Without an IP address you are unable to make connections within a network. Type the router IP address in the browser address bar. You can now access the router.
- Page 10 Breedband Router forwards this existing Internet connection to one or more computers in your network. A total of 6 different settings are possible. We have listed these together with instructions on how to enter these. In order to find out which settings correspond to your provider, you can consult the list with providers further down in this manual.
- Page 11 3. Click “Save” to save the settings. In order to check whether the Internet connection has been set up successfully, go to the status screen by clicking “Status” left in the column. The “WAN” section will display your Internet IP address. It can sometimes take up to 1 minute for this IP address to appear. You have now completed the configuration and are ready to surf the Internet.
- Page 12 4. Click “Save” to save the settings. 5. Left in the column, click “MAC Clone". 6. In order to enter the MAC address of your computer into the router, click “Clone MAC Address” and then “Save” to save the settings. 7. Click “OK” to confirm.
- Page 13 5. Click “Save” to save the settings. In order to check whether the Internet connection has been set up successfully, go to the status screen by clicking “Status” left in the column. The “WAN” section will display your Internet IP address. It can sometimes take up to 1 minute for this IP address to appear.
- Page 14 6. Click “Connect” to make the Internet connection. Next to this button, the message “Connected” will appear and your Internet IP address will be displayed under “Internet IP Address”. It can sometimes take up to 1 minute for this to be shown. You have now completed the configuration and are ready to surf the Internet.
- Page 15 6. Click “Connect” to make the Internet connection. Next to this button the message “Connected” appears and your Internet IP address will be displayed under “Internet IP Address”. It can sometimes take up to 1 minute for it to be shown. You have now completed the configuration and are ready to surf the Internet.
- Page 16 5. Click “Save” to save the settings. In order to check whether the Internet connection has been set up successfully, go to the status screen by clicking “Status” left in the column. The “WAN” section will display your Internet IP address. It can sometimes take up to 1 minute for this IP address to appear.
-
Page 17: Wireless Settings And Security
Left in the column, click “Wireless". The default SSID is “Sweex LW050v2”. We recommend not changing this so you can always recognise the router. Here you can also find other options such as “Channel” and “Mode”. We again recommend maintaining the default values. You can enable or disable the wireless part by means of “Enable Wireless Router Radio”. - Page 18 1. Tick “Enable Wireless Security” 2. Under “Security Type” select “WPA-PSK/WPA2-PSK”. 3. Under “PSK Passphrase”, enter your network key. You can create your own and it may contain 8 to 63 numbers and letters. 4. Click “Save” to save the settings.
- Page 19 The built-in firewall in this router cannot be disabled. However, ports can be opened for programmes and games which require this. We recommend using a fixed IP address for computers for which ports are opened. This is to ensure that these computers always use the same IP address as registered in the router.
- Page 20 English version In some instances, or when a game console is used, you may opt to place a computer or game console entirely outside the firewall. This can be done in the so-called “demilitarized zone” (“DMZ”). This option can be found in the main screen of the port settings (“Port Forwarding”) under (“Advanced”.) Note however, you no longer take advantage of the protection offered by the firewall of the router.
-
Page 21: Lan Settings
Under “IP Address”, the IP address of the router (192.168.50.1) is stated. Changing the number here, changes the IP address of the router. Note! When you assign the router a new IP address, the “Start IP” and “End IP” of the DHCP server must be changed to reflect that range. -
Page 22: Warranty
IP address (192.168.50.1). Method 1: Switch off the router by disconnecting it from the mains. The reset button is located at the rear of the router. Use a small item to press the button.
Need help?
Do you have a question about the LW050V2 and is the answer not in the manual?
Questions and answers