
Related Manuals for Alienware Aurora R7


Summary of Contents for Alienware Aurora R7
- Page 1 Aurora R7 Setup and Specifications Regulatory Model: D23M Regulatory Type: D23M002...
- Page 2 Notes, cautions, and warnings NOTE: A NOTE indicates important information that helps you make better use of your product. CAUTION: A CAUTION indicates either potential damage to hardware or loss of data and tells you how to avoid the problem. WARNING: A WARNING indicates a potential for property damage, personal injury, or death.
-
Page 3: Table Of Contents
Ports and connectors................................13 Communications.................................. 13 Wireless module................................14 Video....................................14 Audio....................................14 Storage....................................14 Power ratings..................................15 Computer environment..............................15 6 Intel Optane memory...........................16 Enabling Intel Optane memory............................16 Disabling Intel Optane memory............................16 7 Getting help and contacting Alienware....................17... -
Page 4: Set Up Your Computer
Set up your computer 1. Connect the keyboard and mouse. NOTE: For setup instructions, see the documentation shipped with the keyboard and mouse. 2. Connect the network cable — optional. 3. Connect the display. NOTE: The DisplayPort on the back panel of your computer is covered. Connect the display to the discrete graphics card of your computer. - Page 5 5. Press the power button.
-
Page 6: Create A Usb Recovery Drive For Windows
Create a USB recovery drive for Windows Create a recovery drive to troubleshoot and fix problems that may occur with Windows. An empty USB flash drive with a minimum capacity of 16 GB is required to create the recovery drive. NOTE: This process may take up to an hour to complete. -
Page 7: Setting Up The Virtual Reality (Vr) Headset - Optional
Setting up the Virtual Reality (VR) headset — optional NOTE: The VR headset is sold separately. 1. Download and run the setup tools for your VR headset at www.dell.com/VRsupport. 2. Connect the VR headset to the USB 3.1 Gen 1 and HDMI ports on your computer, when prompted. NOTE: Connect the headset to the HDMI port on the primary graphics card and connect the display to any available port on the card. -
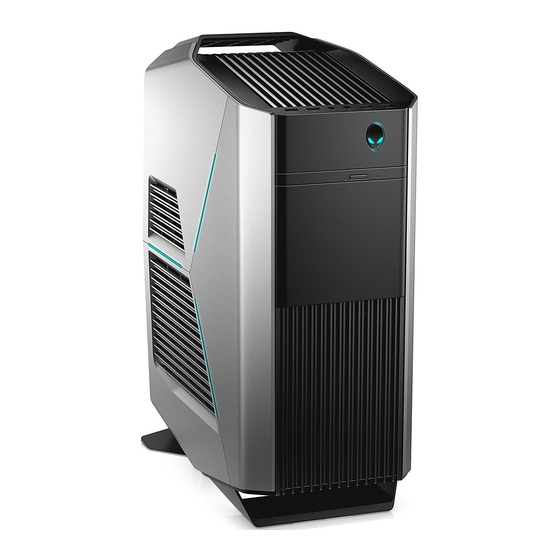
Page 8: Views
Views Front 1. USB 3.1 Gen 1 ports (2) Connect peripherals such as external storage devices and printers. Provides data transfer speeds up to 5 Gbps. 2. Headphone port Connect a headphone or speakers. 3. Microphone port Connect an external microphone to provide sound input. 4. -
Page 9: Back
Back 1. Back panel Connect USB, audio, video, and other devices. 2. PCI-Express X16 (graphics slot 1) Connect a PCI-Express card such as graphics, audio, or network card to enhance the capabilities of your computer. For optimal graphics performance, use a PCI-Express X16 slot for connecting the graphics card. NOTE: The PCI-Express X16 slot works at X8 speed only. -
Page 10: Back Panel
10. Side panel release latch Allows you to remove the side panel from your computer. 11. Security-cable slot (for Kensington locks) Connect a security cable to prevent unauthorized movement of your computer. Back panel 1. Hard-drive activity light Turns on when the computer reads from or writes to the hard drive. 2. - Page 11 Connect the center speaker or the subwoofer. NOTE: For more information about the speaker setup, refer the documentation that shipped with the speakers. 12. Rear L/R surround port Connect audio-output devices such as speakers and amplifiers. In a 5.1 or a 7.1 speaker channel setup, connect the rear-left and rear-right speakers.
-
Page 12: Specifications
Specifications Computer model Table 1. Computer model Computer model Alienware Aurora R7 Dimensions and weight Table 2. Dimensions and weight Height 472.5 mm (18.60 in) Width 212 mm (8.34 in) Depth 360.50 mm (14.19 in) Weight 14.62 kg (32.23 lb) NOTE: The weight of your computer varies depending on the configuration ordered and the manufacturing variability. -
Page 13: Intel Optane Memory
Intel Optane memory Intel Optane memory functions as a storage accelerator. It accelerates the system and any type of SATA-based storage media such as hard drives and solid-state drives (SSDs). NOTE: Intel Optane memory is supported on computers that meet the following requirements: •... -
Page 14: Wireless Module
Wireless • 802.11b/g/n • 802.11ac • Bluetooth 4.1/Bluetooth 4.2 Wireless module Table 10. Wireless module specifications Type QCA9377 (DW1810) QCA61x4A (DW1820) Rivet 1535 (Killer) Transfer rate 433 Mbps Up to 867 Mbps Up to 867 Mbps (1.867 Gbps with Doubleshot Pro technology) Frequency bands supported Dual band 2.4 GHz/5 GHz... -
Page 15: Power Ratings
• with an M.2 drive, the M.2 drive is the primary drive. • without both U.2 drive and M.2 drive, the 3.5-inch drive is the primary drive. Table 13. Storage specifications Type Interface Capacity One M.2 2280 solid-state drive SATA AHCI 6 Gbps Up to 2 TB One U.2 drive PCIe NVMe up to 32 Gbps (U.2 drive) -
Page 16: Intel Optane Memory
Intel Optane memory Enabling Intel Optane memory 1. On the taskbar, click the search box, and then type Intel Rapid Storage Technology. 2. Click Intel Rapid Storage Technology. The Intel Rapid Storage Technology window is displayed. 3. On the Status tab, click Enable to enable the Intel Optane memory. 4. -
Page 17: Getting Help And Contacting Alienware
Getting help and contacting Alienware Self-help resources You can get information and help on Alienware products and services using these online self-help resources: Table 16. Alienware products and online self-help resources Information about Alienware products and services www.alienware.com Troubleshooting information, user manuals, setup instructions, www.alienware.com/gamingservices...
Need help?
Do you have a question about the Aurora R7 and is the answer not in the manual?
Questions and answers