Table of Contents
Advertisement
PROGRAMMABLE
2LB. BREAD MAKER
MODEL: EBM8103(A~Z)
INSTRUCTION MANUAL
Before operating your new appliance, please read all instructions carefully and keep for
future reference.
Questions? Elite's customer service team is ready to help.
For more Elite products, visit us at shopelitegourmet.com.
Recipes are included in this manual.
Advertisement
Table of Contents

Related Manuals for Elite Gourmet EBM8103


Summary of Contents for Elite Gourmet EBM8103
- Page 1 PROGRAMMABLE 2LB. BREAD MAKER MODEL: EBM8103(A~Z) INSTRUCTION MANUAL Before operating your new appliance, please read all instructions carefully and keep for future reference. Questions? Elite's customer service team is ready to help. For more Elite products, visit us at shopelitegourmet.com.
-
Page 2: Table Of Contents
RETURN INSTRUCTIONS THANK YOU FOR YOUR PURCHASE! The Elite Gourmet Programmable Bread Maker is designed to save you time and effort and to provide consistent, fresh results. Fresh baked bread has never been easier to bake in the comfort of your own home. The kneading, rising, and baking processes all take place within the one machine. -
Page 3: Important Safeguards
IMPORTANT SAFEGUARDS The Elite Brand takes consumer safety very seriously. Products are designed and manufactured with our valued consumers' safety in mind. Additionally, we ask that you exercise a level of caution when using any electrical appliance by following all instructions and important safeguards. - Page 4 SHORT CORD PURPOSE NOTE: A short power cord is provided to reduce the risk of personal injury resulting from becoming entangled in or tripping over a longer cord. Longer power-supply cords or extension cords are available and may be used if care is exercised in their use.
-
Page 5: Parts And Identification
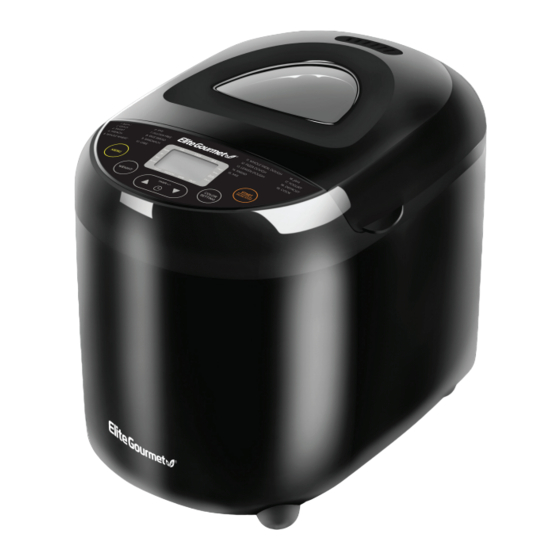
PARTS IDENTIFICATION Air Vent Viewing Window Non-skid Feet Cover Control Panel Bread Pan Measuring Cup H. Measuring Spoon Kneading Blade Metal Hook for lifting out the Kneading Blade Questions? We're here to help! Visit: shopelitegourmet.com for support on this product. -
Page 6: Understanding The Control Panel
UNDERSTANDING THE CONTROL PANEL MENU BUTTON Press the MENU button until desired program number (1-19) appears on the digital display, next to the remaining cooking time. WEIGHT BUTTON Press the WEIGHT button to move the arrow to desired loaf size: 1 LB, l .5LB or 2LB. COLOR SETTING BUTTON Press the COLOR SETTING button to move the arrow to desired crust color: Light, Medium, or Dark. - Page 7 UNDERSTANDING THE CONTROL PANEL (cont.) Ferment: Fermenting Cycle Rest: Resting Cycle Stir: Kneading Cycle Preset Indicator Weight: loaf size of the bread Timer H. Heat: Pre-heating cycle. Bake: Baking cycle. Keep Warm: After the baking cycle is completed, the bread machine will switch to Keep Warm for up to 1 hour.
-
Page 8: Before First Use
BEFORE FIRST USE Carefully unpack the bread maker and remove all packaging materials. Check for any missing or damaged parts. Wash and dry bread pan and kneading blade. Do not use scouring pads or any abrasives on the nonstick surface. Before first use, operate the bread maker on the COOK (#19) mode and bake empty for about 10 minutes to burn off the manufacturing oils. - Page 9 HOW TO USE YOUR BREAD MAKER (cont.) Press the COLOR SETTING button to select the desired browning (light, medium, dark). The browning cannot be set in programs 8-19. 10. If necessary, set the delay timer using the up/down buttons. The bread cycle will start after the delay timer counts down.
-
Page 10: How To Add Ingredients
HOW TO ADD INGREDIENTS ADDING INGREDIENTS INTO THE BREAD PAN Remove the bread pan (F) by lifting the handle, turning counter-clockwise and lifting out. Place bread pan (F) on a clean, dry, level work surface. CAUTION: It is important that the pan is filled with ingredients outside of the machine to avoid spilling ingredients onto the heating elements creating a potential fire hazard. - Page 11 HOW TO ADD INGREDIENTS (cont.) Keep additional ingredients (fruits, nuts, raisins, etc) on one side and add them during the second kneading when the appliance beeps 10 times. First introduce the liquid ingredients. Usually it is water but can include milk and/or eggs.
- Page 12 HOW TO ADD INGREDIENTS (cont.) TIP: To check whether your yeast is fresh and active: Pour 1 cup of warm water (110-120°F) into a measuring cup. Add 1 teaspoon white sugar into the cup and stir, then 1 tablespoon yeast over the water.
-
Page 13: Using Outside Recipes
HOW TO ADD INGREDIENTS (cont.) ADDITIONAL INGREDIENTS Additional ingredients (fruits, nuts, raisins, etc) can be added only in programs that provide them. Dried fruits and nuts must be cut into small pieces, cheese must be grated, chocolate must be chopped into small pieces and not in lumps. Do not add more than those indicated in the recipes, otherwise the bread may not grow properly. - Page 14 IMPORTANT TIPS (cont.) The small measuring spoon (teaspoon, tsp) is provided for measuring small amounts of dry or liquid ingredients: yeast, salt, powdered milk, honey, molasses, etc. The big measuring spoon (tablespoon, TBSP) is provided for measuring dry or liquid ingredients: oil, sugar, etc.
-
Page 15: Recipes For All 19 Menu Programs
RECIPES FOR ALL 19 MENU PROGRAMS USE ONLY THE MEASURING CUP AND THE MEASURING SPOONS PROVIDED. Oil can be replaced with melted butter. Follow the order of the table for each Menu Program for the addition of ingredients. ... - Page 16 RECIPES FOR ALL 19 MENU PROGRAMS (cont.) FRENCH BREAD WEIGHT 1 Lb 1.5 Lb 2 Lb TIME 3:55 4:00 4:05 WATER 12 tbsp 1 cup, 1 ½ tbsp 1 cup, 5 ½ tbsp 1 tbsp 1 ½ tbsp 2 tbsp SALT 2 tsp 2 ½...
- Page 17 RECIPES FOR ALL 19 MENU PROGRAMS (cont.) RICE BREAD WEIGHT 1 Lb 1.5 Lb 2 Lb TIME 2:40 2:45 2:50 WATER 10 tbsp 13 tbsp 1 cup 2 tbsp 2 ½ tbsp 3 tbsp SALT 2/3 tsp ¾ tsp 1 tsp 1 whole egg 1 whole egg 1 whole egg...
- Page 18 RECIPES FOR ALL 19 MENU PROGRAMS (cont.) 11) 100% WHOLE WHEAT DOUGH TIME 3:10 SUGAR 2 tbsp 2 tbsp SALT 1 ½ tsp WATER 1 cup, 9 ½ tbsp WHOLE WHEAT FLOUR 4 ¾ cup INSTANT YEAST 1 ½ tsp 11) 70% WHOLE WHEAT DOUGH TIME 3:10...
- Page 19 RECIPES FOR ALL 19 MENU PROGRAMS (cont.) 16) JAM TIME 1:20 FRUIT PULP 1 cup, 5 tbsp SUGAR ½ cup LEMON JUICE ½ lemon It is advisable to wait 20 minutes before adding sugar which must be poured a little at a time.
-
Page 20: Cleaning & Maintenance
CLEANING AND MAINTENANCE CAUTION: Do not place the bread machine into a dishwasher. Do not use benzene, scrubbing brushes or chemical cleaners as these will damage the machine. Use only a mild, non-abrasive cleanser to clean the bread maker. General Cleaning Remove all bread crumbs by wiping them away with a slightly damp cloth. -
Page 21: Troubleshooting
TROUBLESHOOTING NOTE: In the event of malfunctions, switch off the appliance immediately. PROBLEMS CAUSES SOLUTIONS The device gives off a Flour or other ingredients Turn off the appliance and let it burning smell. may have deposited in the cool completely. Eliminate baking compartment. - Page 22 Baking powder or flour have Check the expiration date of expired. yeast and flour. The lid has been opened Make sure that the liquid during a program. ingredients are added at room Water was too hot and killed temperature. the yeast. Use liquids that are at Yeast has been activated temperatures between 77°F...
- Page 23 shapes. loaves may change depending on the type of bread. The loaf is hollow The dough is too moist. Measure out the ingredients or there are holes There is too much yeast. thoroughly. in the crumb. No salt has been added. Slightly reduce the amount of Too much hot water has been water or yeast.
- Page 24 TROUBLESHOOTING (cont.) POWER INTERRUPTION RECOVERY If the power supply interruption lasts less than 10 minutes, the program will continue as soon as the power supply is restored. If the interruption lasts more than 15 minutes, the program stops and the display returns to its default settings. In this case disconnect the appliance from the electrical outlet, allow to cool, empty the pan, remove the ingredients, clean and start again.
-
Page 25: Warranty & Customer Service
LIMITED WARRANTY* ONE (1) YEAR WARRANTY IS ONLY VALID WITH A DATED PROOF OF PURCHASE PLEASE DO NOT RETURN TO STORE OF PURCHASE. If you have any problems with this unit, contact Customer Service for support. Your small kitchen appliance is warranted to the original purchaser to be free from any manufacturing defects under normal use and conditions for one (1) year, cord excluded. -
Page 26: Return Instructions
RETURN INSTRUCTIONS RETURNS: Any return of defective merchandise to the manufacturer must be processed accordingly by first contacting customer service (support@maxi-matic.com) to obtain an RA # (Return Authorization Number). We will not accept any returns of merchandise without an applicable RA #. IMPORTANT RETURN INSTRUCTIONS. - Page 27 & Contact Us Form Register your product online We take pride in the fact that Elite Gourmet products are continuously improving. To keep you well informed of these changes and to reduce paper consumption, we’ve included this QR code for you to scan and easily download the most recent updates to your product to your mobile device.
Need help?
Do you have a question about the EBM8103 and is the answer not in the manual?
Questions and answers