Table of Contents
Advertisement
Quick Links
Advertisement
Table of Contents

Summary of Contents for Aeroo Pro
- Page 1 User Manual...
-
Page 2: Table Of Contents
Contents First Use Aeroo Fly App 1.1 Charge 4.1 App Download 1.2 Download 4.2 Flight Control Interface 1.3 Power On 4.3 Firmware Updates 1.4 Control 4.4 Flight Log 4.5 Gallery Aircraft 2.1 Aircraft Components Flight 2.2 Aircraft Battery 5.1 Safety Guidelines 2.2.1 Charging... - Page 3 Or simply email: support@aeroodrones.com Disclaimer By using this aircraft or any Aeroo product, you acknowledge you have read and understand the associated risks, and drone laws in your region. Illegal or unethical use of our product is strictly prohibited. Users accept all liability and responsibility for their own behavior and actions,...
-
Page 4: First Use
1.First Use Charge Connect the Single Charger or Charging Station (Combo) into the Power Adapter, and then into the wall. Carefully align the charging pins with the battery connection pins, and connect. The battery will begin charging after a few seconds. Plug the USB-C cable into the remote and a USB socket to charge. -
Page 5: Download
Download Search for "Aeroo Fly" in the App Store or Google Play Store, and download to your mobile device. Create your account: Enter your email and create a password Click, “Send verification” Enter the verification code sent to your email address... -
Page 6: Power On
Power On Press the aircraft battery firmly down until it clicks in place. “Click” Connect your mobile device to the remote using the provided cable. Mobile Power button device cable Slide Pull down Power on the remote by holding the remote power button for 3 seconds. Power on the aircraft by quickly pressing and releasing the power button, then immediately press again and hold until all 4 lights are solid. -
Page 7: Control
Control Follow the instructions in the Aeroo Fly App to activate and for any pre-flight checks or calibrations required. Basic Controls: S/N Key / Switch Function Ascend Descend Backward Forward (Front) Fly Left Fly Right (Back) Spin Right (Front) (Back) Spin Left IMPORTANT: Before attaching a payload, read the “Flight”... -
Page 8: Aircraft
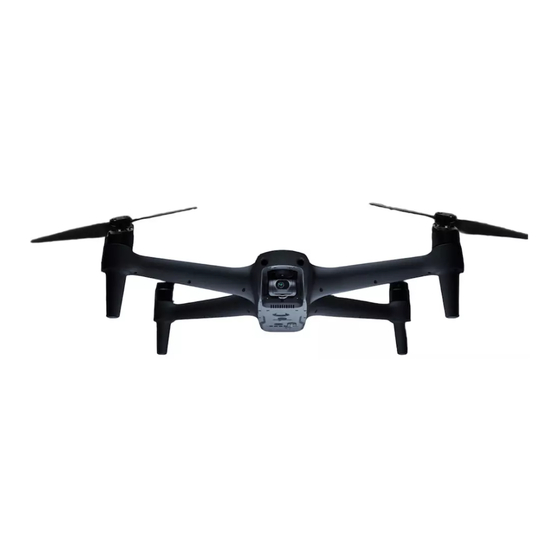
2.Aircraft 2.1 Aircraft Components Spare Component 4G SIM Expansion Slot (for future upgrade) “A” Propeller 4K UHD Camera “B” Propeller 3-Axis Gimbal Gimbal Protector Heavy Lift Motor Battery Level Indicator Lower Shell + Antennas Upper Shell AI Flight Battery Battery Power Button... - Page 9 Bind Button Micro SD Card Slot Aircraft Status Indicator Auxiliary Light Payload Release Pin Downward Vision System Payload Release Button Battery Buckle Infrared Vision Positioning System Burn Risk: Do not touch the motors, battery underside or bottom of the aircraft immediately after flight.
-
Page 10: Aircraft Battery
2.2 Aircraft Battery 2.2.1 Aircraft Battery Charging Aeroo Pro uses an AI 6S lithium battery with a capacity of 4000mah and a nominal voltage of 21.6v. The battery has its own internal management system, to intelligently adjust power output and safely discharge over time. The battery also uses industrial high temperature resistant cells for use in extreme environments. -
Page 11: Installation
2.2.2 Aircraft Battery Installation Take a fully charged battery Push the battery into the compartment until the battery buckles click into place and are fully locked The battery should sit flush with the aircraft shell. Power On Short press to check the battery level, it will turn off after 3 seconds Power Button To power on, quickly press and release the power... -
Page 12: Functions
2.2.3 AI Flight Battery Functions • Activation: The battery can only be used after being put in the drone, connected to the app and then activated as prompted. • Power Level: The 4 indicator lights indicate the approximate percentage of battery power left. -
Page 13: Precautions
Always fully charge each battery to 100% before flight. • Never leave the battery unattended while charging. • Only use Aeroo official branded chargers. • Do not place the battery on charge immediately after flight. Allow the battery to cool down to normal room temperature before charging. -
Page 14: Propellers
2.3 Propellers Aeroo Pro is fitted with high strength polycarbonate foldable propellers, for convenient storage, setup and flight performance. Spare propellers are included in each kit as standard. Use only Aeroo branded propellers. • Immediately replace any propellers that have cracks, chips, warping or fractures. -
Page 15: Camera
2.4 Camera Aeroo Pro has a 12 Megapixel, 1/2.6 CMOS Sensor capable of 4K UHD recording at up to 100mbps. The lens aperture coefficient is F/2.2. You are able to automatically or manually adjust camera settings, as well as shoot in Log (H-Log). It also features a 6x digital zoom and 2.7k live image feed for an ultra high resolution live view. -
Page 16: Gimbal
2.5 Gimbal Aeroo Pro has a 3-Axis Brushless Gimbal with 90° tilt for stable footage and a full range of motion. • The gimbal pitching speed and smoothness can be adjusted in Settings > Gimbal. A slower speed will create a more cinematic feel and a faster speed will be more effective for quick scouting. -
Page 17: Gps
2.9 Landing Light Aeroo Pro is fitted with an ultra bright LED Landing Light (also referred to as Auxilery Light). This enables identification of the aircraft in low lit environments, as well as enhanced performance of the onboard vision systems. -
Page 18: Vision Systems
2.10 Vision Systems Aeroo Pro has both an optical and infrared downward vision sensor system (also referred to as TOF). These are designed to measure the distance below the drone (Infrared) and read the terrain for stability (Optical). • When carrying a payload or in Sport Mode, the Downward Vision Sensors will automatically turn off. -
Page 19: Battery Strugle Mode
Entering battery struggle mode may cause irreversible damage to the battery. It will be automatically recorded by the system and can be used up to 3 times. For any battery damaged after entering battery struggle mode, Aeroo reserves the right to refuse warranty. -
Page 20: Pairing
2.12 Pairing The Aircraft The aircraft will be activated and automatically paired with the remote after logging into your account with the aircraft connected for the first time. To pair a new aircraft/remote: Power on the remote and aircraft Press and hold the “payload release” and “video” buttons on the remote at the same time for ~4 sec until the Remote beeps a second time. -
Page 21: Compass Calibration
2.13 Compass Calibration A Compass Calibration is required before your first flight. It will also occasionally be required before flight after travelling long distances or taking off in an area with strong interference. It is strongly recommended to calibrate the compass regularly, even if not prompted, to ensure accurate compass readings and stable flight. -
Page 22: Aircraft Indicator Light
2.14 Aircraft Indicator Aircraft Status Indicator (Also visible from underside) Aircraft Status Indicator Index Camera Error Red LED flashes slowly (1 time/second) FPV Board Error Red LED off Upgrading Red LED flashes quickly (5 times/2 seconds) Normal (Linked Green LED solid to Remote) Booting Green LED off... -
Page 23: Remote Controller
3. Remote Controller 3.1 Remote Controller Components Left Control Stick Right Control Stick (See next page for stick functions) Automatic Return Home/ Cancel RTH Power F (Film)/N (Normal)/ S (Sport) Mode Take Photo Start/Stop Video Gimbal Tilt Payload Release Button Antennas Charging/RC Cable Port RC Cable (Connects to device) -
Page 24: Basic Controls
IMPORTANT: Read the “Flight” section of the manual to learn full controls and safety tips before flying the aircraft. Before using Aeroo Pro for drone fishing/delivery purposes, read our associated guide to understand the additional safety precautions and variables involved. -
Page 25: Remote Features
3.3 Remote Controller Features Key / Switch Function • Short press to open/close the payload release • Press and hold the payload release button, and Payload Release spin the gimbal tilt wheel to perform digital zoom • When in Return To Home (RTH) or low battery Button mode, press and hold the payload release button to mute the beeping sound. - Page 26 Key / Switch Function After leaving the Remote Controller on and unused for 10 minutes, it will start beeping once every 3 seconds. After Standby 3 minutes of beeping, the Remote Controller will Protection automatically shut down. When the Battery Power of the remote controller is less than 10%, the remote controller enters low power consumption mode.
-
Page 27: Charging The Remote
3.4 Charging The Remote Controller Battery The Remote Control uses a USB-C cable to charge, as shown below: The Remote Controller charging time is approx. 120 minutes. The battery indicator light flashes sequentially during charging. When charging is complete, all 4 lights will stay on solid. -
Page 28: Remote Calibration
3.6 Remote Controller Calibartion Procedure If the aircraft is receiving innacurate control response or buttons/sticks are unresponsive, a remote controller calibration may be required. To begin calibration, hold both control sticks to the top left corner and (at the same time) press the power button. The remote will beep twice per second and the outer two indicator lights will flash. -
Page 29: Aeroo Fly App
4. Aeroo Fly App 4.1 Download The Aeroo Fly APP To fly the Aeroo Pro for the first time, you need to download the Aeroo Fly App. After the initial use, you are able to fly the aircraft without the phone connected. -
Page 30: Flight Control Interface
Aircraft Home Page Settings Aircraft Control Battery Speed Mode Signal Level Payload Release/ Save Drop 8.2V Aeroo Pro Connected 100% Location Camera Smart Flight Modes Mode Photo / Video Switch Take Photo / Auto Takeoff / Auto RTH Video Gimbal Tilt... -
Page 31: Firmware Updates
• Ensure your Aeroo Fly account is setup and the aircraft is bound to your account. This can be checked in the home screen > Profile (top right) > Equipment Management > Aeroo Pro. Click “Bind Account” if shown. -
Page 32: Flight Log
Flight logs can be viewed from the app home screen > Profile > Flight Log • To upload a flight log to Aeroo, click on the specific flight you would like to share, then click the share button (bottom right), then click, then click “Send to Aeroo”... -
Page 33: Flight
• By using any Aeroo product, you agree to use the product only within the guidelines set out in this manual. You are responsible for any and all damages that may occur through the use of... -
Page 34: Pre-Flight Checklist
5.2 Pre-Flight Checklist Batteries are fully charged: Aircraft Remote Mobile Device Gimbal protector is removed. Micro SD card inserted. No loose screws or damage to propellers/airframe. All devices are on and mobile device is connected. Safe takeoff area with no interference or obstructions nearby. Flight route planned in a safe fly zone, no people/trees/large objects around or above - no rain or extreme conditions. -
Page 35: Controls
5.3 Key Flight Controls S/N Key / Switch Function Ascend Descend Backward Forward Fly Left Fly Right Spin Right Spin Left *Mode 2 (Default) shown. You can switch to Mode 1 in Control Settings Payload Release Auto Return Speed Mode Home... -
Page 36: Takeoff/Rth/Landing
5.4 Takeoff/RTH/Landing Takeoff: Once the aircraft has acquired satellites and the flight interface indicates the aircraft is “Ready to Fly” the aircraft can takeoff automatically or manually. Note the aircraft must be stationary and on flat ground, with >15% battery. Auto-Takeoff: Press the button on the left of the app interface. - Page 37 Landing: Allow sufficient battery to always return home safely, the aircraft can be landed manually or automatically. Manual Landing: • Fly the aircraft overhead, then descend down into a safe landing area. • Release any payload before landing the aircraft •...
- Page 38 RTH-Process Home point is set (usually the takeoff position) RTH is triggered. Aircraft will spin to face the home point. If the aircraft is below, it will ascend to the min RTH altitude as set in the app. If the aircraft is within 5m of the home point, it will land directly below.
- Page 39 RTH will cause it to land directly below. AI Search for Landing Pad: When turned on, the aircraft will intelligently search for a landing pad at around 10m altitude. Please note this can be turned on in Settings > Aircraft. 8.2V Aeroo Pro 100% J+RAW 1/30 4800K Speed 0.0m/s...
-
Page 40: Flying With A Payload
5.5 Flight with Payload Aeroo Pro is designed to carry payloads up to 1kg. It is equipped with an electronic release mechanism and other safety features. The main applications for this are Drone Fishing and Drone Delivery, which are detailed in the following pages. - Page 41 Attaching a Payload The payload release pin can be opened/closed by pressing the payload release button on the remote, in the app, or on the bottom of the aircraft. Payload Release Payload Release Button Payload Release Button Payload Release / 8.2V 100% Save Drop...
-
Page 42: Drone Fishing
5.6 Payload Stability Mode Payload stability mode intelligently controls and minimises swinging based on your payload setup. It can be turned on or off in Settings > Controls > Payload Stability Mode. When turned on, payload stability mode will only take effect once a payload is loaded to the aircraft. - Page 43 5.8 Safety Clips Aeroo Safety Clips are designed to release your payload from the aircraft under tension. This works in addition to the electronic release. There are two tension settings for the safety clip: •...
-
Page 44: Drone Delivery
Safety Clip Release Cable Attachment Clip (Small/Large) 5.7 Drone Delivery Aeroo Pro can be used to safely carry and drop almost any payload up to 1kg. Attachment: • Use an included release ring and or payload attachment cable. • Insert into the release slot in the aircraft and press the button on the bottom of the aircraft to close the release pin. -
Page 45: Use Without A Phone
5.8 Flight Without a Mobile Device Connected Aeroo Pro is capable of flight without any mobile device connected, however it is not recommeneded. A mobile device will be required for: • The initial activation of the aircraft • Any pre-flight calibrations required •... -
Page 46: Flight Control Modes
5.9 Flight Control Modes The aircraft will switch between control modes automatically according to how many GPS satellites are acquired. It will be indicated in the top right section of the app interface. Flying in GPS mode is safest and always recommended. GPS mode uses all available sensors for the safest and most stable flight possible. -
Page 47: Ai Flight Modes
5.10 AI Flight Modes Aeroo Pro is equipped with multiple AI flight modes, which allow you to effortlessly create professional videos and perform autonomous flight. Always check the environment to ensure there are no possible obstacles the aircraft could hit while flying autonomously. -
Page 48: Follow Me
5.10.2 Follow Me Enter AI Flight Modes (left side of app) and select “Following Mode” Select “Follow Me” The aircraft will follow the remote at the set parameters, you can manually fly to adjust the camera angle. Follow me, uses the remote controller's GPS position to track where you are, the aircraft will then follow it at the set parateters. -
Page 49: Waypoints
5.10.4 Waypoints Aeroo Pro features advanced waypoint missions, which can be used for fishing drop point recording/planning, creative photography/videography, or for set delivery routes. Enter AI Flight Modes and Select “Waypoint mode". Waypoint Memory: Saves previous missions and allows you to repeat them precisely. -
Page 50: Faq
How do I connect my phone and the remote control? Please ensure the remote and phone are connected correctly using the supplied RC Cable. Ensure the aircraft and remote are powered on. Clean out your phone's charging port carefully (can use a pin/toothpick/ blu-tak) to ensure a better connection. - Page 51 How do I turn on the bottom landing light? Go to Settings > Aircraft > “Auxiliary light” and select your preferred mode, the aircraft must be flying for the light to come on. Payload Release is not working? Ensure you are pressing the button for a short press ~0.5s (not long or too short) Ensure you are using a resistance-free drop loop and your payload is less than 1kg.
- Page 52 You can sync multiple flight logs by selecting the cloud icon in the top right. You can sync individual flight logs by clicking on the flight and then selecting the share button (bottom right) > “Send to Aeroo” (top right). How do I increase battery life? Ensure the remote is only on while the aircraft is in use.
-
Page 53: Safety Information
By using any Aeroo product, you agree to use the product only within the guidelines set out in this manual and on our website: aeroodrones.com. - Page 54 A ir c ra ft O ver vi ew Aeroo Pro is a high performance, multi-purpose drone built for fishing, delivery and camera applications. The Aircraft is capable of professional photography/videography, as well as carrying and releasing payloads of up to 1kg over long distances.
- Page 55 • Operating the Aircraft To reduce the chances of serious injury and property damage: • Never Fly under the influence of alcohol, drugs, or any other condition which may impair your ability to operate the aircraft safely. • Use very gradual controls while carrying a payload •...
-
Page 56: Disclaimer
D i s c l a i m e r Aeroo accepts no liability for damages, injuries or any legal responsibilities directly or indirectly from the use of Aeroo products under the following conditions: • Damages, injuries or any legal responsibilities when users are drunk, under... - Page 57 HAZARDOUS MOVING PARTS KEEP FINGERS AND OTHER BODY PARTS AWAY. Declaration of Conformity Hereby, Aeroo Innovations Pty Ltd., declares this product is in compliance with the essential requirements and other relevant provisions of Directive 2014 / 53 / EU. A...
-
Page 58: Fcc Information
F C C I n f o r m a t i o n This equipment has been tested and found to comply with the limits for a Class B digital device, pursuant to Part 15 of the FCC Rules. These limits are designed to provide reasonable protection against harmful interference in a residential installation. - Page 59 Our experts are always on-hand to help. For any questions, big or small, visit: www.aeroodrones.com/pages/support Or simply email: support@aeroodrones.com Product name: Aeroo Pro Product Standard Number:Q / HBS 001-2017 Vendor: Aeroo Innovations Pty Ltd Address: Factory 10, 6A Prosperity Pde, Warriwood, NSW, 2102, AUSTRALIA Email: support@aeroodrones.com...
Need help?
Do you have a question about the Pro and is the answer not in the manual?
Questions and answers