Table of Contents
Advertisement
Quick Links
Advertisement
Table of Contents

Related Manuals for Paradigm SVX-1202


Summary of Contents for Paradigm SVX-1202
- Page 1 SVX-1202 STREAMING AMPLIFIER OPERATING MANUAL...
- Page 2 I M P O R T A N T S A F E T Y I N S T R U C T I O N S CAUTION RISK OF ELECTRIC SHOCK DO NOT OPEN CAUTION: TO REDUCE THE RISK OF ELECTRIC SHOCK, DO NOT REMOVE COVER (OR BACK). NO USER-SERVICEABLE PARTS INSIDE.
- Page 3 Changes or modifications to this equipment not expressly approved by Paradigm CAUTION: Electronics for compliance could void the user’s authority to operate this equipment.
- Page 4 This product complies with Part 15 of FCC Rules. Operation is subject to the following two conditions: (1) this product may not cause harmful interference, and SVX-1202 : Streaming Ampli er (2) this product must accept any interference received, including interference that may cause undesired operation.
- Page 5 • On wobbly, inclined, or otherwise unstable surfaces. • Near windows where there is a chance of exposure to rain, etc. • On top of an SVX-1202 or another component which dissipates a great deal of heat. To ensure proper heat radiation, do not block the vents.
- Page 6 Apple performance standards. To use AirPlay with Paradigm SVX-1202, the latest version of iOS, iPadOS, or macOS is recommended. Google, Google Play, Google Home, and Google Cast are trademarks of Google LLC.
- Page 7 Paradigm Electronics will distribute such source code to you on a disc for a charge covering the cost of performing such distribution, such as the cost of media, shipping and handling.
-
Page 8: Table Of Contents
Running Anthem Room Correction (ARC ® Controlling The SVX-1202 ANTHEM ROOM CORRECTION (ARC ® Setting Up a Control System Using ARC with The SVX-1202 THE USER INTERFACE Updating Firmware Accessing The User Interface Front Panel LED Status Identifying Multiple SVX-1202s... -
Page 9: Introduction And Quick Start
• Disconnect the power cord or flip the AC switch to OFF before connecting or disconnecting any components. • If the SVX-1202 was transported or stored in the cold, let it reach room temperature before use. • Do not remove the top cover. -
Page 10: Rack And Shelf Mounting
This drawing is issued in the strictest confidence and shall not be used for, or as the basis of the manufacture of any product in whole or in part, without the express written consent of Paradigm Electronics Inc., © 2023... -
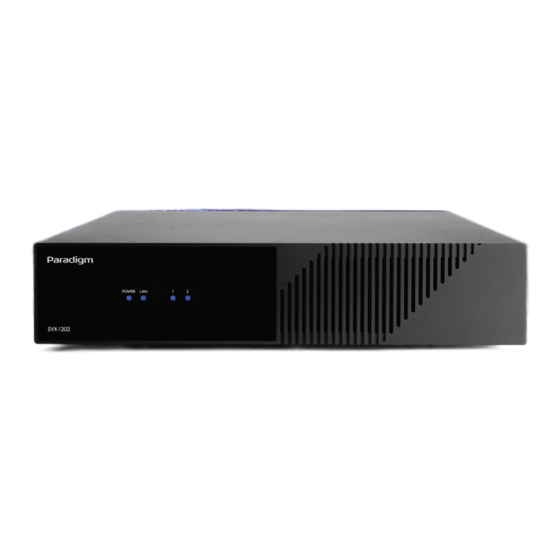
Page 11: Front Panel (Status Lights)
FRONT PANEL (STATUS LIGHTS) Power: When blue, the SVX-1202 is on and ready to play. When red, the SVX-1202 has entered standby mode. When flashing red, the PSU or AMP is in an over-temperature or overload condition. When flashing blue, unit is in Bluetooth pairing/discovery mode. If the Power and LAN are OFF, there is either no AC applied or the unit is in deep stand-by mode. -
Page 12: Back Panel
BACK PANEL AC input Power switch Wireless antenna DHCP reset / Factory Reset button 10/100 local area network jack USB jack for factory service 3.5 mm trigger jack input (with 2nd connector for trigger loop) Coax digital audio input jack Single-ended analog audio input jacks 10. -
Page 13: Quick Start
Anthem Room Correction. Please review the rest of this manual for a deeper understanding of speaker and subwoofer connection options, advanced configuration settings, and control system integration. 1. Install the SVX-1202 in a rack or install the feet using a Phillips screwdriver for tabletop operation. (Rack brackets can be removed using a T10 Torx driver). -
Page 14: Network Setup
If not, tap “+ Add” followed by Google Nest or partner device and follow the instructions on the screen. The SVX-1202 will be shown as “SVX-1202-xxxx” in the list of available devices (where xxxx represents the last few characters of the LAN MAC ID, as shown... -
Page 15: Accessing The Configuration Interface
The web interface lets you access the basic control and all system settings. To access the SVX-1202 web user interface, you will first need to identify the IP address of the SVX- 1202. The IP address can be found in various ways, the easiest being: Using the Anthem Remote App: When starting the app, the IP address of the unit will be shown on the opening screen. -
Page 16: Configuring The Svx-1202
1. Access the configuration interface by entering the SVX-1202’s IP address in a web browser’s address bar. 2. General > General Settings > Device Name: Create a name for the SVX-1202 and click Apply. 3. Inputs > Analog (or other input) > Input Name: Create a name and click Apply. -
Page 17: Running Anthem Room Correction (Arc ® )
App Store or Google Play Store. ® • Access the web interface by entering the SVX-1202’s IP address in a web browser’s address bar. • Quick Access > Current Input: Choose the input you want to hear. • Quick Access > Volume: Adjust the volume here. -
Page 18: Accessing The User Interface
(Information) also matches the unique LAN MAC Address printed on the back of the SVX-1202. Note that the last few characters of the factory default unit’s name correspond to the end of the MAC address printed at the back of the SVX-1202. -
Page 19: Menu Options
MENU OPTIONS (Information): Displays general device information of the SVX-1202, including Serial Number, Software and Firmware versions, etc. Quick Access: Provides access to commonly used controls such as Power, Mute and Volume, Input Selection, Unit Identification and Tone Control. It is also used to display a “Now Playing”... -
Page 20: Quick Access
QUICK ACCESS AUDIO Zone Power: Toggles the unit between active and standby. When the operating mode is set to Automatic mode and music is playing, the toggle automatically goes back ON when analog, digital audio or streaming is detected. Mute: Mutes the unit. Volume: Adjusts the unit’s volume. -
Page 21: General
GENERAL GENERAL SETTINGS Device Name: Sets the unit’s name. This setting is used for network identification, including the device’s Google Cast and Spotify Name. AirPlay Device Name: Displays the unit’s AirPlay name. This appears when the device is configured through Apple HomeKit ®... - Page 22 If an automation system attempts to adjust the volume level higher than the max volume setting, the SVX-1202 ignores the command. Operating Mode: Sets the unit’s operating mode. Possible values are: ‹...
- Page 23 Streaming/Bluetooth input and then to the Digital input even if an Analog signal is present. We recommend keeping Automatic Input Switching disabled when the SVX-1202 is used in conjunction with a Home Automation system.
-
Page 24: Speakers
SPEAKERS COMMON Listening Mode: Sets the listening mode for the unit. Possible values are: ‹ Stereo: The default listening mode. The audio plays in stereo. ‹ Mono: Sums the left and right channels and sends identical signals to both speakers. ‹... -
Page 25: Inputs
INPUTS Input Name: Assign a custom name for each input. You must click Apply to save this setting. Audio Input Type: Displays the input type. On the SVX-1202, audio inputs are static and this setting cannot be changed. Input Trim: If your inputs have varying amplitude, you can normalize them by setting your input trim per input. -
Page 26: Network
SSID pull-down. Type in the Password and click on Apply to configure the SVX-1202. Once the LAN cable will be disconnected, the unit will connect to the wireless network automatically. Alternatively, you can toggle the Manual SSID button and enter the SSID network name. -
Page 27: Store / Load / Update
STORE / LOAD / UPDATE STORE / LOAD SETTINGS User Settings: Selecting Store User Settings and confirming saves all menu settings in a built- in “user file”. If you change settings later and want to recall the saved settings, select Load User Settings. - Page 28 Export Settings: Creates a file that can be saved on your computer or mobile device, allowing you to copy settings to another SVX-1202 or in the event of a replacement unit or service, this file can be used to reload the settings.
-
Page 29: Connections And Back Panel Controls
– be sure that power is off when connecting or disconnecting anything. As well, be sure to use speakers rated for use with this SVX-1202 – an overdriven speaker can pose a fire hazard. -
Page 30: Digital Coaxial Input
Always use one as an input and one as an output. MASTER POWER SWITCH This switch is wired directly to the AC mains and turns on and off all power going to the SVX-1202. DHCP OR FACTORY DEFAULT RESET This reset button allows you to manually reset the SVX-1202’s network connection DHCP settings... -
Page 31: General Operation
G E N E R A L O P E R A T I O N The SVX-1202 does not have a traditional front panel with a volume knob and display but can be controlled using the Anthem Remote App (iOS and Android available), Web Interface, via some custom home automation equipment (such as Crestron or Control4) and even other applications such as Spotify or Google Home. -
Page 32: Web User Interface Operation
The web interface lets you access the basic control and all system settings. To access the SVX-1202 web user interface, you will first need to identify the IP address of the SVX- 1202. This can be found in various ways, but the easiest are as follows: Using the Anthem Remote App: When starting the app, the IP address of the unit will be shown in the opening screen. -
Page 33: Spotify Connect
Access the Bluetooth pairing screen on your device to select the SVX-1202 and initiate the connection. Once the link is established, the front LED will turn back solid blue. The SVX-1202 shown in the available Bluetooth devices will be advertise as the device name defined in the General Settings. -
Page 34: Anthem Room Correction (Arc ® )
A N T H E M R O O M C O R R E C T I O N ( A R C ® Please visit AnthemARC.com for detailed information about using Anthem Room Correction. The most significant detriment to the sound of an audio system is almost always the room it resides within—especially true in the realm of bass. -
Page 35: Using Arc With The Svx-1202
1. Download and install the program from AnthemARC.com. 2. Start the program and select Launch ARC from the first screen. 3. Select SVX-1202 from the device discovery screen. 4. Follow the on-screen instructions to measure the room, calculate correction curves, and... -
Page 36: Updating Firmware
2. Navigate to the Store / Load / Update page. 3. Click the Update button. The SVX-1202 will check if a new firmware version is available and, if found, displays a prompt. Click on Update Now to start the download and installation process. -
Page 37: Front Panel Led Status
F R O N T P A N E L L E D S T A T U S Operating Mode Power LED Channel x LED LAN LED Status or Fault Unit is in standby mode. No audio detected. Automatic Normal Operation: Audio detected and amp Blue Blue... -
Page 38: Troubleshooting
2-5 seconds. The unit may go into connected standby mode of operation and will be available to reconnect to the network within 30 seconds, (the LAN LED will be red). The SVX-1202 will retain the current name if it has been changed, either by the user, Apple and/or Google Home Applications. -
Page 39: Frequently Asked Questions
The SVX-1202 allows you to change the trim of any source. Select the Inputs pane and set the trim level between -6 dB to -9 dB for the source to where your CD player is connected. - Page 40 If using the Anthem Remote App, go back into the discovery screen or re-start the app and re-connect to your SVX-1202. If using the web interface, use one of the method described in page 7 to find out the new IP address.
-
Page 41: Specifications
S P E C I F I C A T I O N S DESIGN Hybrid two-channel 70V/8Ohm power amplifier AMPLIFIER ICEPower 1200AS2, 1250W peak per channel @ 4Ohm DIMENSIONS (H X W X D) 3.5" x 16.375" x 17" (89 x 416 x 432mm) WEIGHT 20 lbs (9 kg) INPUTS... -
Page 42: Limited Warranty
Paradigm shall have no obligation to correct any defect that is not reproducible by Paradigm. If inspection by Paradigm discloses that the repair required is not covered by this warranty, regular repair charges shall apply. - Page 43 T H E B I G P I C T U R E S V X - 1 2 0 2...
- Page 44 T H E B I G P I C T U R E S V X - 1 2 0 2...
- Page 45 N O T E S...
- Page 46 N O T E S...
- Page 47 N O T E S...
- Page 48 N O T E S...
- Page 49 DESIGNED AND ASSEMBLED IN NORTH AMERICA +1 905-564-1994 8:30 am - 5:00 pm M-F (ET) www.Paradigm.com 2024-05-30...
Need help?
Do you have a question about the SVX-1202 and is the answer not in the manual?
Questions and answers