
Related Manuals for Kodak M580 - EXTENDED


Summary of Contents for Kodak M580 - EXTENDED
-
Page 1: Digital Camera
KODAK EASYSHARE M580 Digital Camera Extended user guide www.kodak.com For interactive tutorials: www.kodak.com/go/howto For help with your camera: www.kodak.com/go/m580support... - Page 2 Eastman Kodak Company Rochester, New York 14650 © Eastman Kodak Company, 2010 All screen images are simulated. Kodak, EasyShare, and Pulse are trademarks of Eastman Kodak Company. 4H6898_en...
-
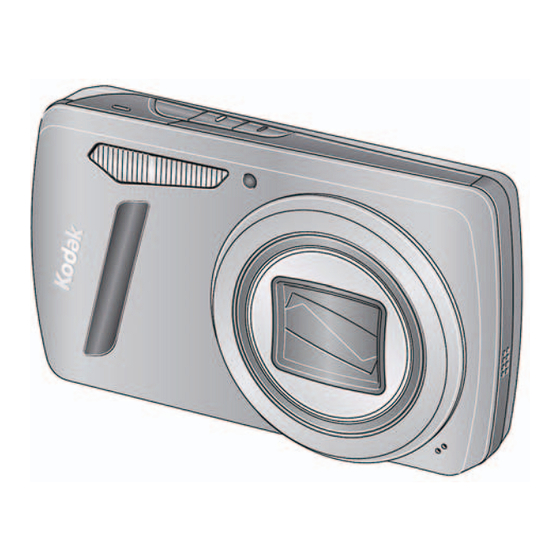
Page 3: Front View
Product features Front view Flash Self-timer/ Video light/ AF Assist light Speaker Lens Microphone IMPORTANT: Your camera offers a built-in Help system. See page www.kodak.com/go/support... -
Page 4: Back View
Wide Angle/ Telephoto button USB, HDMI port IR Receiver (for optional remote control) Strap post Delete, Menu, Share button Info buttons Review button Tripod socket Battery compartment SD/SDHC Card slot IMPORTANT: Your camera offers a built-in Help system. See page www.kodak.com/go/support... -
Page 5: Table Of Contents
Loading the KLIC-7006 battery..............1 Charging the battery ..................2 Turning on the camera .................. 4 Setting the language and date/time............... 4 Storing pictures on an optional SD or SDHC Card........... 5 2 Taking pictures/videos ................6 Taking pictures....................6 Taking a video ....................7 Adjusting LCD brightness ................ - Page 6 Selecting multiple pictures/videos ..............29 Copying pictures/videos................29 Creating a multimedia slide show..............30 Displaying pictures/videos on an HD television ..........31 5 Doing more with your camera .............33 Using the menu button to change settings........... 33 6 Transferring, printing pictures .............39 Transferring pictures to your computer............
-
Page 7: Setting Up Your Camera
Setting up your camera Attaching the strap Loading the KLIC-7006 battery Purchase extra batteries for your special event www.kodak.com/go/m580accessories Charge the battery see page 2 Know when your battery needs charging see page 8 www.kodak.com/go/support... -
Page 8: Charging The Battery
• Steady: finished charging Your adapter may differ. Turn OFF the camera. Connect KODAK Camera USB Cable, Micro B / 5-Pin and charger. (Use only the cable included with this camera!) NOTE: You can use the camera while it’s plugged in. - Page 9 Setting up your camera Using the external battery charger Charge the battery whenever necessary. Your plug may differ. Battery Charging light: • Orange: charging • Green: finished charging Purchase extra batteries www.kodak.com/go/m580accessories Know when your battery needs charging see page 8 www.kodak.com/go/support...
-
Page 10: Turning On The Camera
Setting the language and date/time Language: to change. OK to accept. Date/Time: At the prompt, press OK. to change current field. for previous/next field. OK to accept. NOTE: To change language in the future, use the Setup menu (see page 37). www.kodak.com/go/support... -
Page 11: Storing Pictures On An Optional Sd Or Sdhc Card
Setting up your camera Storing pictures on an optional SD or SDHC Card Your camera has internal memory. We recommend purchasing an SD or SDHC Card to conveniently store more pictures/videos. CAUTION: A card can only be inserted one way; forcing it may cause damage. -
Page 12: Taking Pictures/Videos
Taking pictures/videos Taking pictures 1 The camera turns on in Smart Capture mode. (If it’s in a different mode, press the Mode button, then until the LCD displays Smart Capture mode , then press OK.) 2 Compose the picture. 3 Press the Shutter button halfway to focus and set exposure. -
Page 13: Taking A Video
To review and work with videos, see page Reviewing the picture/video just taken After you take a picture/video, the LCD briefly displays the picture or the first frame of a video. (To take new pictures/videos sooner, press the Shutter button halfway.) While a picture/video is displayed,... -
Page 14: Adjusting Lcd Brightness
Battery level Keyword tag Know when your battery needs charging The battery level icon works like the gas gauge in your car, but appears only when the battery requires your attention. (If you’re viewing shortcuts, the battery level is always displayed. -
Page 15: Using The Optical Zoom
Smart Capture mode.) Press Telephoto (T) until the slider on the LCD is at the end of the optical zoom range. Release Telephoto (T), then press it again. NOTE: You may notice decreased image quality when using digital zoom. -
Page 16: Using The Flash
Taking pictures/videos Using the flash Press the Flash button repeatedly until the LCD displays the desired flash mode. Flash button Flash modes Flash fires Auto When the lighting conditions require it. Fill (Flash On) Every time you take a picture, regardless of the lighting conditions. -
Page 17: Using Different Modes
Faces get focus and exposure priority. ■ The scene is analyzed for other content and for lighting. Smart You can choose the best picture size and aspect ratio for your Capture needs—just press the Menu button and choose Picture Size. - Page 18 3 Press OK (or let the description turn off) to enter the highlighted Scene mode. To read a mode description after it has turned off, press OK to see it again. SCN mode Portrait Full-frame portraits of people.
-
Page 19: Using Shortcuts
“Stitching” 2 or 3 pictures into 1 panoramic scene. (See page 15.) Using shortcuts Your camera has a clean, uncluttered interface. For quick access to the most popular capture and review functions: 1 Press the Info button. The shortcuts appear. To hide the shortcuts again, press... -
Page 20: Using The Self-Timer
Taking pictures/videos Using the self-timer Use the self-timer when you want to be included in a picture or to ensure a steady Shutter button press. For best results, place the camera on a tripod or steady surface. You can turn on the self-timer using a shortcut... -
Page 21: Taking Panoramic Pictures
Use panorama to “stitch” up to 3 pictures into a panoramic scene. NOTE: For best results, use a tripod. Only the panoramic picture is saved; individual pictures are not. (Exposure and white balance are set with the first picture. The flash is set to Off.) 1 Press the Mode button, then until the LCD displays SCN, then press OK . -
Page 22: Sharing Pictures/Videos
If it’s your first time, a Help screen appears. 3 Press to choose a social networking site, then press OK. A check mark appears. Repeat this step to choose more sites. (Press OK again to remove a check mark.) 4 Press to choose Done, then press OK. - Page 23 Sharing pictures/videos Choose which social networking sites to display on your camera You can show/hide networking sites on your camera so that only your favorite sites appear. 1 In Review, press the Menu button. 2 Press to choose the Setup tab, then to choose Share Button Settings, then press OK.
-
Page 24: Tagging Pictures
New Name to add a new one (see page 20), then press OK. If more than one face is detected, a name or question mark is assigned to each detected face. To resolve an incorrect name or a question mark, press to select a face, then press OK. -
Page 25: Tagging With Keywords
When finished, press choose Done, then press OK. To return to picture-taking mode, press the Shutter button halfway down. Tip: You can pre-choose a tag so that new pictures are assigned that tag (see page 33). -
Page 26: Marking Pictures/Videos As Favorites And For Email
2 When finished, press to choose OK, then press OK. 3 If you’ve added a new name, the camera prompts you to update all faces to match assigned names. Choose Yes, then press OK. The name is assigned to all faces that match this one. - Page 27 Sharing pictures/videos Marking pictures for email It’s simple to mark pictures so that they’re ready to email when you transfer them to your computer. First, use the keyboard to create a new email address. (See page 20.) 1 Press the Review button.
-
Page 28: Reviewing And Editing
■ To view pictures/videos as thumbnails, press the Wide Angle (W) button. (For more information, page 24.) Playing a video Press OK to play a video. Press OK to pause/resume. Playback speed During playback: ■ Press to adjust the volume. -
Page 29: Protecting Pictures/Videos From Deletion
Reviewing and editing Using the undo delete picture feature If you accidentally delete a picture, you may be able to use Undo Delete to retrieve it. This feature is only available immediately after you delete a picture. Protecting pictures/videos from deletion 1 Press the Review button. -
Page 30: Viewing Pictures/Videos In Different Ways
1 Press the Review button. The camera shows the last picture that was taken. 2 Press the Wide Angle (W) button to view pictures/videos as thumbnails. (Press it again to see more, smaller thumbnails.) To view all pictures/videos, choose the All tab. -
Page 31: A Smarter Way To Find And Enjoy Your Pictures
Tagging with keywords, page 19.) 1 Press the Review button. 2 Press the Wide Angle (W) button to view pictures by thumbnail (or choose View Thumbnails shortcut). 3 Press to choose a tab and sort pictures by All, Date, People, Favorite, or Keyword. -
Page 32: Understanding The Review Icons
Reviewing and editing Understanding the review icons Print/number of prints Protected Email Video duration Picture/Video number Select picture/video Shortcuts* Add text tag View thumbnails Play video Battery level Upload Favorite Text tag * For more about shortcuts, see page www.kodak.com/go/support... -
Page 33: Using The Menu Button In Review
Picture Edit tab. Choose Crop, then press OK. 3 Press Telephoto (T) to shrink the crop area or Wide (W) to stretch it. Press to move the crop box. When satisfied with the crop box, press OK. 4 Follow the screen prompts. -
Page 34: Editing Videos
You can do incredible things with your videos. Making a picture from a video You can choose a single frame from a video, then make a picture suitable for a 4 x 6-inch (10 x 15 cm) print. 1 Press the Review... -
Page 35: Selecting Multiple Pictures/Videos
Reviewing and editing Selecting multiple pictures/videos Use the multi-select feature when you have two or more pictures to print, share, delete, protect/unprotect, tag with keyword, etc. Multi-select is used most effectively in thumbnail view (see page 24). 1 Press the Review... -
Page 36: Creating A Multimedia Slide Show
Use Multimedia Slide Show to display your pictures/videos on the LCD. You can play all pictures/videos or select the ones you want to include in the slide show. You can customize your slide show to include music and your choice of transitions. You can even save a slide show. -
Page 37: Displaying Pictures/Videos On An Hd Television
Purchase accessories www.kodak.com/go/m580accessories NOTE: The slide show stops if you connect or disconnect the cable while the slide show is running. (Image quality on a television screen may not be as good as on a computer monitor or when printed.) -
Page 38: Using The Optional Remote Control
Reviewing and editing Using the optional remote control Use the optional remote control just as you would use the on-camera buttons—to start/stop recording, review videos and pictures, and more. Go to www.kodak.com/go/m580accessories. Remove the tab to activate the battery www.kodak.com/go/support... -
Page 39: Doing More With Your Camera
Using the menu button to change settings You can change settings to get the best results from your camera. NOTE: Some modes offer limited settings. Some settings remain until you change them; others, until you change modes or turn off the camera. - Page 40 Daylight—For pictures in natural lighting. Program and Panorama Tungsten—Corrects the orange cast of incandescent light modes.) bulbs. Ideal for indoor pictures under tungsten or halogen lighting without flash. Fluorescent—Corrects the green cast of fluorescent lighting. Ideal for indoor pictures under fluorescent lighting without flash.
-
Page 41: Video Settings
Ideal for focusing on a precise area. AF Control (Still) Continuous AF—Because the camera is always focusing, there is no need to press the Shutter button halfway down to Choose an auto-focus setting. focus. Single AF—Focuses when the Shutter button is pressed halfway down. - Page 42 To access your camera Help system, see page Settings More information Image Storage Auto—The camera uses the card if one is in the camera. If not, the camera uses internal memory. Choose a storage location for pictures/videos. Internal Memory—The camera always uses internal memory, even if a card is installed.
- Page 43 Settings More information Orientation Sensor On—The camera rotates pictures so that all appear in the same orientation on the camera. Orient pictures so that they are displayed with the correct side up. On Transfer—The camera rotates pictures when they are transferred to your computer.
- Page 44 Doing more with your camera Settings More information Format Memory Card—Deletes everything on the card; formats the card. CAUTION: Cancel—Exits without making a change. Formatting deletes all Internal Memory—Deletes everything in pictures/videos, internal memory including email addresses and including those that are keyword tags;...
-
Page 45: Transferring, Printing Pictures
Transferring, printing pictures Transferring pictures to your computer When you connect the camera to the computer, it prompts you to run the KODAK Software Downloader on your computer. Make sure the computer is connected to the Internet. When you connect the camera to the computer, the KODAK Software Downloader automatically runs. -
Page 46: Printing Pictures
1 Turn on the printer. Turn on the camera. The PictBridge logo is displayed, followed by the current picture and menu. (If no pictures are found, a message is displayed.) If the menu turns off, press any button to redisplay it. -
Page 47: Marking Your Pictures For Print
Have prints, photo greeting cards, frames, and albums delivered to your door. Printing from an optional SD or SDHC Card Automatically print tagged pictures when you insert your card into a printer with ■ an SD/SDHC Card slot. See your printer user’s guide for details. -
Page 48: Troubleshooting
Getting help from your camera Your camera offers a built-in Help system. It describes every setting for every menu choice. If you learn nothing else about your camera, learn how to use on-camera Help. Turning on camera Help Press the Menu button, then highlight a menu choice. -
Page 49: Troubleshooting
22) or insert a new card. ■ Battery life is short Make sure the correct battery type is installed (see page ■ Wipe the contacts with a clean, dry cloth before inserting a battery in the camera. ■ Insert a new/charged battery (see page www.kodak.com/go/support... - Page 50 Make sure the battery is charged and installed correctly (see the camera page ■ Make sure the KODAK Camera USB Cable, Micro B / 5-Pin is connected to the camera and the computer (see page 39). Then turn on the camera.
- Page 51 (see page 35). For focus ranges, see Camera Specifications starting on page ■ Place the camera on a flat, steady surface or use a tripod (especially in high-zoom settings or in low light). ■ Use a larger picture size (see page 33).
- Page 52 Direct printing (PICTBRIDGE enabled printer) problems Status Solution ■ Cannot find the Use the Direct printing menu to change the image storage location. desired picture ■ The Direct printing Press any camera button to redisplay the menu. menu interface turns ■...
-
Page 53: Getting Help On The Web
Download and get Help with other KODAK Software www.kodak.com/go/camerasw Download KODAK EASYSHARE Software www.kodak.com/go/easysharesw (or see Help in EASYSHARE Software) Get help with the WINDOWS OS and working with www.kodak.com/go/pcbasics digital pictures Other Get support for cameras, software, accessories, more www.kodak.com/go/support... -
Page 54: Appendix
(The SD logo is a trademark of the SD Card Association.) Maximum supported card size: 32 GB Internal storage capacity—64 MB internal memory (32 MB available for image storage. 1 MB equals one million bytes.) Taking lens—8X optical zoom; f/3.3–f/5.7; 35 mm equivalent: 28–224 mm Image stabilizer—CCD shift type... -
Page 55: Video Capture
White Balance—Auto, Daylight, Tungsten, Fluorescent, Open Shade Electronic Flash—Auto flash; Auto, Fill, Red Eye, Off; Guide No. 7.0 (m) @ ISO 100; working range @ ISO 200: 0.6–3.0 m (2–9.8 ft) @ wide; 0.7–1.7 m (2.3–5.6 ft) @ telephoto Self-timer mode—10 second, 2 seconds, 2 picture timer Burst mode—Maximum 3 pictures @ 1 fps... -
Page 56: Care And Maintenance
If you suspect water has gotten inside the camera, remove the battery and card. Allow all components to air-dry for at least 24 hours before using the camera. Blow gently on the lens or LCD to remove dust and dirt. Wipe gently with a soft, ■... -
Page 57: Storage Capacities
The LCD displays the approximate number of pictures (or minutes/seconds of video) remaining. Actual storage capacity varies depending on subject composition, card size, and other factors. You may be able to store more or fewer pictures and videos. Important safety instructions CAUTION: Do not disassemble this product;... -
Page 58: Battery Replacement, Battery Life
Appendix Remove the battery when the product is stored for an extended period of time. In ■ the unlikely event that battery fluid leaks inside the product, contact Kodak customer support. ■ In the unlikely event that battery fluid leaks onto your skin, wash immediately with water and contact your local health provider. -
Page 59: Limited Warranty
If Kodak is unable to repair or replace a Product, Kodak will, at its option, refund the purchase price paid for the Product provided the Product has been returned to Kodak along with proof of the purchase price paid. -
Page 60: Regulatory Compliance
Product), regardless of cause or for breach of any written or implied warranty is expressly disclaimed. -
Page 61: Canadian Doc Statement
1) reorient or relocate the receiving antenna;... - Page 62 Appendix Hereby, Eastman Kodak Company declares that this KODAK Product is in compliance with the essential requirements and other relevant provisions of Directive 1999/5/EC. Australian C-Tick N137 VCCI Class B ITE Russian GOST-R Eastman Kodak Company Rochester, NY 14650 China RoHS...
- Page 63 Appendix Korean Class B ITE Korean Li-Ion Regulatory www.kodak.com/go/support...
- Page 64 11 connect camera, 39 focus control, 35, 36 transfer to, 39 focus framing marks, 6 connector, USB / A/V, 31 auto focus (AF) copy pictures zone, 35 card to memory, 29 memory to card, 29 to computer, 39...
- Page 65 6 cleaning lens, 50 loading battery, 1 guidelines, battery, 52 SD/SDHC Card, 5 locate pictures, 25 long time exposure, 34, 37 help camera help, 42 Web links, 42 magnify a picture, 24 high ISO, 13 maintenance, camera, 50...
- Page 66 Index make picture from video, 28 orientation sensor, 37 manner/museum, 12 marking panoramic pictures, 15 for email, 20 people, tagging, 18 memory PICTBRIDGE enabled printer, 40 inserting card, 5 picture size, 33, 34 menu settings, 33 pictures modes, 11 copying, 29...
- Page 67 Index regulatory information, 54 long time exposure, 34, 37 remote control, 32 orientation sensor, 37 repair, 47 picture size, 33, 34 reset camera, 37 picture-taking mode, 11 reviewing pictures/video self-timer, 14 as you take them, 7 sharpness, 35 deleting, 22...
- Page 68 7 zoom trimming a video, 28 digital, 9 troubleshooting, 42 optical, 9 turning camera on and off, 4 typing, 20 undelete, undo, 23 upgrading software, firmware, 50 URLs, Kodak Web sites, 42 transfer pictures, 39 VCCI compliance, 56...
Need help?
Do you have a question about the M580 - EXTENDED and is the answer not in the manual?
Questions and answers