Advertisement
Available languages
Available languages
Quick Links
Art.-Nr.: 204060
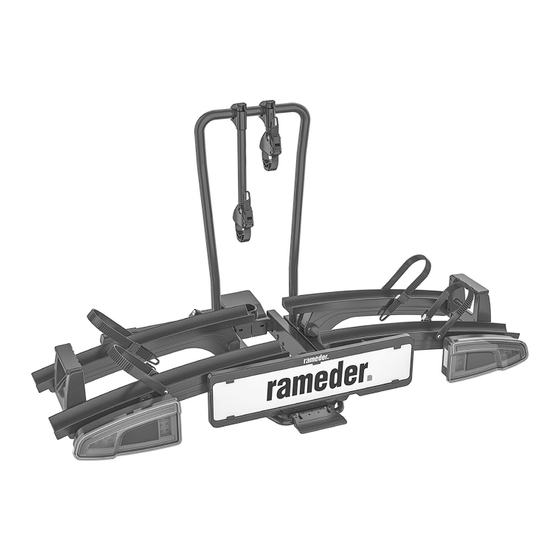
TowBike PRO 2
Fahrradträger für die Anhängerkupplung
Bedienungsanleitung ................................ 2
Article number 204060
TowBike PRO 2
Cycle rack for the towbar
Operating instructions ............................... 7
CZ
DK
ES
FI
NL
NO
PL
SE
© rameder, 01.2024
Réf. 204060
TowBike PRO 2
Porte-vélos pour l'accouplement de remorque
Manuel de l'opérateur ............................... 12
Cod. art. 204060
TowBike PRO 2
Portabiciclette per gancio di traino
Istruzioni per l'uso ..................................... 18
1
Advertisement
Chapters

Related Manuals for rameder TowBike PRO 2

Summary of Contents for rameder TowBike PRO 2
- Page 1 © rameder, 01.2024 Art.-Nr.: 204060 Réf. 204060 TowBike PRO 2 TowBike PRO 2 Fahrradträger für die Anhängerkupplung Porte-vélos pour l‘accouplement de remorque Bedienungsanleitung ........ 2 Manuel de l‘opérateur ....... 12 Article number 204060 Cod. art. 204060 TowBike PRO 2 TowBike PRO 2...
-
Page 2: Table Of Contents
TowBike PRO 2 Material: Stahl / Aluminium / Kunststoff Farbe: schwarz Fahrradträger für die Anhängerkupplung Elektroanschluss: 7/13 polig INHALT D-Wert: 7,6 kN Zulässige Höchstgeschwindigkeit: 130 km/h 1. BESTIMMUNGSGEMÄSSER GEBRAUCH _________________ 2 2. LIEFERUMFANG _______________________________ 2 3.1 KUPPLUNGSVORAUSSETZUNGEN 3. SPEZIFIKATIONEN ______________________________ 2 •... -
Page 3: Bedienungsanleitung
Personen- oder Sachschaden durch nicht komplett montierten 5. BEDIENUNGSANLEITUNG Fahrradträger 5.1 VOR DEM ERSTEM GEBRAUCH • Das Fahren mit nicht vollständig zusammengebauten Fahrradträgern Nehmen Sie den Fahrradträger aus der Verpackung. Bevor Sie den Fahrrad- kann zu Unfällen führen. träger das erste Mal benutzen, müssen noch die Rückleuchten montiert und •... -
Page 4: Montage Der Rückleuchten
5.5 MONTAGE DER RAHMENHALTER Bild 3: Montage Rückleuchten 5.4 EINSETZEN DES KENNZEICHENS Stellen Sie den Fahrradträger auf eine stabile Unterlage. Klappen Sie den Träger auseinander. Bild 7: Montage Rahmenhalter 5.6 MONTAGE DES FAHRRADTRÄGERS AUF DER ANHÄNGERKUPPLUNG Stellen Sie Ihr Fahrzeug auf einer ebenen Fläche ab. Ziehen Sie die Handbremse an. -
Page 5: Montage Der Rahmenhalter
5.7 EINSTELLEN DES SCHNELLVERSCHLUSSES Führen Sie diese Arbeiten nur durch, wenn sich der Fahrradträger, wie im Kapitel „5.3 Montage des Fahrradträgers auf der Anhängerkupplung“ beschrieben, nicht fest auf der Anhängerkupplung montieren lässt. • Nehmen Sie den Fahrradträger von der Anhängerkupplung ab, wie im Kapitel 5.8 „Abnehmen des Fahrradträgers“... -
Page 6: Abklappmechanismus
HINWEIS Die Rahmenhalter können beliebig am Fahrrad und am U-Bügel platziert werden. Da die Rahmenhalter nicht platzgebunden sind, können Sie mehrere Positionen ausprobieren, Bild 13: Rad befestigen Bild 11. Nehmen Sie sich bei der ersten Montage Zeit, um die optimale und auch stabilste Position zu finden. Dabei ist es wichtig die Rahmenhalter so hoch wie möglich zu anzubringen, um eine maximale Stabilität Sichern Sie nun die Fahrräder mit dem langen Sicherheitsgurt. -
Page 7: Hinweise Zum Umweltschutz
TowBike PRO 2 Bike carrier for trailer coupling nur Originalersatzteile verwendet werden. • Bolzen und Muttern des Fahrradträgers regelmäßig kontrollieren und wenn notwendig nachziehen. CONTENTS • Lackschichtbeschädigungen sofort mit Farbe behandeln. 1. PROPER USE OF THE PRODUCT _____________________ 7 • Drehbare und bewegliche Teile regelmäßig schmieren. -
Page 8: Tow Bar Requirements
3.1 TOW BAR REQUIREMENTS Personal injury or property damages caused by protruding parts. • The trailer tow bar must be approved in its construction. • Parts protruding beyond the edge of the vehicle or rack may cause • Ball and ball rod must have been forged in one piece. personal injury or property damage during the journey. -
Page 9: Unfolding The Bike Carrier
5.2 UNFOLDING THE BIKE CARRIER Figure 3: Fitting rear lights 5.4 INSERTING THE LICENCE PLATE Place the bike carrier on a stable surface. Unfold the carrier. Figure 4: Insert licence plate Figure 1: Unfolding 5.3 FITTING THE REAR LIGHTS Open the cardboard packaging of the rear lights between the wings with the wheel rails. -
Page 10: Fitting The Frame Holder
5.5 MOUNTING THE FRAME HOLDERS Fig. 11: Attaching the carrier to the trailer couplin Bild 7: Montage Rahmenhalter 5.6 MOUNTING THE BIKE RACK ON THE TRAILER COUPLING Park your vehicle on a level surface. Apply the the handbrake. WARNING! Personal injury or property damage due to damaged bicycle carrier. -
Page 11: Einstellen Des Schnellverschlusses
NOTE 5.7 ADJUSTING THE QUICK-RELEASE FASTENER The frame holders can be positioned anywhere on the Only carry out this work if the bike carrier cannot be firmly mounted on bike and on the U-bracket. As the frame holders are the trailer coupling as described in chapter „5.3 Mounting the bike carrier not fixed in place, you can try out several positions,Fig. -
Page 12: Folding Mechanism
Dispose of the bicycle rack in accordance with the laws and conditions in your country. 8. CONTACT INFORMATION Rameder Anhängerkupplungen und Autoteile GmbH Am Eichberg Flauer 1 07338 Leutenberg / OT Munschwitz Germany... -
Page 13: Utilisation Conforme
4. CONSIGNES DE SÉCURITÉ Tout non-respect de ces consignes peut entraîner • Le triangle de signalisation indique toutes les instruc- des dommages corporels, endommager l‘appareil tions relatives à la sécurité. Respectez-les à tout moment ou vos biens ! car vous risqueriez sinon de vous blesser ou l‘appareil Conservez l‘emballage d‘origine, le justificatif risquerait d‘être endommagé. -
Page 14: Notice D'utilisation
Dommages matériels en cas de gaz d‘échappement chauds Des dommages sur le porte-vélos ou sur le vélo peuvent se produire si la sortie d‘échappement les avoisine directement. • Utilisez éventuellement un embout d‘échappement. Dommages matériels ou corporels en cas de porte-vélos endommagé. -
Page 15: Montage Des Supports De Cadre
5.6 MONTAGE DU PORTE-VÉLOS SUR L‘ATTELAGE DE REMORQUE Garez votre véhicule sur une surface plane. Serrez le frein à main serrez le frein à main. AVERTISSEMENT ! Dommages corporels ou matériels en raison d‘un vélo endommagé porte-vélos. Tout endommagement du support, par exemple des pièces tordues, des fissures ou des éraflures, exclut le fonctionne- ment sûr du support. -
Page 16: Einstellen Des Schnellverschlusses
5.7 RÉGLAGE DE LA FERMETURE RAPIDE N‘effectuer ces travaux que si le porte-vélos ne peut pas être fixé solidement sur l‘attelage de remorque, comme décrit au chapitre „5.3 Montage du por- te-vélos sur l‘attelage de remorque“. décrit, ne peut pas être monté fermement sur l‘attelage de remorque. •... -
Page 17: Mécanisme De Rabattement
REMARQUE Placez les courroies de serrage des supports de roue autour de la jante de la Les fixations de cadre peuvent être placées à n‘importe roue et insérez la courroie de serrage dans la fermeture. Serrez la courroie quel endroit du vélo et de l‘étrier en U. Il n‘est pas néces- de serrage, figure 13. -
Page 18: Maintenance Et Entretien
In caso di cessione del prodotto, consegnare anche le presenti istruzioni. 8. DONNÉES DE CONTACT Prima della messa in funzione verificare l‘integrità e Rameder Anhängerkupplungen und Autoteile GmbH la completezza del contenuto della confezione! Am Eichberg Flauer 1 1. USO CONFORME... -
Page 19: Condizioni Di Accoppiamento
3.1 CONDIZIONI DI ACCOPPIAMENTO Danni a persone o cose derivanti da parti sporgenti • Il gancio di traino deve essere omologato. • Le parti che sporgono oltre il bordo del veicolo o del portabiciclette, • La sfera e l‘asta devono essere monopezzo fucinate. durante il viaggio possono causare danni a persone o cose. -
Page 20: Dispiegare Il Portabiciclette
5.2 DISPIEGARE IL PORTABICICLETTE Figura 3: Montaggio delle luci posteriori 5.4 INSERIMENTO DELLA TARGA Posizionare il portabici su una superficie stabile. Aprire il portabici. Figura 4: Inserire la targa Figura 1: Svolgimento 5.3 MONTAGGIO DELLE LUCI POSTERIORI Aprire la confezione di cartone delle luci posteriori tra i parafanghi con le Figura 5: Sollevamento della sezione superiore del telaio guide delle ruote. -
Page 21: Montaggio Del Supporto Del Telaio
5.5 MONTAGGIO DEL SUPPORTO DEL TELAIO Figura 11: Fissare il portapacchi al gancio di traino Bild 7: Montage Rahmenhalter 5.6 MONTAGGIO DEL PORTABICICLETTE SUL GANCIO DI TRAINO Parcheggiare il veicolo su una superficie piana. Applicare il il freno a mano. ATTENZIONE! Lesioni personali o danni materiali dovuti al danneggia- mento del portabiciclette. -
Page 22: Caricare Il Portabici Con Le Biciclette
NOTA Posizionare la prima bicicletta, preferibilmente quella più pesante, nella prima guida per le ruote (è la guida per le ruote più vicina al veicolo). Col- Lievi segni di pressione sulla sfera della frizione sono normali legare il telaio della bicicletta alla staffa a U utilizzando il supporto corto e non compromettono il funzionamento. -
Page 23: Meccanismo Di Ripiegamento
Figura 14: Allacciare la cintura di sicurezza 8. COME CONTATTARCI 5.9 MECCANISMO DI RIPIEGAMENTO Rameder Anhängerkupplungen und Autoteile GmbH Se si desidera azionare il meccanismo di ripiega- Am Eichberg Flauer 1 mento, assicurarsi di tenere saldamente la staffa... - Page 24 Rameder Anhängerkupplungen und Autoteile GmbH +49 (0) 36734 35 487 Am Eichberg Flauer 1 info@rameder.de 07338 Leutenberg / OT Munschwitz Germany www.rameder.de...
Need help?
Do you have a question about the TowBike PRO 2 and is the answer not in the manual?
Questions and answers