Table of Contents
Advertisement
Quick Links
Rev02
Instruction manual
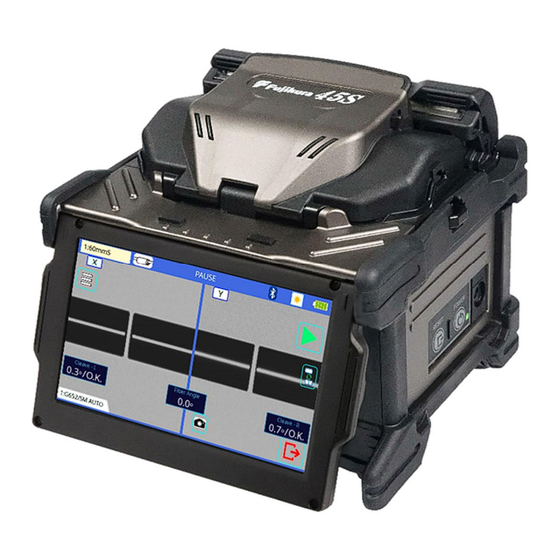
Clad Alignment
45S
Fusion Splicer
Please read this instruction manual carefully
before operating the equipment.
Adhere to all safety instructions and
warnings contained in this manual.
Keep this manual in a safe place.
This manual is subject to change without notice.
We are not responsible for the products which are not
purchased from our authorized distributors.
Advertisement
Table of Contents

Subscribe to Our Youtube Channel
Related Manuals for Fujikura 45S


Summary of Contents for Fujikura 45S
- Page 1 Rev02 Instruction manual Clad Alignment Fusion Splicer Please read this instruction manual carefully before operating the equipment. Adhere to all safety instructions and warnings contained in this manual. Keep this manual in a safe place. This manual is subject to change without notice. We are not responsible for the products which are not purchased from our authorized distributors.
- Page 2 Please consent beforehand. The software equipped in splicer and its related documents are protected by copyright laws and international treaty provisions as well as other intellectual property laws. Copying some or all of instruction manual without notice is forbidden. Moreover, it cannot used without permission from our company for non-individual purposes.
-
Page 3: Table Of Contents
Table of Consents Safety Information ............1 General information ............6 Introduction ...................... 6 New design sheath clamp ................7 Simultaneous preparation for two fibers ............8 Active Fusion Control ..................9 Active Blade Management Technology ............10 New design carrying case and work try ............12 Other Features .................... - Page 4 Table of Consents Splice Menu ..............53 Composition of Splice Mode ................53 Splice Mode ....................54 Select Splice Mode ..................55 Detail of the parameters in splice mode ............62 Heater Menu ..............66 Composition of the Heater Menu ..............66 Select Heater Mode ..................
- Page 5 Table of Consents Error Message List ............ 101 Questions and Troubleshooting ......107 Power Supply ....................107 Splicing Operation ..................108 Sleeve-heating Operation ................109 Supervising ....................110 Other Functions ................... 110 Guarantee and Contact Address ......111 Warranty ....................... 111 Contact Address ...................
-
Page 6: Safety Information
The splicer has been designed for splicing Silica-based optical fibers for telecommunications. Do not attempt to use this machine for other applications. Fujikura Ltd. gives much consideration and regard to personal injury prevention. Misuse of the machine may result in electric shock, fire, and/or serious personal injury. - Page 7 • When using an AC generator with AC output voltage of AC220-240V especially, Fujikura Ltd. recommends the following measures to correct the condition. 1. Connect a step-down transformer between the generator and the AC adapter in order to lower the AC voltage from AC220-240V to AC100-120V.
- Page 8 Safety Information WARNINGS! Never operate the splicer in an environment where flammable liquids or vapors exist. Fire or explosion could result from the splicer’s electrical fusing in such an environment. Do not use compressed gas or canned air to clean the splicer. They may contain flammable materials that could ignite during the electrical discharge.
- Page 9 Safety Information CAUTIONS! Do not store splicer in areas where temperature and humidity are extremely high. Possible equipment failure may result. Do not touch protection sleeve or sleeve-heater during heating or immediately after completion of heating. Their surfaces are very hot and touching these may cause a burn.
- Page 10 : EN 301 489-1 : EN301-489-17 Spectrum : EN 300 328 JAPAN Radio-wave Law Article38-24 paragraph 1 R209-J00429 • If you have any questions for other countries, contact an authorized Fujikura distributor listed in the following web site: https://www.fusionsplicer.fujikura.com/service/index.html Safety Information 45S_Rev02...
-
Page 11: General Information
General information Introduction This fusion splicer can splice a single optical fiber. Moreover, a new functions were added and made the splicer more versatile. In order to master the splicer, please read this instruction manual. Splice mode The splicer has not only standard splice modes, but also automatic modes (AUTO mode). The AUTO mode consists of [G652/SM AUTO], [G651/MM AUTO], [G655/NZ AUTO] , [G653/DS AUTO], [G657/BIF AUTO] mode. -
Page 12: New Design Sheath Clamp
General information New design sheath clamp Interlocking Smart-Clamp Mechanism With the addition of a mechanism that automatically closes the sheath clamp when setting the optical fiber, it is now possible to place the optical fibers on the left and right simultaneously. -
Page 13: Simultaneous Preparation For Two Fibers
General information Simultaneous preparation for two fibers By combining the CT50 optical fiber cleaver with the SS05 dual optical fiber stripper, simultaneous preparation of two fibers is enabled, resulting in shorter work time. Simultaneous stripping of two fibers using Cleaning the SS05 Simultaneous cleaving of two fibers using the CT50 Simultaneous loading of two fiber using the Interlocking Smart-Clamp Mechanism... -
Page 14: Active Fusion Control
General information Active Fusion Control FUSION ACTIVE CONTROL TECHNOLOGY Reducing Occurrence High Splice Loss Real-Time Fusion Control The fusion power is easily affected by changes in the usage environment. This clad alignment fusion splicer has real-time fusion power control by analyzing the fiber’s brightness intensity during fusion. -
Page 15: Active Blade Management Technology
General information Active Blade Management Technology ACTIVE BLADE MANAGEMENT TECHNOLOGY Reducing Occurrence Bad Cleave Angle Automatic blade rotation This fusion splicer and CT50 fiber cleaver are enabled with wireless data connectivity. This capability allows automatic cleaver blade rotation when the splicer judges the blade is worn. It can check and manage the cleaver. - Page 16 General information Blade Life management This fusion splicer displays the remaining blade life and informs the user when a blade height change, position change, or new blade is required. There is no need for the operator to make blade management decisions. The cleaver records cleaves per position per height of the blade.
-
Page 17: New Design Carrying Case And Work Try
General information New design carrying case and work try Work Tray The work tray can be used when removed from the inside of the carrying case, and the carrying case itself can be used as a working table. Other Features Connector Splicing The fabrication of a field assembly optical connector can be performed by the splicer by heating the protection sleeve. -
Page 18: Getting The Instruction Manual And The Utility Software
Note: Please confirm the internet environment, and then consult the authorized distributor when you can not install the Data Connection software. Note: Installation process needs internet connection and access Fujikura data site. Your PC security may block to access it, ask your administrator to allow to access below site. -
Page 19: Description Of Product
Description of Product Components of Splicer Standard Equipment The standard equipment of the splicer is the following. Check the equipment items mentioned of list. Standard Package List. Fusion Splicer Carrying Case [CC-45] AC adapter [ADC-21] AC cord [ACC-**] Quick Reference Guide [QRG-08-E] Warning and Cautions [WAC-01-E]... -
Page 20: Other Necessary Items For Splicing Operation
Description of Products Other Necessary Items for Splicing Operation Tools Fiber coating UV Coating Ny Coating diameter 250µm 900µm Standard sleeve 60mm length [FP-03] 40mm length [FP-03 (L = 40)] Fiber protection sleeves Micro sleeve Micro sleeve 15mm length [FPS01-400-15] 20mm length [FPS01-900-20] Single Fiber Stripper [SS01] Single Fiber Stripper [SS03]... -
Page 21: Description And Function Of Splicer
Description of Products Description and Function of Splicer Structure Illumination LED Sleeve heater Fiber Retention Fiber Retention Clamp Switch Clamp Switch Sheath Clamp Automation Switches Fiber Retention Clamp Wind Protector Clamp Clamp LCD monitor Electrode Objective lens Sheath Clamp Sheath Clamp Clamp Base Clamp Base V-groove... -
Page 22: Key
Description of Products Slide Lock for USB Type-A battery pack USB Mini-B Battery Pack RESET Key ON/OFF Key Power LED Item Description ON/OFF key Turns the splicer power ON/OFF. Depending on the menu status, “Reset” or “Exit”. [RESET] Quits any state except the sleeve heater heating RESET Key process. -
Page 23: Basic Operation
Basic Operation Composition of a READY screen Icon Name Key Function Current “Heater mode” is displayed. After selection the [Heater Heater Mode Mode] screen appears. This is HEAT icon in the touch screen. The icon turns red during heating. Pressing the HEAT icon Heat during heating, the heat icon blinks. -
Page 24: Work Area Preparation
Basic Operation Work area preparation The splicer case has a work tray that can be used in several different ways to create an efficient, portable splicing workstation: 1. Inside the carrying case 2. By itself 3. On top of the carrying case 4. -
Page 25: Power Supply
Basic Operation Power Supply This section describes the procedure for using the power supply with the equipment. AC Operation Insert AC cord into the AC inlet of the AC adapter. If high AC Voltage is supplied, the AC adapter will immediately be damaged. Inlet Insert ADC-21... - Page 26 Basic Operation Battery Operation Please use the supplied battery pack BTR-17. Before using the battery Check the remaining battery capacity. If it is 20% or less before operation, splicer can only work a few times. Keep below practices to prevent battery damage. ...
- Page 27 Basic Operation How to check the battery charge Press ON/OFF key and hold it until the green LED turns on. If splicer is already equipped with the battery, turn splicer ON. Power source of "Battery" is automatically identified and the battery capacity indicator is displayed on the "READY" screen.
- Page 28 Basic Operation Replace the Battery pack When replacing the battery, be sure to power OFF the splicer and unplug the AC power supply. The splicer or battery can be damaged if “hot swapping” is attempted. 1. Turn off the splicer. Move the slide lock lever toward the arrow. Move the slide lock lever Slide lock lever 2.
-
Page 29: Turning Splicer On/Off
Basic Operation Turning Splicer ON/OFF Turning Splicer ON Press ON/OFF key and hold it until the green LED turns on. The following warning message is displayed. The license message is displayed twice a month when the splicer is turned on. ... -
Page 30: Lcd Brightness Adjustment
Basic Operation LCD Brightness Adjustment Monitor visibility changes depending on environmental conditions. To change monitor brightness, press the LCD Brightness icon at the upper right side on READY screen. This causes the LCD Brightness window to appear. Press the Up/Down Arrow icon to change value and press the Apply icon to set the value. -
Page 31: Splicer Settings Check
Basic Operation Splicer Settings Check Confirm the Splice mode and the Heater mode are correct before splicing the fiber. Splice Mode Select appropriate splicing mode for the specific fiber combination. Current mode is displayed on the READY screen. Heater Mode Select appropriate heating mode for the specific protection sleeve used. - Page 32 Basic Operation Splice Mode selection How to change the splice mode Select an appropriate splice mode for type of fiber to be spliced. 1. Select Splice Mode icon at [READY] state. The [Splice Mode] screen appears. 2. Select the suitable splice mode in the list. 3.
-
Page 33: Select Of The Heater Mode
Basic Operation Select of the Heater Mode Each tube-heating mode is optimized for a type of Fujikura protection sleeve. These modes can be found in database area for reference. Copy the appropriate one and paste it to the user-programmable area. The operator can edit the user-programmable modes. - Page 34 How to check the heater mode The current heater mode is displayed in the monitor as shown below. When using a protection sleeve which is not made by Fujikura, please set parameters based on the specific sleeve. When the sleeve of another company is used, the durability of a protection point cannot be warrantied.
-
Page 35: Preparation Of Fiber
Basic Operation Preparation of fiber Cleaning optical fiber Clean optical fiber with alcohol-moistened gauze or lint-free tissue approximately 500mm from the tip. Dust and particulates from the fiber coating can enter inside the protection sleeve and might result in a future fiber break or transmission attenuation. Placing protection sleeve over fiber Place the protection sleeve over the Right side fiber. - Page 36 Basic Operation Fiber Cleaving with CT50 Using Sheath Clamp 1. Lift the Lever until it stops. The blade is automatically set at the start position and is now ready to cleave the fiber. Lever 2. Set the cleaned fiber in the fiber adaptor. Check and adjust the fiber length using the scale on the adaptor.
- Page 37 Basic Operation Using a Fiber Holder 1. Open the lid of a fiber holder and then set the fiber onto the fiber holder. 2. Adjust the position of fiber and then close the lid of fiber holder. The position of the fiber is dependent on the fiber holder as shown below.
- Page 38 Basic Operation 3. Detach the fiber adaptor from CT50 cleaver. Lift the Lever until it stops. The blade is automatically set at the start position and is now ready to cleave the fiber. Lever 4. Set the Fiber holder into the cleaver. Check to ensure only bare fiber sits on the rubber pads (not jacket or coating).
- Page 39 Basic Operation Loading fiber into the splicer Using sheath clamp 1. Open the wind-protector and sheath clamps. 2. Place prepared fiber onto v-groove so that the fiber tip is located between the v-groove edge and tip of electrode. Fibers with a coating diameter greater than 250µm may prevent the sheath clamp from fully closing.
- Page 40 Basic Operation Using Fiber Holder 1. Loosen the 3 screws and remove each sheath clamp from the splicer. Loosen 3 screws. Sheath clamp 2. Insert each Set Plate “SP-01” into the base and tighten the 3 screws. 3. Place fiber holders so that the guide pins on the stage go to guide-holes in the fiber holders. Be careful not to contact the prepared fiber tips with anything to maintain fiber ...
-
Page 41: Fusing Power Calibration
Basic Operation Fusing Power Calibration Atmospheric conditions such as temperature, humidity, and pressure are constantly changing, which creates variability in the fusing temperature. This splicer is equipped with a temperature sensor that is used in a constant feedback monitoring control system to regulate the fusing power to a constant level. - Page 42 Basic Operation “Good” message Fusing power and splicing position calibration have successfully completed. Press Reset icon to exit. Result: Good “Not Adequate” message Fusing power and splicing position calibration are completed but further calibration is strongly recommended, as the change from the previous fusing power calibration is too large.
-
Page 43: Splicing Procedure
Basic Operation Splicing procedure To make a good splice, the optical fiber is observed with the image processing system equipped in the splicer. However, there are some cases when the image processing system cannot detect a faulty splice. Visual inspection with the monitor is often necessary for better splicing yield. - Page 44 Basic Operation 4.Cladding axis offset measurements can be displayed and after completion of fusing is performed to splice the fibers. 5.Estimated splice loss is displayed upon completion of splicing. Splice loss is affected by certain factors stated. These factors are taken into account to calculate, or estimate, splice loss.
- Page 45 Basic Operation Splice loss increase: Cause and remedy Symptom Cause Remedy Axial offset Dust on v-groove or Clean v-groove and fiber clamp chip. fiber clamp chip Fiber angle Dust on v-groove or Clean v-groove and fiber clamp chip. fiber clamp chip Bad fiber end-face Check if fiber cleaver is well conditioned.
-
Page 46: Storing Splicing Results
Basic Operation Storing splicing results Splicing results is stored in memory. After the 20,000th result is stored, 20,001st splice result is written over 1st result. Storing results automatically The splice result is automatically stored in memory when Reset is selected after completion of the splice at the [Finish] screen, or when the wind protector is opened upon completion of the splice at the [Finish] screen. -
Page 47: Fiber Proof Test
Basic Operation Fiber Proof Test The strength of the splice point can be checked. When finished press Reset icon or open wind protector and fiber proof test will be performed. Removing spliced fiber 1. Open lids of wind protector and sleeve heater. 2. -
Page 48: Heating Protection Sleeve
Basic Operation Heating protection sleeve 1. Transfer fiber with protection sleeve to sleeve heater. Make sure the splice point is located at the center of the protection sleeve. Make sure the rod in the protection sleeve is placed on bottom. 2. - Page 49 Basic Operation When using 60mm length sleeve. The sheath clamp is optimized for the 60mm length sleeve. In case of using 60mm length sleeve, it is easy to position the center of the protection sleeve over the splice point. <Procedure> 1.
- Page 50 Basic Operation 5. Slide your left hand slightly to the left on the fiber. 6. Apply tension and transfer fiber with protection sleeve into the sleeve heater. Close the lid by pressing on the clamp pin with the fiber while lowering it into the oven. Heating shorter sleeve When using the 40mm protection sleeve or micro protection sleeves, use the sleeve scale on the top of the heater...
- Page 51 Basic Operation When the fiber is set in the heater, the heater lid closes automatically. Keep holding tension until fiber is completely transferred to tube heater. Two heater plates sandwich the protection sleeve as shown below. Releasing tension too early may cause the protection sleeve to fall below the heat elements, resulting in improper or incomplete heating.
-
Page 52: Maintenance Of Splicing Quality
Maintenance of Splicing Quality Cleaning and Checking before Splicing It is possible to maintain the performance of the splicer for a long time with proper cleaning and maintenance. Critical cleaning points and maintenance checks are described below. Cleaning V-grooves If contaminants are present in the V-grooves, proper clamping may not occur, resulting in higher splice loss. - Page 53 Maintenance of Splicing Quality Cleaning Fiber Clamp Chips If contaminants are present on the clamp chips, proper clamping may not occur, resulting in poor quality splices. The fiber clamp chips should be frequently inspected and periodically cleaned during normal operation. To clean the clamp chips do the following: Fiber clamp chips 1.
-
Page 54: Periodic Checking And Cleaning
Maintenance of Splicing Quality Periodic Checking and Cleaning In order to maintain the splicing quality of the splicer, periodic inspection and cleaning are recommended. Cleaning of Objective Lens If the surface of the objective lens becomes dirty, inaccurate observation of the fiber position may occur, resulting in higher splice loss or poor splicer operation. -
Page 55: Change The Cleaver Blade Position
Maintenance of Splicing Quality Change the cleaver blade position Repositioning the CT50 Cleaver Blade The cleaving of the end face deteriorates when the cleaving blade wears. The CT50 uses a circular blade that has 16 positions. Each position can cleave approximally 1,250 fibers.The blade can be rotated automatically or manually. - Page 56 After the circular blade has been raised 2 times and rotated through all 3 positions (a total of approximately 60,000 for CT50 fiber cleaving), it needs to be replaced. The user can replace the cleaver blade. Contact to Fujikura authorized distributor. Clamp Arm Replacment When the clamp pad is worn, it needs to be replaced.
-
Page 57: Main Menu
Main Menu Composition of Main Menu Main Menu icon Method 1. Select [Main Menu] on the [READY] screen to get to the [Main Menu] screen. 2. Selecting various parts of the main menu screen do the following. Setting parameters Icon Name Description Splice Operation Returns to [READY] screen. -
Page 58: Splice Menu
Splice Menu Composition of Splice Mode Common parameters for all the modes for splicing can be set. [Splice Mode] screen appears when selecting the Splice Mode icon at [READY] screen. How to change the splice mode. 1. When selecting the listed icon at [Splice Mode] screen, the color of the icon changes to blue and the splice mode is changed. -
Page 59: Splice Mode
Splice Menu Splice Mode The optimal splice setting for a specific fiber combination consists of the splicing parameters listed below. In other words, the optimal splicing parameters depend on the fiber combinations, and are different from fiber to fiber. Parameters for controlling fusing. ... -
Page 60: Select Splice Mode
Splice Menu Select Splice Mode Database of splice mode Splice Mode Description This splice mode can splice the standard SM fiber (ITU-T G.652). The amount of heat applied to the fiber is calibrated in real time by G652/SM AUTO analyzing the cladding illumination during fusing then adjusting the fusing power accordingly. - Page 61 Splice Menu Database of splice mode Splice Mode Description For splicing standard Single-mode fiber (ITU-T G652). G652/SM The MFD is 9 to 10 µm at wavelength of 1310 nm. Automatic fusing power calibration doesn’t work in this splice mode. For splicing Non-zero dispersion-shifted fiber (ITU-T G655). G655/NZ The MFD is 9 to 10 µm at wavelength of 1550 nm.
- Page 62 Splice Menu Database of splice mode (FAST) Splice Mode Description For splicing standard Single-mode fiber (ITU-T G652). The MFD is 9 to 10 µm at wavelength of 1310 nm. G652/SM FAST Automatic fusing power calibration doesn’t work in this splice mode. Execute [Fusing Power Calibration] before splicing.
- Page 63 Splice Menu Editing splice modes Splicing parameters in each splice mode can be modified. Fusing power and Fusing time are considered the two most vital parameters. To edit parameters follow the steps below: 1. Select the icon in the [Splice Mode] screen, to show the splice mode. 2.
- Page 64 Splice Menu Initializing edited parameters Edited parameters can easily be initialized to their preset parameters by performing the following procedure: 1. Press icon. 2. Enter the [Fundamental Settings] screen. 3. Select Fiber Type icon and select the same Fiber Type. 4.
- Page 65 Splice Menu Creating or deleting splice modes How to create a splice mode There are necessary splice modes stored when the splicer is first delivered, and all the other modes are displayed [BLANK]. Follow the steps below to add a splice mode: 1.
- Page 66 Splice Menu How to erase splice mode Splice mode can be erased. Follow the below steps to erase splice mode. 1. Change “Fiber Type” to “BLANK”. 2. All parameters are erased. 45S_Rev02...
-
Page 67: Detail Of The Parameters In Splice Mode
Splice Menu Detail of the parameters in splice mode AUTO mode: [G652/SM AUTO], [G651/MM AUTO], [G655/NZ AUTO], [G653/DS AUTO], [G657/BIF AUTO] Below is a list of Splicing parameters for AUTO modes Only a limited number of parameters listed below are displayed for AUTO modes to simplify the operation. - Page 68 Splice Menu Parameter Description Estimation Selects splice loss estimation to "OFF", ”Clad”, “WSI” or “Clad+WSI”. OFF: Does not display the estimation loss after splicing Clad: Displays the loss calculated from the cladding image. Estimating WSI: Displays the loss calculated from the fiber image during the fusing. Mode *Warm Splice Image Clad+WSI: Displays the loss of Clad and WSI.
- Page 69 Splice Menu Standard modes: [G652/SM], [G655/NZ], [G653/DS], [G651/MM] Splicing parameters: standard modes In other splice modes in the user-selectable database, the user can select from a series of factory-set splicing modes for various splicing combinations. Below are the descriptions of the various parameters used in these modes.
- Page 70 Splice Menu A continuation of edit parameter list Parameter Description Tapering Splice loss is sometimes improved when the fiber is tapered (pulled) during Taper Splice fusing to make the splice thinner. This sets taper function "ON". The following three parameters determine the taper shape. Sets the taper wait time from the end of fiber stuffing until the start of Taper Wait tapering.
-
Page 71: Heater Menu
1. When selecting the listed icon at [Heater Mode] screen, the color of the icon changes to blue and the splice mode is changed. 2. Press the Reset icon to return to the [READY] screen. When using a non-Fujikura protection sleeve, please set up parameters in separate heater modes. -
Page 72: Select Heater Mode
Heater Menu Select Heater Mode Each tube-heating mode is optimized for a type of Fujikura protection sleeve. These modes can be found in the database area for reference. Copy the appropriate one and paste it to the user-programmable area. The operator can edit the user-programmable modes. - Page 73 Heater Menu Referring to or Editing Heater Mode Tube-heating conditions stored in heater mode can be edited or changed. 1. Select the icon in the [Heater Mode] menu, to show the heater mode. 2. The category is displayed in left side. The parameters included in the category are displayed in the right side.
- Page 74 Heater Menu Initialization edited parameters Edited parameters can easily be initialized to their preset parameters by performing the following procedure: 1. Press icon. 2. Enter the [Fundamental Settings] screen. 3. Press Sleeve Type icon and select the same Sleeve Type. 4.
- Page 75 Heater Menu Creating or deleting heater modes How to create heater mode There are necessary heater modes stored when the splicer is first delivered, and all the other modes are displayed [BLANK]. Follow the steps below to add a heater mode: 1.
- Page 76 Heater Menu How to erase heater mode Splice mode can be erased. Follow the below steps to erase heater mode. 1. Change “Sleeve Type” to “BLANK”. 2. All parameters are erased. 45S_Rev02...
-
Page 77: Detail Of The Parameters In Heater Mode
Heater Menu Detail of the parameters in heater mode Below is a list of Heating parameters. Heater mode parameters Parameter Description Sets sleeve type. List of all heating modes are displayed. Select a mode in Sleeve type the list and this is copied to a user-programmable mode. Title of a heater mode that is displayed in the lower right part of the Mode Title1 monitor during the splicing/heating process. -
Page 78: Connector Installation
By setting the clamping plate on the right side of the heater down (as shown below), it can be used with connectors from other manufacturers. When using Fujikura FUSEConnect, there is no need to adjust the clamp. Heating the protection sleeves can be done as usual, although the sleeve position may need to be shifted prior to heating. -
Page 79: Memory Menu
Memory Menu Composition of the Memory Menu This splicer stores up to 20,000 splice results. Contents of splice data stored varies depending on the splice mode. Memory Menu Settings List of Memory Menu parameters Parameter Description Up to 20,000 splice results can be stored and displayed. Splice Result The stored data varies according to the splice mode. - Page 80 Memory Menu Display and editing splice result data 1. Select the Memory icon in the [Main Menu] screen. Select the Splice Results icon to display the [Splice Results] Menu. This enables access to all the splice data stored in memory. 2.
- Page 81 Memory Menu Camera Image This function is used to store the fiber image after splice or error occurred. A total of 100images can be stored. 1. Select the Camera Image icon in the [Memory] screen. 2. Select the desired target memory to display or delete. How to store the Camera Image Data Select a specific memory number location where there is no image already stored.
-
Page 82: Maintenance Menu
Maintenance Menu Composition of the Maintenance Menu Common parameters for all the modes for Maintenance Menu can be set. [Maintenance Menu] screen appears when selecting the Maintenance Menu icon at the [Main Menu] screen. Detail of the Maintenance Menu The parameters in the Maintenance Menu are listed below: Maintenance parameter list Parameter Description... -
Page 83: Fusing Power Calibration
Maintenance Menu Fusing Power Calibration Atmospheric conditions such as temperature, humidity, and pressure are constantly changing, which creates variability in the fusing temperature. This splicer is equipped with a temperature sensor that is used in a constant feedback monitoring control system to regulate the fusing power to a constant level. - Page 84 Maintenance Menu “Good” message Fusing power and splicing position calibration have successfully completed. Press Reset icon to exit. Result: Good “Not Adequate” message Fusing power and splicing position calibration are completed but further calibration is strongly recommended, as the change from the previous fusing power calibration is too large.
-
Page 85: Diagnostic Test
Maintenance Menu Diagnostic Test The splicer has a built in diagnostic test feature that allows the operator to perform a simple one step evaluation of splicer performance covering several different critical variables. Perform this function in the event of splicer operation trouble. Operation Procedure 1. -
Page 86: Dust Check
Maintenance Menu Dust Check The splicer observes fibers through image processing. Dust or contaminants may interfere with normal observation of fibers and degrade splice quality. This function checks the optical path for the presence or absence of contaminants and judges whether they will reduce splice quality. -
Page 87: Stabilize Electrodes
Maintenance Menu Stabilize Electrodes In the event of sudden change in environmental conditions, etc., the fusing power may become unstable, resulting in higher splice loss. This is especially likely to happen when the splicer is moved from lower elevations to higher elevations. Over time the fusing power will eventually stabilize, however this process can be expedited by stabilizing the electrodes. -
Page 88: Replace Electrodes
Maintenance Menu Replace Electrodes When the number of fusing reaches the setting value, a message prompting to replace the electrodes is displayed immediately after turning on the power. Using the worn electrodes will result in greater splice loss and reduced splice strength. Replacement Procedure 1. -
Page 89: Clear Cleaver Counter
Maintenance Menu Clear Cleaver Counter This function resets the number of cleaves stored in [Cleaver Counter]. 1. Select the Clear Cleaver Counter icon. 2. When the confirmation screen “Is it OK to clear?” appears, select “OK” icon to clear. Parameter Descriptions The number of times of cleave is Cleave Count... -
Page 90: Maintenance Info
Maintenance Menu Maintenance Info The maintenance information is displayed in the Maintenance Info screen. When selecting [Maintenance Info], the following information is displayed: Parameter Description Serial Num. Displays the serial number of the splicer. Version Displays the software version. Displays the number of fusing since electrode replacement. Fusing Count Performing the function [Replace Electrodes] or [Clear Fusing Count] resets this parameter to zero. -
Page 91: Splice Settings Menu
Splice Settings Menu Composition of the Splice Settings Menu Common parameters for all splice modes can be set. [Splice Settings] screen appears when selecting the Splice Settings icon at [READY] screen. How to change the settings 1. The category is displayed in left side. The parameters included in the category are displayed in the right side. -
Page 92: Splice Settings Parameter Detail
Splice Settings Menu Splice Settings parameter detail The Splice Settings parameters are described below: Splice Settings parameter list Parameter Description Fundamental Settings If “Pause” is set to "ON", the splicing operation pauses after fiber Pause alignment is completed. Auto Start Trigger Select of "ON", and "OFF"... -
Page 93: Other Settings Menu
Other Settings Menu Composition of the Other Settings Menu Common parameters for all the modes for Other Settings Menu can be set in this menu. Select the Other Settings icon at [Main Menu] screen to enter this menu. Detail of the Other Settings Menu The parameters in the Other Settings Menu are listed below: List of the other settings Parameter... -
Page 94: Machine Settings
Other Settings Menu Machine Settings Basic operation and maintenance parameters can be changed in this menu. The list of warning and maintenance parameters in this menu follow: Parameter Description Basic Settings Select the language displayed on the screen. Language The language that can be displayed is controlled by the software version and region code. - Page 95 Other Settings Menu A continuation of other settings parameter list Parameter Description Power On Option Sets the message to be displayed when the power is turned on. Opening Title1 Max. number of characters : 15 (Opening Title1) Opening Title2 15 (Opening Title2) Quick Boot If set to “ON”, the splicer boots up quickly.
-
Page 96: Supervisor Settings
Other Settings Menu Supervisor Settings Used by an Administrator to limit operators from selecting or changing certain functions. The list of Supervisor Settings parameters in this menu follow: Parameter Description Calendar Calendar Sets the date and time in the calendar. Password Setting Sets a password to access the [Supervisor Settings] menus. - Page 97 Other Settings Menu About "Boot Password Variation" "Boot Password Variation" This parameter determines whether the boot password variation function is utilized or not. The default setting is "OFF". "Boot Password 1"..."Boot Password 12" Initial default password settings are all "0". "Boot Password Lock From 1"..."Boot Password Lock From 12"...
-
Page 98: Menu Lock Settings
Other Settings Menu Menu Lock Settings Used by Administrator to limit operator from selecting or changing certain functions. The list of Menu Lock Settings parameters in this menu follow: Parameter Descriptions Password Setting Sets a password to access the [Menu Lock Password] menus. Maximum Characters: 9 Menu Lock Password At the time of shipment from factory, the password is set to “0”. - Page 99 Other Settings Menu A continuation of edit parameter list Parameter Descriptions Cleaver Setting to “Disable” prevents unauthorized changing of the Cleaver Settings [Cleaver Settings] menu. Maintenance Menu Replace Electrodes Stabilize Electrodes Clear Fusing Count Clear Cleaver Counter Setting to “Disable” prevents unauthorized changing of Battery Discharge various maintenance parameters.
-
Page 100: Wireless Data Communication
Other Settings Menu Wireless Data Communication The splicer features wireless data communication with the optical fiber cleaver (CT50) via Bluetooth. This capability allows the splicer to monitor and change various settings within the cleaver. The splicer can assess blade wear by analyzing the fiber image after cleaving, and then inform the operator with an on-screen alarm. - Page 101 Other Settings Menu Procedure 1. Turn the splicer power on. 2. Place batteries in the cleaver. 3. Press the [Bluetooth] Icon of wireless data communication on the screen of splicer to open the [Bluetooth] Menu. 4. Set [Splicer] and [Cleaver] setting to "ON".
- Page 102 Other Settings Menu How to turn off Bluetooth communication Please turn off the Bluetooth function when using this splicer in places where wireless communication is prohibited. In order to stop output of all electromagnetic waves, Bluetooth must be turned off on both the cleaver and the splicer. Turning Bluetooth off on one device does not disable wave output for the other.
- Page 103 Other Settings Menu Blade management By using the "blade management menu,” it is simple to check wear condition of the cleave blade during splice operation. The splicer determines whether or not to rotate the cleaver blade by assessing cleave quality for the current position. It analyzes the fiber edge to determine whether or not the cleave angle and quality are sufficient.
-
Page 104: Cleaver Setting
Other Settings Menu Cleaver Setting This menu enables parameter selection to control the splicer interface with the CT50 cleaver. List of the Cleaver Settings parameters Parameter Description Blade Setting Shows the cleaved fiber count at all blade positions of the cleaver Blade Position (48 positions). - Page 105 Other Settings Menu Parameter Description Alarm Settings ON/OFF setting enables or disables display of each warning Blade Position Change message for cleaver blade wear. If “OFF” is selected for an Blade Height Change alarm, no warning is indicated on the READY screen. If “ON” is selected, the alarm will be displayed for the operator when Blade Replacement required.
-
Page 106: Error Message List
Error Message List Press Start when an error is shown on the monitor. The [HELP] screen displays the following. When one of the errors listed below occurs, the splicer will repeat the alignment process when the operator presses the Start icon: ・L-Too Long Fiber ・R-Too Long Fiber ・LR-Too Long Fiber... - Page 107 Error Message List Error Reason Solution Message • Press RESET, and set the fiber end-face L-Too Long • The fiber end-face is between the electrode centerline and the V- Fiber placed on the electrode groove edge. centerline, or beyond it R-Too Long •...
- Page 108 Error Message List Error Reason Solution Message • The fiber is not set ZL Motor correctly at the bottom • Press Reset icon or open the wind protector, Overrun of the V-groove. The and set the fiber again to seat it correctly at (Forward) fiber is not located in the bottom of the V-groove.
- Page 109 Error Message List Error Reason Solution Message • Assure the electrodes are in proper position. • Fusing did not No Fusing • Replace the electrodes. occur. • Consult the authorized distributor. • Bad fiber end- • Check the condition of the fiber cleaver. If the blade is face.
- Page 110 Error Message List Error Reason Solution Message • Dust or dirt on the fiber surface results in bad splice loss and low tensile strength. • Completely prepare the fiber again (strip, clean and • Dust or dirt is on cleave). the fiber surface •...
- Page 111 Error Message List Error Message Reason Solution There is dust • Clean the objective lenses by referring see after executing • Dirt or dust exists section [Cleaning of Objective Lens]. Dust Check in optical path. • When the above processes cannot remove the function dirt or dust, consult the authorized distributor.
-
Page 112: Questions And Troubleshooting
Questions and Troubleshooting Power Supply (1) Power does not turn on when pressing ON/OFF key • The battery may not be charged. Charge the battery. (2) Power does not turn off when pressing ON/OFF key • Press and hold the key until the LED color changes from green to red. (3) Few splices can be made with a fully charged battery pack •... -
Page 113: Splicing Operation
Questions and Troubleshooting Splicing Operation (1) Error message appears on monitor • Refer to [Error Message List] function. (2) Inconsistent splice loss / High splice loss • Clean the V-grooves, fiber clamps, wind protector mirrors, and objective lenses. • Replace the electrodes. •... -
Page 114: Sleeve-Heating Operation
Questions and Troubleshooting Sleeve-heating Operation (1) Fiber protection sleeve does not shrink completely • Extend the heating time. Refer to [Heater Mode]. (2) Heater icon blinks • Pressing the HEAT icon during heating causes the HEAT icon to blink. The sleeve heater is turned off if the HEAT icon is pressed again. -
Page 115: Supervising
Bluetooth SIG, Inc. This logo and words appearing in this manual are trademarks or registered trademarks of their respective owners. Any use of such marks by Fujikura Ltd is under license. 45S_Rev02... -
Page 116: Guarantee And Contact Address
Guarantee and Contact Address Warranty 1. Warranty period Please ask to the Fujikura authorized distributor of your country about the warranty period of this product. 2. Warranty item coverage The warrantee covers the Splicer's and Accessories' standard package except for consumables like batteries or electrodes. -
Page 117: Contact Address
Guarantee and Contact Address Contact Address Inquiries concerning products should be made to the authorized distributor or one of the following: Fujikura Europe Ltd. C51 Barwell Business Park Leatherhead Road, Chessington, Surrey KT9 2NY, UK General inquiries : +44-20-8240-2000 Service & support : +44-20-8240-2020 https://www.fujikura.co.uk...
Need help?
Do you have a question about the 45S and is the answer not in the manual?
Questions and answers
Could you please share the type test reports for Fujikura 45S