Advertisement
Available languages
Available languages
Quick Links
H-11269, H-11270
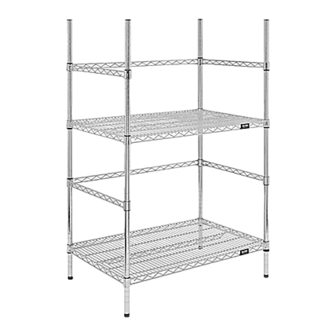
WATER JUG RACKS
TOOL NEEDED
Rubber Mallet
Figure 1
Figure 2
Figure 3
PAGE 1 OF 6
1-800-295-5510
uline.com
PARTS
Frame x 2
Shelf x 2
ASSEMBLY
POST ASSEMBLY
1. Connect post tops to post bottoms with a post connector. (See Figure 1)
NOTE: Post tops have a black plastic cap in the top of the post.
SELF-LEVELING FEET
NOTE: If installing casters, do not install self-levelers.
1.
Make sure post is positioned as shown. (See Figure 2)
2. Insert self-levelers into open end of post. Use a rubber mallet/hammer or
tap on ground to slide self-leveler into post.
3. Repeat step 2 for all other posts.
UNIT ASSEMBLY
1.
Start with the lowest shelf. Snap the interlocking pieces of a shelf support
(wide end down) around the post at the lowest groove where shelf is to be
located. Slide the support up or down until it snaps onto the groove. Add
a shelf support to the same place on the remaining posts. (See Figure 3)
NOTE: NSF requires food service applications to keep the
lowest shelf at least 6" above the floor.
Pour le français, consulter les pages 5-6.
Shelf Support x 16 Sets
Self-Leveling Foot x 4
Para en Español, vea páginas 3-4.
Post x 4
1123 IH-11269
Advertisement

Related Manuals for U-Line H-11269


Summary of Contents for U-Line H-11269
- Page 1 Para en Español, vea páginas 3-4. Pour le français, consulter les pages 5-6. H-11269, H-11270 1-800-295-5510 uline.com WATER JUG RACKS TOOL NEEDED Rubber Mallet PARTS Frame x 2 Shelf Support x 16 Sets Shelf x 2 Self-Leveling Foot x 4...
- Page 2 ASSEMBLY CONTINUED 2. Slide post through underside of shelf until shelf slides firmly over supports. (See Figure 4) Figure 4 3. Stand unit upright. Gently tap shelf down to secure. (See Figure 5) Figure 5 4. Determine the height of the frame, snap supports to post, then add frame. Gently tap down to secure.
-
Page 3: Herramienta Necesaria
H-11269, H-11270 H-11269, H-11270 800-295-5510 uline.mx ESTANTERÍA PARA GARRAFONES DE AGUA HERRAMIENTA NECESARIA Mazo de Caucho PARTES 2 Armazónes 16 Sets de Soportes para Repisa 2 Repisas 4 Patas Autoniveladoras 4 Postes ENSAMBLE ENSAMBLE DEL POSTE Diagrama 1 1. Conecte las partes superiores del poste a las inferiores con un conector de poste. - Page 4 CONTINUACIÓN DEL ENSAMBLE 2. Deslice el poste a través del lado inferior de la repisa hasta que se deslice con firmeza sobre los soportes. (Vea Diagrama 4) Diagrama 4 3. Coloque la unidad en posición vertical. Golpee suavemente las guías del riel para fijarlas.
-
Page 5: Montage
H-11269, H-11270 H-11269, H-11270 1-800-295-5510 uline.ca PORTE-BOUTEILLES D'EAU OUTIL REQUIS Maillet en caoutchouc PIÈCES Cadre x 2 Support de tablette x 16 ensembles Tablette x 2 Pied autonivelant x 4 Montant x 4 MONTAGE ASSEMBLAGE DES MONTANTS Figure 1 Raccordez les parties supérieures des montants aux parties inférieures des montants avec un connecteur de montant. - Page 6 MONTAGE SUITE 2. Faites glisser les montants à travers la partie inférieure de la tablette jusqu'à ce que la tablette se fixe fermement en place sur les supports. (Voir Figure 4) Figure 4 3. Placez l'unité à la verticale. Tapotez doucement sur la tablette pour la fixer. (Voir Figure 5) Figure 5 4.
Need help?
Do you have a question about the H-11269 and is the answer not in the manual?
Questions and answers