
Related Manuals for Nakamichi APOLLO 550


Summary of Contents for Nakamichi APOLLO 550
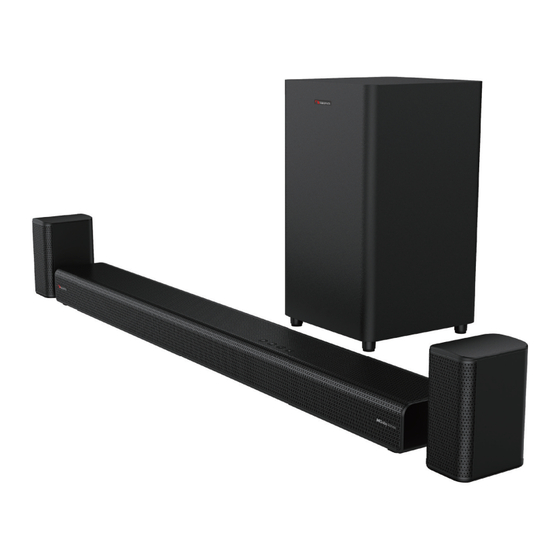
- Page 1 APOLLO 550 User Manual 5.1.2CH ATMOS SOUNDBAR WIRELESS SUBWOOFER / WIRELESS SURROUND nakamichihomeaudio.com nakamichi.global nakamichihomeaudio...
- Page 2 Contents Contents Important Safety Instructions ....................3 Important Safety Instructions ....................3 1.1 Safety ..............................3 1.1 Safety ..............................3 1.2 Warning ..............................4 1.2 Warning ..............................4 What’s in the Box ........................5 What’s in the Box ........................5 Identifying the Parts .......................6 Identifying the Parts .......................6 3.1 Main Unit ..............................6 3.1 Main Unit ..............................6 3.2 Wireless Subwoofer ..........................6...
-
Page 3: Important Safety Instructions
1. Important Safety Instructions the other. A grounding plug has two blades and a third grounding prong. The wide blade or the third prong is provided for your safety. If the provided CAUTION RISK OF ELECTRIC SHOCK an electrician for replacement of the DO NOT OPEN obsolete outlet. - Page 4 Inc. and any use of such marks by Nakamichi Inc. and any use of such marks by Nakamichi • Do not attempt to clean the unit with •...
-
Page 5: What's In The Box
2. What’s in the Box Remote Control x 1 Main Unit x 1 Wireless Subwoofer x 1 (not supplied batteries) CCC AC Power Cord x 2 HDMI Cable x 1 Wireless Surround x 2 Adapter x 1 Surround Speaker Cable x 1 Wall Mount Kit x 1 (For Soundbar) Wall Mount Kit x 1... - Page 6 3. Identifying the Parts 3. Identifying the Parts 3.1 Main Unit 3.1 Main Unit Display Window Display Window Show the current status. Show the current status. Remote Control Sensor Remote Control Sensor Receive signal from the remote Receive signal from the remote control.
-
Page 7: Remote Control
3.3 Wireless Surround Surround's PAIR Indicator Light stops blinking once the Surround Speaker R is paired with the Soundbar. DC~ Socket Connect to adapter. SPEAKER (R) Socket PAIR button Press activate the pairing function between the main unit and the Surround. - Page 8 4. Preparations 4. Preparations • Do not allow anything to impact the • Do not allow anything to impact the remote control. remote control. 4.1 Prepare the Remote Control 4.1 Prepare the Remote Control • Do not spill water or any liquid on the •...
- Page 9 Care in your country. to install your Sound Bar. IMPORTANT: wall can support the weight of your Sound Bar may not be suitable for all types Sound Bar. of wall. Please consult a professional for advice before drilling any holes if you are remove the rubber feet at the bottom in any doubt.
-
Page 10: Pcm Audio
4.5 Wall Mounting (For Surround) 4.5 Wall Mounting (For Surround) as a Digital Optical cable) but as a Digital Optical cable) but these are unable to support all of these are unable to support all of • The (R /L) surround speakers can be •... - Page 11 Method 2: Standard HDMI connect your soundbar to the TV through a standard HDMI connection. Use an HDMI cable to connect the COAXIAL soundbar's HDMI OUT (TV ARC/eARC) socket to the TV’s HDMI IN socket. COAXIAL Use an HDMI cable to connect the soundbar's HDMI IN (1 or 2) socket to your Tip: The unit may not be able to decode all DVD players and blu-ray).
- Page 12 5.8 Pair up with the Subwoofer & 5.8 Pair up with the Subwoofer & Surround Surround Manual Pairing Manual Pairing Plug the Soundbar and the subwoofer Plug the Soundbar and the subwoofer into the mains sockets and then press into the mains sockets and then press on the unit or remote control to on the unit or remote control to switch the unit to On mode.
-
Page 13: Basic Operation
6. Basic Operation 6.5 Select Equalizer (EQ) Effect Press the EQ button on the remote control 6.1 Standby/ON to select your desired preset equalizer: NEWS / MOVIE / MUSIC. 6.6 Adjust the Volume Standby mode. • Press the button on the unit or on the •... - Page 14 Activate your Bluetooth device and user manual of the input source device user manual of the input source device select the search mode. "APOLLO 550" select the search mode. "APOLLO 550" for its audio setting details) with HDMI for its audio setting details) with HDMI...
-
Page 15: Usb Operation
• The player will also be disconnected Press the (SOURCE) button repeatedly on the unit or press the USB when your device is moved beyond the operational range. button on the remote control to select USB mode. • If you want to reconnect your device During playback: operational range. - Page 16 No sound No sound This is a 15 mins power off function, This is a 15 mins power off function, one of the ERPII standard requirement one of the ERPII standard requirement • Make sure that the unit is not muted. •...
- Page 17 Soundbar Power Supply AC 100-240V~ 50/60Hz Power Consumption 80 W / < 0.5 W (StandBy) Output Power 180 W 500mA Hi-Speed USB (2.0) / FAT32 / FAT16 Dimension (WxHxD) 1000 x 67 x 102 mm Net Weight 3.6 kg Audio Input Sensitivity 500mV Frequency Response 120Hz - 20KHz...
- Page 21 HDMI...
- Page 25 ~50 MM/2.0” 962 MM ~3MM/0.12” ’ . 1 2 ’ 4mm/ M / 0 0.16” ~ 3 M >25MM/0.98”...
- Page 28 Riesgo...
- Page 34 ые колонки ого чания Д саундбара колонок 5.1 Dolby Atmos ............................® ние ов колонками ого чания.. ор ов..Регулировка я ение ние ого а Регулировка и ..
- Page 35 "...
- Page 36 – – – – – d, Ni – – – • • • • 2014 53 • l toot l toot G ,. nc. • D finition ltim ia nt rfac • • ing Administrator, nc. Dolby, Dolby A dio, Dolby Atmos •...
- Page 37 Кабель HDMI Колонки ого чания ( шт) (Зависит от региона) А...
- Page 38 Отображение его а С Не закрывать. Место птический разъём оаксиальный разъём К Беспроводной сабвуфер е...
- Page 39 ые колонки ого а Разъем равый разъем К евый разъем источник Громкость • Приглушение...
-
Page 40: Подготовительные Операции
4. Подготовительные операции • Не проливайте воду или другие жидкости на пульт дистанционного управления. 4.1 Подготовка пульта дистанционного • Не кладите пульт дистанционного управления управления на влажные предметы. Поставляемый пульт дистанционного управления • Не размещайте пульт дистанционного управле- позволяет управлять устройством на расстоянии. ния... - Page 41 • Перед настенным монтажом убедитесь, Важно: Крепления, поставляемые с вашей что стена выдержит вес саундбара. звуковой панелью, могут не подходить для всех типов стен. Пожалуйста, проконсультируйтесь с • Перед настенным креплением не нужно профессионалом, прежде чем сверлить какие-либо снимать резиновые ножки в нижней части отверстия, если...
- Page 42 Dolby. Колонки • Dolby Atmos ® Dolby Atmos Dolby. dolby.com t ologi dolby atmos . olby tmos® Dolby Atmos " ". HDMI OUT Dolby Atmos® HDMI (eARC/ARC) TV eARC/ARC Dolby Atmos®. "No " l ray DVD • AR . D Dolby Atmos Dolby Digital •...
- Page 43 AR , COAXIAL COAXIAL HDMI OUT olby igital HDMI IN 1 HDMI IN 2 HDMI OUT TV eARC/ARC HDMI IN OPTICAL OPTICAL •...
- Page 44 панели динамиками ого а • динамиках объемного » » • : • • • • •...
- Page 45 • Standby . • • • • • AR , • Standby AV SYNC • " ". A io D lay • • B SS • • • V200 •...
- Page 46 AUX / OPTICAL / COAXIAL / DMI – • olby igital • • Y D G A , • Y D G A , R F R...
- Page 47 • • • FA 32 FA 16. • • • • • • • • •...
- Page 48 • • • • lu toot u toot Bl tooth. Dolby Digital • l toot l toot • l toot • • • Настройте " ". • •...
- Page 49 500mA 32G ( 3.6 kg 500mV колонок объемного звучания l toot 5.4 kg Колонки объёмного звучания 24V 1.5A...
- Page 55 Speaker R Speaker L...
- Page 58 HDMI OUT HDMI OUT HDMI IN 1 HDMI IN 2 HDMI IN 1 HDMI IN 2 HDMI OUT HDMI OUT TV eARC/ARC TV eARC/ARC HDMI IN HDMI IN OPTICAL OPTICAL OPTICAL OPTICAL OPTICAL OPTICAL OPTICAL OPTICAL COAXIAL COAXIAL HDMI OUT HDMI OUT COAXIAL COAXIAL...
- Page 59 » » • • •...
- Page 64 CONNECT WITH US ONLINE TO EXPLORE NAKAMICHI’S COMPLETE RANGE, INSTRUCTIONS & SOFTWARE DOWNLOADS AND WARRANTY REGISTRATION. WWW.NAKAMICHIHOMEAUDIO.COM nakamichi.global nakamichihomeaudio nakamichihomeaudio Nakamichi Corp, Japan Made in China |...
Need help?
Do you have a question about the APOLLO 550 and is the answer not in the manual?
Questions and answers