Table of Contents
Advertisement
Quick Links
• For Outdoor Use Only (outside
any
enclosure)..
• This instruction manual
contains important information
necessary for proper assembly
and safe use of this appliance.
• Read and follow all warnings
and instructions before
assembling and using the
appliance.
• Follow all warnings and
instructions when using the
appliance.
• Keep this manual for future
reference.
DANGER
• If you smell gas:
1. Shut off gas to the appliance.
2. Extinguish any open flames.
3. Open the lid.
4. If the odor continues, keep
away from the appliance and
immediately call your fire
department.
• Never operate this appliance
unattended.
• Never operate this appliance
within 10ft (3 m) of any structure,
combustible material or other
gas cylinder.
• Never operate this appliance
within 25ft (7.5 m) of any
flammable liquid.
• If a fire should occur, keep
away from the appliance and
immediately call your fire
department. Do not attempt to
extinguish an oil or a grease fire
with water.
Failure to follow these
instructions could result in fire
or explosion which could cause
property damage, personal
injury, or death.
Customer Service Hotline
1-866-994-6390
DO NOT RETURN PRODUCT TO THE STORE
Before visiting your local retailer, please email
outdoors@cuisinart.com or call our customer care team
at 1-866-994-6390 to talk with a representative.
To best serve you, our representatives are available
to answer calls Monday to Friday 9 AM to 5 PM EST.
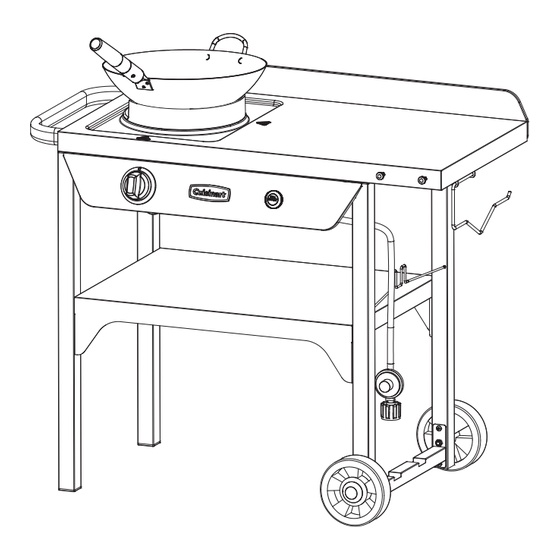
Outdoor Wok Station
MODEL NO: CGG-1265
1
Advertisement
Table of Contents

Subscribe to Our Youtube Channel
Related Manuals for Cuisinart Outdoors CGG-1265

Summary of Contents for Cuisinart Outdoors CGG-1265
- Page 1 Outdoor Wok Station MODEL NO: CGG-1265 • For Outdoor Use Only (outside enclosure).. • This instruction manual contains important information necessary for proper assembly and safe use of this appliance. • Read and follow all warnings and instructions before assembling and using the appliance.
-
Page 2: Table Of Contents
Table of Contents Table of Contents Safety Information What’s in the Box Assembly Instructions Setup Instructions Operating Instructions How to Season the Wok Care and Maintenance Troubleshooting Match Lighting Instructions Exploded View Parts List Warranty & Replacement Parts Back Cover Questions? Back Cover... -
Page 3: Safety Information
SAFETY INFORMATION SAVE THESE INSTRUCTIONS FOR OUTDOOR HOUSEHOLD USE ONLY 1. The installation must conform with local codes or, in the absence of local codes, with the National Fuel Gas Codes, with the National Fuel Gas Code, ANSI Z223.1/NFPA 54, Storage and Handling of Liquefied Petroleum Gases, ANSI/NFPA 2. - Page 4 SAFETY INFORMATION The Fuel System • Gas appliances are used safely by millions of people when following simple safety precautions. This appliance is configured for liquid propane. Do not use a natural gas supply. • The components in the fuel system, including the pressure regulator and hose, are designed for operation with this Wok Station.
-
Page 5: What's In The Box
WHAT’S IN THE BOX PART COMPONENT DESCRIPTION PART COMPONENT DESCRIPTION Station Top Rear Brace Handle Lower Shelf Side Panel Ignition Button Match Holder Knob Leg A Wheel Leg B Wheel Cap Leg C Wok Ring Leg D Backsplash Lower Brace Propane Tank Clip Burner Cover Paper Towel Holder... -
Page 6: Assembly Instructions
ASSEMBLY INSTRUCTIONS Before beginning assembly, installation, or operation of product, make sure all parts are present. Compare parts with package contents list. If any part is missing or damaged, do not attempt to assemble, install or operate the product. Contact our customer care team for replacement parts. Estimated assembly time: Tools you will need: 30 minutes... - Page 7 ASSEMBLY INSTRUCTIONS STEP 2 - - - - - - - - - - - - - - - - - - - - - - - - - - - - - - - - - - - - - - - - - - - - - - - - - - - - - - - - - - - - - - - - - - - - - - - - - - - - - - - - - - - - - - •...
- Page 8 ASSEMBLY INSTRUCTIONS STEP 3 - - - - - - - - - - - - - - - - - - - - - - - - - - - - - - - - - - - - - - - - - - - - - - - - - - - - - - - - - - - - - - - - - - - - - - - - - - - - - - - - - - - - - - •...
- Page 9 ASSEMBLY INSTRUCTIONS STEP 4 - - - - - - - - - - - - - - - - - - - - - - - - - - - - - - - - - - - - - - - - - - - - - - - - - - - - - - - - - - - - - - - - - - - - - - - - - - - - - - - - - - - - - - •...
- Page 10 ASSEMBLY INSTRUCTIONS STEP 5 - - - - - - - - - - - - - - - - - - - - - - - - - - - - - - - - - - - - - - - - - - - - - - - - - - - - - - - - - - - - - - - - - - - - - - - - - - - - - - - - - - - - - - •...
- Page 11 ASSEMBLY INSTRUCTIONS STEP 6 - - - - - - - - - - - - - - - - - - - - - - - - - - - - - - - - - - - - - - - - - - - - - - - - - - - - - - - - - - - - - - - - - - - - - - - - - - - - - - - - - - - - - - •...
- Page 12 ASSEMBLY INSTRUCTIONS STEP 7 - - - - - - - - - - - - - - - - - - - - - - - - - - - - - - - - - - - - - - - - - - - - - - - - - - - - - - - - - - - - - - - - - - - - - - - - - - - - - - - - - - - - - - •...
- Page 13 ASSEMBLY INSTRUCTIONS STEP 8 - - - - - - - - - - - - - - - - - - - - - - - - - - - - - - - - - - - - - - - - - - - - - - - - - - - - - - - - - - - - - - - - - - - - - - - - - - - - - - - - - - - - - - •...
- Page 14 ASSEMBLY INSTRUCTIONS STEP 9 - - - - - - - - - - - - - - - - - - - - - - - - - - - - - - - - - - - - - - - - - - - - - - - - - - - - - - - - - - - - - - - - - - - - - - - - - - - - - - - - - - - - - - •...
- Page 15 ASSEMBLY INSTRUCTIONS STEP 10 - - - - - - - - - - - - - - - - - - - - - - - - - - - - - - - - - - - - - - - - - - - - - - - - - - - - - - - - - - - - - - - - - - - - - - - - - - - - - - - - - - - - - - •...
- Page 16 ASSEMBLY INSTRUCTIONS STEP 11 - - - - - - - - - - - - - - - - - - - - - - - - - - - - - - - - - - - - - - - - - - - - - - - - - - - - - - - - - - - - - - - - - - - - - - - - - - - - - - - - - - - - - - •...
- Page 17 ASSEMBLY INSTRUCTIONS STEP 12 - - - - - - - - - - - - - - - - - - - - - - - - - - - - - - - - - - - - - - - - - - - - - - - - - - - - - - - - - - - - - - - - - - - - - - - - - - - - - - - - - - - - - - •...
- Page 18 ASSEMBLY INSTRUCTIONS STEP 13 - - - - - - - - - - - - - - - - - - - - - - - - - - - - - - - - - - - - - - - - - - - - - - - - - - - - - - - - - - - - - - - - - - - - - - - - - - - - - - - - - - - - - - •...
- Page 19 ASSEMBLY INSTRUCTIONS STEP 14 - - - - - - - - - - - - - - - - - - - - - - - - - - - - - - - - - - - - - - - - - - - - - - - - - - - - - - - - - - - - - - - - - - - - - - - - - - - - - - - - - - - - - - •...
-
Page 20: Setup Instructions
SETUP INSTRUCTIONS CONNECTING THE LIQUID PROPANE (LP) CYLINDER - - - - - - - - - - - - - - - - - - - - - - - - - - - - - - - - - - - - - - - - - - - - - - - - - - - - - - - - - - - - - - - - - - - - - - - - - - - - - - - - - - - - - - •... - Page 21 SETUP INSTRUCTIONS LEAK TEST PROCEDURE - - - - - - - - - - - - - - - - - - - - - - - - - - - - - - - - - - - - - - - - - - - - - - - - - - - - - - - - - - - - - - - - - - - - - - - - - - - - - - - - - - - - - - Although gas connections on the Wok Station are leak tested prior to shipment, we recommend conducting a leak test after initial setup and every time an LP cylinder is attached.
-
Page 22: Operating Instructions
OPERATING INSTRUCTIONS OUTDOOR USE ONLY / NEVER LEAVE UNATTENDED - - - - - - - - - - - - - - - - - - - - - - - - - - - - - - - - - - - - - - - - - - - - - - - - - - - - - - - - - - - - - - - - - - - - - - - - - - - - - - - - - - - - - - WARNING: DO NOT stand with any body parts over an active burner. - Page 23 OPERATING INSTRUCTIONS THIS COOKING APPLIANCE IS FOR OUTDOOR USE ONLY AND SHALL NOT BE USED IN A BUILDING, GARAGE OR ANY OTHER ENCLOSED AREA. PREP AREA • You have approximately 21” x 18” of prep area off to the right side of the burner where you can prepare your food and store your food after that preparation, so that as you’re cooking all your ingredients are close to you for easy reach as your cook.
-
Page 24: How To Season The Wok
HOW TO SEASON THE WOK HOW TO SEASON A WOK ON YOUR OUTDOOR Wok Station - - - - - - - - - - - - - - - - - - - - - - - - - - - - - - - - - - - - - - - - - - - - - - - - - - - - - - - - - - - - - - - - - - - - - - - - - - - - - - - - - - - - - - A seasoned wok infuses flavor into your dishes and creates a natural non-stick surface. - Page 25 HOW TO SEASON A WOK SUMMARY: • Seasoning is essential (see instructions on previous page for initial seasoning). After each use, wipe the wok clean and coat with a thin layer of oil to maintain the seasoning. HOW MANY LAYERS DO YOU SEASON A WOK? •...
-
Page 26: Care And Maintenance
CARE AND MAINTENANCE CLEANING AND CARE - - - - - - - - - - - - - - - - - - - - - - - - - - - - - - - - - - - - - - - - - - - - - - - - - - - - - - - - - - - - - - - - - - - - - - - - - - - - - - - - - - - - - - •... - Page 27 CARE AND MAINTENANCE MAINTENANCE - - - - - - - - - - - - - - - - - - - - - - - - - - - - - - - - - - - - - - - - - - - - - - - - - - - - - - - - - - - - - - - - - - - - - - - - - - - - - - - - - - - - - - •...
-
Page 28: Troubleshooting
TROUBLESHOOTING WARNING Spiders and insects can nest inside the burner of the Wok Station and disrupt gas flow. This very dangerous condition could cause a fire behind the valve panel, thereby damaging the Wok Station and making it unsafe for operation. Inspect the burner at least twice a year. When to Look for Spiders You should inspect the burner at least twice a year or immediately after any of the following conditions occur: •... -
Page 29: Match Lighting Instructions
MATCH LIGHTING INSTRUCTIONS If for any reason you want to use a match to start this product please follow these instructions: • Remove the wok or any other obstruction from the top of the burner. • Verify the propane tank is installed and when turning the burner valve, gas flows through the burner. •... -
Page 30: Exploded View
EXPLODED VIEW & PARTS LIST... - Page 31 EXPLODED VIEW & PARTS LIST For replacement parts, call our customer care team at 866-994-6390, 9 a.m.-5 p.m., EST, Monday-Friday or email outdoors@cuisinart.com NOTE: Not all parts are replaceable. Part Description Quantity Station Top 1 pc Handle 1 pc Side Panel 1 pc Match Holder 1 pc...
-
Page 32: Warranty & Replacement Parts
Questions, problems, missing parts? Before returning to your retailer, call our customer care team at 866-994-6390, 9 a.m.-5 p.m., EST, Monday-Fri- day or email: outdoors@cuisinart.com Visit our website: www.cuisinart.com 2402 Model# CGG-1265 Cuisinart Outdoors a division of Conair LLC Newton, MA 02466...
Need help?
Do you have a question about the CGG-1265 and is the answer not in the manual?
Questions and answers
what tools will I need to assemble wok station