Advertisement
Quick Links
RiverRidge
Estantería infantil multifunción de pared RiverRidge
RiverRidge
RiverRidge
RiverRidge
RiverRidge
®
es una marca comercial registrada de Sourcing Solutions, Inc., Hudson, WI 54016, USA
RiverRidge
®
RiverRidge
ist ein eingetragenes Warenzeichen der Sourcing Solutions, Inc. mit Sitz in Hudson, WI 54016, USA
ASSEMBLY INSTRUCTIONS
INSTRUCCIONES DE ENSAMBLAJE
INSTRUCTIONS D'ASSEMBLAGE
MONTAGEANLEITUNGEN
®
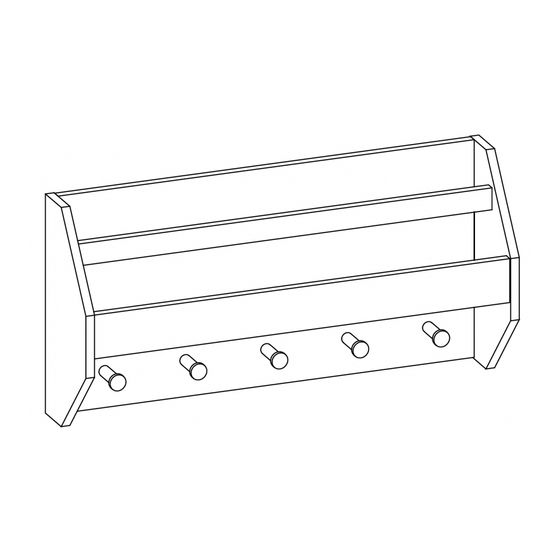
Kids Catch-All Wall Shelf with Bookrack and Hooks
®
Kids Catch-All Wall Shelf avec porte-livres et crochets
®
Wandregal für Kinderspielzeug mit Bücherregal und Haken
02-404 – White, Blanco, Blanc, Weiß
®
is a registered trademark of Sourcing Solutions, Inc., Hudson, WI 54016, USA
®
est une marque déposée de Sourcing Solutions, Inc., Hudson, WI 54016, USA
®
con soporte para libros y ganchos
Advertisement

Related Manuals for Sourcing Solutions RiverRidge Kids Catch-All 02-404


Summary of Contents for Sourcing Solutions RiverRidge Kids Catch-All 02-404
- Page 1 Sourcing Solutions, Inc., Hudson, WI 54016, USA RiverRidge ® est une marque déposée de Sourcing Solutions, Inc., Hudson, WI 54016, USA ® RiverRidge ist ein eingetragenes Warenzeichen der Sourcing Solutions, Inc. mit Sitz in Hudson, WI 54016, USA...
- Page 2 This product will hold up to 15 pounds (6.8kgs) in the bookrack and 3 pounds (1.4kgs) per hook, not to exceed 30 pounds (13.6kgs) total. Please do not overload product for risk of damage and/or serious injury or death. Sourcing Solutions, Inc. UK Authorized Representative: OBELIS UK LTD EU Authorized Representative: OBELIS S.A.
- Page 3 30 libras (13,6 kg). No sobrecargue el producto para evitar el riesgo de daños o lesiones graves o la muerte. Sourcing Solutions, Inc. Representante autorizado del Reino Unido: Representante autorizado de la Unión Europea: OBELIS UK LTD OBELIS S.A.
- Page 4 30 livres (13,6 kg) au total. Veuillez ne pas surcharger le produit pour éviter tout risque de dommage et de blessure grave ou mortelle. Sourcing Solutions, Inc. Représentant autorisé par le R.-U. : Représentant autorisé de l’UE: OBELIS S.A.
- Page 5 Dieses Produkt fasst bis zu 6,8 kg (15 Pfund) auf dem Buchregal und 1,4 kg (3 Pfund) pro Haken bis zu einem Gesamtgewicht von 13,6 kg (30 Pfund). Bitte überlasten Sie das Produkt nicht, da die Gefahr von Schäden und/oder schweren Verletzungen oder Tod besteht. Sourcing Solutions, Inc. Bevollmächtigter Vertreter UK: OBELIS UK LTD Bevollmächtigter Vertreter EU: OBELIS S.A.
-
Page 6: Parts List
PARTS LIST << FONT = 30pt PRODUCT PARTS IMAGE HERE DESCRIPTION Left Side Panel Right Side Panel Back Board Shelf Front Rail Board Rail... - Page 7 This Column = 24pt << HEADER = 30pt PARTS LIST PARTS DESCRIPTION 8PCS Cam Bolt 8PCS Cam Lock 16PCS Wood Dowel 9PCS Screw (4x35mm) 4PCS Screw (3x12mm) 2PCS Keyhole Hanging Plate Wood Peg 5PCS 2PCS Plastic Wall Anchor Wall Mounting Paper Template TOOLS NEEDED FOR ASSEMBLY: FLAT &...
- Page 8 STEP 1 1. Attach 2 keyhole hanging plates (F) to back board (3) by inserting 4 screws (E) through holes on keyhole hanging plate (F), then tighten to back board (3). ^^ Do not use the word ‘pre-threaded’ to describe any holes.
- Page 9 STEP 3 1. Insert 2 wood dowels (C) into wood dowel holes on back board (3). 2. Attach back board (3) to shelf (4) by inserting wood dowels (C) into wood dowel holes on shelf (4). 3. Insert 2 screws (D) though holes on back board (3), then tighten to shelf (4). STEP 4 1.
- Page 10 STEP 5 1. Screw 6 cam bolts (A) into cam bolt holes on left side panel (1) and right side panel (2). STEP 6 1. Insert 4 wood dowels (C) into wood dowel holes on left side panel (1). 2. Attach left side panel (1) to back board (3), shelf (4) and front rail board (5) by inserting wood dowels (C) into wood dowel holes and inserting cam bolts (A) into cam lock holes on back board (3), shelf (4) and front rail board (5).
- Page 11 STEP 7 1. Insert 2 wood dowels (C) into wood dowel holes on left side panel (1). 2. Attach rail (6) to left side panel (1) by inserting wood dowels (C) into wood dowel holes on rail (6). 3. Insert 6 wood dowels (C) into wood dowel holes on right side panel (2). 4.
- Page 12 STEP 8 WALL OPTION #1 DRYWALL WALL ANCHOR WITH SCREW OPTION #2 DRYWALL WOOD STUD SCREW ONLY Option #1: Securing to Drywall 1. Using wall mounting paper template to determine position, screw 2 plastic anchors (H) into drywall. 2. Insert 2 screws (D) into holes on plastic anchors (H) and tighten. 3.
-
Page 13: Maintenance
WARNING Please make sure your item is secured to the wall, per assembly instructions. MAINTENANCE Item should be checked periodically for damage or loose screws/parts. Take appropriate action necessary to correct hazards such as tightening of screws and taking any damaged parts away from children. -
Page 14: Piezas De Repuesto
LISTA DE PIEZAS N.° DESCRIPCIÓN CANT. Panel izquierdo Panel derecho Tablero trasero Repisa Riel del tablero delantero Riel Perno de anclaje Pestillo de leva Pasador de madera Tornillo (4x35mm) Tornillo (3x12mm) Placa colgante para ojo de cerradura Colgador de madera Anclajes de plástico para pared Plantilla de papel para ensamblaje en pared HERRAMIENTAS NECESARIAS PARA EL ENSAMBLAJE: DESTORNILLADOR PLANO Y... - Page 15 PASO 1 1. Fije 2 placas colgantes para ojo de cerradura (F) al tablero trasero (3) introduciendo 4 tornillos (E) en los orificios para placa colgante para ojo de cerradura (D), luego, ajústelos al tablero trasero (3). PASO 2 1. Atornille 2 pernos de anclaje (A) en los orificios para pernos de anclaje del riel del tablero delantero (5).
-
Page 16: Mantenimiento
PASO 8 Opción n.º 1: Fijar a una pared de yeso 1. Atornille los 2 anclajes plásticos (H) a la pared de yeso usando una plantilla de papel para montaje en la pared a fin de determinar la posición. 2. Introduzca 2 tornillos (D) en los orificios de los anclajes de plástico (H) y apriételos. 3. -
Page 17: Liste Des Pièces
LISTE DES PIÈCES Nº DESCRIPTION QTÉ Panneau latéral gauche Panneau latéral droit Plaque arrière Étagère Panneau pour rail avant Rail Boulon à came Verrou de came Goujon en bois Vis (4x35mm) Vis (3x12mm) Plaque du trou de serrure Cheville en bois Ancrage mural en plastique Modèle en papier de montage mural OUTILS NÉCESSAIRES POUR L’ASSEMBLAGE : TOURNEVIS À... - Page 18 ÉTAPE 1 1. Fixez les deux plaques du trou de serrure (F) au panneau arrière (3) en insérant 4 vis (E) dans les trous de la plaque du trou de serrure (A), puis serrez-les sur le panneau arrière (3). ÉTAPE 2 1.
-
Page 19: Entretien
ÉTAPE 8 Option 1 : Fixation sur des cloisons seches 1. En utilisant un gabarit de papier de montage mural pour déterminer la position, vissez 2 ancrages en plastique (H) dans le mur de cloison sèche. 2. Insérez 2 vis (D) dans les trous des ancrages en plastique (H), puis serrez-les. 3. - Page 20 TEILELISTE BESCHREIBUNG ANZ. Linkes Seitenteil Rechtes Seitenteil Rückwand Regal Vorderes Schienenbrett Schiene Korpusverbinder-Bolzen Korpusverbinder-Exzentergehäuse Holzdübel Schraube (4x35mm) Schraube (3x12mm) Schlüsselloch-Aufhängeplatte Holzstift Kunststoffwanddübel Papiervorlage für Wandmontage FÜR DIE MONTAGE BENÖTIGTE WERKZEUGE: FLACH- UND KREUZSCHLITZSCHRAUBENDREHER (NICHT ENTHALTEN). DIE VERWENDUNG EINES ELEKTRISCHEN SCHRAUBENDREHERS WIRD FÜR DIE MONTAGE NICHT EMPFOHLEN. VERWENDEN SIE DEN ARTIKEL NICHT, WENN TEILE FEHLEN ODER BESCHÄDIGT SIND.
- Page 21 SCHRITT 1 1. Befestigen Sie 2 Schlüsselloch-Aufhängeplatten (F) an der Rückwand (3), indem Sie 4 Schrauben (E) durch die Löcher an der Schlüsselloch-Aufhängeplatte (F) einsetzen und an der Rückwand (3) festschrauben. SCHRITT 2 1. Schrauben Sie 2 Korpusverbinder-Bolzen (A) in die Korpusverbinder-Bolzenbohrungen des vorderen Schienenbretts (5).
-
Page 22: Wartung
SCHRITT 8 Option 1: Befestigung an Trockenbauwand 1. Schrauben Sie mit Hilfe der Papiervorlage für die Wandmontage 2 Kunststoffdübel (H) in die Trockenbauwand ein. 2. Führen Sie 2 Schrauben (D) in die Öffnungen der Kunststoffwanddübel (H) ein und ziehen Sie sie fest.
Need help?
Do you have a question about the RiverRidge Kids Catch-All 02-404 and is the answer not in the manual?
Questions and answers