Advertisement
Important Information
Be sure to obey the following information so as not to harm yourself or others or damage this instrument or other external equipment.
Power adapter:
- Please use only the specified AC adapter supplied with the product. An incorrect or faulty adapter can cause damage to the electronic keyboard.
- Do not place the AC adapter or power cord near to any source of heat such as radiators or other heaters.
- To avoid damaging the power cord, please ensure that heavy objects are not placed on it and that it is not subject to stress or over bending.
- Check the power plug regularly and ensure it is free from surface dirt. Do not insert or unplug the power cord with wet hands.
Do not open the body of the electronic keyboard:
- Do not open the electronic keyboard or try to disassemble any part of it. If the device is not functioning correctly, please stop using it and send it to a qualified service agent for repair.
Use of the electronic keyboard:
- To avoid damaging the appearance of the electronic keyboard or damaging the internal parts please do not place the electronic keyboard in a dusty environment, in direct sunlight or in places where there are very high or very low temperatures.
- Do not place the electronic keyboard on an uneven surface. To avoid damaging internal parts do not place any vessel holding liquid onto the electronic keyboard as spillage may occur.
Maintenance:
- To clean the body of the electronic keyboard wipe it with a dry, soft cloth only.
Connection:
- To prevent damage to the speaker of the electronic keyboard please adjust the volume of any peripheral device to the lowest setting and gradually adjust the volume accordingly to an appropriate level once the music is playing.
During operation:
- Do not use the keyboard at the loudest volume level for a long period.
- Do not place heavy objects onto the keyboard or press the keyboard with undue force.
- The packaging should be opened by a responsible adult only and any plastic packaging should be stored or disposed of appropriately.
Specification
- Specifications are subject to change without notice.
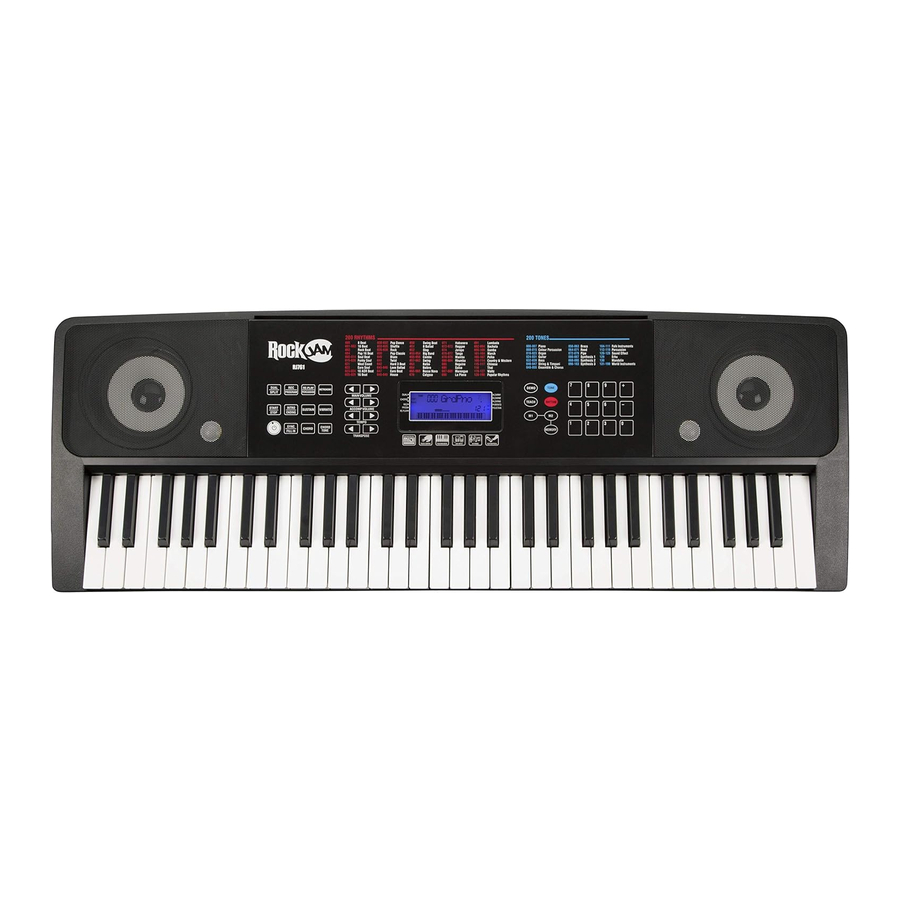
Controls/Indicators and External Connections
Front Panel

- Speaker
- Power Switch
- Start / Stop
- Dual / Split
- Sync / Fill in
- Into / Ending
- Record / Program
- Chord
- Sustain
- Re-Play / Percussion
- Chord Tone
- Vibrato
- Metronome
- Main Volume +/-
- Accompaniment Volume -/+
- Tempo [Slow/Fast]
- Transpose
- Rhythms List
- Tones List
- LCD Screen
- Demo
- Tone
- Teach
- Rhythm
- Memory storage 1
- Memory storage 2
- Memory
- Number Buttons
- Chord Keyboard Area
- Keyboard Playing Area
External Connections

- MIDI Output
- Sustain Pedal Input
- AUX IN
- Headphone Output
- DC 12V Power Input
LCD Display

- TONE, RHYTHM or DEMO song
- Digital display for song, rhythm and tone number
- Metronome for rhythm and song
- Mode Indicators 1
- Tempo value of rhythm and song (bpm)
- Volume level display
- Playing chord indication
- Mode Indicators 2
Preparation Before First Use
Power
Use of AC/DC power adapter:
Please use the AC/DC power adapter that came with the electronic keyboard or a power adapter with DC 12V output voltage and 1,000mA output current with a centre positive plug. Connect the DC plug of the power adapter into the DC 12V power socket on the rear of the keyboard and then connect the other end into the mains wall socket and switch on.


When the keyboard is not in use you should unplug the power adapter from the mains power socket.
Battery operation:
Open the battery lid on the underneath of the electronic keyboard and insert 6 x 1.5V Size D alkaline batteries. Ensure the batteries are inserted with the correct polarity and replace the battery lid.
Do not mix old and new batteries. Do not leave batteries in the keyboard if the keyboard is not going to be used for any length of time. This will avoid possible damage caused by leaking batteries.
Jacks and Accessories
Using headphones:
Connect the 3.5mm headphone plug into the [PHONES] jack on the rear of the keyboard. The internal speaker will cut off automatically once headphones are connected. Headphones with inline volume control are included.

Connecting the sustain pedal:
This electronic keyboard has a 6.35mm socket for connecting a sustain pedal (included). Connect the pedal to the 6.35mm socket.

Connecting an Amplifier or Hi-Fi Equipment:
This electronic keyboard has a built in speaker system but it can be connected to an external amplifier or other hi-fi equipment. First turn off the power to the keyboard and any external equipment you are looking to connect. Next insert one end of a stereo audio cable (not included) into the LINE IN or AUX IN socket on the external equipment and connect the other end into the [PHONES] jack on the rear of the electronic keyboard.

Connecting an iPad or Android device:
The Keyboard can be connected to an Apple or Android device through the MIDI output. This allows you to play music through an app. Connect the USB B type plug into the MIDI output at the back of the keyboard. USB cables for Android and Apple are not included but can be bought from Amazon or eBay.
Note: Android 6.0 and upwards are required for MIDI function.
Recommended App: 'Simply Piano' by Joytunes available from Google Play or Apple App Store.

Connecting a phone or audio device to the AUX Input to play music through the keyboard:
This keyboard has a built-in speaker system that can be used to play music from your phone or mobile device. Insert one end of a stereo audio cable into the AUX IN socket on the back of the keyboard and connect the other end into your phone or audio device. Make sure the keyboard is switched on. Use the volume control of the phone to control the music volume. AUX in cable not included.

Connecting a Laptop or PC:
You can connect the keyboard to a laptop or PC device and work with various 3rd party MIDI software for recording and playing back songs using midi files. Connect a cable with USB B type plug into the MIDI output at the back of the keyboard and then connect the USB A type plug to the PC or Laptop. USB cable for PC/Laptop connection is not included.

Device Operation
Power and Volume
Power control:
Press the [POWER] button to turn the power on and again to turn the power off. The LED will light blue to indicate standby and red for power on.

Adjustment of the Master Volume:
The keyboard has 16 levels of volume from 000(off) - 015. To change the volume, touch the [MAIN VOLUME +/-] buttons. The volume level is indicated by the bars on the LCD display. Pressing both the [MAIN VOLUME +/-] buttons at the same time will make the Main Volume return to the default level (level 009). The main volume level will be retained after power off and restored at power on.

Tone
Tone Selection:
When the keyboard is switched on the default TONE is ''000'' Grand Piano. To change the tone, touch the TONE button first and then directly put in the number code on the keypad by pressing the corresponding digits 0-9. The tones can also be changed by using the + / - buttons. Refer to Tone Table for a list of the available tones.

Effect & Control
Dual Tone Keyboard:
Dual Tone mode allows the keyboard to mix two tones and play them at the same time. To switch on Dual Tone Keyboard mode touch the [DUAL / SPLIT] button. The LCD display will show that Dual tone mode is active by showing [Dual] in the left side mode indicator. The first tone will be fixed as the tone that was selected before the [DUAL / SPLIT] button was pressed. The second tone can be freely selected by pressing the corresponding digits 0-9 on the numerical keypad. Press the [DUAL / SPLIT] button twice to exit Dual Tone mode.

Split Keyboard:
To switch on Split Keyboard mode press the [DUAL / SPLIT] button until the LCD display shows Split. The keyboard will split into two keyboards at the 24th key from the left. You can adjust the TONE of the left hand side of the keyboard by pressing the corresponding digits 0-9 on the numerical keypad. The TONE of the right hand side of the keyboard will remain set to the tone chosen before the Split Keyboard mode was entered. In Split Keyboard mode the pitch of the left hand keys are raised by one octave. Press the [DUAL / SPLIT] button to exit Split Keyboard mode.

Sustain and Sustain Pedal use:
Touch the [SUSTAIN] button to enter Sustain mode. The LCD display will display that [SUSTAIN] is on. Once this mode is selected the sound of each note played is prolonged. Touching the [SUSTAIN] button again will turn the sustain feature off and exit this mode.
NOTE: In order to use the sustain pedal included then make sure that the sustain mode is switched off then press the sustain pedal to sustain individual notes as required.

Vibrato:
Touch the [VIBRATO] button to enter Vibrato mode. The LCD display will display that [VIBRATO] is on.
Once this mode is selected each time a note is played a trembling effect is added to the end of the note. Touching the [VIBRATO] button again will turn the Vibrato feature off and exit this mode.

Transpose:
Touching the [TRANSPOSE +/-] buttons alters the musical scale of the note being played. You can adjust the scale by 6 levels upwards or downwards. Pressing both the [Transpose +/-] buttons at the same time will make the musical scale revert to 00. The transpose level will be reset to 00 after power off and on.

Metronome:
Touch the [METRONOME] button to start the tick-tock beat. There are four beats to choose from. Depending on what the performance needs, you can touch the [TEMPO + / -] buttons to speed up or slow down. Press the [METRONOME] button repeatedly to cycle through to the required beat pattern. The LCD display will indicate the beat you have chosen. The metronome effect is added to the music once you start playing. To exit this mode touch the [START/STOP] or [METRONOME] button again.

Panel Percussion Instruments:
When the [RE-PLAY/ PERCUSSION] button is touched the keyboard's keys turn into a percussion instrument, the LCD will show 'Perc' to indicate percussion mode. Play the keyboard accordingly and the percussion sounds will be heard. Touch the [RE-PLAY/PERCUSSION] button again to exit Percussion mode. Refer to "Percussion Instruments" section for a table of the 61 percussion sounds available.

Rhythm
Selecting the rhythm:
You can choose from any of the 200 built in rhythms. Please refer to the Rhythm Table. Touch the [RHYTHM] button to enter the rhythm selection function. The LCD display will show the current rhythm number. You can select the rhythm you require by pressing the corresponding digits on the numerical keypad or by pressing the + / - buttons.

Start / Stop:
Touch the [START / STOP] button to play the rhythm. Touch the [START / STOP] button again to stop the rhythm playback

Sync:
Touch the [SYNC / FILL IN] button to select the sync accompaniment function. Pressing any of the first 19 keys on the left hand side of the keyboard will start the rhythm playing. Touch the [START / STOP] button to stop the rhythm and exit the sync function.

Fill in:
You can fill in a length of interlude if you touch the [SYNC / FILL IN] button during the rhythm playback. After the fill in, the rhythm will continue playing as normal
Accompaniment Volume Adjustment:
The Accompaniment Volume can be adjusted by pressing the [ACCOMP VOLUME +/-] buttons. The LCD display will show the volume as you are adjusting it. The adjustment range has 10 levels which are displayed as 000 – 009 and indicated by the bars on the LCD display. Pressing both the [ACCOMP VOLUME +/-] buttons at the same time will make the Accompaniment Volume return to the default level (level 006). The Main Volume control will also affect the output level of the accompaniment. At power on the acccompaniment volume will reset to the default level.

Tempo Adjustment:
Touch the [TEMPO +/-] buttons to adjust the playing tempo of the rhythm, metronome and demo song. The adjustment range is 30-240 bpm. Pressing both the [TEMPO +/-] buttons at the same time will make the tempo revert to the default tempo for the rhythm selected. At power on the tempo will revert to 120 bpm.

Chord Accompaniment
Single Finger Chords:
Touch the [CHORD] button to activate the combined single and multi finger chord function. The LCD screen will display this once the function is activated. Chords are played by pressing certain keys in the chord area on the left hand side of the keyboard (keys 1-19). The finger patterns required are shown in Chord Tables. The played chord is displayed in the top left corner of the LCD display. Touch the [START / STOP] button to start or stop the chord accompaniment.

Chord Tones:
There are 4 kinds of chord accompaniment tone to choose from. To select the chord tone, touch the [CHORD TONE] button repeatedly during chord accompaniment. The LCD display will briefly show a number 00 - 03 to indicate the chord tone selected.

Intro / Ending:
Touch the [Intro / Ending] button to enable the intro section. When the intro finishes playing, accompaniment shifts to the main section. Touch [Intro / Ending] button again to enable the ending section. When the ending is finished, the auto accompaniment stops automatically.

Recording Function

Touch the [REC / PROGRAM] button to enter the recording mode. The LCD will indicate that the recording function is on by showing [Record] in the left side Mode display. Press any key to start recording. The maximum recording capacity is 118 notes. When the recording capacity is full the LCD display will show [FL]. Each time you touch the [REC / PROGRAM] button, the previous memory will be cleared and the keyboard will enter the recording mode again.

Touch the [RE-PLAY] button to play back the recorded notes.
Rhythm Programming
Press the [REC / PROGRAM] three times to activate the Program mode. The LCD will indicate that the rhythm program function is on by showing [Program] in the left side Mode display. You can then play the keyboard and record your the percussion track (up to 32 percussion beats). To listen to your piece touch the [Re-Play / Percussion] button and the keyboard will playback your edited percussions. You can also adjust the speed of the playback using the [TEMPO +/-] buttons. To cancel the Programming mode, touch the [REC / PROGRAM] button.
Demo Songs

Touch the [DEMO] button to play a demo song. The LCD display will show [XXX DEMO] where xxx is the number of the demo song. By pressing the + and - button on the numerical keypad you can choose the demo song you require. There are 30 demo songs to choose from in total. The keyboard will finish the chosen song and then repeat in loop mode. Touch the [DEMO] button again to exit the demo mode. Refer to Demo Song Table for a list of the available Demo songs.
Setting Memories M1 and M2
The keyboard has two built in memories for saving specific volume levels, rhythm, tones and tempos. Before performing, select the VOLUME, TONE, RHYTHM and TEMPO you wish to use. Then press and hold the [MEMORY] button. While holding the [MEMORY] button, press the [M1] or [M2] button and this will save the keyboard settings to that memory. You can access the stored keyboard settings you have saved by touching the [M1] or [M2] buttons before performing. The [M1] and [M2] memories will work even after the keyboard is switched off and back on again,

Teaching Modes
Single Key Course:
Touch the [TEACH] button to enter the Single Key teaching mode. The LCD screen will display [Course 1] in the right side Mode display area. This mode is suitable for beginners to familiarise themselves with the rhythm and tempo of the song. The LCD display will show [XXX DEMO] where xxx is the number of the demo song selected. Select a different song using the +/- or number keys. The beat point will flash on the LCD display to indicate the tempo. The keyboard will then play the main melody in time with any key presses, even incorrect ones.

Synchronised Course:
Touch the [TEACH] button x 2 to enter the Synchronised teaching mode. The LCD screen will display [Course 2] in the Mode display area. This mode is suitable for more advanced users. The LCD display will show [XXX DEMO] where xxx is the number of the demo song selected. Select a different song using the +/- or number keys. The beat point will flash on the LCD display to indicate the tempo. The correct key to press next is displayed on the LCD display. Play along in time making sure to press and hold the correct keys in time as indicated.
Concert Course:
Touch the [TEACH] button x 3 to enter the Concert course teaching mode. The LCD screen will display [Course 3] in the Mode display area. This mode is suitable for more advanced users. The LCD display will show show [XXX DEMO] where xxx is the number of the demo song selected. Select a different song using the +/- or number keys. The beat point will flash on the LCD display to indicate the tempo. The correct key to press is NOT displayed on the LCD display. Play along in time with correct key presses.
Progressive Learning:
- In general, follow the sequence below to master any of the included songs.
- Listen to the song in DEMO mode to get an idea of the note timings and beat. When confident move on to the next stage.
- Access the same song in SINGLE KEY COURSE mode and duplicate the note timings using a single key. When mastered move onto the next stage.
- Access the same song in SYNC COURSE mode and play along by pressing the correct keys as indicated. When mastered move onto the next stage.
- Access the same song in CONCERT COURSE mode and play along by pressing the correct keys unaided. When mastered congratulate yourself and move onto a new song!
Percussion Instruments

| No. | Percussion Instrument | No. | Percussion Instrument | No. | Percussion Instrument |
| 1 | C1 Click (Square Wave) | 21 | G#2 Hi-Hat Pedal | 41 | E4 Conga L |
| 2 | C#1 Brush Tap | 22 | A2 Low Tom | 42 | F4 Timbale H |
| 3 | D1 Brush Swirl | 23 | A#2 Hi-Hat Open | 43 | F#4 Timbale L |
| 4 | D#1 Brush Slap | 24 | B2 Mid Tom L | 44 | G4 Agogo H |
| 5 | E1 Brush Swirl W/Attack | 25 | C3 Mid Tom H | 45 | G#4 Agogo L |
| 6 | F1 Snare Roll | 26 | C#3 Crash Cymbal 1 | 46 | A4 Cabasa |
| 7 | F#1 Castanet | 27 | D3 High Tom | 47 | A#4 Maracas |
| 8 | G1 Snare H Soft | 28 | D#3 Ride Cymbal 1 | 48 | B4 Samba Whistle H |
| 9 | G#1 Sticks | 29 | E3 Chinese Cymbal | 49 | C5 Samba Whistle L |
| 10 | A1 Bass Drum H Soft | 30 | F3 Ride Cymbal Cup | 50 | C#5 Guiro Short |
| 11 | A#1 Open Rim Shot | 31 | F#3 Tambourine | 51 | D5 Guiro Long |
| 12 | B1 Bass Drum L | 32 | G3 Splash Cymbal | 52 | D#5 Claves |
| 13 | C2 Bass Drum H Hard | 33 | G#3 Cowbell | 53 | E5 Wood Block H |
| 14 | C#2 Closed Rim Shot | 34 | A3 Crash Cymbal | 54 | F5 Wood Block L |
| 15 | D2 Snare L | 35 | A#3 Vibraslap | 55 | F#5 Cuica Mute |
| 16 | D#2 Hand Clap | 36 | B3 Ride Cymbal 2 | 56 | G5 Cuica Open |
| 17 | E2 Snare H Hard | 37 | C4 Bongo H | 57 | G#5 Triangle Mute |
| 18 | F2 Floor Tom L | 38 | C#4 Bongo L | 58 | A5 Triangle Open |
| 19 | F#2 Hi-Hat Closed | 39 | D4 Conga H Mute | 59 | A#5 Shaker |
| 20 | G2 Floor Tom H | 40 | D#4 Conga H Open | 60 | B5 Jingle Bell |
| 61 | C6 Bell Tree |
Rhythm Table
| No. | Rhythm Name | No. | Rhythm Name | No. | Rhythm Name | No. | Rhythm Name |
| 000 | 8 Beat | 050 | Swing Beat | 100 | Jazz Samba | 150 | Soul Psychedelic 6 |
| 001 | 16 Beat | 051 | 8 Ballad | 101 | March 1 | 151 | Classical ballad 1 |
| 002 | Soul 16 Beat | 052 | Step | 102 | March 2 | 152 | Classical ballad 2 |
| 003 | Rock Beat | 053 | Big Band1 | 103 | March 3 | 153 | Classical ballad 3 |
| 004 | Pop 16 Beat | 054 | Big Band2 | 104 | March 4 | 154 | Classical ballad 4 |
| 005 | Soulbeat | 055 | Combo 1 | 105 | Polka 1 | 155 | Neo-Soul 1 |
| 006 | Soul 1 | 056 | Combo 2 | 106 | Polka 2 | 156 | Neo-Soul 2 |
| 007 | Soul 2 | 057 | Swing 1 | 107 | Polka 3 | 157 | Neo-Soul 3 |
| 008 | Soul 3 | 058 | Swing 2 | 108 | Country & W 1 | 158 | Rock Soul 1 |
| 009 | Soul 4 | 059 | Swing 3 | 109 | Country & W 2 | 159 | Rock Soul 2 |
| 010 | Soul 5 | 060 | Swing 4 | 110 | Bluegrass | 160 | Rock Soul 3 |
| 011 | Soul 6 | 061 | Swing 5 | 111 | Country 1 | 161 | Rock Soul 4 |
| 012 | Slow Soul 1 | 062 | Swing 6 | 112 | Country 2 | 162 | Rock Soul 5 |
| 013 | Slow Soul 2 | 063 | Baiao | 113 | Country 3 | 163 | Rock Soul 6 |
| 014 | Slow Soul 3 | 064 | Bolero | 114 | Middle East | 164 | Folk Rock 1 |
| 015 | Funky Soul 1 | 065 | Bossanova 1 | 115 | China 1 | 165 | Folk Rock 2 |
| 016 | Funky Soul 2 | 066 | Bossanova 2 | 116 | China 2 | 166 | Middle Eastern Rock |
| 017 | Funky Soul 3 | 067 | Bossanova 3 | 117 | China 3 | 167 | 70's Rock |
| 018 | Funky Soul 4 | 068 | Bossanova 4 | 118 | Thailand | 168 | 80's Rock |
| 019 | Funky Soul 5 | 069 | Bossanova 5 | 119 | Waltz 1 | 169 | Heavy Metal Rock |
| 020 | Funky Soul 6 | 070 | Calypso | 120 | Waltz 2 | 170 | Classic Rock |
| 021 | West Coast | 071 | Habanera | 121 | Waltz 3 | 171 | Rock Dance |
| 022 | Euro Soul | 072 | Reggae 1 | 122 | Waltz 4 | 172 | Country Shuffle 1 |
| 023 | 16 AOR 1 | 073 | Reggae 2 | 123 | Jazz Waltz 1 | 173 | Country Shuffle 2 |
| 024 | 16 AOR 2 | 074 | Joropo | 124 | Jazz Waltz2 | 174 | 8 Country Shuffle |
| 025 | 16 Beat 1 | 075 | Tango 1 | 125 | Jazz Waltz 3 | 175 | Modern Lyric 1 |
| 026 | 16 Beat 2 | 076 | Tango 2 | 126 | Country Waltz 1 | 176 | Modern Lyric 2 |
| 027 | 16 Beat 3 | 077 | Tango 3 | 127 | Country Waltz 2 | 177 | Modern Lyric 3 |
| 028 | 16 Ballad 1 | 078 | Mambo 1 | 128 | Punk Swing 1 | 178 | Middle East pop |
| 029 | 16 Ballad 2 | 079 | Mambo 2 | 129 | Punk Swing 2 | 179 | Euro Pop |
| 030 | Pop Dance 1 | 080 | Rhumba 1 | 130 | Punk Swing 3 | 180 | New Age Pop |
| 031 | Pop Dance 2 | 081 | Rhumba 2 | 131 | Punk Swing 4 | 181 | New Century |
| 032 | Pop Dance 3 | 082 | Rhumba 3 | 132 | Punk Swing 5 | 182 | House Dance 1 |
| 033 | Shuffle1 | 083 | Rhumba 4 | 133 | Punk Swing 6 | 183 | House Dance 2 |
| 034 | Shuffle 2 | 084 | Rhumba 5 | 134 | Oriental 16 Beat | 184 | Modern Orchestra 1 |
| 035 | 8 Shuffle | 085 | Bequine | 135 | Soft 16 Beat 1 | 185 | Modern Orchestra 2 |
| 036 | Hard Rock | 086 | Salsa | 136 | Soft 16 Beat 2 | 186 | Euro Big Band |
| 037 | Slow Rock 1 | 087 | Merengue1 | 137 | Soft 16 Beat 3 | 187 | Jazz Big Band |
| 038 | Slow Rock 2 | 088 | Merengue2 | 138 | 16 Chamber Pop 1 | 188 | Bossanova Pop 1 |
| 039 | Pop Classic | 089 | Vallenato | 139 | 16 Chamber Pop 2 | 189 | Bossanova Pop 2 |
| 040 | Blues | 090 | Plena | 140 | Modern 16 Beat | 190 | Bossanova Pop 3 |
| 041 | Twist | 091 | Lambada | 141 | Classical 8 Beat | 191 | Bossanova Pop 4 |
| 042 | Hard 3 Beat | 092 | Bachata 1 | 142 | Classical 16 Beat | 192 | Bossanova Pop 5 |
| 043 | Love Ballad 1 | 093 | Bachata 2 | 143 | Pop 3 Beat | 193 | 8 Piano Blues |
| 044 | Love Ballad 2 | 094 | Bachata 3 | 144 | Psychedelic | 194 | Habanera Blues |
| 045 | Love Ballad 3 | 095 | Samba 1 | 145 | Soul Psychedelic 1 | 195 | Country Blues |
| 046 | Love Ballad 4 | 096 | Samba 2 | 146 | Soul Psychedelic 2 | 196 | Big Beat |
| 047 | Euro Beat | 097 | Pop Samba 1 | 147 | Soul Psychedelic 3 | 197 | Psychedelic Swing |
| 048 | House 1 | 098 | Pop Samba 2 | 148 | Soul Psychedelic 4 | 198 | Baiao Pop |
| 049 | House 2 | 099 | Pop Samba 3 | 149 | Soul Psychedelic 5 | 199 | Africa Bolero |
Tone Table


Demo Song Table
| No. | Name of Song | No. | Name of Song |
| 00 | Beautiful Prairie My Home | 15 | Liuyang River |
| 01 | Rose Waiting For Love | 16 | Little Star |
| 02 | Fascinated | 17 | Water Village In My Dream |
| 03 | Hot dance Music | 18 | Cucurbit Flute |
| 04 | Song Of Herding Sheep | 19 | Happy Birthday To You |
| 05 | Passionate Music | 20 | Rhythm Of Rain |
| 06 | Passionate | 21 | Five Hundred Miles |
| 07 | Little Apple | 22 | Katusha |
| 08 | The South Of Cloud | 23 | Doraemon |
| 09 | Flower Fairy | 24 | Hungarian Dances |
| 10 | Jingle Bells | 25 | Dream Wedding |
| 11 | Entering A New Era | 26 | Heipanpo |
| 12 | Butterfly Rain | 27 | Beethoven Sonata |
| 13 | Place Of Flower in full bloom | 28 | Grand March |
| 14 | I Only Care About You | 29 | Mozart Piano Sonatas |
Troubleshooting
| Problem | Possible Reason / Solution |
| A faint noise is heard when turning the power on or off. | This is normal and nothing to worry about. |
| After turning the power on to the keyboard there was no sound when the keys were pressed. | Check the master volume is set to the correct volume. Check that headphones or any other equipment are not plugged into the keyboard as these will cause the built-in speaker system to cut off automatically. |
| Sound is distorted or interrupted and the keyboard is not working properly. | Use of incorrect power adapter. Use the power adapter supplied or the batteries may need replacing. |
| There is a slight difference in timbre of some notes. | This is normal and is caused by the many different voice sampling ranges of the keyboard. |
| When using the sustain function some tones have long sustain and some short sustain. | This is normal. The best length of sustain for different tones has been pre-set. |
The main volume or accompaniment volume is not right | Check that the main (master) volume and accompaniment volume are set correctly. Note that the main volume also affects the accompaniment volume. |
In SYNC status the auto accompaniment does not work | Check to make sure that Chord mode has been selected and then play a note from the first 19 keys on the left hand side of the keyboard. |
The pitch of the note is not correct | Check that the transpose is set to 00. |
Chord Tables
Single Finger Chords

Fingered Chords

Technical Specification
- Display
LCD Display with staff and key Indication - Touch control and MIDI Output
- Tone
200 tones - Rhythm
200 rhythms - Demo
30 different demo songs - Effect and Control
Dual keyboard, Split keyboard, Sustain, Sustain pedal, Vibrato, Transpose - Recording and Programming
118 Note record memory, Playback, 32 Beat rhythm programming - Percussion
61 different instruments - Accompaniment Control
Start / Stop, Sync, Fill in, Tempo - Intelligent Teaching
Metronome, 3 teaching modes - External Jacks
Power input, Headphone output, Sustain pedal input, MIDI output, AUX Input - Diapason (Range of Keyboard)
C2- C7 (61 keys) - Intonation
<3cent - Weight
4.4kg - Power Adapter
DC12V, 1,000mA - Output Power
5W x 2 - Accessories included
Power adapter, Headphones, Sheet music stand, Sustain pedal, Keyboard stand, User guide
PDT Ltd.
Unit 4B, Greengate Industrial Estate, White Moss View, Middleton, Manchester,
M24 1UN, United Kingdom - info@pdtuk.com
Documents / ResourcesDownload manual
Here you can download full pdf version of manual, it may contain additional safety instructions, warranty information, FCC rules, etc.
Advertisement


Need help?
Do you have a question about the RJ-761 and is the answer not in the manual?
Questions and answers