
Related Manuals for KYY K5-3


Summary of Contents for KYY K5-3
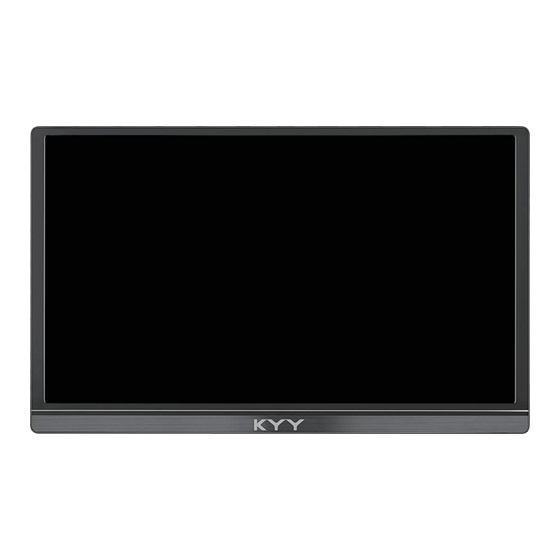
- Page 1 User Guide K5-3 14 " Full HD Portable Monitor Note: Any technical problem pls contact support team [support1@kyytech.com]...
- Page 2 Service Not Satisfied? Monitor Damaged? Can’t Connect? We apologize for any inconveniences, if the monitor you received damaged or can’t connect the monitor successfully with your devices, Please Contact: support1@kyytech.com provides 12-MONTH WARRANTY plus online responsive customer service...
-
Page 3: Table Of Contents
Content Package List ............1 Introduction ............2 Smart Cover ............5 Connect with Devices ..........7 Mode Settings ............13 Supported Devices and Models ......19 Specifications .............21 Notices ...............22 Troubleshooting ..........23 The terms HDMI, HDMI High‐Definition Multimedia Interface, HDMI trade dress and the HDMI Logos are trademarks or registered trademarks of HDMI Licensing Administrator, Inc. -
Page 4: Package List
Package List 14 " Portable Monitor Magnetic Smart Cover USB-C to Mini HDMI to USB-C to USB-A 5V/2.4 A Power USB-C Cable HDMI Cable Cable (Power Supply) Adapter (Power Supply, (Video Transmission) Video Transmission) -
Page 5: Introduction
Introduction Dual Speakers Listen to music, movies, games, and multimedia files. Power Button/Back Button Long press for 3s to turn the screen on/off. Short press to back to the previous page. Trackwheel • Press the trackwheel to turn to the OSD menu. Scroll the trackwheel to control the cursor on the menu, and press to confirm;... - Page 6 Introduction Type-C Full Function Port • USB-C 3.1 • Supply power; • Transmit the audio, video signal. Type-C Full Function Port • USB-C 3.1 • Supply power; • Transmit the audio, video signal. Mini HDMI Port • HDMI 2.0; • Audio and video signal transmission. Note: The Mini-HDMI port only support audio and video signal transmission, does not support power supply, pls plug in the...
- Page 7 Introduction 4* VESA Holes • VESA size: 75 x 75 mm • Screw Size: M4x6mm With the 4 VESA Holes, you can easily mount the monitor to a stand for landscape or portrait mode vewing. * VESA Stand is not included.
-
Page 8: Smart Cover
Smart Cover Place the screen on the backside of the smart cover. Cover the screen side of the smart cover on the screen for protection. - Page 9 Smart Stand Use the smart cover to make the monitor stands at a proper viewing angle. The backside of the smart cover is Magnetic, it can stabilize and support the monitor as a stand. There are two grooves in the base to give you two choices of comfortable viewing Fold the screen side of the...
-
Page 10: Connect With Devices
Connect with Devices Connect with External Power Supply Connect your monitor to the power supply with the [usb-c to usb-a cable] and the Adapter provided, plug in the [usb-c to usb-c cable] OR [mini HDMI to HDMI cable] for video output. Connect without External Power Supply Only works with full-function USB-C port. - Page 11 Connect with Devices USB-C Devices USB-C to USB-C iPhone 15 Series External Power Supply Needed Conditions 1. When the brightness or volume of the monitor is adjusted to more than 80%. 2. When the connected device is in a low battery state. Note: Please check if the USB-C port of your laptop is compatible with audio and video signal transmission.
- Page 12 Connect with Devices Android Devices USB-C Phone USB-C to USB-C If there is no external power supply, the phone would supply power to the monitor. Then the monitor would turn to energy-saving mode (30% brightness). If plugin a 5V/2.4A (or above) external power, the monitor can reversely charge the phone.
- Page 13 Mini HDMI to HDMI Cable Lightning to HDMI Adapter (not included) Connecting your iOS device with KYY requires a Lightning to HDMI adapter (not included). Before connecting, pls make sure your Lightning to HDMI adapter works. The lightning to HDMI adapter and the monitor both need a...
- Page 14 Connect with Devices HDMI PC/Laptop USB-A to USB-C Computer HD to Mini HD (external power supply) USB-C to USB-A Computer HD to Mini HD HDMI port does not supply power. The monitor needs an external Note: power supply (5V/2.4A or above) or USB-A to USB-C cable to supply.
- Page 15 Connect with Devices HDMI Other Devices USB-A to USB-C HD to Mini HD USB-C to USB-A (external power supply) HD to Mini HD Please connect the external power supply first then Note: the mini HDMI to HDMI cable to ensure smooth transmission.
-
Page 16: Mode Settings
Mode Settings Multiple-Display Setting for Windows Right-click the desktop and select either Screen Resolution (Windows 7/8) or Display Settings (Windows 10) Screen Rotate Setting: Click the Orientation drop-down list, and then select Landscape or Portrait. Duplicate & Extend Mode Setting: Click the Multiple displays drop-down list, and then select Extend/Duplicate these displays. - Page 17 Mode Settings Multiple-Display Setting for Mac Choose Apple menu > System Preferences, then click Displays. Click the Arrangement tab. To change the position of a display, drag it to the desired position. A red border appears around the display as it's movable.
- Page 18 Mode Settings OSD (On Screen Display) Menu Press the trackwheel to turn on the OSD menu. Scroll the trackwheel to control the cursor on the menu. Press the trackwheel to confirm. Short press the back button to back to the upper page.
- Page 19 Mode Settings OSD (On Screen Display) Menu BRIGHTNESS Adjust the brightness of display. Adjust the difference in color and light CONTRAST between parts of an image. BRIGHTNESS BLACK Adjust the level of brightness at the darkest part of a visual image. LEVEL SHARPNESS Adjust the sharpness of graphics.
- Page 20 Mode Settings OSD (On Screen Display) Menu Adjust the screen COLOR TEMP. color temperature. COLOR TEMP. Adjust the brightness GREEN of the RGB colors. BLUE Modify the OSD Menu interface language, LANGUAGE default is English. OSD TIMER Adjust the time to OSD SETTING OSD TIMER OSD Menu display...
- Page 21 Mode Settings OSD (On Screen Display) Menu RESET Reset all the items to factory defaults. RESET MUTE Mute the display. VOLUME Adjust the display volume. Switch signal sources such as HDMI or SIGNAL SOURCE Type-C. Filters out harmful blue light, which can MISC LOW BLUE LIGHT cause eye fatigue.
-
Page 22: Supported Devices And Models
ROG gaming phone,ROGgaming phone2 More Brands Updating If you are not sure whether the device is compatible or you meet Note: some problem when connecting, please contact the KYY support team with your device detailed model ID for consultation: support1@kyytech.com... - Page 23 Supported Devices and Models Laptop Brand Model MacBook 12 in, MacBook Pro 2016/2017/2018 Apple MacBook Air 2018, iPad Pro 2018 Google Chromebook Pixels, Pixelbook Pen Savior Y7000, Savior Y7000P, Savior Y9000K, YOGA 6 Pro, Lenovo ThinkPad X1 Carbon, Yoga 5 Pro, Miix 720 G3 Series, G5 Series, G7 Series, Inspiron 5000, DELL Inspiron 7000, XPS13, XPS15...
-
Page 24: Specifications
Specifications Product: KYY K5-3 Portable Monitor Visible Area: 310*175mm 323.8mm Panel Type: IPS LCD Contrast Ratio: 1500: 1 Resolution: 1920*1080 14 inch Color Temperature: 6500K Brightness: 350cd/m² Aspect Ratio: 16:9 Display Color: 16.7M Speaker: Built-in Speaker (1W*2) Visual Angle: H 89°/89°Min V 89°/89°Min Product Dimensions: 323.8*204.4*8.2mm... -
Page 25: Notices
Notices • Before setting up the monitor, carefully read all the instructions with the package. • To prevent fire or shock hazards never expose the monitor to rain or moisture. • Never attempt to open the monitor cabinet. • Before using, make sure all the cables are correctly connected and power cable is not damaged. -
Page 26: Troubleshooting
• Check if the monitor and the computer are in the "ON" mode. • Make sure the cable is properly connected between the KYY monitor and the computer. • Please make sure that the monitor has been charged by the connected device or by the included 5V/2.4A power adapter. - Page 27 Problem Possible Solution The screen flickers in • Long press the power button for 3s to turn off the various colors when monitor and restart it again. starting up. Brightness/Volume • Please make sure that HDR mode is turned off and shows grey and can't Scene(ECO) Mode is not adjusted be adjusted.
- Page 28 lf you encounter any technical problem, Please Contact: support1@kyytech.com provides 12-MONTH WARRANTY plus online responsive customer service...
Need help?
Do you have a question about the K5-3 and is the answer not in the manual?
Questions and answers