
Related Manuals for PROLiNK DL-7202


Summary of Contents for PROLiNK DL-7202
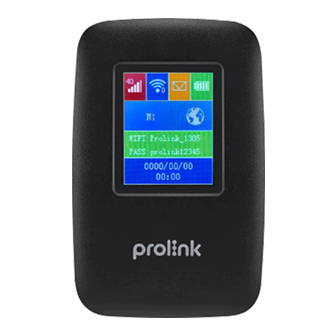
- Page 1 Model No: DL-7202 Quick Installation Guide 4G LTE mobile Wi-Fi Scan me: Version 1.10 (English | Indonesian)
-
Page 2: Package Contents
Package Contents Type-A Type-C Notes: 1. The illustrations in this document may appear di erently from your model. 2. If any of above item is not packed in your package upon opening, please consult your seller immediately. Overview... -
Page 3: Hardware Installation
Overview Interface and Buttons LCD display Nano SIM slot (under the battery) Power button Reset button WPS button *To reset, press and hold the reset button for 3 sec after turning on the device. microSD slot USB Type-C port (under the battery) Hardware Installation Insert SIM card and battery 1. -
Page 4: Charge The Battery
Using an incompatible charger or a charger from an unknown manufacturer may cause MiFi failure, malfunction, or even fire. 2. Recharge battery: connect the provided USB cable to DL-7202's USB Type-C port. Power On the device Press and hold the power button for 5-10 seconds until power is turned on. - Page 5 Web-based Configuration 2. Open the browser and enter http://192.168.1.1 or http://m.home Enter default Username : admin and Password: password to login. 3. Click the upper right corner – Modify Login Password to change the default login password.
- Page 6 Web-based Configuration 4. Click Wi-Fi Settings to change default SSID and password.
- Page 7 Web-based Configuration 5. APN settings (If SIM card's APN cannot be found by Auto Mode). 1) Click Network Settings 2) Select Mode to Manual 3) Click Add New button to enter the correct APN settings accordingly - The APN information should be available in the booklet that comes along with the SIM card or contact the telco to check.
- Page 8 Web-based Configuration 3) Tick “Enable Roaming” and click “Apply” Button. 4) Switch on the connection after Roaming Enable.
-
Page 9: Isi Kemasan
Isi Kemasan Type-A Type-C Nota: 1. Ilustrasi dalam dokumen ini mungkin tampak berbeda dari model Anda. 2. Jika salah satu item di atas tidak dikemas dalam paket Anda saat dibuka, harap segera berkonsultasi dengan seller Anda. Keterangan Gambar... - Page 10 Keterangan Gambar Antaramuka dan Tombol Layar LCD Nano SIM slot (bawah baterai) Tombol Power Tombol Atur ulang Tombol WPS *Untuk mengatur ulang, tekan dan tahan tombol reset selama 3 detik setelah menyalakan perangkat. mikroSD slot USB Type-C port (bawah baterai) Instalasi Perangkat Keras Masukkan kartu SIM dan baterai Buka penutup...
- Page 11 MiFi, kegagalan fungsi, atau bahkan kebakaran. 2. Isi ulang baterai: sambungkan kabel USB yang disediakan ke port USB Type-C DL-7202. 3. Bank daya: berfungsi sebagai bank daya untuk mengisi daya perangkat lain dengan menghubungkan melalui port USB Type-A DL-7202.
- Page 12 Pengaturan melalui halaman Web 2. Buka browser dan masukkan http://192.168.1.1 atau http://m.home Enter default Nama Pengguna: admin dan Kata Sandi: password untuk masuk. 3. Klik pojok kanan atas – Ubah Kata Sandi Masuk untuk mengubah kata sandi masuk default.
- Page 13 Pengaturan melalui halaman Web 4. Klik Pengaturan Wi-Fi untuk mengubah SSID dan kata sandi default.
- Page 14 Pengaturan melalui halaman Web 5. Pengaturan APN ( Jika APN kartu SIM tidak dapat ditemukan dengan Mode Otomatis). 1) Klik Network Settings 2) Pilih Mode to Manual 3) Klik tombol Add New untuk memasukkan pengaturan APN yang benar sesuai - Informasi APN harus tersedia di buklet itu disertakan dengan kartu SIM atau hubungi perusahaan telekomunikasi untuk memeriksanya.
- Page 15 Pengaturan melalui halaman Web 3) Ketuk “Enable Roaming” dan ketuk tombol “Apply”. 4) Mengaktifkan koneksi setelah Roaming Diaktifkan.
- Page 16 Register online for your Product Warranty at www.prolink2u.com Prolink is a registered trademark of Fida International (S) Pte Ltd. Other brands and product names are trademarks or registered trademarks of their respective holders. Product images are purely for illustrative purposes and may defer from the actual product.
Need help?
Do you have a question about the DL-7202 and is the answer not in the manual?
Questions and answers