
Related Manuals for VITRA Joyn 2 Platform


Summary of Contents for VITRA Joyn 2 Platform
- Page 1 Joyn 2 Platform Developed by Vitra in Switzerland Design: Ronan & Erwan Bouroullec Assembly instructions and instructions for use 2023, 62913815/B...
-
Page 2: Table Of Contents
CONTENTS Contents Notes............................... 3 Proper use ............................3 Explanation of symbols ....................... 3 Safety .............................. 4 Principle for assembly ........................5 Base assembly specifications ....................5 Specifications and restrictions for assembly and modification ........... 8 Requirements for an office desk ....................8 4.1.1 Full-fledged desk .......................... -
Page 3: Notes
NOTES Notes Please read these instructions carefully before use. Keep them in a safe place for later refer- ence. Assembly/dismantling may only be performed by qualified personnel. Check delivery is complete before assembly. Do not use parts that are not part of the system. Proper use The product has been designed for use as an table system. -
Page 4: Safety
SAFETY Safety CAUTION Risk of injury and material damage due to incorrect assembly/disassembly. The stability of the product is no longer guaranteed. ► Assembly/dismantling may only be performed by qualified personnel. CAUTION When moving the product, the following points must be strictly observed: ►... -
Page 5: Principle For Assembly
PRINCIPLE FOR ASSEMBLY Principle for assembly Base assembly specifications NOTE Observe the permissible distance between the double-leg section and the outer edge and between the double-leg sections. CAUTION If a platform has two different end plates, the intermediate table top must be at least 1400 mm in size. - Page 6 PRINCIPLE FOR ASSEMBLY NOTE The maximum distance between two cross-connectors is 2400 mm. If the distance exceeds 2400 mm, the other cross-connector must always be placed in the middle. NOTE A cross-connector must be mounted under each technical rail end and technical rail joint. Other cross-connectors that are required must be mounted as described.
- Page 7 PRINCIPLE FOR ASSEMBLY NOTE An additional base must be mounted under each table top joint (see diagram). NOTE An additional base must be mounted in the centre if the table top is larger than 1600 mm. 2023, 62913815/B 7/60...
-
Page 8: Specifications And Restrictions For Assembly And Modification
SPECIFICATIONS AND RESTRICTIONS FOR ASSEMBLY AND MODIFICATION Specifications and restrictions for assembly and modifica- tion Requirements for an office desk NOTE If the dimensions of a configuration are at least equal to the specified masses, then the requirements for an office desk according to EN527-1 are met. 4.1.1 Full-fledged desk 8/60 2023, 62913815/B... -
Page 9: Written Material On A Smaller Scale
SPECIFICATIONS AND RESTRICTIONS FOR ASSEMBLY AND MODIFICATION 4.1.2 Written material on a smaller scale 2023, 62913815/B 9/60... -
Page 10: Assembly
The assembly instructions and instructions for use is an important document that the user must observe. To assemble your Joyn 2 Platform, you will need the following tools and aids. 10/60 2023, 62913815/B... - Page 11 ASSEMBLY 2023, 62913815/B 11/60...
-
Page 12: Overview Of Assembly Sequence
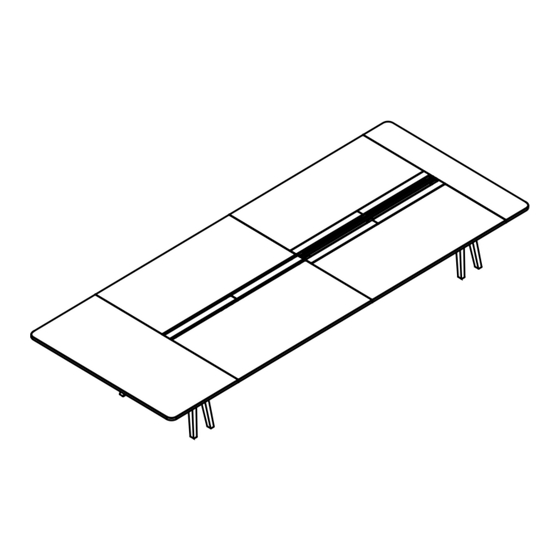
ASSEMBLY 5.2 Overview of assembly sequence Profile connectors Cross-connectors Trestle Base End cap Notes on mounting the cover Technical rail Table tops and end plates Cover Cable basket 12/60 2023, 62913815/B... - Page 13 ASSEMBLY 1. Profile connector 2023, 62913815/B 13/60...
- Page 14 ASSEMBLY 2. Cross connector 14/60 2023, 62913815/B...
- Page 15 ASSEMBLY 2023, 62913815/B 15/60...
- Page 16 ASSEMBLY 3. Trestle 16/60 2023, 62913815/B...
- Page 17 ASSEMBLY 4. Table top support 2023, 62913815/B 17/60...
- Page 18 ASSEMBLY NOTE The base must be mounted as follows: 1) under each butt joint. 2) in the middle of the table top, for table tops larger than 1600 mm. 18/60 2023, 62913815/B...
- Page 19 ASSEMBLY 5. End caps 2023, 62913815/B 19/60...
- Page 20 ASSEMBLY 6. Notes on mounting the cover NOTE Before installing the cover holders on the technical rail and the table top, the position of the individual covers must be noted. Accordingly, the holders must be pre-assembled. 20/60 2023, 62913815/B...
- Page 21 ASSEMBLY 7. Technical rail NOTE Before installing the technical rail, the holders for the covers must be mounted on the technical rail. See the following assembly step. The holders can be found in the cover packaging. 2023, 62913815/B 21/60...
- Page 22 ASSEMBLY 22/60 2023, 62913815/B...
- Page 23 ASSEMBLY NOTE Before installing the technical rail, a cross-connector must be mounted under each technical rail end and technical rail joint. See installation of the cross-connector in section 2 2023, 62913815/B 23/60...
- Page 24 ASSEMBLY 24/60 2023, 62913815/B...
- Page 25 ASSEMBLY 8. General assembly of table tops and end plates NOTE Before mounting the table top, gather together the following assembly materials from all the table top and end plate packages of your Joyn 2 Platform. 2023, 62913815/B 25/60...
- Page 26 ASSEMBLY NOTE If your Joyn 2 Platform has an end plate 80, the holders for the end plate 80 must be mounted before the table tops are fitted. 26/60 2023, 62913815/B...
- Page 27 ASSEMBLY NOTE Take note of assembly options A & B when assembling the table tops and end plates. 2023, 62913815/B 27/60...
- Page 28 ASSEMBLY 8. A Table top + end plate Melamine, veneer, HPL Version Version Version Gap without cover Gap with cover Technical rail with cover 28/60 2023, 62913815/B...
- Page 29 ASSEMBLY Version Version Gap with cover Technical rail with cover 2023, 62913815/B 29/60...
- Page 30 ASSEMBLY 30/60 2023, 62913815/B...
- Page 31 ASSEMBLY 2023, 62913815/B 31/60...
- Page 32 ASSEMBLY 32/60 2023, 62913815/B...
- Page 33 ASSEMBLY 2023, 62913815/B 33/60...
- Page 34 ASSEMBLY 34/60 2023, 62913815/B...
- Page 35 ASSEMBLY NOTE Base + clamping plate only required for table tops larger than 1600 mm. 2023, 62913815/B 35/60...
- Page 36 ASSEMBLY 36/60 2023, 62913815/B...
- Page 37 ASSEMBLY 8. B Meet table top + end plate Melamine, veneer, HPL 6x 6x "X" 1600m m "X" 1600m m "X" 1600m m "X" 1600m m M 6 x2 0 M 6 x2 0 M 6 x2 0 M 6 x2 0 2023, 62913815/B 37/60...
- Page 38 ASSEMBLY NOTE Steps 1 + 2 are only required for table top variant HPL. 38/60 2023, 62913815/B...
- Page 39 ASSEMBLY 2023, 62913815/B 39/60...
- Page 40 ASSEMBLY NOTE Assembly steps B+D are only required if the table top is larger than 1600 mm. NOTE The table top supports will not be fully assembled until all table tops and end plates 30/80 have been connected together. 40/60 2023, 62913815/B...
- Page 41 ASSEMBLY 2023, 62913815/B 41/60...
- Page 42 ASSEMBLY 42/60 2023, 62913815/B...
- Page 43 ASSEMBLY 2023, 62913815/B 43/60...
- Page 44 ASSEMBLY 44/60 2023, 62913815/B...
- Page 45 ASSEMBLY NOTE Base + clamping plate only required for table tops larger than 1600 mm. 2023, 62913815/B 45/60...
- Page 46 ASSEMBLY 46/60 2023, 62913815/B...
- Page 47 ASSEMBLY 8. C Table top/Meet table top + solid wood end plate 2023, 62913815/B 47/60...
- Page 48 ASSEMBLY 48/60 2023, 62913815/B...
- Page 49 ASSEMBLY 2023, 62913815/B 49/60...
- Page 50 ASSEMBLY 50/60 2023, 62913815/B...
- Page 51 ASSEMBLY NOTE Place all table tops and add-on table tops offset on the base. Connect the table tops and add-on table tops with the table top connectors and the Minifix connectors in ac- cordance with assembly A & B on page 27. Position the Lamello dowels as per the dia- gram.
- Page 52 ASSEMBLY NOTE Place all table tops and add-on table tops offset on the base. Connect the table tops and add-on table tops with the table top connectors and the Minifix connectors in ac- cordance with assembly A & B on page 27. Position the Lamello dowels as per the dia- gram.
- Page 53 ASSEMBLY NOTE Base + clamping plate only required for table tops larger than 1600 mm. 2023, 62913815/B 53/60...
- Page 54 ASSEMBLY 54/60 2023, 62913815/B...
- Page 55 ASSEMBLY 9. A Cover for gap 2023, 62913815/B 55/60...
- Page 56 ASSEMBLY 9. B Cover for technical rail 56/60 2023, 62913815/B...
- Page 57 ASSEMBLY 10. Cable basket NOTE If an electric socket is provided in the cable basket, it must be installed using instruction 62913762 before installing the cable basket. 2023, 62913815/B 57/60...
- Page 58 ASSEMBLY 58/60 2023, 62913815/B...
- Page 59 ASSEMBLY 2023, 62913815/B 59/60...
- Page 60 Vitra Factory GmbH Charles-Eames-Strasse 2 79576 Weil am Rhein Germany www.vitra.com...
Need help?
Do you have a question about the Joyn 2 Platform and is the answer not in the manual?
Questions and answers