Table of Contents
Advertisement
Available languages
Available languages
Quick Links
Advertisement
Chapters
Table of Contents

Related Manuals for UpLiving L22

Summary of Contents for UpLiving L22
- Page 1 L22 MINI LCD VIDEO PROJECTOR POWER YOUR LIFE...
-
Page 2: Table Of Contents
Info@UpLivingGoods.com (Dutch) INHOUD Note --------------------------------------------------------------------------------------------- 02 Accessoire Lijst -------------------------------------------------------------------------------- Veiligheidsmededelingen ------------------------------------------------------------------ Afstandsbediening --------------------------------------------------------------------------- Handleiding ------------------------------------------------------------------------------------ Optische Aanpassingen ---------------------------------------------------------------------- Verbindingen ---------------------------------------------------------------------------------- Menu-instellingen --------------------------------------------------------------------------- Screen Mirroring ------------------------------------------------------------------------------ Projector Installatie --------------------------------------------------------------------------- Technologische Kenmerken ----------------------------------------------------------------- - 01 -... -
Page 3: Note
Niet aanbevolen voor PowerPoint, Word, Excel of zakelijke presentaties. Gebruik de Wi-Fi functie voor schermspiegeling of gebruik een externe HDMI-adapter om de UpLiving mini projector met een tablet of smartphone te verbinden. Voor aansluiting van een HDMI-adapter, moeten Android telefoons MHL ondersteunen en is een MHL-naar-HDMI kabel vereist. -
Page 4: Accessoire Lijst
Info@UpLivingGoods.com Verklaring inzake blootstelling aan straling Deze apparatuur voldoet aan de FCC-limieten voor blootstelling aan straling die zijn opgesteld voor een ongecontroleerde omgeving. Deze apparatuur moet worden geïnstalleerd en bediend met een minimale afstand van 20 cm tussen de radiator en uw lichaam. Deze zender mag niet op dezelfde locatie worden geplaatst of gebruikt in combinatie met een andere antenne of zender. -
Page 5: Veiligheidsmededelingen
10. Gebruik het originele verpakkingsschuim of ander antischokmateriaal bij het verplaatsen van de projector. 11. Neem contact op met de UpLiving-klantenondersteuning als u problemen ondervindt met de projector. 12. Deze miniprojector wordt geleverd met een volledige garantie van 12 maanden. -
Page 6: Afstandsbediening
Info@UpLivingGoods.com AFSTANDSBEDIENING In / Uitschakelen Dempen Bron SoundBar-Functie Instellingen Pijltjestoetsen Home Menu Afsluiten 10. Volumetoets Voorzichtigheid × Dompel de afstandsbediening niet onder in water. × Plaats de afstandsbediening niet in de buurt van vuur of op natte / hete plaatsen. ×... -
Page 7: Handleiding
Info@UpLivingGoods.com Handleiding - 06 -... - Page 8 Info@UpLivingGoods.com 1. De projector op het lichtnet aansluiten. a. Sluit de stroomkabel aan op de projector. b. De projector geeft een indicatielampje weer wanneer deze op de voeding is aangesloten. - 07 -...
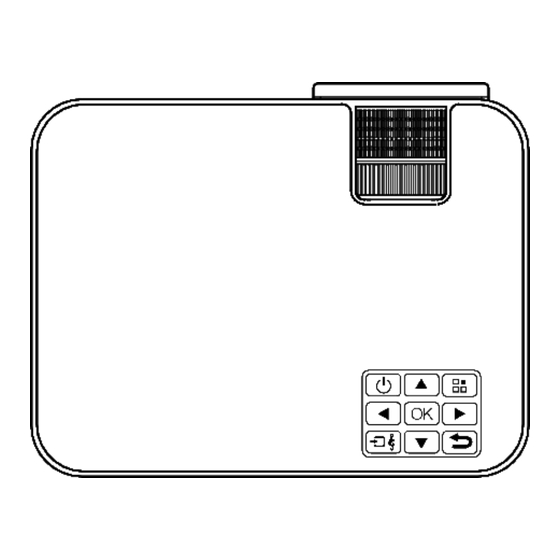
- Page 9 Info@UpLivingGoods.com 2. Inschakelen / Uitschakelen Druk op de “ ” knop op de beamer of op de afstandsbediening om de beamer aan te zetten. B e a m e r A f s t a n d s b e d i e n i n g - 08 -...
- Page 10 Info@UpLivingGoods.com 3. Multimedia-Opstartscherm Na 10-20 seconden wordt het multimediascherm weergegeven. 4. Focus & keystone-correctie a. Als het beeld wordt weergegeven als een trapeziumvorm, kunt u dit aanpassen met de keystone-correctiefunctie door op knop 3 te drukken. Dit zou het weergavebeeld moeten normaliseren. b.
-
Page 11: Optische Aanpassingen
Info@UpLivingGoods.com Optische aanpassingen De projector gebruikt een optische keystone-correctiefunctie, zodat het beeld als volgt kan worden aangepast: Deze projector heeft echter geen horizontale keystone-correctiefunctie. De projector moet horizontaal ten opzichte van het projectiescherm worden geplaatst. Als u het bovenstaande probleem tegenkomt, komt dat waarschijnlijk doordat de projector niet horizontaal ten opzichte van het projectiescherm is geplaatst, of doordat het projectiescherm niet verticaal is geplaatst. -
Page 12: Verbindingen
Info@UpLivingGoods.com Verbindingen Sluit meerdere apparaten en applicaties aan. - 11 -... - Page 13 Info@UpLivingGoods.com a. Steek de USB-stick in de USB-poort. b. Kies USB als bron in het menu. - 12 -...
- Page 14 Info@UpLivingGoods.com Ondersteunde multimedia indeling Geluidsbestand MP3/WMA/OGG/AAC/MA4/FLAC/APE/WAV Afbeeldingsbestand JPEG/BMP/PNG MPEG1, MPEG2, FLV, PMEG4, RM, AVI/RMVB, MOV, MKV, DIVX, FVOB M-JPEG (Alleen mogelijk op Multimedia Videobestand 640*480) Tekstbestand c. Kies de inhoud die u wilt weergeven: Video/muziek/foto’s/tekst d. Kies het bestand dat u wilt weergeven. Druk op “...
- Page 15 Info@UpLivingGoods.com 2. AV-video-aansluiting Gebruik een 3-in-1 AV-kabel om op de projector aan te sluiten, zoals hieronder weergegeven. Eenmaal aangesloten, selecteert u de AV- signaalbron. Ondersteunt NTSC/PAL - 14 -...
- Page 16 Info@UpLivingGoods.com 3. HDMI-aansluiting Gebruik de HDMI-sleuf om computers en HDMI-compatibele apparaten aan te sluiten. Eenmaal aangesloten, selecteert u de HDMI-signaalbron. Ondersteunde resoluties • • 576P • 800x600 1366x768 • • 480P • 1024x768 1920x1080 • • 720P • 1280x1024 1280x800 •...
- Page 17 Info@UpLivingGoods.com 4. 3,5 mm audio-aansluiting Gebruik de 3,5 mm audio-aansluiting om koptelefoons en luidsprekerapparatuur aan te sluiten. Opmerking: Deze projector ondersteunt geen Dolby-geluid. - 16 -...
-
Page 18: Menu-Instellingen
Info@UpLivingGoods.com Menu-instellingen 1. Gebruikershandleiding afstandsbediening Druk op de toets “ " om het hoofdmenu te openen en druk vervolgens op “ " om elk submenu te openen. Druk op “ " om het submenu te selecteren, pas vervolgens de parameters naar wens aan en druk op de “ OK " -toets om te bevestigen. 2. -
Page 19: Screen Mirroring
Info@UpLivingGoods.com Schermspiegeling 1. Selecteer Screen Mirroring in de lijst met invoerbronnen 2. Druk op de OK-toets om de interface te openen 3. Nadat u de interface heeft geopend, selecteert u de functie die u nodig hebt (Afbeelding 1) (Afbeelding 1) - 18 -... - Page 20 Info@UpLivingGoods.com a. Verbind de projector met de Wi-Fi router. Er zijn twee methoden om de projector te verbinden met een Wi-Fi-router. Methode 1: Maak verbinding met de Wi-Fi-router via het systeemmenu (1) Selecteer de functie instellingen “Setting” (2) Selecteer WiFi in het menu Systeeminstellingen (System Setup). De projector zal zoeken naar Wi-Fi in de buurt.
- Page 21 (1) Selecteer de iOS schermfunctie (2) Verbind uw smartphone of laptop met de Wi-Fi van de projector, bijvoorbeeld: UPLIVING-B09586, selecteer het en voer het wachtwoord 12345678 in, waarna de verbinding tot stand wordt gebracht. (3) Open de browser op uw smartphone of laptop, bezoek http://192.168.49.1...
- Page 22 (2) Schakel het WLAN in op het Android-apparaat (3) Start de functie Multi-screen / Wireless Display / Screen Mirroring / Smart View / Cast (Afbeelding 1) (4) Selecteer “UPLIVING-XXX” in de lijst met zoekresultaten (Afbeelding 2) (Afbeelding 2) (Afbeelding 1) Sommige Android-apparaten ondersteunen mogelijk geen schermspiegeling vanwege de compatibiliteit.
- Page 23 Info@UpLivingGoods.com Methode 2: Bekabelde verbinding (1) Selecteer Android Screen-functie (2) Zoek op uw Android-apparaat naar opties voor ontwikkelaars en schakel USB-foutopsporing in. (3) Verbind uw Android-apparaat met de OUT5V-poort van de projector met de ORIGINELE USB-kabel. (4) Voor de eerste keer verschijnt uw Android-apparaat onder het venster USB-foutopsporing toestaan”, selecteert u “Altijd toestaan vanaf deze computer”...
- Page 24 (1) De projector hoeft geen verbinding te maken met een WiFi-router (2) Selecteer de iOS-schermfunctie (3) Schakel Wi-Fi in op uw iOS-apparaat en zoek naar de netwerknaam van de projector, bijvoorbeeld: UPLIVING-B09586, selecteer het en voer het wachtwoord 12345678 in, waarna uw iOS-apparaat verbinding maakt met de projector.
- Page 25 Info@UpLivingGoods.com Methode 3: Wired connection (1) Selecteer de iOS schermfunctie (2) Sluit uw iOS-apparaat aan op de OUT5V-poort van de projector met de ORIGINELE USB-kabel (3) Voor de eerste keer zal uw iOS-apparaat een vertrouwensprompt laten zien (4) Bevestig “Vertrouwen”, waarna de schermreproductie zal starten d.
-
Page 26: Projector Installatie
Info@UpLivingGoods.com Raadpleeg het volgende diagram om de projector aan het plafond te bevestigen. Plaats de projector niet in de buurt van warmtebronnen om oververhitting van de projector te voorkomen. Bevestiging Plafond Zorg er bij plafondmontage van de projector voor dat schroeven van een geschikte kwaliteit worden gebruikt en dat de schroefdiepte diep genoeg is om te voorkomen dat de projector valt. -
Page 27: Technologische Kenmerken
Info@UpLivingGoods.com (1) Basisparameters Beeldtechnologie LTPS LCD Kleurweergave 16.7kk Handmatige Resolutie 1280*720 Keystone correctie ± 15 ° Hoogste Resolutie 1920*1080 Netspanning 100V-240V 50/60Hz Licht Geïntegreerde watt 65W (Max) Levensduur 50,000 uur Invoer USB/VGA/HDMI/AV Oortelefoon USB(5V- Lens Multichip gecoat Uitvoer 500MA) Speaker 50 3W Lens (F-135) Ondersteuning voor... - Page 28 Heel erg bedankt We zijn erg blij dat u ervoor heeft gekozen om de Mini LCD- videoprojector aan te schaffen. Bij UpLiving zijn we toegewijd om u producten te bieden die uw dagelijks leven verbeteren. We streven er ook naar om onze klanten uitstekende ondersteuning te bieden.
- Page 29 Voor meer informatie, bezoek onze website: UpLivingGoods _Official info@UpLivingGoods.com www.UpLivingGoods.com +31 6 45563132...
- Page 30 L22 MINI LCD VIDEO PROJECTOR POWER YOUR LIFE...
- Page 31 Info@UpLivingGoods.com TABLE OF CONTENTS Note --------------------------------------------------------------------------------------------- 02 Accessory List ---------------------------------------------------------------------------------- Security Notices ------------------------------------------------------------------------------ Remote control ------------------------------------------------------------------------------- Manual ------------------------------------------------------------------------------------------ Optical Adjustments -------------------------------------------------------------------------- Connections ----------------------------------------------------------------------------------- Menu Settings -------------------------------------------------------------------------------- Screen Mirroring ------------------------------------------------------------------------------ Projector Installation ------------------------------------------------------------------------- Technological Features ----------------------------------------------------------------------- - 01 -...
-
Page 32: Note
Use the Wi-Fi function for screen mirroring or use an external HDMI adapter to connect the UpLiving mini projector to a tablet or smartphone. To connect an HDMI adapter, Android phones must support MHL and an MHL-to-HDMI cable is required. For iPhone and iPad devices, a lighting to HDMI cable adapter is required. -
Page 33: Accessory List
Info@UpLivingGoods.com Radiation Exposure Statement This equipment complies with FCC radiation exposure limits set forth for an uncontrolled environment. This equipment must be installed and operated with a minimum distance of 20 cm between the radiator and your body. This transmitter must not be co-located or operating in conjunction with any other antenna or transmitter. -
Page 34: Security Notices
10. Use the original packing foam or other anti-shock material when moving the projector. 11. Contact UpLiving Customer Support if you experience any problems with the projector. 12. This mini projector comes with a full 12 month warranty. -
Page 35: Remote Control
Info@UpLivingGoods.com REMOTE CONTROL Turn on / off Mute Source SoundBar Function Settings Arrow Keys Home Menu Exit 10. Volume key Caution × Do not immerse the remote control in water. × Do not place the remote control near fire or in wet/hot places. ×... -
Page 36: Manual
Info@UpLivingGoods.com Manual - 06 -... - Page 37 Info@UpLivingGoods.com 1. Connect the projector to the mains. a. Connect the power cable to the projector. b. The projector displays an indicator light when connected to power.
- Page 38 Info@UpLivingGoods.com 2. Turn On / Off Press the “ ” button on the projector or on the remote control to turn on the projector. B e a m e r R E M O T E C O N T R O L - 08 -...
- Page 39 Info@UpLivingGoods.com 3. 3. Multimedia Boot Screen After 10-20 seconds, the multimedia screen will be displayed. 4. 4. Focus & Keystone Correction a. If the image is displayed as a trapezoidal shape, you can adjust it with the keystone correction function by pressing button 3. This should normalize the display image.
-
Page 40: Optical Adjustments
Info@UpLivingGoods.com Optical Adjustments The projector uses an optical keystone correction function to adjust the image as follows: However, this projector does not have a horizontal keystone correction function. The projector should be placed horizontally to the projection screen. If you encounter the above problem, it is probably because the projector is not placed horizontally to the projection screen, or the projection screen is not placed vertically. -
Page 41: Connections
Info@UpLivingGoods.com Connections Connect multiple devices and applications. - Page 42 Info@UpLivingGoods.com 1. Play media from a USB a. Plug the USB stick into the USB port. b. Choose USB as source from the menu.
- Page 43 Info@UpLivingGoods.com Supported multimedia format Sound file MP3/WMA/OGG/AAC/MA4/FLAC/APE/WAV Image file JPEG/BMP/PNG MPEG1, MPEG2, FLV, PMEG4, RM, AVI/RMVB, MOV, MKV, DIVX, FVOB M-JPEG (Only available for 640*480) Multimedia Video file Text file Choose the content you want to display: Video/Music/Photos/Text c. Choose the file you want to view. Press “...
- Page 44 Info@UpLivingGoods.com 2. AV-video connection Use a 3-in-1 AV cable to connect to the projector as shown below. Once connected, select the AV signal source. Supports NTSC/PAL...
- Page 45 Info@UpLivingGoods.com 3. HDMI-connection Use the HDMI slot to connect computers and HDMI-compatible devices. Once connected, select the HDMI signal source. Supported Resolutions • • • 576P 800x600 1366x768 • • 480P • 1024x768 1920x1080 • • 720P • 1280x1024 1280x800 •...
- Page 46 Info@UpLivingGoods.com 4. 3.5mm audio jack Use the 3.5mm audio jack to connect headphones and speaker equipment. Note: This projector does not support Dolby sound.
-
Page 47: Menu Settings
Info@UpLivingGoods.com Menu settings 1. Remote Control User Manual Press the button “ " to enter the main menu, then press “ " to enter each submenu. Press. “ " to select the submenu, then adjust the parameters as you want and press the “OK” button to confirm. 2. -
Page 48: Screen Mirroring
Info@UpLivingGoods.com Screen mirroring 1. Select Screen Mirroring from the input source list 2. Press the OK key to enter the interface 3. After entering the interface, select the function you need (Figure 1) (Image 1) - Page 49 Info@UpLivingGoods.com a. Connect the projector to the Wi-Fi router. There are two methods to connect the projector to a Wi-Fi router. Method 1: Connect to the Wi-Fi router from the system menu (1) Select the function settings “Setting” (2) Select WiFi from the System Setup menu. The projector will search for nearby Wi-Fi.
- Page 50 (1) Select the iOS screen function (2) Connect your smartphone or laptop to the projector's Wi-Fi, for example: UPLIVING-B09586, select it and enter the password 12345678, then the connection will be established. (3) Open the browser on your smartphone or laptop, visit http://192.168.49.1 and you will see the projector configuration...
- Page 51 (2) Enable the WLAN on the Android device (3) Start the Multi-screen / Wireless Display / Screen Mirroring / Smart View / Cast function (Figure 1) (4) Select “UPLIVING-XXX” from the search results list (Figure 2) (Image 2) (Image 1) Some Android devices may not support screen mirroring due to compatibility.
- Page 52 Info@UpLivingGoods.com Method 2: Wired Connection (1) Select Android Screen function (2) Search your Android device for developer options and enable USB debugging. (3) Connect your Android device to the OUT5V port of the projector with the ORIGINAL USB cable. (4) For the first time, your Android device will appear under the Allow USB Debugging window”, select “Always allow from this computer”...
- Page 53 (2) Select the iOS screen function (3) Enable Wi-Fi on your iOS device and search for the network name of the projector, for example: UPLIVING-B09586, select it and enter the password 12345678, then your iOS device will connect to the projector.
- Page 54 Info@UpLivingGoods.com Method 3: Wired connection (1) Select the iOS screen function (2) Connect your iOS device to the OUT5V port of the projector with the ORIGINAL USB cable (3) For the first time, your iOS device will show a trust prompt (4) Confirm “Trust”, then the screen mirroring will start d.
-
Page 55: Projector Installation
Info@UpLivingGoods.com Technological Features Refer to the following diagram to mount the projector on the ceiling. Do not place the projector near heat sources to avoid overheating the projector. Montage When mounting the projector in the ceiling, make sure that suitable quality screws are used and that the screw depth is deep enough to prevent the projector from falling. - Page 56 Info@UpLivingGoods.com PROJECTOR INSTALATION (1) Basic Parameters Screen technology LTPS LCD Rendering 16.7kk Manual Resolution 1280*720 Keystone correction ± 15 ° Highest Resolution 1920*1080 Voltage 100V-240V 50/60Hz Light Integrated watt 65W (Max) Lifetime 50,000 hours Input USB/VGA/HDMI/AV Earphone USB(5V- Lens Multi-chip coated Output 500MA) Speaker...
- Page 57 Thank you very much We are very pleased that you have chosen to purchase the Mini LCD Video Projector. At UpLiving, we are committed to bringing you products that improve your everyday life. We also strive to provide excellent support to our customers. If you have any...
- Page 58 For more information, visit our website: UpLivingGoods_Official info@UpLivingGoods.com www.UpLivingGoods.com +31 6 45563132...
Need help?
Do you have a question about the L22 and is the answer not in the manual?
Questions and answers