
Related Manuals for Hisense HMAS4211BMV


Summary of Contents for Hisense HMAS4211BMV
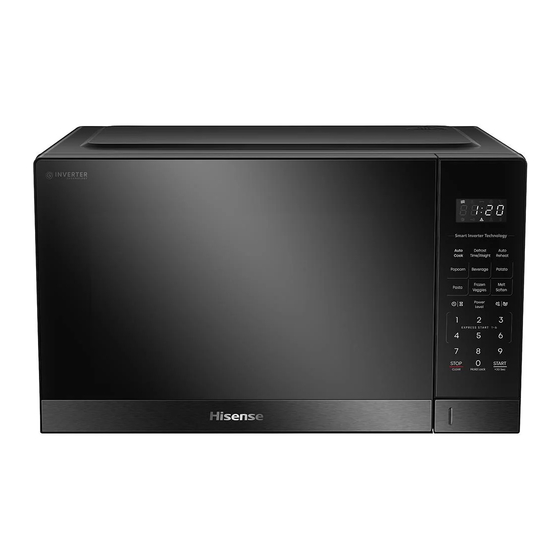
- Page 1 User and Installation Manua l Microwave Oven Model: HMAS4211BMV HMAS4211WMV HMAS4211SSV HMAS4211DSV Before installing or using the appliance, please read the manual carefully, and keep it for future reference.
-
Page 3: Table Of Contents
Table of Contents PRECAUTIONS TO AVOID POSSIBLE EXPOSURE TO EXCESSIVE MICROWAVE ENERGY ................4 IMPORTANT SAFETY INSTRUCTIONS ............5 CLEANING INSTRUCTIONS ................. 8 SETTING UP YOUR OVEN ................10 CONTROL PANEL ..................12 OPERATION INSTRUCTIONS ..............13 UTENSILS GUIDELINE ................22 COOKING TIPS ..................... -
Page 4: Precautions To Avoid Possible Exposure To Excessive Microwave Energy
(2) HINGES AND LATCHES (broken or loosened) (3) DOOR SEALS AND SEALING SURFACES (d) The oven should not be adjust ed or repaired by anyone except properly qualified service personnel. Product Specification HMAS4211BMV HMAS4211WMV Model Number HMAS4211SSV HMAS4211DSV Rate Voltage... -
Page 5: Important Safety Instructions
IMPORTANT SAFETY INSTRUCTIONS WARNING: If the door or door seals are damaged, the oven must not be operated until it has been repaired by a trained person. WARNING: It is hazardous for anyone other than a trained person to carry out any service or repair operation, which involves the removal of any cover, which gives protection against exposure to microwave energy. - Page 6 7. Eggs in their shell and whole hard-boiled eggs shall not be heated in microwave ovens since they may explode, even after microwave heating has ended. 8. Failure to maintain the oven in a clean condition could lead to deterioration of the surface that could adversely affect the life of the appliance and possibly result in a hazardous situation.
- Page 7 13. If the supply cord is damaged, it must be replaced by the manufacturer or its service agent or a similarly qualified person in order to avoid a hazard. 14. This appliance can be used by children aged from 8 years and above and persons with reduced physical, sensory or mental capabilities or lack of experience and knowledge if they have been given supervision or...
-
Page 8: Cleaning Instructions
CLEANING INSTRUCTIONS MICROWAVE OVEN CARE The oven should be cleaned regularly and any food deposits removed. a. Remove the power cord from the wall outlet before cleaning. After cooling products. Don't immerse the appliance in water or other fluids when cleaning. b. - Page 9 Details how to clean surfaces in contact with food: After use wipe the waveguide cover with a damp cloth, followed by dry cloth to remove any food splashes and grease. Built -up grease may overheat and begin to cause smoke or catch fire. TIPS FOR CLEANING Details for cleaning door seals, cavity and adjacent parts: Exterior:...
-
Page 10: Setting Up Your Oven
SETTING UP YOUR OVEN Names of Oven Parts and Accessories Remove the oven and all materials from the carton and oven cavity. Your oven comes with the following accessories: Glass tray Turntable ring assembly Instruction Manual A) Control panel B) Turntable shaft C) Turntable ring assembly D) Glass tray E) Observation window... - Page 11 Countertop Installation Remove all packing material and accessories. Cabinet: Remove any protective film found Examine the oven for any damage such as on the microwave oven cabinet surface. dents or broken door. Do not install if oven is Do not remove the light brown Mica cover damaged.
-
Page 12: Control Panel
Control Panel Auto Cook Use to set the automatic cook programs (See Page 18). TIME / WEIGHT DEFORST Press once to set defrost program based on time (See Page14). Press twice to set defrost program based on weight (See Page 15). -
Page 13: Operation Instructions
1. FIRST TIME USE If you are using your microwave oven for the first time, please be sure to: Clean the glass turntable with hot water, a small amount of dishwashing liquid and a nonabrasive cleaning pad. Do not immerse the body of the unit in water. When you plug in the unit, the display will show “1:00". - Page 14 100% (Applicable for quick and HIGH power output thorough cooking) (Applicable medium M.High power output express cooking) (Applicable steaming power output food) (Applicable defrosting M.Low power output food) (Applicable keeping power output warm) a. The max time which can be set is 99 minutes and 99 seconds.
- Page 15 The maximum time that can input is 99:99. Or after selecting dEF1, dEF2, or dEF3 for defrosting, press the number buttons to set the defrosting weight within the range of 100-1500g. After entering the cooking weight or time, press the “START/+30s” button start to work.
- Page 16 3. Preset Menu There are five automatic menus, potato, pasta, popcorn, frozen vegetable and beverage respectively. Select the desired menu. Press the corresponding button which to be selected continuously to select the desired food weight, and the display shows the corresponding weight.
- Page 17 4. CLOCK/TIMER 4.1 CLOCK (24-hour clock) In standby mode, press and hold down this button to enter the setting interface, and press this button to select 24-hour or 12 hour clock. Press the "START/+30s" button again to confirm the clock system and enter the clock setting. Press the 0 ~ 9 number buttons to input the time.
- Page 18 size is displayed on the display screen. After select the weight, press “START/+30s” button to start work, an buzzing sound to notify completion of the operation. Display Food Weight Range The optional weights are 50g, 100g, 150g AH-1 Bread and 200g. The optional weights are 200g, 300g, AH-2 Pizza...
- Page 19 After select the weight, press “START/+30s” button to start work, an buzzing sound to notify completion of the operation. Display Food Weight Range The optional weight are 1 pcs, 2 pcs and AC-1 Meat Pie 3 pcs. Frozen The optional weights are 200g, 300g, AC-2 400g and 500g.
- Page 20 corresponding portion size will be displayed on the display screen. After select the weight, press “START/+30s” button to start work, an buzzing sound to notify completion of the operation. Display Food Weight Range The optional weights are 100g, 200g, So-1 Chocolate 300g and 400g.
- Page 21 9. EXPRESS START 9.1 1-6 NUMBER PAD In standby mode, you can directly press the 1~6 number buttons to start the microwave. The working time is 1~6 minutes, that is, press 1 to work for 1 minute, press 2 to work for 2 minutes, and so 9.2 STRAT/+30SEC In standby mode, after the food is put in and the door is closed, press the "START/+30s"...
-
Page 22: Utensils Guideline
UTENSILS GUIDELINE It is strongly recommended to use the containers which are suitable and safe for microwave cooking. Generally speaking, the containers which are made of heat-resistant ceramic, glass or plastic are suitable for microwave cooking. Never use the metal containers for microwave cooking and combination cooking as spark is likely to occur. -
Page 23: Cooking Tips
COOKING TIPS The following factors may affect the cooking result: Food arrangement Place thicker areas towards outside of dish, the thinner part towards the centre and spread it evenly. Do not overlap if possible. Cooking time length Start cooking with a short time setting, evaluate it after it times out and extend it according to the actual need. -
Page 24: Maintenance Instructions
Microwave safe plastic wrap When cooking food with high fat content, do not allow the plastic wrap come into contact with food as it may melt Microwave safe plastic cookware Some microwave safe plastic cookware might not be suitable for cooking foods with high fat and sugar content. - Page 25 (use a screwdriver) to discharge before touching. 2. During servicing below listed parts are liable to be removed and give access to potentials above 250V to earth. ● Magnetron ● High voltage transformer ● High voltage capacitor ● High voltage diode ●...
-
Page 26: Trouble Shooting Guide
TROUBLE SHOOTING GUIDE Error Code Failure Mode Action Undervoltage First confirm that the startup voltage is within the rated voltage fault range, if check there is no circuit faults also, pls contact customer service for assistance. Overvoltage fault Unplug the oven and allow it to cool. Recommend waiting at least 30 minutes and listen for the fan.
Need help?
Do you have a question about the HMAS4211BMV and is the answer not in the manual?
Questions and answers
I cannot set the clock up
To set the clock on a Hisense HMAS4211BMV:
1. In standby mode, press and hold the CLOCK/TIMER button to enter the setting interface.
2. Press the same button to choose between 24-hour or 12-hour format.
3. Press the "START/+30s" button to confirm the clock system.
4. Use the number buttons (0–9) to input the time.
5. Press the "START/+30s" button again to confirm and exit clock setting mode.
This answer is automatically generated