
Related Manuals for Hytera PDC680


Summary of Contents for Hytera PDC680
- Page 1 PDC680 Multi-mode Advanced Radio User Manual Hytera Communications Corporation Limited...
- Page 2 Preface Welcome to the world of Hytera and thank you for purchasing this product. This manual includes a description of the functions and step-by-step procedures for use. To avoid bodily injury or property loss caused by incorrect operation, please carefully read the Safety Information Booklet before use.
-
Page 3: Table Of Contents
Contents Documentation Information ........................1 1. Packing List ............................3 2. Product Layout ........................... 4 3. Before Use ............................5 3.1 Attaching the Antenna ........................5 3.2 Installing the Cards ......................... 5 3.3 Attaching the Belt Clip ........................6 3.4 Attaching the Battery ........................7 3.5 Charging the Battery ........................ - Page 4 6.5 Managing the App Center ......................20 6.6 Viewing the Notifications ....................... 20 6.7 Inverting the Top Screen ....................... 21 6.8 Switching Between Sleep and Wake Mode .................. 21 6.9 Locking or Unlocking the Screen ....................21 6.9.1 Setting the Screen Lock Type ..................... 21 6.9.2 Setting the Screen Lock Range ..................
- Page 5 8.1.12 Call Queuing ........................34 8.1.13 Call on Analog Channel ....................34 8.1.14 TOT ........................... 34 8.2 RoIP Call ............................34 8.2.1 Voice Call ..........................34 8.2.2 Video Call ........................... 34 8.3 Phone Call ............................ 35 8.3.1 Initiating a Phone Call ......................35 8.3.2 Receiving or Declining a Phone Call ...................
- Page 6 11.4.3 Tethering and Portable Hotspot ..................46 11.5 BT ............................... 46 11.5.1 Pairing a BT Device ......................46 11.5.2 BT Location ........................47 11.5.3 Sending and Receiving Files ..................... 47 11.6 NFC ............................47 11.7 Airplane Mode ..........................48 11.8 VPN ............................48 12.
- Page 7 14.4.1 Setting Auto Start Upon Power-On ................... 58 14.4.2 Setting the Network Permission of Apps ................58 14.5 Camera ............................58 14.5.1 Taking Photos ........................58 14.5.2 Recording Videos ......................59 14.5.3 Adjusting the Focus ......................59 14.5.4 Setting the Camera ......................59 14.6 Photos ............................
- Page 8 15. Personalization ..........................69 15.1 Display ............................69 15.2 Audio Profile ..........................69 15.3 Languages and Input ........................70 15.4 Date and Time ..........................70 15.4.1 Selecting Reference Clock ....................70 15.4.2 Setting Time Format ......................71 15.4.3 Selecting Time Zone ......................71 15.5 Glove Mode ..........................
- Page 9 21.2 Disclaimer ........................... 88 21.3 FCC Statement ........................... 88 21.4 Compliance with RF Exposure Standards .................. 89 21.5 RF Exposure Compliance and Control Guidelines and Operating Instructions ......89 21.6 IC Statement ..........................90 21.7 EU Regulatory Conformance ...................... 90 22.
-
Page 10: Documentation Information
Documentation Information Icon Conventions Icon Description Indicates references that can further describe the related topics. Indicates situations that could cause data loss or equipment damage. Notation Conventions Item Description Example To save the configuration, click Apply. Denotes menus, tabs, parameter names, Boldface window names,... - Page 11 Main Screen Operations Operation Illustration Description Example Touch an item once with your finger. to open the Camera app. Touch an item with your finger and Touch and hold Touch and hold until it jiggles. maintain contact. Swipe down from the top edge of any Swipe Swipe your finger across the screen.
-
Page 12: Packing List
1. Packing List Please unpack carefully and check that you have received the following items. If any item is missing or damaged, contact your dealer. Item Quantity (PCS) Item Quantity (PCS) Radio Strap Battery Belt Clip Antenna Color Ring Charger Documentation Kit Power Adapter ... -
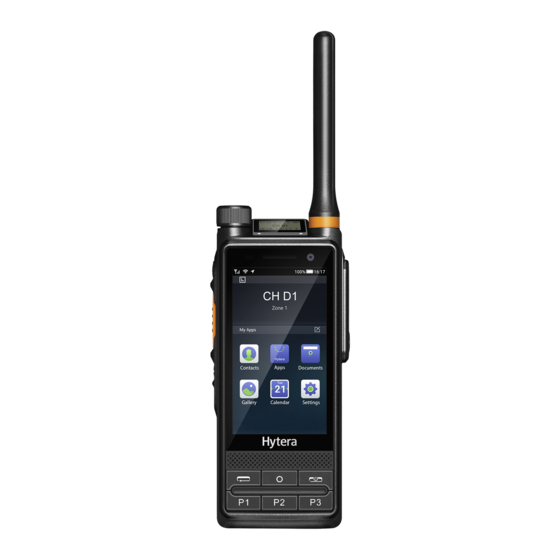
Page 13: Product Layout
2. Product Layout... -
Page 14: Before Use
3. Before Use 3.1 Attaching the Antenna Do not hold the radio by the antenna and swing it. This may affect the antenna performance and shorten the life span of the antenna. (Optional) Put the color ring (for identification) on the antenna connector. Put the antenna on the antenna connector. -
Page 15: Attaching The Belt Clip
3.3 Attaching the Belt Clip Align the holder on the belt clip with the grooves on the battery. Press the belt clip downwards into place. You can press and hold the belt clip spring plate and push the belt clip upwards to remove it. -
Page 16: Attaching The Battery
3.4 Attaching the Battery Use the approved battery to avoid the risk of explosion. Dispose of the used battery according to "Precautions for Disposal" in the Safety Information Booklet. Slide the battery into the slot. Press the battery latch until it is fully fitted into the radio. 3.5 Charging the Battery ... -
Page 17: Battery
4. Battery 4.1 Viewing the Remaining Battery Power Tap Battery. Enable Battery percentage. The percentage of the remaining battery power is shown in the status bar. 4.2 Enabling the Power Saving Mode To enable the power saving mode, do either of the following: ... -
Page 18: Basic Operations
5. Basic Operations 5.1 Turning On or Off the Radio To turn on the radio, long press until the startup screen appears. To turn off the radio, long press , and then select Power off. 5.2 Using the SIM Cards 5.2.1 Enabling or Disabling the SIM Cards Go to Network &... -
Page 19: Switching Between Ring Mode And Silent Mode
To adjust the volume singly of ring, call, or media, disable Volume control, and then go to Sound > Volume adjustment default control, and then select Ring, Call, or Media. Method 2 Rotate the Smart Knob, and then tap on the main screen. -
Page 20: Switching The Channel Or Contact
5.4 Switching the Channel or Contact Method 1 To switch the channel or contact, press the Smart Knob, and then rotate the knob within 5s. If you do not rotate the Smart Knob within 5s, or if you press it again within 5s, you can rotate it to adjust the volume only. -
Page 21: Setting The Programmable Keys
Tap System. Go to Language & input > Virtual keyboard > Gboard. Set the languages, preferences, theme, text correction, glide typing, voice typing, and more advanced settings. 5.8 Setting the Programmable Keys The programmable keys make your operations convenient. , and then tap Programmable keys. Program the TK, SK2, SK3, P1, P2, P3 keys with functions shown in the following table and set the key operation modes to "short press", "long press", or "double press". - Page 22 Option Description programmed and configured. It allows you to switch the registration strategies over PMR network and RoIP Voice registration network. Home Group Switch It allows you to enable or disable the Video Call feature. With the Video Call feature enabled, if the voice registration is set to Video Call narrowband voice only, you can still make a video call.
- Page 23 Option Description Emergency on It allows you to initiate an emergency alarm service. Emergency off It allows you to end the emergency alarm service. Man down It allows you to enable or disable the Man Down feature. Secure Lone worker It allows you to enable or disable the Lone Worker feature.
-
Page 24: Checking The Device Information
To view the legal info, do the following: In the Device info interface, tap Legal information. You can view the Hytera software license, Hytera privacy policy, Hytera version declare, third-party licenses, and system WebView licenses. -
Page 25: Checking The Radio Information
5.9.2 Checking the Radio Information Tap Radio information. You can view network, PMR number, frequency, and power level. 5.9.3 Viewing the Broadband Network Information In the right lower corner, tap Enter "*#*#0328#*#*". 5.10 Connecting to the PC Connect the radio to the PC through the USB data cable. On the main screen, swipe down from the top. -
Page 26: Screens
6. Screens Do not hit or scrape the screen with hard or sharp objects. Otherwise, the screen may be damaged. Do not drop the radio. Otherwise, the screen may be cracked. 6.1 Understanding the Home Screens 6.2 Understanding the LCD Icons Type Top Screen Main Screen... - Page 27 Type Top Screen Main Screen Radio Status The radio has not registered with the broadband network. The radio operates in airplane mode. The WLAN hotspot is enabled. The RoIP network is enabled, and the radio has registered voice services in the broadband network. The RoIP network is enabled, and the radio has registered video services in the broadband network.
-
Page 28: Managing The Widgets
Type Top Screen Main Screen Radio Status The radio stays on an active channel. The radio stays on Priority Channel 1. The radio stays on Priority Channel 2. The End-to-End Encryption (E2EE) feature is enabled. The Over the Air Encrypt feature is enabled. The Monitor feature is enabled. -
Page 29: Managing The Control And Notification Center
To add or delete widgets, tap the enable/disable toggle. To manage the Shortcuts widget, do any of the following: To quickly access features, tap the feature icons. To add or delete displayed features, tap Edit. 6.4 Managing the Control and Notification Center The control and notification center allows you to access system functions and view notifications. -
Page 30: Inverting The Top Screen
Select an app. Tap Notifications. Enable Show notifications, and then change the display mode. 6.7 Inverting the Top Screen You can change the orientation of the top screen for clear and fast access to the information. Do either of the following. -
Page 31: Setting The Screen Lock Range
6.9.2 Setting the Screen Lock Range Go to Security > Lock screen operation restrictions. Do any of the following: Enable Sync lock Control Center. The radio locks the control and notification center when the screen is locked. Enable Keys work when broadband off. You can use the Smart Knob, the PTT key, SK2, SK3, and TK when the screen is locked with the broadband off. -
Page 32: Contacts
7. Contacts Contacts include PMR contacts and phone contacts. You can view and manage contacts. You can add, edit, and delete phone contacts and PMR private/PSTN/PABX contacts only. 7.1 PMR Contacts 7.1.1 Searching for a Contact Tap Contacts. In the search box, enter the name or radio ID of the contact. The radio displays the search results below the search box. -
Page 33: Editing Or Deleting A Contact
Auto Adding Tap Talker alias, and then enable Auto-add contacts. If the caller has enabled the Send Talker alias feature, your radio will automatically add the caller to the contact list. 7.1.5 Editing or Deleting a Contact Tap Contacts. Tap the contact, and then tap Do either of the following: ... -
Page 34: Phone Contacts
b. Tap Subgroup In trunking mode, a subgroup consists of multiple groups or private contacts. To switch the contact, do as follows: Tap Subgroups. Tap the subgroup. on the right side of the contact to set it as the current contact. 7.2 Phone Contacts 7.2.1 Searching for a Contact In the search box, enter the contact name or other related information. -
Page 35: Adding A Contact
7.2.4 Adding a Contact Through the Contacts App Set the contact information including avatar, name, phone number, and email address. Tap Save. Through the Call App Do any of the following: Go to Contacts > Create new contact. Tap Recents, tap a phone number, and then select Add contact. -
Page 36: Calls
8. Calls 8.1 PMR Calls In trunking mode, if the radio is not registered or attached, you cannot initiate a call. In trunking mode, you can initiate a call by entering an ID complying with the dialing rules. For details, consult your dealer. -
Page 37: Private Call
8.1.1.2 Receiving a Group Call You can answer a group call without any operation. 8.1.1.3 Ending a Group Call Conventional Mode A group call automatically ends when the call hang time expires. Trunking Mode A group call ends in one of the following cases: ... -
Page 38: All Call
Go to Contacts > Private, and then tap a private contact. Press and hold the PTT key, or tap Through One Touch Call With the One Touch Call feature enabled, do either of the following: In conventional mode, press the preprogrammed One touch call/msg key, and then press the PTT key. ... - Page 39 Trunking Mode An all call is a call from an individual user to all the other users within a specific BS, area, or system. The all call can be either of the following types: Broadcast All Call: Only the calling radio can transmit voice. ...
-
Page 40: Broadcast Call (Trunking Only)
The preset transmission time of the calling party expires. The call duration exceeds the preset time. The BS signal is lost. With the Clear Down feature enabled, the calling party changes the contact. 8.1.4 Broadcast Call (Trunking Only) A broadcast call is a special group call. -
Page 41: Include Call (Trunking Only)
8.1.5.1 Initiating a PSTN/PABX Call Through Contact List Go to Contacts > Private. Tap the PSTN/PABX contact. Press the PTT key. Through Manual Dialing On the dialpad, enter the PSTN/PABX ID complying with the dialing rules. , and then tap PSTN or PABX. Press the PTT key. -
Page 42: Dgna (Trunking Only)
8.1.7 DGNA (Trunking Only) The Dynamic Group Number Assignment (DGNA) feature allows you to initiate a call to or receive a call from a dynamic group temporarily created by a dispatch station. The created dynamic group is saved in a dynamic group list on the radio. -
Page 43: Call Queuing
8.1.12 Call Queuing When all channels of the trunking system are busy, the call initiated by the radio will be placed in a queue. After a channel becomes idle and the trunking system allocates the channel to the call, the call can be established. During queuing, both the top screen and the main screen display "Call queued". -
Page 44: Phone Call
Through Conversation , and then tap Conversation. , and then tap New Conversation. Do either of the following: Tap the To field to enter the contact ID. to select the contact from the contact list. , and then tap Video Call. 8.2.2.2 Ending a Video Call or press 8.3 Phone Call... -
Page 45: Ending A Phone Call
8.3.3 Ending a Phone Call To end a phone call, tap or press... -
Page 46: Messages
9. Messages 9.1 PMR Messages You can send text messages or status messages. A status message is a predefined code that transfers the message content. 9.1.1 Sending a Message To enter the message editing interface, do either of the following: ... -
Page 47: Managing Message Text
To pin the conversation to the top, touch and hold it, and then select Stick. To delete the conversation, touch and hold it, and then select Delete. Tap a conversation, and then tap In the Session information interface, do any of the following: ... -
Page 48: Searching For The Message
Tap the Text message field, and then enter the content. To send a picture, tap To send emoji, location, audio, or files, tap Through the Contacts App Tap the phone contact in the contact list. In the contact details interface, tap Edit and send the message. - Page 49 Tap the conversation. Long press the message text, and then do any of the following: To copy and paste the text message, tap To delete the text message, tap...
-
Page 50: Audio And Call Settings
10. Audio and Call Settings 10.1 Three-Band Equalization The Three-Band Equalization feature allows the radio to balance frequency components of the audio signal upon receiving voice. This optimizes the quality of the received voice to meet user demands in different scenarios. You can select different three-band equalization modes when the radio outputs audio through a speaker or an audio accessory. -
Page 51: Call Recording
In the call panel, tap (speaker), (earphone), or (BT device). Press the pre-programmed Switch audio path key. 10.4 Call Recording You can record the current or all calls. The recorded audio files are stored to the path of recorder files. ... -
Page 52: Soft Ptt Key
Tap TX power, and then tap High or Low. 10.7 Soft PTT Key To enable or disable this feature, tap and then tap Soft PTT button. With the feature enabled, you can see in the call panel. -
Page 53: Connectivity
11. Connectivity 11.1 PMR Network After the radio is connected to the PMR network, you can access PMR services. To enable the PMR network, do either of the following: , and then enable Narrowband. Swipe down from the top to enter the control and notification center, and then tap 11.2 RoIP Network In trunking mode, after registering in the Radio over IP (RoIP) network, the radio automatically switches between the broadband and narrowband networks according to the network signal. -
Page 54: Monitoring Or Limiting The Data Usage
To enable the Voice over LTE (VoLTE) feature, go to Advanced > Enhanced 4G LTE Mode. This feature allows the radio to use LTE services to improve voice communications. 11.3.3 Monitoring or Limiting the Data Usage Tap Network & internet, and then tap Mobile Network Settings. Tap Data usage. -
Page 55: Tethering And Portable Hotspot
To automatically enable WLAN, tap WLAN preferences, and then enable Turn on WLAN automatically. To receive a notification when a WLAN network is available, tap WLAN preferences, and then enable Open network notification. To view WLAN traffic usage in total or of each app, tap WLAN data usage. 11.4.3 Tethering and Portable Hotspot The Tethering &... -
Page 56: Bt Location
FORGET to cancel the paired device. 11.5.2 BT Location The BT Location feature is an indoor positioning technology. After detecting the beacon information broadcast by the BT beacon, the radio sends the location information to the BT location data center through the public network. With the BT feature enabled, tap Go to Connected devices >... -
Page 57: Airplane Mode
11.7 Airplane Mode When you are on an airplane or in an area with radio restrictions, you may be required to make the radio enter the airplane mode. In airplane mode, you cannot use voice or data services. However, you can use services over WLAN network or BT, initiate narrowband services, and use apps that require no cellular data connection. -
Page 58: Location
12. Location 12.1 Enabling the Location Services The location service allows the radio to determine its location information with WLAN, cellular network, BT, and GPS. Tap Location, and then enable Use location. (Optional) To enable or disable the app's permission to access the location information, do as follows: Tap App permission, and then tap the app. -
Page 59: Safety And Security
13. Safety and Security 13.1 Emergency Phone Call If the radio is within the network coverage of the carrier, you can initiate an emergency phone call even without the SIM card installed. Do either of the following: On the unlocked main screen, tap >... -
Page 60: Initiating An Emergency Alarm Service
13.2.2 Initiating an Emergency Alarm Service With the Emergency feature enabled by your dealer, you can press the preprogrammed Emergency on key (short press TK by default) to initiate an emergency alarm service. If the Alarm w/Call To Follow feature is enabled by your dealer, you can speak into the microphone without pressing and holding the PTT key. -
Page 61: Lone Worker
, tap Alarms, and then tap Man down. Press the preprogrammed Man down key. This feature is applicable only to radios that support the Emergency Alarm feature. This feature is configured by your dealer. 13.4 Lone Worker The Lone Worker feature allows the radio to automatically send an emergency alarm to your companion or the control center in either of the following scenarios: ... -
Page 62: E2Ee
Press the preprogrammed One touch call/msg key. Trunking Mode When the radio is stunned by the dispatch station or trunking system, both the top and main screens display the icon . In this case, the radio cannot initiate or receive any network service (including calls and short messages), but retains features such as registration, revive, authentication, power-on/off, and lock screen. -
Page 63: Sim Card Lock
13.8 SIM Card Lock The SIM card lock allows you to lock the SIM card with the PIN number. If you restart or replace the radio, or install or uninstall the SIM card, you must enter the PIN number to unlock the SIM card. Go to Security >... -
Page 64: Apps
14. Apps 14.1 Basic Operations 14.1.1 Installing an App , and then tap App. Select the app from the app list. Tap Install. 14.1.2 Uninstalling an App It is recommended to uninstall unused non-system apps to release the storage space and improve the system running speed. -
Page 65: Managing App Permission
14.1.3 Managing App Permission When you open an app, the app may request access to a specific function or information. You can tap ALLOW or DENY to accept or deny the request. To view or change the permission settings of the third-party apps, do as follows: Go to Privacy >... -
Page 66: Documents
You can touch and hold the file until it is selected, or tap to select more files, and then do any of the following: to share the file via BT or Messaging. to delete the file. to copy, move, or rename the file. 14.3 Documents The Documents app allows you to view, download, and manage documents from the Smart Mobile Device Management (MDM) server. -
Page 67: Launch
During the download process, you can go to Download > Downloading to select the document, and then pause or continue the process, or re-download or delete the document. For Downloaded Documents Once the download is complete, go to Download > Downloaded, and then do either of the following: to open the document. -
Page 68: Recording Videos
The flash is available only for the rear camera. To switch between the front and rear camera, tap 14.5.2 Recording Videos to start recording. (Optional) Tap to take a photo. to finish recording. 14.5.3 Adjusting the Focus When you open the camera to take a photo or record a video, the radio automatically adjusts the focus. You can also pinch the screen to zoom out or spread the screen to zoom in. -
Page 69: Photos
Time lapse recording: It allows the camera to shot multiple photos, and then generate these photos into a short video. Background video: It allows the camera to keep recording in the background. BACK CAMERA: You can set the resolution of the rear camera to HD 1080p, HD 720p, or SD 480p. Higher resolution indicates clearer videos and more storage. -
Page 70: Editing The Photo Or Video
Select the video. (Optional) To pause the video, tap the screen. 14.6.3 Editing the Photo or Video Select a photo or video, and then tap at the bottom. Crop, adjust, filter, and mark the photo, or crop and adjust the video. 14.6.4 Managing Photos or Videos Touch and hold the photo or video. -
Page 71: Playing An Audio File
(Optional) Tap to pause, and then tap to continue. to stop recording. 14.7.2 Playing an Audio File , and then tap the file from the Local, Phone, or Radio list. 14.7.3 Managing Audio Files In the Local, Phone, or Radio list, touch and hold the audio file until appears. -
Page 72: Stopwatch
Set the time. Do any of the following: to start the countdown. to stop the countdown. Tap Delete to delete the current countdown. 14.8.4 Stopwatch Do any of the following: to measure the time. to stop measuring the time. ... -
Page 73: Notes
14.11 Notes The Notes app records and stores information including texts, images, and audios. to open the notepad. to create a note. Tap Attachments to add an image, audio, or reminder. Tap Background to change the background color. to save the edited content. -
Page 74: Compass
14.12 Compass The Compass app shows you the direction, latitude, longitude, and altitude. To open the compass, tap When you use the compass for the first time, calibrate the compass according to the on-screen instructions. To normally use the compass, allow the compass to access your location information. 14.13 Browser Do not browse untrusted websites to protect the radio from malwares and viruses. -
Page 75: Viewing Bookmarks Or History
To close a webpage, swipe left or right from the webpage. You can also swipe up or down, and then tap in the upper right corner to close multiple webpages. 14.13.2 Viewing bookmarks or history Tap BOOKMARKS or HISTORY. 14.13.3 Setting the Current Webpage on the right side of the address bar to make more settings for the current webpage. -
Page 76: Setting The Font And Image Display
Set whether the browser displays website warnings. Accept cookies or clear all cookie data. Set whether the browser remembers form data or clear all saved form data. Set whether to allow websites to access your location information. 14.13.7 Setting the Font and Image Display ... -
Page 77: Downloading An Offline Map
Enter the contact number or select the contact from the contact list. 14.14.3 Downloading an Offline Map You can download the offline map to view it when offline. Select the city and download the map. -
Page 78: Personalization
15. Personalization 15.1 Display , tap Display, and then do any of the following: To adjust the screen brightness, tap Brightness level, and then do as follows: Tap Brightness level under Main screen, and then drag the brightness slider for the main screen. ... -
Page 79: Languages And Input
Audio Profile Option Standard Mode Covert Mode With Call tone enabled, the radio emits an alert tone when receiving a call. You can set the Call tone tone for call services. Options include Broadband, Narrowband, and Narrowband Vibrations. With Message tone enabled, the radio emits an alert tone when receiving a message or failing Message tone to send the message. -
Page 80: Setting Time Format
Broadband timing: After successfully registering with the broadband system and obtaining the broadcast time of the system, the radio updates the display time. Satellite timing: Upon power-on, the radio acquires satellite time through the positioning system and updates the display time. -
Page 81: Storage
, tap Assistance under the Device pane, and then tap Voice broadcast. Press the preprogrammed Voice broadcast key. 15.7 Storage You can check and manage the internal storage space of the radio and the storage space of the installed Micro SD card. -
Page 82: Advanced Pmr Features
16. Advanced PMR Features 16.1 Scan/Hunt The Scan/Hunt feature allows you to listen to activities on other channels, keeping track of your team members. 16.1.1 Conventional Mode Enabling the Scan Feature Swipe down from the top to enter the control and notification center, and then tap ... -
Page 83: Alert Call
Hunt Mode Description Operation Hunt preset frequency range. comprehensive hunt, or team hunt. This feature allows the radio to hunt the fixed TSCC in the Team Hunt defined team hunt list. Post-registration Hunt After successful registration, you can hunt again by pressing the preprogrammed Manual hunt key. To ensure seamless communications, you can select one of the following hunt modes. -
Page 84: Remote Monitor
To initiate the feature, do either of the following: , go to Contacts > Private, select a contact, and then tap the service. Press the preprogrammed One touch call/msg key. 16.4 Remote Monitor In conventional mode, the Remote Monitor feature allows you to remotely activate the microphone of a private contact's radio to monitor its activities. -
Page 85: Roam
Mode Description Operation Mode Initiate a group, private, or all call. channel, press the One Touch Call/msg key, and then press Send a text message or location information to a and hold the PTT key. private or group contact. ... -
Page 86: Trunking Mode
Either the Scan feature or the Roam feature can be enabled for the same digital channel. The direct channel cannot be set the roam list. 16.7.2 Trunking Mode The Roam feature allows the radio to register with a non-home BS or network when it is on the move. When the radio detects a signal, it initiates the registration. -
Page 87: System
With the network connected, the radio can log in to the Smart MDM server after registration, and then can be managed through the Smart MDM server. , tap Accounts. Tap Hytera ID, and then do any of the following: If the status is disconnected, enable the mobile data or connect to the WLAN network. -
Page 88: Factory Reset
17.4 Factory Reset Before restoring the factory settings, back up your data to avoid loss of important data. When the battery level is below 20%, the factory settings cannot be restored. The Factory Reset feature allows you to restore the radio to factory settings through the Smart MDM. During the process, the radio displays "Factory reset", and all data including the system and SD card data, or encryption key is deleted. -
Page 89: Troubleshooting
The keys, screens, or LED temporarily. indicators do not work normally. The keys, screens, or LED Contact your local dealer or Hytera indicators may be damaged. technicians for maintenance. The touch screen fails to be The unlock pattern or password Contact your local dealer or Hytera unlocked. - Page 90 Phenomena Analysis Solution repeatedly during weak. of the BS. communication. Make sure call participants are within the The voice is unclear. The signal may be weak. communication range. The battery voltage may be low. Recharge or replace the battery. Increase the volume or contact your local The volume may be low.
- Page 91 Phenomena Analysis Solution underground areas. The radio may suffer from Stay away from equipment that may cause external disturbance (such as interference. electromagnetic interference). The radio may be at an unfavorable position. For example, The GPS cannot locate your the signal may be blocked by tall Move to an open and flat area, and try again.
- Page 92 Phenomena Analysis Solution charged. charger improperly. The power adapter plug may be inserted into the socket Remove and reinsert the plug. improperly. If the above solutions cannot fix your problems, or you may have some other queries, please contact your local dealer for more technical support.
-
Page 93: Radio Care
19. Radio Care 19.1 Radio If the radio is seriously wet inside, do not turn on it. Contact the dealer or maintenance center for maintenance in time. To guarantee optimum performance as well as a long service life of the radio, follow the tips below: ... -
Page 94: Cleaning
Do not use the radio during charging. Charge the battery under the temperature from 0 ℃ to 45 ℃. When the low battery alert occurs, replace or charge the battery in time. When the battery is fully charged, disconnect the charger in time. ... -
Page 95: Storing
Keep the radio away from the power supply and fire. Do not use the radio before it is fully dry. After sterilizing the accessory connector, put the cover back in place. It is recommended to sterilize the radio regularly. Use the lint-free cloth with proper rubbing alcohol (density ≥... -
Page 96: Optional Accessories
20. Optional Accessories Use the accessories specified by the Company only. Otherwise, we will not be liable for any loss or damage arising out of use of unauthorized accessories. Type Model Name ACN-02 PTT & MIC Cable (used with receive-only earpiece) EH-02 Receive-Only Swivel Earset (used with PTT &... -
Page 97: Statement
21. Statement 21.1 Copyright Hytera is the trademark or registered trademark of Hytera Communications Corporation Limited (the Company) in PRC and/or other countries or areas. The Company retains the ownership of its trademarks and product names. All other trademarks and/or product names that may be used in this manual are properties of their respective owners. -
Page 98: Compliance With Rf Exposure Standards
21.4 Compliance with RF Exposure Standards Hytera's radio complies with the following RF energy exposure standards and guidelines: United States Federal Communications Commission, Code of Federal Regulations; 47CFR § 1.1307, 1.1310 and 2.1093... -
Page 99: Ic Statement
When worn on the body, always place the radio in a Hytera-approved holder, holster, case, or body harness or by use of the correct clip for this product. Use of non-approved accessories may result in exposure levels which exceed the FCC's occupational/controlled environmental RF exposure limits. -
Page 100: Abbreviations
22. Abbreviations Abbreviation Full Name E2EE End-to-End Encryption FOACSU Full Off Air Call Set-Up Global Positioning System High-Dynamic Range International Standardization Organization Light-emitting Diode Mobile Device Management MIDI Musical Instrument Digital Interface Near Field Communication OACSU Off Air Call Set-Up Push-to-Talk over Cellular Push-to-Talk VoLTE... - Page 101 Hytera Communications Corporation Limited. © 2021 Hytera Communications Corporation Limited. All Rights Reserved. Address: Hytera Tower, Hi-Tech Industrial Park North, 9108# Beihuan Road, Nanshan District, Shenzhen, People's Republic of China Postcode: 518057 https://www.hytera.com...
Need help?
Do you have a question about the PDC680 and is the answer not in the manual?
Questions and answers