Table of Contents
Advertisement
Quick Links
RA02G
Wireless Smoking, Vaping and Bullying Alarm Sensor
Wireless Smoking, Vaping and
Bullying Alarm Sensor
RA02G
User Manual
For Hardware v0.5
Copyright© Netvox Technology Co., Ltd.
This document contains proprietary technical information which is the property of NETVOX Technology. It shall be maintained in
strict confidence and shall not be disclosed to other parties, in whole or in part, without written permission of NETVOX
Technology. The specifications are subject to change without prior notice.
Advertisement
Table of Contents

Related Manuals for netvox RA02G


Summary of Contents for netvox RA02G
- Page 1 This document contains proprietary technical information which is the property of NETVOX Technology. It shall be maintained in strict confidence and shall not be disclosed to other parties, in whole or in part, without written permission of NETVOX Technology. The specifications are subject to change without prior notice.
-
Page 2: Table Of Contents
Table of Contents 1. Introduction ............................3 2. Appearance ............................4 3. Features ............................. 4 4. Set up Instructions ..........................5 5. Data Report ............................7 5.1 Example of ReportDataCmd ..................... 10 5.2 Example of Report Configuration ..................... 11 5.3 Example of NetvoxLoRaWANRejoin ..................16 5.4 Example for MinTime/MaxTime logic .................. -
Page 3: Introduction
1. Introduction RA02G is an indoor sensor with smoking, noise, and anti-tamper detection. New functions such as power outage detection, sensitivity adjustment, audio alerts customization, and PoE splitter connection are now added. The new RA02G makes indoor monitoring easier and flexible than you ever imagined. -
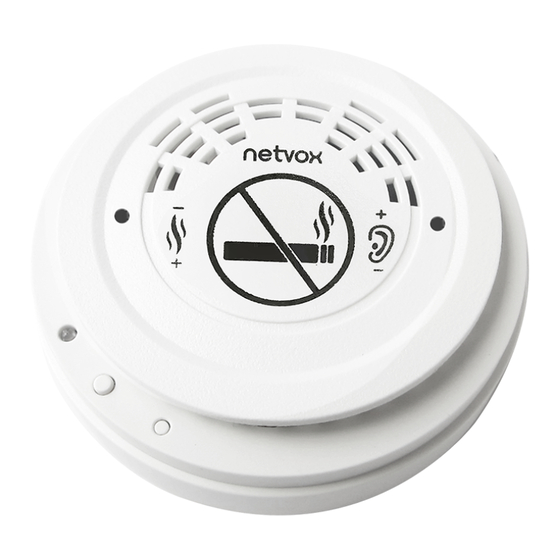
Page 4: Appearance
▲ The above figure is for reference only. The 12V PoE splitter is not included when purchasing RA02G. Note: (1) To adjust the sensitivity of the noise and smoking sensor, the user may use a small screwdriver to poke in the hole and slowly turn the knob. -
Page 5: Features
3. Features ⚫ Power supplied by 12V power adapter and PoE splitter ⚫ 2* AAA 1.5V Alkaline batteries as backup power ⚫ Type-C port for audio alerts transmission ⚫ Smoking, noise, and anti-tamper detection ⚫ Power outage detection ⚫ Compatible with LoRaWAN Class C ⚫... - Page 6 Function Key Back to factory setting and restart the device Press and hold the function key① The green indicator flashes 20 times: Success for 5 seconds The green indicator remains off: Fail The device is in the network: Short press the function key① The green indicator flashes once, sends a data packet, and stops all audio alerts.
-
Page 7: Data Report
5. Data Report The device will immediately send a version packet report and a data packet with the IncenseSmokeAlarm, HighSoundAlarm, ShockAlarm, and PowerOffAlarm. Data will be reported by default setting before any configuration. Default setting: Max Interval = 0x0384 (900s) Min Interval = 0x0384 (900s) // The MinTime configuration is not available, but the MinTime must be configured a number greater than 0. - Page 8 2. Sensitivity Adjustment of Smoking and Noise Detection (1) Smoking detection (IncenseSmokeAlarm) (2) Noise detection (HighSoundAlarm) High High Sensitivity Sensitivity 4 levels Levels (every 45° for one level) The lower the HighSoundAlarmTriggerThreshold is, Sensitivity Level 1 > Level 2 > Level 3 > Level 4 the higher the sensitivity is.
- Page 9 (3) The length of the audio alert is 15 seconds by default. When the audio alert sounds before smoking and vibration sensors, the device would report HighSoundAlarm=0 during the 15 seconds. Please visit Netvox Lorawan Application Command document and Netvox Lora Command Resolver http://www.netvox.com.cn:8888/cmddoc...
-
Page 10: Example Of Reportdatacmd
0x00) 1: alarm) alarm) 1: alarm) 1: alarm) Example of Uplink: 01D7010000010000000000 byte (01): Version byte (D7): DeviceType 0xD7-RA02G byte (01): ReportType byte (00): DC power supply byte (00): IncenseSmokeAlarm-noalarm byte (01): HighSoundAlarm-alarm byte (00): ShockAlarm-noalarm byte (00): PowerOffAlarm-noalarm –11... -
Page 11: Example Of Report Configuration
(2 bytes Unit: s) (5 Bytes, Fixed 0x00) SmokesensorSensitivity (1 Byte, 0x00_accroding the hardware SetSmokeSensitivityReq sensitivity knob, (Remain Lastconfig 0x03 0x01_Level1 Reserved (8 Bytes, Fixed 0x00) RA02G 0xD7 when resettofac) 0x02_Level2, 0x03_Level3, 0x04_Level4) SetSmokeSensitivityRsp 0x83 Status (0x00_success) Reserved (8 Bytes, Fixed 0x00) - Page 12 SetShockSensor ShockSensorSensitivity Reserved 0x05 SensitivityReq (1 Byte) (8 Bytes, Fixed 0x00) SetShockSensor Status Reserved 0x85 SensitivityRsp (0x00_success) (8 Bytes, Fixed 0x00) GetShockSensor Reserved 0x06 SensitivityReq (9 Bytes, Fixed 0x00) GetShockSensor ShockSensorSensitivity Reserved 0x86 SensitivityRsp (1 Byte) (8 Bytes, Fixed 0x00) SetHighSound HighSoundAlarm HighSoundAlarm...
- Page 13 mRsp SetSmokeDebounceandR SmokeDebounceTime SmokeResumeTime Reserved 0x0C esumeCheckTimeReq (2 Bytes, Unit:1s) (1 Bytes, Unit:1s) (6 Bytes, Fixed 0x00) SetSmokeDebounceandR 0x8C Status (0x00_success) Reserved (8 Bytes, Fixed 0x00) esumeCheckTimeRsp GetSmokeDebounceand 0x0D Reserved (9 Bytes, Fixed 0x00) ResumeCheckTimeReq GetSmokeDebounceand SmokeDebounceTime SmokeResumeTime (1 Reserved 0x8D ResumeCheckTimeRsp (2 Bytes, Unit: 1s)
- Page 14 (5) SetShockSensorSensitivityReq Set ShockSensorSensitivity as 20 (0x14) The vibration value could only be configured between 0x01 to 0x14. Downlink: 05D7140000000000000000 When the ShockSensorSensitivity = 0xFF, the vibration detection is off. Response: 85D7000000000000000000 (6) GetShockSensorSensitivityReq Downlink: 06D7000000000000000000 Response: 86D7140000000000000000 (7) SetHighSoundAlarmTriggerThresholdTimeReq HighSoundAlarmTriggerThreshold = 10 (0x0A);...
- Page 15 (11) StopCurrentBeeperAlarmReq Stop audio alert. Downlink: 0BD7000000000000000000 Response: 8BD7000000000000000000 (12) SetSmokeDebounceandResumeCheckTimeReq: SmokeDebounceTime: 5 mins (no detection); SmokeResumeTime: 10s (start detection) The device starts detection after SmokeDebounceTime ends. During SmokeResumeTime, the device would report IncenseSmokeAlarm= noalarm as the data is lower than the threshold Downlink: 0CD7012C0A000000000000 Response: 8CD7000000000000000000 (13) GetSmokeDebounceandResumeCheckTimeReq:...
-
Page 16: Example Of Netvoxlorawanrejoin
5.3 Example of NetvoxLoRaWANRejoin (Note: check if the device is still in the network. If the device is disconnected, it will automatically rejoin back to the network.) Fport: 0x20 CmdDescriptor CmdID (1 byte) Payload (5 bytes) RejoinCheckPeriod (4 Bytes, Unit: 1s RejoinThreshold SetNetvoxLoRaWANRejoinReq 0x01... -
Page 17: Example For Mintime/Maxtime Logic
5.4 Example for MinTime/MaxTime logic Example#1 based on MinTime = 1 Hour, MaxTime= 1 Hour, Reportable Change i.e. BatteryVoltageChange=0.1V MaxTime MaxTime sleeping (MinTime) sleeping (MinTime) Wakes up and collect data Wakes up and collect data Wake up and collect data REPORTS 3.6V REPORTS 3.6V REPORTS 3.6V... - Page 18 Notes: (1) The device only wakes up and performs data sampling according to MinTime Interval. When it is sleeping, it does not collect data. (2) The data collected is compared with the last data reported. If the data variation is greater than the ReportableChange value, the device reports according to MinTime interval.
-
Page 19: Audio Alerts Customization
6. Audio Alerts Customization (1) Connect the computer and device with a TYPE-C cable. USB Type-C cable DC 12V power supply (2) Wait 1 to 2 minutes until the virtual USB drive appears. (3) Right click the USB Drive and select format. - Page 20 (4) Click OK to start formatting. (5) Format complete.
- Page 21 (6) Turn off and on the device. The flash drive should be empty as the picture shown below. (7) Create a new folder in USB Drive and rename it as 01. (8) Put all files of audio alerts in the 01 folder.
- Page 22 (9) Name all audio alerts as 00x.mp3 or 00x.wav. Default: 001: anti-tamper detection; 002: noise detection; 003: smoking detection Note: (1) The folder and audio alerts should be named according to the default setting. (2) The file type of audio alerts should always be mp3 or wav. (3) The above procedure should be followed when uploading new audio alerts.
-
Page 23: Installation
• RA02G could only alert users as the possible danger occurs. Only by staying alert to the surroundings can users prevent the occurrence of damage and disasters.
Need help?
Do you have a question about the RA02G and is the answer not in the manual?
Questions and answers