Shimadzu GC-2014 Series Service Manual
Hide thumbs
Also See for GC-2014 Series:
- Instruction manual (318 pages) ,
- Service manual (98 pages) ,
- Operation manual (148 pages)

Related Manuals for Shimadzu GC-2014 Series


Summary of Contents for Shimadzu GC-2014 Series
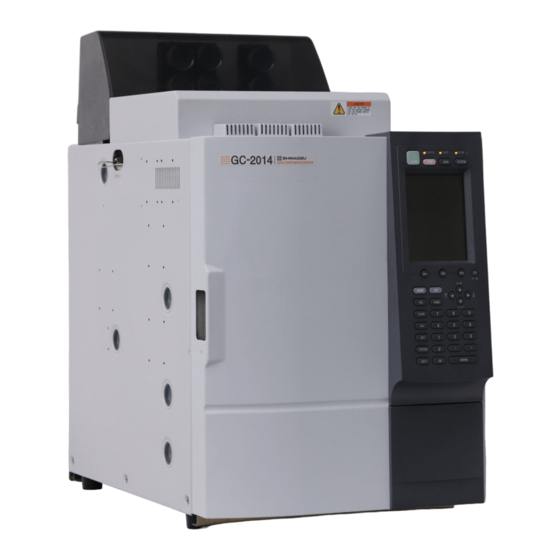
- Page 1 221-30116 GC-2014 Service Manual Shimadzu Corporation Analytical & Measuring Instruments Division...
-
Page 2: Product Guarantee
Japan.) 2. Scope of Guarantee If a fault that can be attributed to Shimadzu occurs during the guarantee period, we will perform repair or part replacement as appropriate without charge. 3. Items Beyond the Scope of This Guarantee Faults that occur in any of the following cases are beyond the scope of this guarantee, even if they occur within the guarantee period. -
Page 3: Introduction
Introduction Purpose of This Service Manual This service manual is intended for use by service engineers approved by Shimadzu Corporation, and describes the maintenance methods used for the GC-2014-series gas chromatograph. Maintenance may only be performed by service engineers who have received training for this instrument. - Page 4 - blank page - GC-2014 Service Manual...
-
Page 5: Table Of Contents
1.3.2 Power-Supply Capacity ................7 1.4 Gas....................8 1.4.1 Purity......................8 1.4.2 Supply Pressure ..................8 CHAPTER 2 CONFIGURATION OF GC-2014......9 2.1 Configuration Diagrams for GC-2014 Series ....... 9 2.1.1 GC-2014A....................9 2.1.2 GC-2014AF....................10 2.1.3 GC-2014AFsc ...................11 2.1.4 GC-2014AFSPL..................11 2.1.5 GC-2014AT.................... - Page 6 Table of Contents 2.3.5 FID Controller ..................40 2.3.6 ECD Controller..................47 2.3.7 FPD Controller ..................50 2.3.8 FTD Power Controller ................54 2.3.9 PCB AUX TEMP ..................57 CHAPTER 3 GAS-FLOW CONTROLLER .......59 3.1 Configuration Diagrams for Gas-Flow Controller ....... 59 3.1.1 AFC ......................
- Page 7 Table of Contents CHAPTER 7 TROUBLESHOOTING........99 7.1 Gas and Pressure/Flow-Rate Settings ........99 7.1.1 Precautions for Flow-Rate Control Settings (CAR) ......... 99 7.1.1.1 When the control mode is "SPLIT" or "SPLITLESS": ....... 99 7.1.1.2 When the control mode is "TOTAL FLOW" and the injection mode is "DIRECT": ....................102 7.1.1.3 When the control mode is "PRESS"...
-
Page 9: Chapter 1 Installation
Chapter 1 Installation Chapter 1 Installation 1.1 Installation Space DANGER Hot Air Hot air is discharged from the opening. Do not expose flammable objects directly to the hot air. 400 mm min. Width: 400 mm 100 mm min. 50 mm min. 1.1.1 Rear Spac Hot air is blown out of the exhaust holes at the back of the instrument when the column oven is cooled. -
Page 10: Installation Surface
Chapter 1 Installation 1.2.2 Installation Surface Install the instrument on a steady, stable, flat surface. 1.2.3 Corrosive Gas and Dust In order to attain the specified service life and maintain performance specifications, do not install the instrument in locations subject to large amounts of corrosive gas or dust. 1.2.4 Influence of Electromagnetic Waves and Power-Supply Noise Do not use this instrument in locations subject to strong electromagnetic waves or use with power supplies that generate high noise levels. -
Page 11: Power Supply
Chapter 1 Installation 1.3 Power Supply DANGER High Voltage Before connecting the power cable directly to the terminal block in the switchboard, be sure to turn OFF the switchboard switch. Be sure to supply power from a power supply incorporating a circuit breaker. Do not place heavy objects on the power cable. -
Page 12: Gas
Chapter 1 Installation 1.4 Gas 1.4.1 Purity In order to maintain performance specifications, prepare the following gases. Carrier gas Detector gas Detector (usable) Other Make-up (recommended) Compressor , He 99.995% min. 99.995% min. 99.995% min. 99.995% min. FID, high , He 99.999% min. -
Page 13: Chapter 2 Configuration Of Gc-2014
Chapter 2 Configuration of GC-2014 Chapter 2 Configuration of GC-2014 2.1 Configuration Diagrams for GC-2014 Series 2.1.1 GC-2014A 221-70019-91 221-70051-91 ① GC-2014AD,NONE,DUAL,100 GC-2014ASSY,100V 221-70080-91 ② PA CKED DU A L IN J ,100V 115V:221-70080-92 230V:221-70080-34 221-70075-91 ③ DU A L AFC ASSY 221-70063-91 ④... -
Page 14: Gc-2014Af
Chapter 2 Configuration of GC-2014 2.1.2 GC-2014AF 221-70025-91 221-70051-91 ⑬ ① GC-2014AF,100V GC-2014ASSY,100V 115V:221-70052-92 115V:221-70051-92 230V:221-70052-34 230V:221-70051-34 221-70080-91 ② PA CKE D DU A L IN J ,100V 115V:221-70080-92 230V:221-70080-34 221-70075-91 ③ D U A L AFC ASSY 221-70090-91 ⑤ FID-2014 CELL ASSY,P 221-70040-91 ⑥... -
Page 15: Gc-2014Afsc
Chapter 2 Configuration of GC-2014 2.1.3 GC-2014AFsc 221-70020-91 221-70051-91 ① GC-2014AFSC,100 GC-2014ASSY,100V 115V:221-70020-92 115V:221-70051-92 230V:221-70020-34 230V:221-70051-34 221-70035-91 ⑨ SPL-2014ASSY,100 115V:221-70035-91 230V:221-70035-34 221-70091-91 ⑩ FID-2014,100-120V 115V:221-70091-91 230V:221-70091-98 221-70049-91 ⑧ F LOW CON TR OLLE R ,H2-AIR,FID 221-70049-94 ⑪ F LOW CON TR OLLE R ,AUX 221-70064-91 ⑫... -
Page 16: Gc-2014At
Chapter 2 Configuration of GC-2014 2.1.5 GC-2014AT 221-70027-91 221-70051-91 ① GC-2014,AT100V GC-2014ASSY,100V 115V:221-70027-92 115V:221-70051-92 230V:221-70027-34 230V:221-70051-34 221-70080-91 ② PACKED DUAL INJ,100V 115V:221-70080-92 230V:221-70080-34 221-70075-91 ③ DUAL AFC ASSY 221-70086-91 ⑭ DET HEATER ASSY,FT,100V 115V:221-70086-92 230V:221-70086-34 221-70063-91 ④ ACCESSORY,GC-2014 115V:221-70063-91 230V:221-70063-96 221-70098-91 ⑮... -
Page 17: Gc-2014Atf
Chapter 2 Configuration of GC-2014 2.1.6 GC-2014ATF 221-70026-91 221-70051-91 ⑲ ① GC-2014ATF,100V GC-2014ASSY,100V 115V:221-70026-92 115V:221-70051-92 230V:221-70026-34 230V:221-70051-34 221-70080-91 ② PA CKE D DU A L INJ,100V 115V:221-70080-92 230V:221-70080-34 221-70075-91 ③ DU LA AFC ASSY 221-70090-91 ⑤ FID-2014 CELL ASSY,P 221-70040-91 ⑥... -
Page 18: Gc-2014Atfspl
Chapter 2 Configuration of GC-2014 2.1.7 GC-2014ATFSPL 221-70029-91 221-70026-91 ⑲ GC-2014ATFSPL,100 GC-2014ATF,100V 115V:221-70029-92 115V:221-70026-92 230V:221-70029-34 230V:221-70026-34 221-70035-91 ⑨ SPL-2014ASSY,100 115V:221-70035-91 230V:221-70035-34 221-70952-91 ⑳ DETECTOR ADAPTER ASSY GC-2014 Service Manual... - Page 19 Chapter 2 Configuration of GC-2014 221-70051-91 221-70050-90 ① GC-2014ASSY,100V COMMON ASSY 221-70052-91 221-49613-91 OVEN HEATER ASSY,100V COLUMN OVEN HEATER ASSY, 100V 115V:221-70052-92 115V:221-49613-92 230V:221-70052-34 230V:221-49613-34 221-43695-91 PT SENSOR ASSY, 17A PLUS 221-43696-91 THERMOCOUPLE, 221-70072-91 WITH CONTACTS, 17A+ MOTOR ASSY,100V 115V:221-70072-92 230V:221-70072-34 221-48460-92 POWER UNIT,2014 100V...
- Page 20 Chapter 2 Configuration of GC-2014 221-70050-90 221-70055-91 221-70056-91 COMMON ASSY OVEN ASSY OVEN UNIT ASSY 221-70057-91 221-49480 AIR-SUPPLY/EXHAUST ADDITIONAL PROCESSING, PIPE ASSY GEAR, MOTOR 221-47652 FLAP MOTOR 221-70060-91 221-70254-91 RIGHT PLATE, PCB DET I/F, GC-2014 GC-2014 221-47632-92 221-45737-91 CPU UNIT, GC-2014 PCB CPU ASSY, GC2010 221-70065-91 221-70066-91...
- Page 21 Chapter 2 Configuration of GC-2014 221-70080-91 221-70189-91 ② PACKED DUAL INJ,100V INJECTION UNIT ASSY,122 115V:221-70080-92 230V:221-70080-34 221-70479-91 221-70484-91 HETER,PT ASSY,P-INJ100 HEATER, 100V/150W ASSY 115V:221-70479-92 115V:221-70484-92 230V:221-70479-34 230V:221-70484-34 221-44584 221-70596-91 GUIDE, FOR NEEDLE FIN, AOC HEAT SENSITIVE MATERIAL, INJ 221-70466 050-73001-79 FIN, 2014 R, RN AXIAL, 1/2W, 1802F 221-22206...
- Page 22 Chapter 2 Configuration of GC-2014 221-70035-91 221-70082-91 221-47221-91 ⑨ SPL-2014ASSY,100 SPL-2014UNIT,100-120 INJECTION PORT A AASY 115V:221-70035-91 115 V : 221-70082-91 230V:221-70035-34 221-70166-91 230 V : 221-70082-98 BASE, VAPORIZING CHAMBER A ASSY 221-70602-91 221-70599-91 HEATER, PT ASSY, SPL100 HEATER, 120/150W ASSY 115V:221-70602-91 115V:221-70599-91 230V:221-70602-34...
- Page 23 Chapter 2 Configuration of GC-2014 221-70086-91 221-70671-91 ⑭ DET HEATER ASSY,FT,100V HEATER,PT ASSY,D-FID 100 115V:221-70086-92 115V:221-70671-92 230V:221-70086-34 230V:221-70761-34 221-70098-91 221-70743-91 221-70741-91 221-70742-91 ⑮ TCD-2014 CELL ASSY,100V HOT PLATE ASSY, 2014, 100V HEATER PT ASSY, TCD, 100 HEATER ASSY, 100V, 200W 115V:221-70098-91 115V:221-70743-91 115V:221-70741-91...
-
Page 24: Structure Of Gc-2014
Chapter 2 Configuration of GC-2014 2.2 Structure of GC-2014 2.2.1 External Appearance FLOW CONTROLLER UPPER COVER 221-70515 UPPER COVER 221-70378 KEY COVER 221-70368 DOOR ASSEMBLY 221-70065-91 GC-2014 Service Manual... -
Page 25: Structure Diagram 1
Chapter 2 Configuration of GC-2014 2.2.2 Structure Diagram 1 KEY RUBBER 1 221-46470 LCD ASSY 221-48721-91 KEY RUBBER 2 221-46471 TAPE WIRE 221-70465 GC-2014 Service Manual... -
Page 26: Structure Diagram 2
Chapter 2 Configuration of GC-2014 2.2.3 Structure Diagram 2 POWER UNIT, 2014, 100 V (100-V system) 221-48460-92 POWER UNIT, 2014, 230 V (200-V system) 221-48460-39 FILTER, ZAG2230-11S PCB DET I/F, GC2014 (100-V system) 221-70254-91 075-00075-04 FILTER, MBS-1220-22 (200-V system) 075-00069-04 POWER SUPPLY, VS100B-24 (100-V system) 074-80654-77 POWER SUPPLY, ZWS100PF-24/J (200-V system) -
Page 27: Structure Diagram 3
Chapter 2 Configuration of GC-2014 2.2.4 Structure Diagram 3 MOTOR ASSY 221-70072-91 MOTOR ASSY, 115 221-70072-92 MOTOR ASSY, 230 221-70072-34 2.2.5 PT Sensor and Thermocouple Silicon glass tube Top side of element PT sensor (221-43695-91) Ensure that the top side of the element is in front. -
Page 28: Heater And Pt Sensor/Thermocouple
Chapter 2 Configuration of GC-2014 2.2.6 Heater and PT Sensor/Thermocouple HEATER ASSY Part number/name Heater resistance value P/N: 221-43652-91 7.1 to 7.9 Ω 100 V COLUMN OVEN HEATER ASSY, 100 V, 1.3 kW P/N: 221-46381-94 24.6 to 25.8 Ω 200 V COLUMN OVEN HEATER ASSY, 230 V, 2.1 kW Rear Side Inside wall of oven... -
Page 29: Fan
Chapter 2 Configuration of GC-2014 2.2.8 Fan When the fan (P/N: 221-28247) is mounted onto the motor shaft and pushed to the position where it touches the back of the oven, if the motor shaft protrudes at least 5 mm in the front of the fan, mount the fan with its outer face (i.e., the back) in alignment with the end of the shaft. -
Page 30: Structure Of Oven Cooling Unit
Chapter 2 Configuration of GC-2014 2.2.9 Structure of Oven Cooling Unit Attach the top end of spring #17 to the outer surface of air-supply/exhaust pipe #11 with tape #42. In the fully open, intermediate, and fully Insert gear #18 as closed positions, the shaft must drop far as it will go. -
Page 31: Electric Circuits
Chapter 2 Configuration of GC-2014 2.3 Electric Circuits 2.3.1 Block Diagram Note: ・One AFC can be mounted to one odd-numbered slot and one even-numbered slot. ・The AFCs are recognized as CAR1 and CAR2 in order of increasing slot number. ... -
Page 32: Cpu Unit
Chapter 2 Configuration of GC-2014 2.3.2 CPU Unit Fig. 2.3.2 Assembly Diagram for CPU Unit GC-2014 Service Manual... - Page 33 Chapter 2 Configuration of GC-2014 Fig. 2.3.3 Circuit Diagram for CPU Unit (1/4) GC-2014 Service Manual...
- Page 34 Chapter 2 Configuration of GC-2014 Fig. 2.3.4 Circuit Diagram for CPU Unit (2/4) GC-2014 Service Manual...
- Page 35 Chapter 2 Configuration of GC-2014 Fig. 2.3.5 Circuit Diagram for CPU Unit (3/4) GC-2014 Service Manual...
- Page 36 Chapter 2 Configuration of GC-2014 Fig. 2.3.6 Circuit Diagram for CPU Unit (4/4) GC-2014 Service Manual...
-
Page 37: Power Unit
Chapter 2 Configuration of GC-2014 2.3.3 Power Unit Fig. 2.3.7 Assembly Diagram for Power Unit GC-2014 Service Manual... - Page 38 Chapter 2 Configuration of GC-2014 Fig. 2.3.8 Circuit Diagram for Power Unit (1/3) GC-2014 Service Manual...
- Page 39 Chapter 2 Configuration of GC-2014 Fig. 2.3.9 Circuit Diagram for Power Unit (2/3) GC-2014 Service Manual...
- Page 40 Chapter 2 Configuration of GC-2014 Fig. 2.3.10 Circuit Diagram for Power Unit (3/3) GC-2014 Service Manual...
-
Page 41: Tcd Controller
Chapter 2 Configuration of GC-2014 2.3.4 TCD Controller Fig. 2.3.11 Assembly Diagram for TCD Controller GC-2014 Service Manual... - Page 42 Chapter 2 Configuration of GC-2014 Fig. 2.3.12 Circuit Diagram for TCD Controller (1/2) GC-2014 Service Manual...
- Page 43 Chapter 2 Configuration of GC-2014 Fig. 2.3.13 Circuit Diagram for TCD Controller (2/2) GC-2014 Service Manual...
-
Page 44: Fid Controller
Chapter 2 Configuration of GC-2014 2.3.5 FID Controller (1) AFSC, FTD, or Additional FID Fig. 2.3.14 Assembly Diagram for Single FID Controller GC-2014 Service Manual... - Page 45 Chapter 2 Configuration of GC-2014 (2) AF, ATF, AF/SPL, or ATF/SPL Fig. 2.3.15 Assembly Diagram of Dual FID Controller GC-2014 Service Manual...
- Page 46 Chapter 2 Configuration of GC-2014 Fig. 2.3.16 Circuit Diagram for Single FID Controller (1/2) GC-2014 Service Manual...
- Page 47 Chapter 2 Configuration of GC-2014 Fig. 2.3.17 Circuit Diagram for Single FID Controller (2/2) GC-2014 Service Manual...
- Page 48 Chapter 2 Configuration of GC-2014 Fig. 2.3.18 Circuit Diagram for Dual FID Controller (1/3) GC-2014 Service Manual...
- Page 49 Chapter 2 Configuration of GC-2014 Fig. 2.3.19 Circuit Diagram for Dual FID Controller (2/3) GC-2014 Service Manual...
- Page 50 Chapter 2 Configuration of GC-2014 Fig. 2.3.20 Circuit Diagram for Dual FID Controller (3/3) GC-2014 Service Manual...
-
Page 51: Ecd Controller
Chapter 2 Configuration of GC-2014 2.3.6 ECD Controller Fig. 2.3.21 Assembly Diagram for ECD Controller GC-2014 Service Manual... - Page 52 Chapter 2 Configuration of GC-2014 Connect near M3. Fig. 2.3.22 Circuit Diagram for ECD Controller (1/2) GC-2014 Service Manual...
- Page 53 Chapter 2 Configuration of GC-2014 Fig. 2.3.23 Circuit Diagram for ECD Controller (2/2) GC-2014 Service Manual...
-
Page 54: Fpd Controller
Chapter 2 Configuration of GC-2014 2.3.7 FPD Controller Fig. 2.3.24 Assembly Diagram for FPD Controller GC-2014 Service Manual... - Page 55 Chapter 2 Configuration of GC-2014 Fig. 2.3.25 Circuit Diagram for FPD Controller (1/3) GC-2014 Service Manual...
- Page 56 Chapter 2 Configuration of GC-2014 Fig. 2.3.26 Circuit Diagram for FPD Controller (2/3) GC-2014 Service Manual...
- Page 57 Chapter 2 Configuration of GC-2014 Fig. 2.3.27 Circuit Diagram for FPD Controller (3/3) GC-2014 Service Manual...
-
Page 58: Ftd Power Controller
Chapter 2 Configuration of GC-2014 2.3.8 FTD Power Controller Fig. 2.3.28 Assembly Diagram for FTD Power Controller GC-2014 Service Manual... - Page 59 Chapter 2 Configuration of GC-2014 Fig. 2.3.29 Circuit Diagram for FTD Power Controller (1/2) GC-2014 Service Manual...
- Page 60 Chapter 2 Configuration of GC-2014 Fig. 2.3.30 Circuit Diagram for FTD Power Controller (2/2) GC-2014 Service Manual...
-
Page 61: Pcb Aux Temp
Chapter 2 Configuration of GC-2014 2.3.9 PCB AUX TEMP Fig. 2.3.31 Assembly Diagram for PCB AUX TEMP GC-2014 Service Manual... - Page 62 Chapter 2 Configuration of GC-2014 Fig. 2.3.32 Circuit Diagram for PCB AUX TEMP GC-2014 Service Manual...
-
Page 63: Chapter 3 Gas-Flow Controller
Chapter 3 Gas-Flow Controller Chapter 3 Gas-Flow Controller 3.1 Configuration Diagrams for Gas-Flow Controller 3.1.1 AFC There are four types of AFC: for packed dual injection, split/splitless injection, WBI (direct), and packed single injection. AFC_SPL (Assembly Configuration Chart) AFC_WBI (Assembly Configuration Chart) DAFC (Assembly Configuration Chart) GC-2014 Service Manual... - Page 64 Chapter 3 Gas-Flow Controller GC-2014 Service Manual...
- Page 65 Chapter 3 Gas-Flow Controller Manual Flow Controller 3.1.2 3.1.2.1 FID Reference No. 221-70049-91 221-18150-91 FLOW CONTROLLER, 1PC, N BELLOW VALVE, 2K H2-AIR,FID 221-41511-91 1PC, N BELLOW VALVE, 2K, WITH RESISTANCE 670-18558-11 2PC, PRESSURE GAUGE, 200 KPA 018-21330 TAPE, STICKER, 0.1 × 13 × 5 221-70483-91 1PC, SOLENOID VALVE ASSY 042-40043-02...
- Page 66 Chapter 3 Gas-Flow Controller FID resistance tube: (26) Insert with rubber plug for port (27). Air resistance tube: (32) Insert with rubber plug for port (27). Air resistance tube: (32) Insert with rubber plug for port (27). GC-2014 Service Manual...
- Page 67 Chapter 3 Gas-Flow Controller 3.1.2.2 FTD Reference No. 221-70049-92 221-18150-91 FLOW CONTROLLER, 1PC, N BELLOW VALVE, 2K H2-AIR, FTD 221-41511-91 1PC, N BELLOW VALVE, 2K, WITH RESISTANCE 670-18558-11 2PC, PRESSURE GAUGE, 200 KPA 018-21330 TAPE, STICKER, 0.1 × 13 × 5 221-18713-95 1PC, FTD-9, RESISTANCE TUBE ASSY, H2 221-18713-96...
- Page 68 Chapter 3 Gas-Flow Controller FTD H2 resistance tube Inlet: Side with red mark AIR Air resistance tube Air resistance tube: (32) Insert with rubber plug for port (27). GC-2014 Service Manual...
- Page 69 Chapter 3 Gas-Flow Controller 3.1.2.3 FPD Reference No. 221-70049-93 221-18150-91 FLOW CONTROLLER, 2PC, N BELLOW VALVE, 2K H2-AIR, FPD 670-18558-11 2PC, PRESSURE GAUGE, 200 KPA 018-21330 TAPE, STICKER, 0.1 × 13 × 5 221-42080-92 1PC, BRANCHED PIPE, AIR, FPD, V2 221-70483-91 1PC, SOLENOID VALVE ASSY 035-60395-43...
- Page 70 Chapter 3 Gas-Flow Controller FPD H2 resistance tube: (26) Insert with rubber plug for port (27). AIR Air resistance tube: (32) Insert with rubber plug for port (27). GC-2014 Service Manual...
- Page 71 Chapter 3 Gas-Flow Controller 3.1.2.4 AUX Reference No. 221-70049-94 221-18150-93 FLOW CONTROLLER, AUX 1PC, N BELLOW VALVE, 2K, 8KIN 670-18558-11 2PC, PRESSURE GAUGE, 200 KPA 018-21330 TAPE, STICKER, 0.1 × 13 × 5 221-31745 1PC, HOUSING 221-19502-08 1PC, RESISTANCE TUBE, HYDROGEN, GC-8A 201-47435 1PC, RUBBER PLUG, PORT, SILICON 221-09864-18...
- Page 72 Chapter 3 Gas-Flow Controller AUX resistance tube: (26) Insert with rubber plug for port (27). GC-2014 Service Manual...
-
Page 73: Apc
Chapter 3 Gas-Flow Controller 3.1.3 APC (Optional) Different APCs are used for each detector. 3ch APC: FID FTD 2ch APC: FPD 1ch APC: TCD ECD 3.1.3.1 3ch APC APC_FID (Assembly Configuration Chart) 221-47740-94 221-47740-94 APC-2014,DET-3CH APC-2014,DET-3CH APC_FTD (Assembly Configuration Chart) 221-47740-95 APC-2014,FTD GC-2014 Service Manual... -
Page 74: 2Ch Apc
Chapter 3 Gas-Flow Controller 3.1.3.2 2ch APC APC_FPD (Assembly Configuration Chart) 221-47742-92 DET APC FPD GC-2014 Service Manual... -
Page 75: 1Ch Apc
Chapter 3 Gas-Flow Controller 3.1.3.3 1ch APC APC_ECD (Assembly Configuration Chart) 221-47743-92 GC-2014 Service Manual... -
Page 76: Flow-Line Diagram For Gas-Flow Controller
Chapter 3 Gas-Flow Controller 3.2 Flow-Line Diagram for Gas-Flow Controller (1) Flow Line for Packed Dual Injection The flow line shown applies for use in combination with a DAFC and a manual flow controller. CARRIER IN Flow-rate sensor (Back of unit, top) Valve assembly Sample Detector... - Page 77 Chapter 3 Gas-Flow Controller (2) Flow Line for SPL The flow line shown applies for use in combination with AFC-2014, D-Purge, SPL, and a manual flow controller. GC-2014 Service Manual...
- Page 78 Chapter 3 Gas-Flow Controller - blank page - GC-2014 Service Manual...
-
Page 79: Chapter 4 Sample Injection Unit
Chapter 4 Sample Injection Unit Chapter 4 Sample Injection Unit 4.1 Configuration Sample Injection Unit SPL-2014 (Assembly Configuration Chart) WBI-2014 (Assembly Configuration Chart) GC-2014 Service Manual... -
Page 80: Piping For Sample Injection Unit
Chapter 4 Sample Injection Unit 4.2 Piping for Sample Injection Unit Piping for SPL-2014 2014 (Total Flow Controller) MOLECULAR SIEVE FILTER (Back of unit) Flow-rate sensor Pressure sensor FILTER ASSY Pressure FILTER ASSY sensor (Septum Purge Controller) BUFFER ASSY Detector UNIT Column oven (Electric Split Controller) -
Page 81: Configuration Of Injection Unit
Chapter 4 Sample Injection Unit 4.3 Configuration of Injection Unit 221-41286 SEPTUM NUT 221-44584 NEEDLE GUIDE AOC 221-47721-91 INJECTION PORT A ASSY (shaded region) 221-47435 RUBBER PLUG, INJ PORT, SILICON 221-70602 -91 HEATER, PT ASSY, SPL100 CARRIER/PURGE LINE -34 HEATER, PT ASSY, SPL230 221-70597-01 INSULATOR, UPPER SPLIT LINE 221-70166-91... -
Page 82: Heater Resistance Values For Heater, Pt Assy, Spl, 100 And Heater
Chapter 4 Sample Injection Unit 4.3.1 Heater Resistance Values for HEATER, PT ASSY, SPL, 100 and HEATER, PT ASSY, SPL, 230 Model name Heater resistance values 90.0 to 99.3 Ω HEATER, PT ASSY, SPL, 100 429.8 to 484.0 Ω HEATER, PT ASSY, SPL, 230 4.3.2 Recognized Resistance Values for HEATER, PT ASSY, SPL, 100 and HEATER, PT ASSY, SPL, 230 As shown in the configuration diagrams and flow-line diagrams for SPL-2014 and... -
Page 83: Packed Dual Injector
Chapter 4 Sample Injection Unit 4.4 Packed Dual Injector Parts List for Packed Dual INJ, 221-70080-34 (230V), -81 (100V), -82 (115V) Quantity Number Part name 230V 100V 115V 221-70189-91 INJECTION UNIT ASSY, 122 221-70479-34 HEATER, PT ASSY, P-INJ230 221-70479-91 HEATER, PT ASSY, P-INJ100 221-70479-92 HEATER, PT ASSY, P-INJ115 221-70188... - Page 84 Chapter 4 Sample Injection Unit - blank page - GC-2014 Service Manual...
-
Page 85: Chapter 5 Detector Unit
Chapter 5 Detector Unit Chapter 5 Detector Unit 5.1 TCD (Right) (Left) Parts List for TCD-2014 CELL ASSY, 221-70098-38 (230V), -81 (100V), -82 (115V) Quantity Number Part name 230V 100V 115V 221-70743-34 HOT PLATE ASSY, 2014, 220V 221-70743-91 HOT PLATE ASSY, 2014, 100V 221-70743-92 HOT PLATE ASSY, 2014, 115V 2 (Left) 221-32577-91 PIPE ASSY, COL-TCD 1 (145mm) 221-32577-92 PIPE ASSY, COL-TCD 2 (210mm) -
Page 86: Det Heater Assy, Ft
Chapter 5 Detector Unit 5.1.1 DET HEATER ASSY, FT Parts List for DET HEATER ASSY, FT, 221-70086-34 (230V), -91 (100V), -92 (115V) Quantity Number Part name 230V 100V 115V 221-70671-34 HEATER, PT ASSY, D-FID, 230 221-70671-91 HEATER, PT ASSY, D-FID, 100 221-70671-92 HEATER, PT ASSY, D-FID, 115 221-70125... -
Page 87: Fid
Chapter 5 Detector Unit 5.2 FID Parts List for FID-2014 CELL ASSY, 221-70090-91 Number Part name Quantity 221-70630-91 FID-2014 CELL BASE ASSY 11-1 221-70298-91 BASE,MAIN ASSY, FID 11-2 221-70162-92 NOZZLE ASSY, PACKED 11-3 221-47146-92 HIGH VOLTAGE ELECTRODE, FID2014 221-47659-92 COLLECTOR ASSY, FID, 600MM 221-41847-93 FILAMENT ASSY, 180MM GC-2014 Service Manual... -
Page 88: Det Heater Assy, F
Chapter 5 Detector Unit 5.2.1 DET HEATER ASSY, F Parts List for DET HEATER ASSY, F, 221-70085-34 (230V), -91 (100V), -92 (115V) Number Part name 230V 100V 115V 221-70671-34 HEATER, PT ASSY, D-FID 230 221-70671-91 HEATER, PT ASSY, D-FID 100 221-70671-92 HEATER, PT ASSY, D-FID 115 221-70124 DET, DUAL, UPPER COVER, FID... -
Page 89: Ecd
Chapter 5 Detector Unit 5.3 ECD ECD CELL GC-2014 Service Manual... - Page 90 Chapter 5 Detector Unit Configuration Diagram for ECD 221-25055-91 ECD-9 GC-2014 Service Manual...
-
Page 91: Fpd
Chapter 5 Detector Unit Chapter 5 Detector Unit 5.4 FPD GC-2014 Service Manual GC-2014 Service Manual... - Page 92 Chapter 5 Detector Unit Configuration Diagram for FPD GC-2014 Service Manual...
-
Page 93: Ftd-2014C
Chapter 5 Detector Unit 5.5 FTD-2014C GC-2014 Service Manual... - Page 94 Chapter 5 Detector Unit Configuration Diagram for FTD-2014C GC-2014 Service Manual...
-
Page 95: Ftd-2014
Chapter 5 Detector Unit 5.6 FTD-2014 GC-2014 Service Manual... - Page 96 Chapter 5 Detector Unit GC-2014 Service Manual...
- Page 97 Chapter 5 Detector Unit Configuration Diagram for FTD-2014 221-70458-91(-34) 1PC HEATER, PT ASSY, 100V (230V) DET 221-70121 1PC DET, SINGLE, UPPER COVER 221-70129 1PC RETAINER PLATE, DET, SINGLE 221-70138 1PC LOCK RING, DET, SINGLE 221-70134 1PC DET, SINGLE, BLOCK, UPPER 221-70135 1PC DET, SINGLE, BLOCK, LOWER 020-46534...
- Page 98 Chapter 5 Detector Unit - blank page - GC-2014 Service Manual...
-
Page 99: Chapter 6 Maintenance Parts Lists
Chapter 6 Maintenance Parts Lists Chapter 6 Maintenance Parts Lists <GC-2014 MAIN UNIT> Part name Remarks 072-01665-36 FUSE, 15A 100 V 072-02004-23 FUSE, 218, 15A 100 V 072-01665-34 FUSE, 10A 200 V 072-02004-21 FUSE, 218, 3.15A 200 V 074-73307-01 LITHIUM BATTERY CR2032 074-80427-61 POWER SUPPLY, LEA100F-24... -
Page 100: Fid-2014, Single
Chapter 6 Maintenance Parts Lists < FID-2014, SINGLE > Part name Remarks 221-70610-91 FID-2014 HEATER ASSY, 100 FID, 100 V 221-70610-34 FID-2014 HEATER ASSY, 230 FID, 200 V 221-70630-91 FID-2014 CELL BASE ASSY 221-47659-91 COLLECTOR ASSY, FID 221-46520-92 FID-2014 CONTROLLER 221-21910 INSULATOR, CERAMIC For FID collector... -
Page 101: Ftd-2014, Capillary
Chapter 6 Maintenance Parts Lists < FTD-2014, CAPILLARY > Part name Remarks 201-48386 3-WAY SPLIT TUBING, M-TYPE 221-18713-95 RESISTANCE TUBE ASSY, H2 For FTD 221-18713-96 RESISTANCE TUBE ASSY, AIR FTD-9 For FTD 221-21910 INSULATOR, CERAMIC 221-19502-08 RESISTANCE TUBE, H2 Resistance tube only (for make-up gas) 221-31745 HOUSING, RESISTANCE TUBE 221-34121-94... -
Page 102: Tcd-2014
Chapter 6 Maintenance Parts Lists < TCD-2014 > Part name Remarks 221-70041-91 TCD-2014 CONTROLLER 221-70086-91 DET HEATER ASSY, FT, 100 221-70086-34 DET HEATER ASSY, FT, 230 221-70043-91 TCD POWER SUPPLY < D-FID > Part name Remarks 221-70040-91 FID-2014 CONTROLLER, DUAL 221-70085-91 DET HEATER ASSY, F, 100 V 221-70085-34... -
Page 103: Chapter 7 Troubleshooting
(The method is described in the GC-2014 instruction manual.) If the gain value is well outside this range, obtain the correct value from Shimadzu Corporation's Quality Assurance Department. At this time, provide notification of the serial number and lot number displayed on the side of the AFC. - Page 104 (The method is described in the GC-2014 instruction manual.) If the gain value is well outside this range, obtain the correct value from Shimadzu Corporation's Quality Assurance Department. At this time, provide notification of the serial number and lot number displayed on the side of the AFC.
- Page 105 (The method is described in the GC-2014 instruction manual.) If the gain value is well outside this range, obtain the correct value from Shimadzu Corporation's Quality Assurance Department. At this time, provide notification of the serial number and lot number displayed on the side of the AFC.
-
Page 106: When The Control Mode Is "Total Flow" And The Injection Mode Is
(The method is described in the GC-2014 instruction manual.) If the gain value is well outside this range, obtain the correct value from Shimadzu Corporation's Quality Assurance Department. At this time, provide notification of the serial number and lot number displayed on the side of the AFC. - Page 107 (The method is described in the GC-2014 instruction manual.) If the gain value is well outside this range, obtain the correct value from Shimadzu Corporation's Quality Assurance Department. At this time, provide notification of the serial number and lot number displayed on the side of the AFC.
-
Page 108: Precautions For Flow-Rate Control Settings (Detapc)
(The method is described in the GC-2014 instruction manual.) If the gain value is well outside this range, obtain the correct value from Shimadzu Corporation's Quality Assurance Department. At this time, provide notification of the serial number and lot number displayed on the side of the AFC. -
Page 109: Temperature Control
Chapter 7 Troubleshooting Also, it may be possible to stop fluctuation by changing the P term or the I term (to a value several times, or a fraction of, the original value). Use this method to stop fluctuation in urgent cases. 7.2 Temperature Control The temperature does not rise, or does not agree with the setting. -
Page 110: Fpd
Chapter 7 Troubleshooting 7.3.2 FPD 1. Ignition is not possible. Cause Countermeasure The igniter filament has burnt out. Replace the igniter. 2. There is a lot, or a high level, of noise. Cause Countermeasure There is a fault in the photomultiplier. Replace the photomultiplier. -
Page 111: Other Problems
Chapter 7 Troubleshooting 2. Peaks are not output or are extremely small; FID used as detector. Cause Countermeasure If the igniter filament is red hot even though the ignition The hydrogen flame is out. operation is not being executed, this means that the hydrogen flame is out. - Page 112 Chapter 7 Troubleshooting 3. The sample injection unit and the detector are not recognized. Cause Countermeasure Check the contact state and the caulking state of the recognized resistance. The recognized resistance values, measured between pins 1 and 2 on the connector, are as follows. SPL, WBI (both recognized as SPL): 1 kΩ...
-
Page 113: Chapter 8 Service Window
Chapter 8 Service Window Chapter 8 Service Window This chapter describes the service window that is displayed by pressing the FUNC key, selecting 7. Service/Maintenance − 5. Service, and inputting the correct password in the password input window that is displayed. pf2: Displays the ID window. -
Page 114: Flow Adjust (Car)
Chapter 8 Service Window 8.1 Flow Adjust (CAR) This window can be used to set the control parameters for the carrier-gas flow controller (DAFC for DINJ, AFC for SPL-2014, or AFC for WBI-2014). If the set value and the actual measurement value of the flow rate or pressure differ, adjustment can be made by changing the Offset or Gain value. -
Page 115: Flow Adjust (Detapc)
Chapter 8 Service Window 8.2 Flow Adjust (DetAPC) (Options only) As an example, the window on the left shows the items displayed for H . The items are the same, however, for the APCs of air and make-up gas. The displayed contents may vary, however, depending on the type of Det APC. -
Page 116: Temp. Sensor Use Time
Chapter 8 Service Window 8.4 Temp. Sensor Use Time This window is used to check or reset the temperature-sensor usage time for each unit. Note: The display items vary with the unit. With the GC-2014, the time for which the temperature sensor has been used at a temperature of 300ºC or higher is calculated. -
Page 117: Serial Number
Chapter 8 Service Window 8.6 Serial Number 8.6.1 Main Body Serial Number Up to 20 characters can be input. The unit serial number is input before shipment. This information is shown on self-diagnostic reports. If, for some reason, the serial number does not appear, it can be input from this window. -
Page 118: Unit Serial Numbers
Chapter 8 Service Window 8.6.2 Unit Serial Numbers Note: The display items vary with the unit. This window can be used to check the serial numbers written in ROM for automatically recognized units. There is no display for some units. For example, the serial number for a single injection unit (SPL unit) cannot be checked. -
Page 119: Fan & Lcd Use Time
Chapter 8 Service Window 8.8 Fan & LCD Use Time This window is used to reset the operation times of the column-oven fan and the LCD unit. Note: The settings for the "acceptable values" cannot be changed. Fan: 61320.0 hours (approx. 7 years) LCD: 46380.0 hours (approx. - Page 120 Chapter 8 Service Window - blank page - GC-2014 Service Manual...
-
Page 121: Chapter 9 Appendix
Chapter 9 Appendix Chapter 9 Appendix Upgrade Procedure for GC-2014 CPU Board's ROM Software The procedure for upgrading the GC-2014 CPU board's ROM software via RS-232C from a PC is explained below. Items Required (1) PC with Windows installed (2) RC-232C cross cable for connecting GC and PC (cross-cable type: 9-pin female to 9-pin female;... - Page 122 Chapter 9 Appendix (9) After reconfirming the Installation (Position) and Installation (Piping) parameters that were recorded before the version upgrade (or after resetting them, if they have been deleted), reset the unit's power supply. (This is because changes in condition settings, such as the Installation (Position) and Installation (Piping) parameters, are only enabled when the power supply is reset.) (10) Press the FUNC key and select 3.
Need help?
Do you have a question about the GC-2014 Series and is the answer not in the manual?
Questions and answers