Table of Contents
Advertisement
Advertisement
Table of Contents

Related Manuals for ECOWITT WS90


Summary of Contents for ECOWITT WS90
- Page 1 7-in-1 Weather Outdoor Sensor Model: WS90 https://s.ecowitt.com/MP7YJJ...
-
Page 2: Table Of Contents
7.2 Mounting ............... 9 Specification ............... 13 Attention ..............16 9.1 About daily rain deviation ........16 9.2 How to calibrate the WS90 ......... 17 9.3 Wind speed 0 calibration ........20 Warranty ..............16 Care and Maintenance .......... 16 12. Contact Us25 .............. 25 12.1 After-sales Service .......... -
Page 3: Introduction
Introduction Figure 1 Ecowitt Ecosystem Pair with the gateways/consoles Pair with the gateways: GW1100/GW2000/GW1200 GW1100 GW2000 GW1200 Table 1 Pair with the consoles: HP2560/WS3800/WS3900/WS3910/HP2550/ WN1820/WN1821/WN1920/WN1980... - Page 4 The WN1920/WN1980 can not show the data of the illumination and UV on the display, just upload their data to the Ecowitt cloud. The WN1820/WN1821 can not show the data of the WS90 on the display, just upload their data to the Ecowitt cloud.
-
Page 5: Part List
Part List 1 x WS90 Weather Outdoor Sensor 1 x User Manual Note: 1.Optional other accessories (sold separately): 12V/1A power extension cord; Bird spikes. 2.2*AA Batteries for the sensor package are not included. 3.There’s a built-in heat plate in the 7-in-1 sensor package body, if the lowest temperature at your place is below 0°C, or 32°F, and the weather is mostly... -
Page 6: Overview
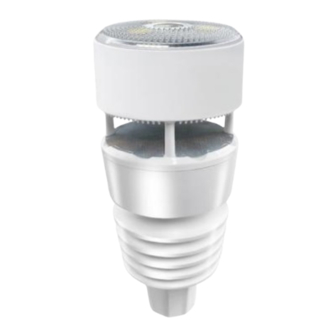
• Solar light intensity and UV index; • Waterproof IPX5; • Heater and additional power supply; Overview Figure 2: Sensor package assembly components Setup Guide Preparations 1. Open the package. 2. Preparing the receivers (gateways and consoles) to pair with the WS90. -
Page 7: Install Batteries In The Sensor Package
6.2 Install batteries in the sensor package Insert 2*AA batteries into the battery compartment after opening the battery compartment with a screwdriver, when the LED on the back of the sensor package lights up for 3 seconds and blinks every 8.5 seconds, make sure that the sensor is transmitting data. - Page 8 Note: Please make sure the battery is inserted correctly for its polarity as the system needs its initial power from this backup battery to start up the system before the solar panel charges up the accumulator and supply system power afterward. when in high altitude areas, during wintertime, the sunshine time is short, and the system needs to be powered from this backup battery, we recommend...
-
Page 9: Assembly
7.Ultrasonic anemometer with piezoelectric assembly 7.1 Before you mount Before mounting the outdoor sensor in a permanent location, you should test the sensor wireless connection in a temporary location, and make sure that the sensor has a good station to show the data on the gateway or console. - Page 10 Figure 4: Sensor package mounting diagram Make sure the mounting pole is vertical, or very close to it. Use a level as needed. 2.The WS90 has the extension cable to connect the waterproof adapt 12V. As Figure 5 show...
- Page 11 Figure 5: Sensor package mounting diagram...
- Page 12 Now you will need to align the whole package in the proper direction by rotating it on top of the mounting pipe as needed. 3. When you get the outdoor sensor WS90, try to turn left or turn right to confirm how to screw the bottom threaded cover.
-
Page 13: Specification
To achieve proper alignment, it is helpful to use a compass (many cell phones have a compass application). Note: In Southern hemisphere, it is not necessary to change the orientation to“SOUTH”as its solar panel is a rounded type and it is orientation free for its charging capability. - Page 14 Model WS90 Ultrasonic Anemometer with Piezoelectric Rain Name Gauge, Light & UV, Thermo-hygrometer Sensors Dimensions 93*93*208mm Weight 498(g) Material of Plastic Casing ASA+PC、PC Temperature Metering Range -40°C to 60°C(-40℉ to 140℉) Temperature Metering ±0.2°C (± 0.4°F) Accuracy Temperature Metering 0.1°C (± 0.2°F)
- Page 15 Light Metering accuracy ±25% Light Metering resolution 0.1Klux UV Metering range 1 to 15 UV Metering accuracy ±2 UV Metering resolution Data reporting Interval 8.5 seconds 920/915/868/433MHz (depending on local RF Connection Frequency regulations) RF Wireless Range (in open Over 150 meters (500 ft.) areas) Operating Temperature Range -40°C to 60°C(-40℉...
-
Page 16: Attention
About daily rain deviation Figure 7: Daily rain deviation for WH40 and WS90 The daily rain deviation of WS90 is very small in the long run, but under certain conditions the deviation can be larger: as the rain drop size and wind speed can have different impacts on the sensor output which lead to this variance. -
Page 17: How To Calibrate The Ws90
WH40 and use it together with WS90. If there is no precise requirement on data of each rain, then WS90 is just fine: After all the device works well after a longer run time. How to calibrate WS90 Ensure your mobile phone and gateway in the same router, the WS90 has been paired with the gateway. - Page 18 Figure 8 The WS90 is equipped with a haptic rain sensor, and the system offered a way that users can calibrate the rain sensor accuracy by themselves. To carry out a proper calibration, please check the following:...
- Page 19 0.8 for the time being. Only when different rain rates are recorded, you have the WS90 rain divided by 0.8 to get 1.0 rain, and then have the (reference/WS90/0.8) calculated again, and fill up the corresponding rain gain setting precisely.
-
Page 20: Wind Speed 0 Calibration
9.3 Wind speed 0 calibrations for WS90. 1. In a windless room, research a soft cloth to cover the top cover and the wind speed area of the WS90, after holding the CAL button for 3 seconds, the light will be bright for 5 seconds and then start to flash, after waiting the light has closed, and the wind speed will be reset to zero. - Page 21 Figure 11 2. In the usual state, press the CAL button three times to turn the LED off to stop the light flash. After the LED has been closed, if want to restart the light function: Press the reset button to restart it.
-
Page 22: Warranty
10.Warranty Figure 12 Note: Sensor damage, due to lack of grounding protection against lightning ESD discharge, is not covered by warranty. We disclaim any responsibility for any technical error or printing error or the consequences thereof. All trademarks and patents are recognized. We provide a 1-year limited warranty on this product against manufacturing defects or defects in materials and... - Page 23 workmanship. This limited warranty begins on the original date of purchase, is valid only on products purchased, and only to the original purchaser of this product. To receive warranty service, the purchaser must contact us for problem determination and service procedures. This limited warranty covers only actual defects within the product itself and does not cover the cost of installation or removal from a fixed installation, normal...
-
Page 24: Care And Maintenance
11. Care and Maintenance When batteries of different brands or types are used together, or new and old batteries are used together, some batteries may be over-discharged due to a difference in voltage or capacity. This can result in venting, leakage, and rupture and may cause personal injury. -
Page 25: Contact Us25
3.5v and lower than 5.5v. If it is not overpassing 2.5v, please check the top part of your WS90, and make sure it is free from dust coverage. Use a brush to clean up the surface for higher solar charging efficiency. -
Page 26: Stay In Touch
We are committed to providing assistance and resolving any concerns you may have. 12.2 Stay in Touch Ask questions, watch setup videos, and provide feedback on our social media outlets. Follow Ecowitt on Discord, YouTube, Facebook and Twitter. Copyright©2024 ecowitt All Rights Reserved. DC031824...
Need help?
Do you have a question about the WS90 and is the answer not in the manual?
Questions and answers