Table of Contents
Advertisement
Advertisement
Table of Contents

Related Manuals for Yamaha QY-8


Summary of Contents for Yamaha QY-8
- Page 6 • Turn the power switch OFF when the instrument is not in use. • If you use an AC power adaptor — the QY8 requires an optional Yamaha PA-1B or PA-3 AC Power Adaptor — unplug the adaptor from the AC outlet if the instrument is not to be used for an extended period of time.
- Page 7 QY8 Data Out function (see page 61 for details) to transfer important data to a MIDI data recorder such as the Yamaha MDF2 MIDI Data Filer for safe long-term storage. Yamaha cannot be held responsible for data loss caused by...
- Page 8 About This Manual The following simple icons are used throughout this manual to draw attention to important points and information where necessary. The icons also make it easier to differentiate between information that you should read immediately and information that can be skipped until later, hopefully helping you to become familiar with the QY8 in the quickest, most efficient manner possible.
-
Page 9: Table Of Contents
Contents The QY8: What It Is & What It Can Do ... 2 What It Is … ... 2 What It Can Do … ... 4 Setting Up: Power & Connections ... 5 Power Supply ... 5 Setting Up Your System ... 8 Getting to Know the QY8: How the Controls Work ... -
Page 10: The Qy8: What It Is & What It Can Do
20 complete songs. For extra storage capacity you can use the Data Out utility to transmit the song data to a MIDI data recorder such as the Yamaha MDF2 ( Voices The QY8’s internal AWM tone generator provides 40 top-quality voices plus a complete drum kit with different drum and percussion instru- ments assigned to different notes. - Page 11 The four parts can be independently muted so you can use the entire accompaniment, any combination of parts, or only a single part, as required. The accompaniment parts feature Yamaha’s advanced ABC (Auto Bass Chord) auto-accompaniment system so you can create even complex accompaniments with a minimum of effort.
-
Page 12: What It Can Do
The QY8: What It Is & What It Can Do What It Can Do … Here are a few ideas on how you can use the QY8. There’s no way we can cover all possibilities, but the ideas presented might help to spark some new and interesting applications. -
Page 13: Setting Up: Power & Connections
Using a Power Adaptor Plug the DC output cable from a Yamaha PA-1B or PA-3 AC Adaptor (available from your Yamaha dealer) into the DC IN jack on the rear panel, then plug the adaptor into a convenient wall AC power outlet. -
Page 14: Using Batteries
Setting Up: Power & Connections Using Batteries Six 1.5V AA size (SUM-3 or R6P) or equivalent manganese or alkaline batteries must first be installed in the battery compartment. Open Battery Compartment Cover Open the battery compartment cover — located on the instru- ment’s bottom panel —... -
Page 15: When To Replace The Batteries
When to Replace the Batteries When the batteries run down and are no longer able to operate the QY8, the sound may become distorted and the following display will appear: Battery When this display appears, replace the batteries with a complete set of six new batteries. -
Page 16: Setting Up Your System
QY8 sequencer, or a MIDI data recorder such as the Yamaha MDF2 if you want to store your songs to floppy disk ( 61). >... -
Page 17: Audio Connections
This jack is only used when you are powering the QY8 from an optional AC adaptor instead of batteries. The DC output cable from an optional Yamaha PA-1B or PA-3 AC Power Adaptor is plugged in here. The batteries are automatically disconnected when a plug is inserted into the DC IN jack. -
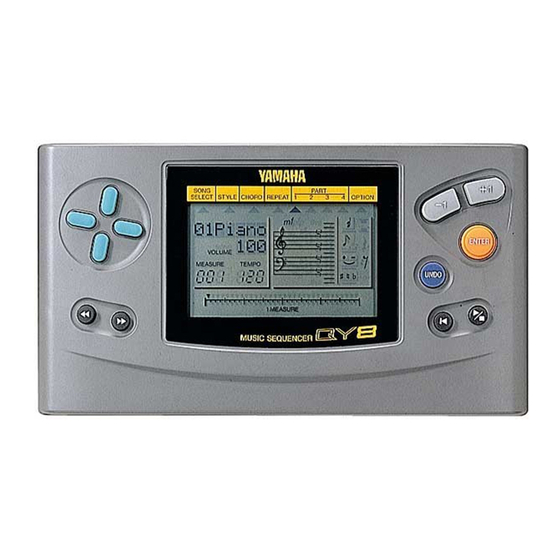
Page 18: Getting To Know The Qy8: How The Controls Work
Getting to Know the QY8: How the Controls Work The QY8 has fairly simple, consistent control interface that, once understood, makes operation fast and easy, no matter what operation you are performing. If you read through this section carefully you should have no problem accessing and operating the QY8’s many advanced features. - Page 19 3 Cursor Buttons L e f t R i g h t D o w n 4 [ - 1 ] [ - 1 ] [ - 1 ] and [ + 1 ] [ - 1 ] [ + 1 ] [ + 1 ] Buttons [ + 1 ] [ - 1 ]...
- Page 20 Getting to Know the QY8: How the Controls Work 7 Sequencer Buttons The sequencer buttons control playback of the accompaniment and sequencer parts (also real-time recording of the sequencer parts), and allow you to locate a specific measure and beat within a song. Their layout and functions are similar to the transport controls on a tape recorder.
- Page 21 Right Side Panel 8 VOLUME Control The VOLUME control adjusts the volume of the sound delivered via the PHONES/LINE OUT jack. Slide the control toward “MAX.” to increase the volume or toward “MIN.” to decrease the volume. Set the VOLUME control to “MIN.” when connect- ing the QY8 to a sound system for the first time, CAUTION then gradually raise the volume level until the re-...
-
Page 22: Play The Demo
Getting to Know the QY8: How the Controls Work Play the Demo Now that you’re set up and are basically familiar with the controls, try playing the built-in demonstration to hear what the QY8 can do. Select the SONG SELECT Mode Use the cursor buttons to move the cursor to the SONG SELECT pointer ( ). - Page 23 Getting to Know the QY8: How the Controls Work Start Playback ; ; ; ; ; t t t t t Press the [ ] button to start playback — the demo will playback repeatedly until stopped. You may need to adjust the VOLUME control to set a comfortable listening level.
-
Page 24: Play The Initial Song Data
Getting to Know the QY8: How the Controls Work Exit Use the [-1] and [+1] buttons to select a song number other than “00” to exit from the demo mode. Play the Initial Song Data Songs 1 through 15 initially contain a variety of accompaniments and chord progressions in a range of musical styles. -
Page 25: The Basics: The Elements That Make Up A Song
The Basics: That Make Up a Song A QY8 “SONG” consists of two main sections: 1: An accompaniment created using pre-programmed “styles”. You specify chord changes and repeats as required. 2: Four “parts” (similar to sequencer tracks) on which you can record melody lines, counter lines, or just about anything you like using the QY8 voices. -
Page 26: Styles
The Basics: The Elements That Make Up a Song Styles Styles are pre-programmed basic accompaniment patterns which include two chord parts, a bass part, and a rhythm part. The QY8 has 50 basic styles, each with six “sections” — an introduction, main pattern A (usually a good choice for the “verse”... - Page 27 Select a Style Move the cursor down to the style name and use the [-1] and [+1] buttons to select a style (it is also possible to select a style while the cursor is positioned at the STYLE pointer). • Normally the currently set tempo is retained when you change styles.
- Page 28 The Basics: The Elements That Make Up a Song Abbreviation E n d Try Out Different Styles and Sections You can move the cursor up or down to the style name or section abbreviation and select different styles and sections while the QY8 plays.
- Page 29 If you move the cursor to the TEMPO parameter you can use the [ - 1 ] [ - 1 ] [ - 1 ] [ - 1 ] and [ + 1 ] [ - 1 ] [ + 1 ] [ + 1 ] [ + 1 ] buttons to set the playback tempo to anywhere [ + 1 ]...
-
Page 30: Chords
The Basics: The Elements That Make Up a Song Set the Volume Use the [-1] and [+1] buttons to set the volume as required (you can do this while the cursor is located at the STYLE pointer or at the VOLUME parameter). The volume range is from 0 to 127. A setting of “0”... - Page 31 The Basics: The Elements That Make Up a Song Chord Type (Key of C)
- Page 32 The Basics: The Elements That Make Up a Song Try Out the QY8 Chords Play a Style Select a style and start playback as described in the preceding section. Select the Chord Entry Mode Move the cursor to the CHORD pointer ( ) to select the chord entry mode.
-
Page 33: The Sequencer Parts
The on-bass setting is automatically cancelled whenever you change the chord root or type. DETAIL Stop Playback ; ; ; ; ; t t t t t Press the [ The Sequencer Parts The QY8’s internal AWM tone generator provides 40 top-quality voices plus a complete drum kit with different drum and percussion instruments assigned to different notes. -
Page 34: Creating An Accompaniment
Creating an Accompaniment Creating a complete accompaniment that can be used on its own, or as the basis for a complete song, is a simple process: specify the appropriate style/section changes, chord changes, and repeats. Select a Song Number 1-1. Position the cursor at the SONG SELECT pointer ( ) to select the song selection mode. - Page 35 Enter the Styles 2-1. Move the cursor to the STYLE pointer ( ) to select the style entry mode. h h h h h j j j j j 2-2. Use the [ ] and [ want to enter the first style change, as indicated by the MEASURE number.
- Page 36 Creating an Accompaniment 2-4. Press [ENTER] to enter the selected style/section at the current location. A dot will appear on the 1 MEASURE bar to indicate that a style change has been entered at that location. 2-5. Repeat steps 2-2 through 2-4 until all required style and section changes have been entered.
- Page 37 In addition to deleting mistakes as described above, you can use the [UNDO] button to undo the last operation performed — i.e. a mistaken style entry. HINT Enter the Chord Changes 3-1. Move the cursor to the CHORD pointer ( ) to select the chord entry mode.
- Page 38 Creating an Accompaniment • In the chord entry mode the [ [ [ [ [ backward or forward in eighth-note increments when the cursor is located at the 1 MEASURE pointer, and in quarter-note DETAIL increments when the cursor is in any other position. The [ [ [ [ [ j j j j j and [ [ [ [ [ increments when the cursor is located at the CHORD pointer.
- Page 39 Deleting Chord Changes To delete a chord change, move the cursor to the dot on the 1 MEASURE bar corresponding to the change you want to delete, then press the [ENTER] button. An alternative method is to use the h h h h h j j j j j ] and [ ] buttons to locate the chord to be deleted, select the...
- Page 40 Creating an Accompaniment Start repeat. Marks the beginning of a section of the song which is to be repeated. Must be used in conjunction with an end repeat (:||) mark, or first ending ( (:|| ¡02 current measure when the [ENTER] button is pressed. End repeat and number of repeats.
- Page 41 If this happens use the Clear Song function described on page 60 to clear unwanted song data. You might also want to use an optional Yamaha MDF2 MIDI Data Filer to save your important song data to floppy disk for later loading and use.
- Page 42 Creating an Accompaniment g g g g g 5-2. Press [ ] to make sure you start at the first measure of the song, ; ; ; ; ; then press [ or ending section, playback will stop automatically. Otherwise, ;...
- Page 43 Select a Character Use the [-1] and [+1] buttons to select the first character for the song name. The available characters are listed below: (Space) !"#$%&'()*+,-.0123456789:;<=>?@ ABCDEFGHIJKLMNOPQRSTUVWXYZ[¯]^_£ abcdefghijklmnopqrstuvwxyz{|}‘“ Move to the Next Character & Repeat Move the cursor to the next character position and repeat the selection process.
-
Page 44: Programming The Sequencer Parts
Programming the Sequencer Parts Once you’ve created an accompaniment, you might like to add a melody line and other parts that will finish off your composition. Melody lines and other musical elements can be recorded using the QY8’s four “parts”, as described below. - Page 45 Assign a Voice to the Selected Part With the cursor either at the PART pointer or the voice name, use the [-1] and [+1] buttons to select the voice you want to use for the selected part. • You can also set the volume of the selected part by moving the cursor to the VOLUME parameter below the voice name and using the [ - 1 ] DETAIL...
- Page 46 Programming the Sequencer Parts • The key signature set for any one part applies to all other parts as well. • If you have already created an accompaniment as described in DETAIL the preceding section, the key signature you select should natu- rally be appropriate for your accompaniment.
- Page 47 Enter the Required Notes and Rests A number of parameters are used to define each note you enter (described below). When you’ve set all the required parameters for your next note, press [ENTER] to actually enter the note (or rest). The 1 MEASURE pointer will advance by a corresponding amount to the next note/rest location.
- Page 48 Programming the Sequencer Parts Pitch To specify the pitch of the next note to be entered, move the cursor to the pitch symbols on the display score (the dot on the score will flash), use the [-1] and [+1] buttons to select the pitch you want to enter, then press [ENTER] to actually enter the selected note.
- Page 49 Sharp. Raises the pitch of the note by a semitone. Natural. Returns a sharped or flatted note to its normal pitch. Flat. Lowers the pitch of the note by a semitone. An “accidental” is a sharp or flat that is not specified by the key signature of the song.
- Page 50 Programming the Sequencer Parts List of Rest Lengths The length of rests can be extended in the same way as notes — the amount the rest is extended is determined by the currently selected note length (see Note Length, above). HINT Chords To enter more than one note on the same beat in order to produce...
- Page 51 If this happens use the Clear Song function described on page 60 to clear unwanted song data. You might also want to use an optional Yamaha MDF2 MIDI Data Filer to save your important song data to floppy disk for later loading and use.
- Page 52 Programming the Sequencer Parts Select a Part Move the cursor to the pointer ( ) of the part you intend to record. Engage the Real Time Record Mode Press [ENTER] while holding the cursor up button to engage the real time record mode.
- Page 53 Quantize Values One measure of 8th notes before quantization Always use a quantize value that is at least as short as the shortest notes in the part to be quantized. If you set the quantize MUSICAL value to 8th notes but actually record 16th notes, for example, NOTE some of the 16th notes will be aligned with the 8th note beats, thus ruining the track.
- Page 54 Programming the Sequencer Parts Start Recording ; ; ; ; ; t t t t t Press the [ ] button to begin recording. The metronome will sound and you’ll be given a two-measure count-in prior to the first measure actually recorded.
-
Page 55: The Option Functions
The Option Functions The QY8 provides a range of “option” functions that perform a variety of important tasks. Most of these functions apply to the currenty selected song, so be sure that the appropriate song is selected before calling and executing the option functions. - Page 56 The Option Functions Parts 1 through 4 12340 Use the cursor buttons to select the part you want to mute: “1” … “4” are sequencer parts 1 through 4; “CI” and “CII” are accompa- niment chord parts 1 and 2, “B” is the bass part, and “R” is the rhythm part.
-
Page 57: Key Change
Key Change Transposes the accompaniment and parts up or down by the specified number of semitones. Minus (–) values transpose down while plus (+) values transpose up. The maximum key change range is from –12 (down one octave) to +12 (up one octave). With the cursor at the OPTION pointer use the [-1] and [+1] buttons to select “KeyChng”... -
Page 58: Erase Measure
The Option Functions Erase Measure Erases all data from the specified measure or range of measures in the specified part. An erase operation leaves the specified measures intact but blank. With the cursor at the OPTION pointer use the [-1] and [+1] buttons to select “ErsMeas”... -
Page 59: Delete Measure
Move the cursor across to the end measure parameter and use the [-1] and [+1] buttons to select the last measure in the range you want to erase (this should be the same as the top measure if you only want to erase one measure). Press [ENTER] to erase the specified measures. - Page 60 The Option Functions DelMeas Use the [-1] and [+1] buttons to select the top measure in the range you want to delete. Move the cursor across to the end measure parameter and use the [-1] and [+1] buttons to select the last measure in the range you want to delete (this should be the same as the top measure if you only want to delete one measure).
-
Page 61: Create Measure
Create Measure Creates a specified number of blank measures having the specified time signature for all tracks. The created measures are inserted at a specified measure number, and all subsequent measures are moved forward to make room. With the cursor at the OPTION pointer use the [-1] and [+1] buttons to select “CreMeas”... -
Page 62: Copy Measure
The Option Functions Move the cursor across to the number of measures parameter and use the [-1] and [+1] buttons to specify the number of measures you want to create (1 … 99). Press [ENTER] to create the specified measures. “Completed” will appear briefly on the display and the Create Measure function will automatically be exited when the specified number of blank measures have been created. - Page 63 Cpyfrom Top measure Source part Use the [-1] and [+1] buttons to select the part from which you want to copy data: “P1” … “P4” are parts 1 through 4; “CHD” is the accompaniment chord track, “ALL” is all accompaniment and sequencer parts.
- Page 64 The Option Functions Cpy0to0 Destination part Use the [-1] and [+1] buttons to select the part to which you want to copy the specified “copy-from” data: “P1” … “P4” are parts 1 through 4. The copy-to part parameter will automatically be selected if “ALL” or “CHD”...
-
Page 65: Mix Part
The Copy Measure job makes it easy to use phrases or even complete sections (an entire chorus, for example) in more than MUSICAL one place in a song. You can copy a phrase played by one voice, NOTE and have it repeated by a different voice later in the song. You can always edit the copied sections to create variations. - Page 66 The Option Functions Use the [-1] and [+1] buttons to select the first source part to be mixed: “P1” … “P4” are parts 1 through 4. Move the cursor across to the second source part parameter and use the [-1] and [+1] buttons to select the second source part to be mixed.
-
Page 67: Transpose
Transpose Individually transposes the specified range of measures within the specified part up or down by the specified number of semitones. Minus (–) values transpose down while plus (+) values transpose up. The maximum transpose range is from –12 (down one octave) to +12 (up one octave). -
Page 68: Clear Song
The Option Functions Move the cursor down to the top measure parameter and use the [-1] and [+1] buttons to select the first measure in the range you want to transpose. Move the cursor across to the end measure parameter and use the [-1] and [+1] buttons to select the last measure in the range you want to transpose. -
Page 69: Data Out
An ideal storage device for use with the QY8 is the Yamaha MDF2 MIDI Data Filer. To save data from the QY8 to the MDF2, first connect the QY8... - Page 70 • If you will be transferring data in QY8 format, there’s no need to change the “to QY8” parameter. If you want to send data to the Yamaha QY20 Music Sequencer, or save it in a format that DETAIL can be loaded by the QY20, move the cursor to the “to QY8”...
-
Page 71: Program Change
MDF2 (or another QY8). To receive bulk data make sure that the MIDI OUT of the MDF2 (or other device) is connected to the MIDI IN of the QY8. The QY8 will also receive bulk data from the Yamaha QY10 Music Sequencer. DETAIL Program Change Normally the QY8 uses its own internal voice assignments. -
Page 72: Undo/Redo On/Off
The Option Functions PgmChng Voice assignment configuration Use the [-1] and [+1] buttons to select “GM” for General MIDI voice assignments, or “Nml” for the standard QY8 voice assignments. Move the cursor back to the OPTION pointer to exit. Undo/Redo On/Off The QY8 Undo/Redo function requires a significant amount of memory when used with the option functions or during real-time recording. - Page 73 Move the cursor down to the On/Off parameter. Use the [-1] and [+1] buttons to turn the Undo/Redo function on or off as required. Exit by either pressing [ENTER] while holding the up cursor button, or by pressing the left or right cursor button. The Option Functions Udo/Rdo On/off...
-
Page 74: The Qy8 As A Tone Generator/Abc Expander
The QY8 As a Tone Generator/ABC In addition to being played from its internal sequencer, the QY8 can be controlled from an external keyboard, sequencer, or music computer. As a Tone generator Module Used as a tone generator module, the QY8 allows 8 different voices to be played via different MIDI channels. -
Page 75: As An Abc Expander
Select PART 1 Move the cursor to the PART 1 pointer ( ). Select a Voice & Play Use the [-1] and [+1] buttons to select different voices and try playing them via your keyboard or controller. Note that when you select the “41Drums”... - Page 76 The QY8 As a Tone Generator/ABC Expander ABC Zone This utility function sets the range of notes in which chords played on an external MIDI keyboard will be recognized by the QY8 ABC system. Select the Chord Entry Mode Move the cursor to the CHORD pointer ( ) to select the chord entry mode.
- Page 77 Exit Move the cursor up to the CHORD pointer and press [ENTER] or one of the cursor buttons to return to the normal chord entry mode. Play Chords played within the specified ABC range will be recognized by the ABC system and the accompaniment chord will change accordingly during song playback.
-
Page 78: Appendix
ALL songs you have made. Be sure to save data you want to keep to a MIDI data storage device such as the Yamaha MDF2 MIDI Data Filer before carrying out the total reset procedure. -
Page 79: Voice List & Polyphony Information
Voice List & Polyphony Information The QY8 has 28-note “polyphony.” This simply means that it can produce a maximum of 28 notes at the same time. If the maximum polyphony is exceeded — this includes all notes on the accompaniment and melody tracks — some of the notes will be truncated and will therefore not sound. - Page 80 Appendix Drum Set (Voice Number 41) Note No. Note Voice Name Brush Swish Brush Roll Brush Slap Stick Bass Drum Soft Bass Drum Hard Side Stick Snare Drum 1 Hand Clap Snare Drum 2 Low Floor Tom Closed Hi Hat High Floor Tom Pedal Hi-Hat Low Tom...
-
Page 81: Style List
Style List Number Category Dance & Funk Rock1 Rhythm & Blues Rock 2 Jazz & Swing Latin Caribbean Country& Would March & Waltz New Age Blank Name Time Signature Disco Disco Euro Beat Euro House House Dance Shuffle Dance Funk Shuffle Funk Soul Ballad SolBl... -
Page 82: Troubleshooting
Appendix Troubleshooting If something doesn’t seem to be working right, please check the following points before assuming that your QY8 is faulty. Symptom Power won’t turn on. If you are using an AC adaptor, is the adaptor properly plugged into both the AC outlet and the QY8? See page 5. - Page 83 Display Data Which may Not Be the Same as When Entered Pitch Accidentals ( , ) may change according to the selected key signature. If, for example, D is entered in a key signature, it will be changed to C . Note A slur will be displayed where tenuto was entered.
-
Page 84: Error Messages
Appendix Error Messages Errors do occur from time to time, and when they do the QY8 will usually display a message that indicates what type of problem has occurred so you can rectify it and return to normal operation as quickly as possible. Battery Err The battery voltage is too low for proper operation. -
Page 85: Specifications
Specifications and descriptions in this Owner’s Manual are for information purposes only. Yamaha Corp. reserves the right to change or modify products or specifications at any time without prior notice. Since specifications, equipment or options may not be the same in every locale, please check with your Yamaha dealer. -
Page 86: Midi Data Format
Appendix MIDI Data Format [Tone Generator Section] (1) RECEIVE FLOW NOTE OFF NOTE ON/OFF HOLD 1 BnH,40H PROGRAM CHANGE PITCH BEND CHANGE ACTIVE SENSING (2) RECEIVE DATA (2-1) CHANNEL VOICE MESSAGES * Rception is always “omni on” in the record mode. (2-1-1) NOTE OFF 1000nnnn (8nH) n=0~6, 9 VOICE CHANNEL STATUS... - Page 87 (3-1-3) CONTROL CHANGE STATUS 1011nnnn (BnH) n=0~6, 9 VOICE CHANNEL NUMBER 01000000 SUSTAIN SWITCH Control number 0vvvvvvv v=0~63: OFF, 64~127: ON Control value (3-1-4) PROGRAM CHANGE STATUS 1100nnnn (CnH) n=0~6, 9 VOICE CHANNEL NUMBER 0ppppppp p=0~127 Program number (3-2) SYSTEM REAL TIME MESSAGE 11111000 TIMING CLOCK STATUS...
-
Page 90: Index
Appendix Index [–1]/[+1] buttons ... 11 ; ; ; ; ; t t t t t button ... 12 g g g g g button ... 12 h h h h h j j j j j buttons ... 12 1 MEASURE ...