Advertisement
INTRODUCTION
Before you get started, make sure to visit scuf.co/setup to setup your controller, update your controller firmware and any additional downloads.
Unlike standard controllers, the full-customization capabilities of Vantage 2 allows you to personalize every feature to fit your specific needs and style.
WHAT'S IN THE BOX

- SCUF Vantage 2 Controller
- SCUF Vantage 2 Protection Case (Wireless/Wired models only)
- 10ft High Speed Braided Micro-USB Cable
- 2x Long Domed Thumbsticks
- 2x Long Trigger Covers
- 2x Anti-friction Rings
- 1x Control Disc
- 1x SCUF Key (0.9mm)
- Product Guide
- Product Manual
- Sticker Pack
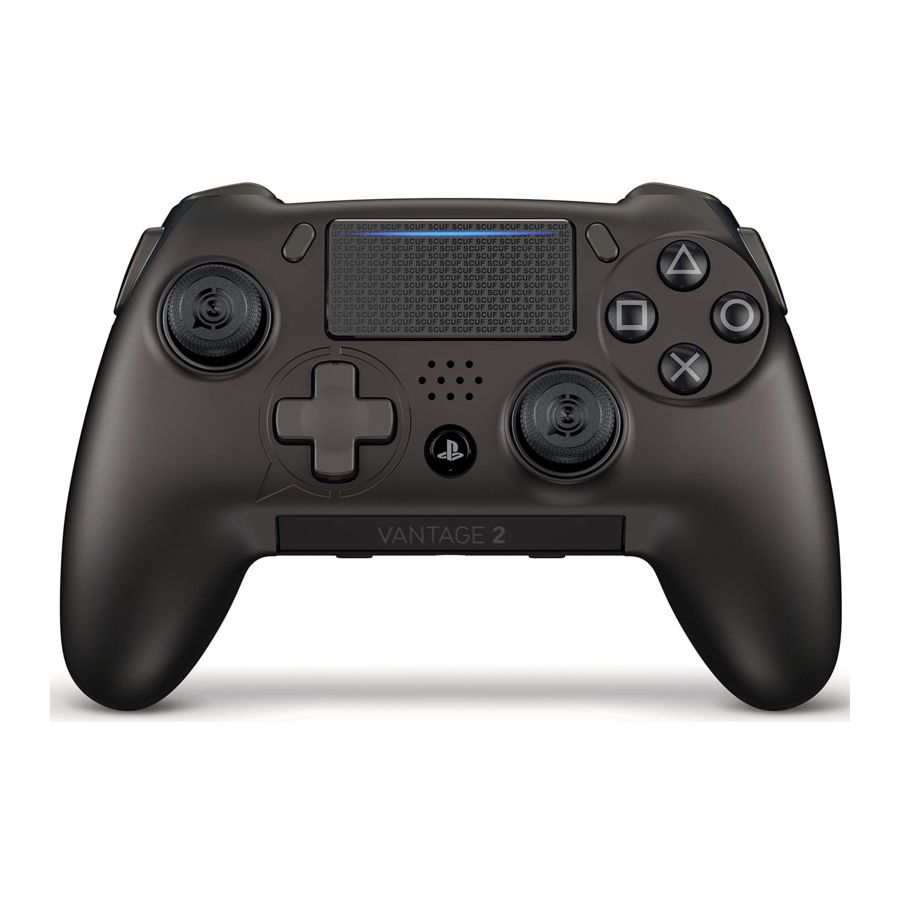
DEVICE LAYOUT & FEATURES

- Sax Buttons
- Customizable Thumbsticks
- Share Button
- Touch Pad
- Options Button
- Interchangeable Magnetic Faceplate
- Interchangeable D-pad & Control Disc
- Built-In Speaker
- PS Button
- Reset Button
- Wireless/Wired Switch*
- Audio Touch Bar
- 3.5mm Audio Jack Port
- Remapping Switch
- Removable Vibration Modules
*Wireless/Wired models only

- Inclined Mechanical Bumpers
- Trigger Covers – Long and Short
- Adjustable Hair Triggers
- Quick Shift Trigger Stops
- Cable Retention System & Micro-USB Port
- Paddle Control System
- High Performance Grip
DEVICE SET-UP
WIRELESS/WIRED MODEL
Pairing your controller with your PS4
This operation is performed only once, when you are using the SCUF Vantage Controller for the first time.
- Turn on your PS4 System (pressing the PS Button on your SCUF Vantage will not turn on the console).
- Slide the Wireless/Wired Switch on your SCUF Vantage to the right (Bluetooth).
- Using another controller already connected to your PS4, select: Settings > Devices > Bluetooth Devices from the PS4 System Menu.
- Press the PS Button on your SCUF Vantage to activate it.
- Press and hold the Share Button and the PS Button simultaneously on your SCUF Vantage until the Light Bar begins to flash.
- Place the controller close to the PS4 System and wait for "SCUF Controller" to appear in the device list.
- Using the connected controller, select "SCUF Controller" from the PS4 System List, and press the "X" button and when prompted, select "Yes."
- The LED on the SCUF Vantage will illuminate for 3 seconds and then turn off, indicating successful pairing.
Notes:
- If pairing is unsuccessful, repeat steps 4 through 8.
- If you slide the mode switch to the left (USB) while pairing, your SCUF Vantage will exit pairing mode.
- If you do not have another controller already connected to your PS4, you can alternatively download the PlayStation Second Screen Application on your smartphone. Available on the Apple App Store and Google Play Store for Android.
- Pressing and holding the Share button and the PS Button simultaneously once your SCUF Vantage has been paired will delete the existing pairing.


Your SCUF Vantage is either dual mode Wireless (Bluetooth) / Wired (USB) or a Wired only model.
Please follow the appropriate set-up instructions for your device.
USB MODE
- To play in Wired mode, slide the Wireless/Wired Switch to the left (USB).
- Connect the cable to the Micro-USB port in the back of the controller.
- Connect the other end of the cable to one of the USB ports on your PS4 console.
- Press the PS Button on your SCUF Vantage.
BLUETOOTH MODE
Wireless models only
- To play wirelessly, slide the Wireless/Wired Switch to the right (Bluetooth).
CHARGING
Your SCUF Vantage Controller should be charged via the PS4 System. Using any other power source could result in damage to your controller.
- Connect the cable to the Micro-USB port in the back of the controller.
- Connect the other end of the cable to a USB port on your PS4 System.
- When the battery is charging, and the controller is not in use, the light bar will turn orange.
- Expected charge time is approximately 21/2 hours.
- Expected battery life up to 20 hours depending on use. If the Removable Vibration Modules are active, expected battery life will decrease.
Note: If your controller is already paired, you do not need to pair it again when switching to Wireless (Bluetooth) mode.
Note: If you would like to play while charging your controller, switch to Wired mode.
WIRED MODEL
Using your controller with your PS4
- Turn on Your PS4 System.
- Connect the cable to the Micro-USB port in the back of the controller.
- Connect the other end of the cable into a USB port on your PS4 System.
- Press the PS Button on your SCUF Vantage to activate it.
FEATURES & BENEFITS
We've created the most versatile controller ever — optimized for comfort and ergonomics to suit your hands and game style. Reading this manual for a few minutes will help you discover the power you now own.
PADDLE CONTROL SYSTEM
(P1, P2, P3, P4)
Paddles allow you to utilize more of your hands, shortening the response time in between performing actions.
- Any of the four paddles can be mapped to buttons or controller functions, including the triggers and Touch Pad click. For more information, see the "Remapping Switch" section.
![]()

Adding, removing, replacing or customizing your paddles:
- To remove a paddle: slide up, twist slightly and then lift.
- To replace a paddle: twist the paddle into the paddle cavity from the top, then slide it down to secure it into place. You will hear a "click" when the paddle is secured.
SAX BUTTONS
Sax Buttons can be easily accessed by extending your index finger. Sax Buttons offer intuitive access to the sides of the controller, reducing the travel of your fingers between the buttons.

- Either of the Sax Buttons can be mapped to buttons or controller functions, including the triggers and Touch Pad click. For more information, see the "Remapping Switch" section.
Adding, removing, replacing or customizing your Sax Buttons:
- To remove a Sax Button: lift from the bottom up.
- To replace a Sax Button: press from the top down.
REMAPPING SWITCH
The Remapping Switch on the rear of the controller takes your gaming flexibility to the next level allowing you to configure the Paddle Control System (P1, P2, P3, P4) and Sax Buttons (S1, S2) to fit different games.
You can easily remap any paddle or Sax Button to one of the following fifteen functions:  ,
,  ,
,  ,
,  , Left D-pad, Right D-pad, Up D-pad, Down D-pad, R1, R2, R3, L1, L2, L3, or Touch Pad click.
- Slide the Remapping Switch to the right (to Remapping mode).
![]()
- Press and hold the paddle or Sax Button that you intend to remap, and simultaneously press and hold the controller function or button that you want to map it to.
- Release the button or controller function, then release the paddle or Sax Button.
- Slide the Remapping Switch back to the left (to Play Mode).

Note: Paddle or Sax Button mapping can be cleared by remapping the button to the Share, Options or PS Button.
TRIGGER CONTROL SYSTEM
Reduces latency, allows you to optimize the triggers to eliminate unnecessary movement and accommodates different hand sizes. The Trigger Control System consists of three modules: the Adjustable Hair Triggers, the Quick Shift Trigger Stops, and the Interchangeable Trigger Covers.
ADJUSTABLE HAIR TRIGGERS
You may want to adjust and fine-tune your trigger tension to reduce latency in trigger pull for faster response time. We recommend adjusting the Hair Triggers in-game by tightening until the in-game action is initiated, then loosening off slightly to your playing preference.

To use your Hair Trigger feature:
- Lift the lip of the Trigger Cover straight up to separate it from the trigger body.
- Insert the SCUF Key (0.9mm) into the adjustable screw.
- Turn the SCUF Key clockwise to tighten the Hair Trigger. Then turn the SCUF Key counterclockwise to loosen the Hair Trigger.
To return to standard Hair Trigger operation:
- Insert the SCUF Key (0.9mm) into the adjustable screw and turn counterclockwise until the screw is flush with the top of the trigger body.
- Replace the Trigger Cover by pushing the trigger down and snapping the top part of the cover on first, then push the bottom of the Trigger Cover down to snap it in place. You will hear a "click" when the Trigger Cover is secured.
QUICK SHIFT TRIGGER STOPS
Trigger Stops are designed to reduce trigger latency by eliminating the travel required past the activation point of the trigger. Use your fingers to adjust the Trigger Stop position on the trigger. This feature may not be compatible with all games, and is most efficient in shooter games.

- "ON" position: the travel distance when releasing the trigger will be reduced.
- "OFF" position: the trigger will have a standard travel distance.
TRIGGER COVERS – SHORT OR LONG
Trigger Covers are fully removable and easily clip onto the trigger body. They are designed to let you access the Hair Trigger for fine-tuning and to improve your trigger accuracy and hand comfort. The Long Trigger Covers extend the natural parameters of the controller to suit larger hand sizes and have a rubberized grip for added control.

To remove the Trigger Covers:
- Lift the lip of the Trigger Cover straight up to separate it from the trigger body.
To replace Trigger Covers:
- Replace the Trigger Cover by pushing the trigger down and snapping the top part of the cover on first, then push the bottom of the Trigger Cover down to snap it in place. You will hear a "click" when the Trigger Cover is secured.
CUSTOMIZABLE THUMBSTICK AREA
SCUF Thumbsticks provide a larger surface area for thumbs to grip for improved accuracy and control. SCUF Vantage includes multiple length and shape thumbsticks which are interchangeable so you're able to select the thumbstick that best fit your hand size and gamestyle.

To swap thumbsticks:
- Remove the faceplate by lifting it from the controller chassis using the two finger notches on each side of the handles.
- To remove the current thumbstick, lift it off the thumbstick shaft.
- Align your selected thumbstick with the thumbstick shaft and press firmly to secure.
- Align faceplate with the controller and push to secure. You will hear the magnets "click" into place.
Note: The tail of the SCUF logo on the thumbstick should be positioned at the bottom left once the thumbstick is in proper position.
ANTI-FRICTION RINGS
The Anti-friction Rings can also be swapped out or replaced. These rings are made with high grade self-lubricating materials to provide a pro-grade finish, so the thumbsticks glide on contact.

To swap the rings:
- Remove the faceplate by lifting it from the controller chassis using the two finger notches on each side of the handles.
- To remove the ring, push it from the inside of the front faceplate until release.
- To place a ring into a faceplate, push it into place from the front side aligning the teeth.
- To place the faceplate, align it with the controller and push to secure. You will hear the magnets "click" into place.
INTERCHANGEABLE D-PAD & CONTROL DISC
The D-pad helps access a single direction bias more quickly, reducing the distance when alternating between the thumbstick and D-pad. With the Control Disc, you can transform the D-pad to a Control System similar to a thumbstick and improve the comfort of D-pad use, making it easier to activate diagonals.

To install Control Disc:
- Pull the D-pad away from the controller and position the Control Disc instead. The magnets in the Control Disc will hold it in position.
To remove Control Disc:
- Pull the Control Disc away from the controller.
Note: The tail of the SCUF logo should be positioned at the bottom left once the Control Disc is in proper position.
ADDITIONAL FEATURES
INTERCHANGEABLE MAGNETIC FACEPLATE
This allows you to customize your controller's style. It can be removed by lifting the controller chassis using the two finger notches on each side of the handles.

REMOVABLE VIBRATION MODULES
Removing the Vibration Modules will significantly reduce the weight of the controller and turn off vibration in the handles. These modules should be removed based on player preference.

AUDIO TOUCH BAR
This feature enables you to quickly access your audio settings. Swipe left to lower volume and swipe right to raise volume. Hold the Audio Touch Bar to mute your headset microphone.

Note: Vantage's audio functionality compatible in Wired (USB) mode only.
3.5MM AUDIO JACK PORT
For your headset to function properly, your headset must be equipped with a 3.5mm jack plug.

RESET BUTTON
Positioned beneath the faceplate, on the right side, the Reset Button can be pressed using the SCUF Key (0.9mm) provided.

ACCESSORIES
PROTECTION CASE
Wireless/Wired models only.
Store your controller in the Protection Case to prevent accidental damage to the controller when not in use.

10FT HIGH SPEED BRAIDED MICRO-USB CABLE
10 foot cable used for charging or for wired play.

CONTACT US & TECHNICAL SUPPORT
For technical assistance or questions about your product, warranty and return questions as well as general inquiries, please visit scuf.co/support.
Contact: scuf.co/contact
North America & International
SCUF Gaming International LLC
3970 Johns Creek Court, Suite 325
Suwanee, GA 30024 USA
(+1) 844-SCUF-IT-UP (844-728-3488)
U.S. & Canada Only
REGISTER YOUR PRODUCT
To register your SCUF Vantage Controller, please visit scuf.co/register. You'll learn more about your controller and its features and receive updates about SCUF innovations, including accessories for your controller.
Documents / Resources
References
Download manual
Here you can download full pdf version of manual, it may contain additional safety instructions, warranty information, FCC rules, etc.
Advertisement


Need help?
Do you have a question about the Vantage 2 and is the answer not in the manual?
Questions and answers