Advertisement
Quick Links
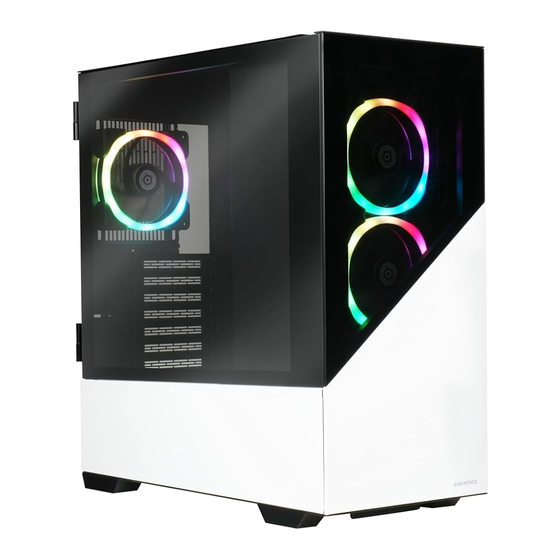
Case
Follow ENERMAX on social media for the latest informa�on and show us your build with
hashtag #ENERMAX
Facebook: h�ps://www.facebook.com/OfficialENERMAX
Instagram: h�ps://www.instagram.com/OfficialENERMAX
Twi�er: h�ps://twi�er.com/OfficialENERMAX
YouTube: h�ps://www.youtube.com/@OfficialENERMAX
Advertisement

Related Manuals for ENERMAX EnermaxK8


Summary of Contents for ENERMAX EnermaxK8
- Page 1 Case Follow ENERMAX on social media for the latest informa�on and show us your build with hashtag #ENERMAX Facebook: h�ps://www.facebook.com/OfficialENERMAX Instagram: h�ps://www.instagram.com/OfficialENERMAX Twi�er: h�ps://twi�er.com/OfficialENERMAX YouTube: h�ps://www.youtube.com/@OfficialENERMAX...
- Page 2 Specifica�on Model Name ECA-EK8 Series Dimensions(Case) 420 x 220 x 470 Material Tempered Glass, SPCC M/B Type ATX, Micro-ATX, Mini-ITX USB 3.2 Gen1 x 1, USB 3.2 Gen2 Type C x 1, HD Audio 3.5'' Drive Bays 2 (2 x converted from 3.5''HDD Cage) 2.5'' Expansion Slots Front...
-
Page 3: Product View
Product View *The actual product depends on different regions or countries. Power LED Reset USB 3.2 Gen1 Power USB 3.2 Gen2 Type C HD Audio HDD LED 220mm 453mm Rear Le� Front Right... -
Page 4: Accessory Box Contents
Accessory Box Contents Screw for M/B moun�ng Screw for 3.5" X 21 HDD moun�ng (Also for 2.5" SSD moun�ng) Screw for HDD cage Stand-off bolt for moun�ng M/B moun�ng Screw for PSU & Cable �es expansion slots moun�ng... - Page 5 Installa�on Step 6 Cable Connec�on Descrip�on USB 3.2 Gen2 Type C Panel Connector HD Audio Connector USB 3.2 Gen1 Connector SYNC SATA Connector IntA_P2_D+ VBUS ID ELED+ MIC2_L IntA_P2_D- IntA_P2_D+ PLED+ AGND SBU2 TX2+ SBU1 IntA_P2_D- TX2- ID ELED- MIC2_R PLED- PRESENSE# IntA_P2_SSTX+...
- Page 6 Installa�on Step 1 Remove both side panels. En�ernen Sie beide Seitenteile. Re�rez les deux panneaux latéraux. Rimuovere entrambi i pannelli laterali. Quite ambos paneles laterales. 両側のパネルを取り外します。 將兩側側板拆卸。 将两侧侧板拆卸。 Снимите обе боковые панели. Zdejmij obie boczne panele. 사이드 패널과 강화 유리 도어를 그림과 같은 방향으로 탈거해 주세요. .
- Page 7 Installa�on Step 2 Install the motherboard into the chassis. Installieren Sie das Mainboard in das Gehäuse. Installez la carte-mère dans le châssis. Installare la scheda madre nel telaio. Instale la placa madre en el chasis. マザーボードをケースに取り付けます。 將主板安裝到機殼內。 将主板安装到机壳内。 Установите материнскую плату в корпус. Zainstaluj płytę...
- Page 8 Installa�on Step 2 Motherboard Compa�bility Mini-ITX Micro-ATX...
- Page 9 Installa�on Step 3 Step 3-1 Take out the HDD Cage. Nehmen Sie den HDD-Käfig heraus. Sortez la cage du disque dur. Togli la gabbia dell'HDD. Saca la jaula del HDD. HDDケージを取り出してください。 將HDD硬碟槽取出。 将HDD硬碟槽取出。 Выньте корзину для HDD. Wyjmij klatkę HDD. HDD 케이지를...
- Page 10 Installa�on Step 3 Step 3-2 Install the internal 2.5’’device. Installieren Sie das interne 2,5-Zoll-Festpla�engerät. Installez le disque dur interne de 2,5 pouces. Installare il disposi�vo hard disk interno da 2.5''. Instale el disposi�vo de disco duro interno de 2.5''. 内部に2.5インチハードドライブデバイスを取り付けます。 安裝隱藏式2.5吋硬碟。...
- Page 11 Installa�on Step 3 Step 3-3 *Step Can be replaced with accessory for easier installation. Install the internal 3.5’’device. Installieren Sie das interne 3,5-Zoll-Festpla�engerät. Installez le disque dur interne de 3,5 pouces. Installare il disposi�vo hard disk interno da 3.5''. Instale el disposi�vo de disco duro interno de 3.5''. 内部に3.5インチハードドライブデバイスを取り付けます。...
- Page 12 Installa�on Step 4 Step 4-1 Install the system fans or radiator. Installieren Sie die Systemlü�er oder den Kühler. Installez les ven�lateurs du système ou bien le radiateur. Installare i ven�latori del sistema o il radiatore. Instale los ven�ladores del sistema o el radiador. システムファンまたはラジエーターを取り付けます。...
- Page 13 Installa�on Step 4 Step 4-2 Radiator *Radiator screws are provided by water cooling products. -12-...
- Page 14 Installa�on Step 4 Fan Compa�bility *This picture is for reference only, installation is subject to the actual situation. Top 2 x 140mm / 3 x 120mm Rear 1 x 120mm Front 3 x 140mm / 3 x 120mm -13-...
- Page 15 Installa�on Step 4 Radiator Compa�bility *This picture is for reference only, installation is subject to the actual situation. Top 240mm Rear 120mm Front 360 / 280 / 240mm -14-...
- Page 16 Installa�on Step 4 Air Cooler Compa�bility 170mm -15-...
- Page 17 Installa�on Step 5 Step 5-1 Remove the slot volume you will use to install GPU. En�ernen Sie den Slot, den Sie zur Installa�on der GPU verwenden werden. Re�rez le nombre d’équerres PCIe nécessaires à l’installa�on de votre carte graphique. Rimuovere il volume dello slot che verrà u�lizzato per installare la GPU. Quite el volumen del slot que usará...
- Page 18 Installa�on Step 5 Step 5-2 Install the GPU into the chassis. Installieren Sie die GPU in das Gehäuse. Installez la carte graphique dans le châssis. Installare la GPU nel telaio. Instale la GPU en el chasis. グラフィ ックボードをケースに取り付けます。 將顯示卡安裝到機殼內。 将显示卡安装到机壳内。 Установите...
- Page 19 Installa�on Step 5 GPU Compa�bility 390mm -18-...
- Page 20 Installa�on Step 6 Install the PSU into the chassis. Installieren Sie das Netzteil in das Gehäuse. Installez l'alimenta�on dans le châssis. Installare l'alimentatore nel telaio. Instale la fuente de alimentación en el chasis. 電源ユニッ トをケースに取り付けます。 將電源安裝到機殼內。 将电源安装到机壳内。 Установите блок питания в корпус. Zainstaluj zasilacz w obudowie.
- Page 21 ARGB & PWM Control Hub .21 Ligh�ng effects supported. .Change the ligh�ng effect by pressing the reset bu�on. .Press and hold the bu�on for 2-4 seconds(a�er flashing the white light once) to turn to M/B sync. .Press and hold the bu�on for over 4 seconds(a�er flashing the white light twice) to turn off...
- Page 22 Visit Us at: Global (Except North America & Korea): www.enermax.com North America: www.enermaxusa.com Korea: www.enermaxkorea.com Support Team: General: enermax@enermax.com.tw North America/English: support@enermaxusa.com Germany/Deutsch: support@enermax.de France/French: contact@enermax.fr EMEA: support@enermax.de Japan/Japanese: support@enermaxjapan.com Korea/Korean: enermax@cynex.co.kr Taoyuan/Mandarin: support-tw@enermax.com.tw APAC: enermax@enermax.com.tw Find answers to your ques�ons at: www.enermax.com/en/faq If you can't find an answer to your ques�on by searching in the FAQ, please contact your local support team or...
Need help?
Do you have a question about the EnermaxK8 and is the answer not in the manual?
Questions and answers