
Summary of Contents for Swiss+go AquaShot
- Page 1 AquaShot Cámara Digital Fotocamera Digitale Digital Camera Manual del Usuario Manuale d’uso User Manual...
-
Page 2: Características Principales
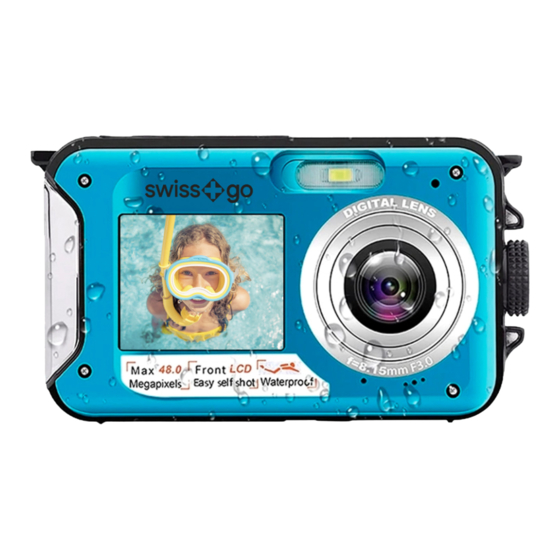
CARACTERÍSTICAS PRINCIPALES • Sumergible 3 metros, captura de fotos y grabación de video bajo el agua • Sensor CMOS 8 MP • Modo Vïdeo: 2.7K 2688x1520, FHD 1920x1080, HD 1280x720P • Modo Foto: Máx. 48M pixels Interpolados. • Doble Pantalla. Pantalla frontal de 1,8 pulgadas. Pantalla trasera TFT de 2,7 pulgadas •... -
Page 3: Descripción General
DESCRIPCIÓN GENERAL Botón de encendido Botón de Disparo Botón de cambio de pantalla Anclado para Correa Anclado para Correa Flash Pantalla Selfie Lente Tapa de la batería Pantalla Indicador de Ranura Tarjeta/USB Principal encendido Zoom (+) Seguro para Zoom (-) cerrar la tapa Botón Flash Eliminar... -
Page 4: Captura De Fotos
Cambiar entre pantallas Para alternar entre las pantallas delantera y trasera, presione la “Tecla de cambio de pantalla de vi- sualización”. Cada pulsación de este botón activará la pantalla delantera de 1,8” y la pantalla trasera de 2,7” a su vez. CAPTURA DE FOTOS Para capturar una foto, presiona la tecla del Disparo. -
Page 5: Detección De Rostro
Detección de rostro Para activar la función de detección de rostros. 1. Pulsa la tecla Menú 2. Pulsa las teclas izquierda/derecha para seleccionar el icono de detección de rostros 3. Pulsa las teclas arriba/abajo para activar/desactivar la detección de rostros. 4. -
Page 6: Apagado Automático
Calidad Esta función ajusta la calidad general de su foto. 1. Pulsa las teclas arriba/abajo para seleccionar la opción de calidad en el menú de configuración. 2. Presiona la tecla OK para ingresar al submenú. 3. Pulsa las teclas arriba/abajo para seleccionar: súper fino/fino/común 4. -
Page 7: Modo De Reproducción
MODO DE GRABACIÓN DE VÍDEO Pulsa la tecla Modo para activar el modo de grabación de vídeo. Presiona la tecla del Disparo para comenzar a grabar El icono de vídeo aparecerá en la parte superior izquierda de la pantalla LCD. El tiempo de grabación se mostrará... - Page 8 Imprimir Las fotos se pueden imprimir en cualquier impresora habilitada para Pict Bridge 1. Selecciona una foto para imprimir 2. Pulsa la tecla Menú 3. Pulsa las teclas izquierda/derecha para seleccionar el icono Imprimir 4. Pulsa las teclas arriba/abajo para seleccionar: Imprimir/Cancelar. 5.
- Page 9 ICONOS DE LA CÁMARA...
-
Page 10: Especificaciones Técnicas
ESPECIFICACIONES TÉCNICAS Sensor Sensor CMOS SONY 8 MP (48M) 8000x6000 , (30M) 6400x4800 , (24M) 5600x4200 , (20M) 5200x3900, (16M) 4608x3456, (12M) 4000x3000, Resolución de la foto (8M) 3264x2448 , (7MHD) 3648x2048 , (5M) 2592x1944 , (3M) 2048x1536, (2MHD) 1920x1080, Resolución de vídeo 2.7K 2688X1520, FHD1920x1080, HD1280x720P, pantallas... -
Page 11: Digital Camera
AquaShot Digital Camera User Manual... -
Page 12: Main Features
MAIN FEATURES • 3 meters waterproof, photo capture and video recording under water • 2.7K 2688x1520, FHD 1920x1080, HD 1280x720P • Max. 48M pixels • Convenient dual screens, 1.8 inch front screen, 2.7 inch TFT rear screen • Face detection, image stabilization, web cam function, various scene modes •... -
Page 13: Camera Overview
CAMERA OVERVIEW INSTALLING MICRO SD CARD The camera supports Micro SD memory card up to 128GB Max. The camera’s internal memory only stores one photo for testing purposes. Please insert a Micro SD card into the memory card slot before use, being careful to ensure that the card is installed correctly. -
Page 14: Switching Between Displays
Switching between displays To switch between the front and rear screens press the ‘Display screen switching Key’. Each press of this button will activate the front 1.8” screen and rear 2.7” screen in turn. PHOTO SHOOTING To capture a photo press the shutter key. There will be a slight delay while the photo is stored on the memory card. -
Page 15: Continuous Shooting
Face detection To activate the face detection function. 1. Press the Menu key 2. Press the left/right keys to select the face detection icon 3. Press the up/down keys to select face detection on/off. 4. Press OK key to confirm your selection. Continuous shooting The continuous shooting function allows you to capture 6 individual photos in rapid succession with just one press of the shutter button. -
Page 16: Factory Default Settings
Quality This function adjusts the overall quality of your photo. 1. Press the up/down keys to select the quality option under settings menu. 2. Press the OK key to enter the sub menu. 3. Press the up/down keys to select: super fine/fine/ common 4. -
Page 17: Video Recording Mode
VIDEO RECORDING MODE Press the Mode key to activate the video recording mode. Press shutter key to start recording The video icon will show on top the left of the LCD screen. The recording time will show on top right of the LCD screen The red ‘Recording’... - Page 18 Print Photos can be printed to any Pict Bridge enabled printer 1. Select a photo to be printed 2. Press the Menu key. 3. Press the left/right keys to select the Print icon 4. Press the up/down keys to select: Print/Cancel. 5.
-
Page 19: Technical Specification
TECHNICAL SPECIFICATION Sensor SONY CMOS sensor (48M) 8000x6000 , (30M) 6400x4800 , (24M) 5600x4200 , (20M) 5200x3900 , (16M) 4608x3456 , (12M) 4000x3000 , Photo resolution (8M) 3264x2448 , (7MHD) 3648x2048 , (5M) 2592x1944 , (3M) 2048x1536 , (2MHD) 1920x1080, Video resolution 2.7K 2688X1520, FHD1920x1080, HD1280x720P, Displays... -
Page 20: Fotocamera Digitale
AquaShot Fotocamera Digitale Manuale d’uso... -
Page 21: Caratteristiche Principali
CARATTERISTICHE PRINCIPALI - Sommergibile a 3 metri, cattura foto e registrazione video sott’acqua - Sensore CMOS 8 MP - Modalità video: 2.7K 2688x1520, FHD 1920x1080, HD 1280x720P - Modalità foto: Max. 48M pixel interpolati - Doppio display. Schermo anteriore da 1,8 pollici. Schermo posteriore TFT da 2,7 pollici - Rilevamento dei volti, stabilizzazione dell’immagine, funzione webcam, varie modalità... -
Page 22: Descrizione Generale
DESCRIZIONE GENERALE Pulsante di accensione Pulsante di attivazione Pulsante di cambio schermo Ancoraggio per cinghia Ancoraggio per cinghia Flash Schermo selfie Lente Coperchio della batteriaSlot per Schermata Indicatore di principale alimentazione scheda/USB Zoom (+) Dispositivo di Zoom (-) bloccaggio del Pulsante flash coperchio Eliminare... -
Page 23: Zoom Digitale
Passare da una schermata all’altra Per passare dallo schermo anteriore a quello posteriore, premere il tasto “Display Screen Toggle”. Ogni pressione di questo tasto attiverà a turno il display anteriore da 1,8” e quello posteriore da 2,7”. CATTURA DI FOTO Per scattare una foto, premere il tasto Otturatore. - Page 24 Rilevamento dei volti Per attivare la funzione di rilevamento del volto. 1. Premere il tasto Menu 2. Premere i tasti sinistra/destra per selezionare l’icona Rilevamento volto 3. Premere i tasti su/giù per attivare/disattivare il rilevamento dei volti. 4. Premere il tasto OK per confermare la selezione. Raffica di foto La funzione di scatto continuo consente di catturare 6 foto singole in rapida successione premen- do semplicemente il pulsante Otturatore.
-
Page 25: Spegnimento Automatico
Qualità Questa funzione regola la qualità complessiva della foto. 1-Premere i tasti su/giù per selezionare l’opzione di qualità nel menu di impostazione. 2. Premere il tasto OK per accedere al sottomenu. 3. Premere i tasti su/giù per selezionare: super fine/fine/comune. 4. - Page 26 MODALITÀ DI REGISTRAZIONE VIDEO Premere il tasto Modalità per attivare la modalità di registrazione video.Premere il tasto Otturatore per avviare la registrazioneL’icona del video apparirà in alto a sinistra dello schermo LCD.Il tempo di registrazione sarà visualizzato in alto a destra dello schermo LCDL’icona rossa “Registra- zione”...
- Page 27 Stampa Le foto possono essere stampate su qualsiasi stampante abilitata a Pict Bridg 1. Selezionare una foto da stampare 2. Premere il tasto Menu 3. Premere i tasti sinistra/destra per selezionare l’icona Stampa. 4. Premere i tasti su/giù per selezionare: Stampa/Annulla. Premere i tasti su/giù per selezionare: Stampa/Annulla.
- Page 28 ICONE DELLA CAMERA...
-
Page 29: Specifiche Tecniche
SPECIFICHE TECNICHE Sensor SONY 8MP CMOS sensor (48M) 8000x6000 , (30M) 6400x4800 , (24M) 5600x4200 , (20M) 5200x3900, (16M) 4608x3456, (12M) 4000x3000, Photo resolution (8M) 3264x2448 , (7MHD) 3648x2048 , (5M) 2592x1944 , (3M) 2048x1536, (2MHD) 1920x1080, video resolution 2.7K 2688X1520, FHD1920x1080, HD1280x720P, screens 2.7-inch rear screen, 1.8-inch front screen External memory...
Need help?
Do you have a question about the AquaShot and is the answer not in the manual?
Questions and answers